
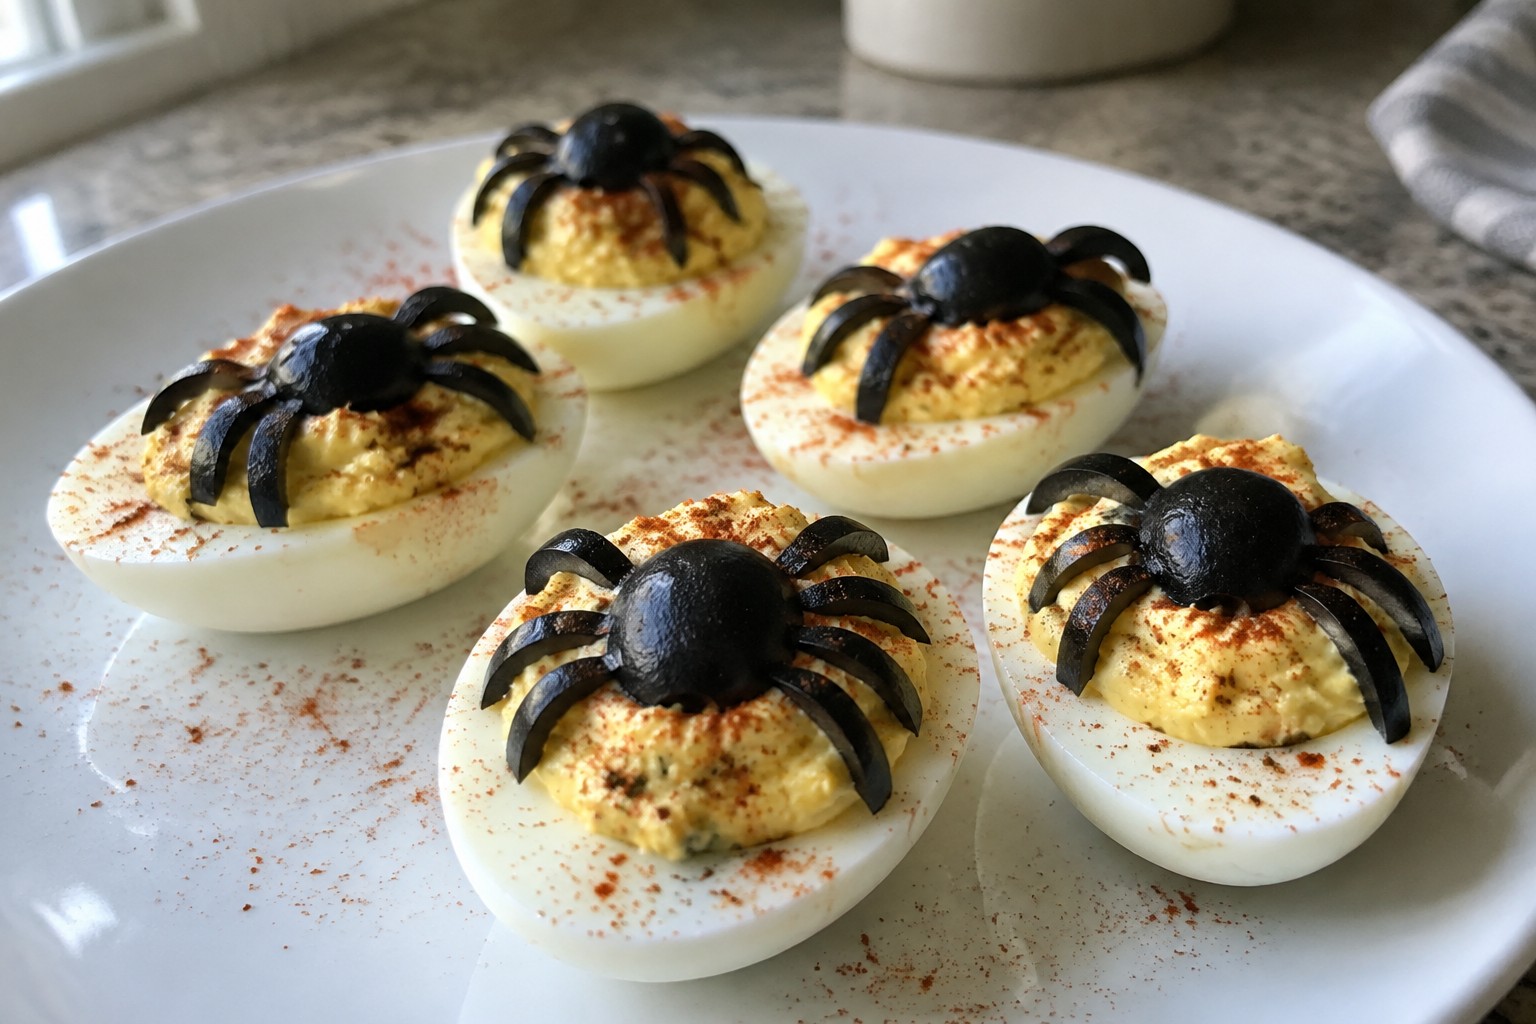
Halloween potlucks can be stressful when you need something quick to bring. These recipes focus on simple steps and everyday ingredients. They are designed to travel well and hold up at a party. You will see both sweet treats and savory dishes in the list. Most take under 30 minutes to prepare.
Helpful Tips Before You Start
A little planning goes a long way when you need a dish that travels well and feeds a crowd.
Pick recipes that hold up
Choose dishes that taste good at room temperature. Hot items cool down and cold items warm up during the drive.
Use sturdy containers
Pack food in leakproof containers with tight lids. Bring a serving platter or bowl separately so you can transfer everything once you arrive.
Add simple Halloween touches
Keep the theme light with quick add-ons like candy eyeballs, orange food coloring, or a sprinkle of black sesame seeds. These extras take minutes but make the dish feel festive.
Label ingredients clearly
Write a small card with the main ingredients and any common allergens. Guests appreciate knowing what they can safely eat at a shared table.
Bring serving tools
Pack a serving spoon or spatula along with your dish. It saves the host from hunting for the right utensil during the party.
Mummy Hot Dogs with Crescent Rolls
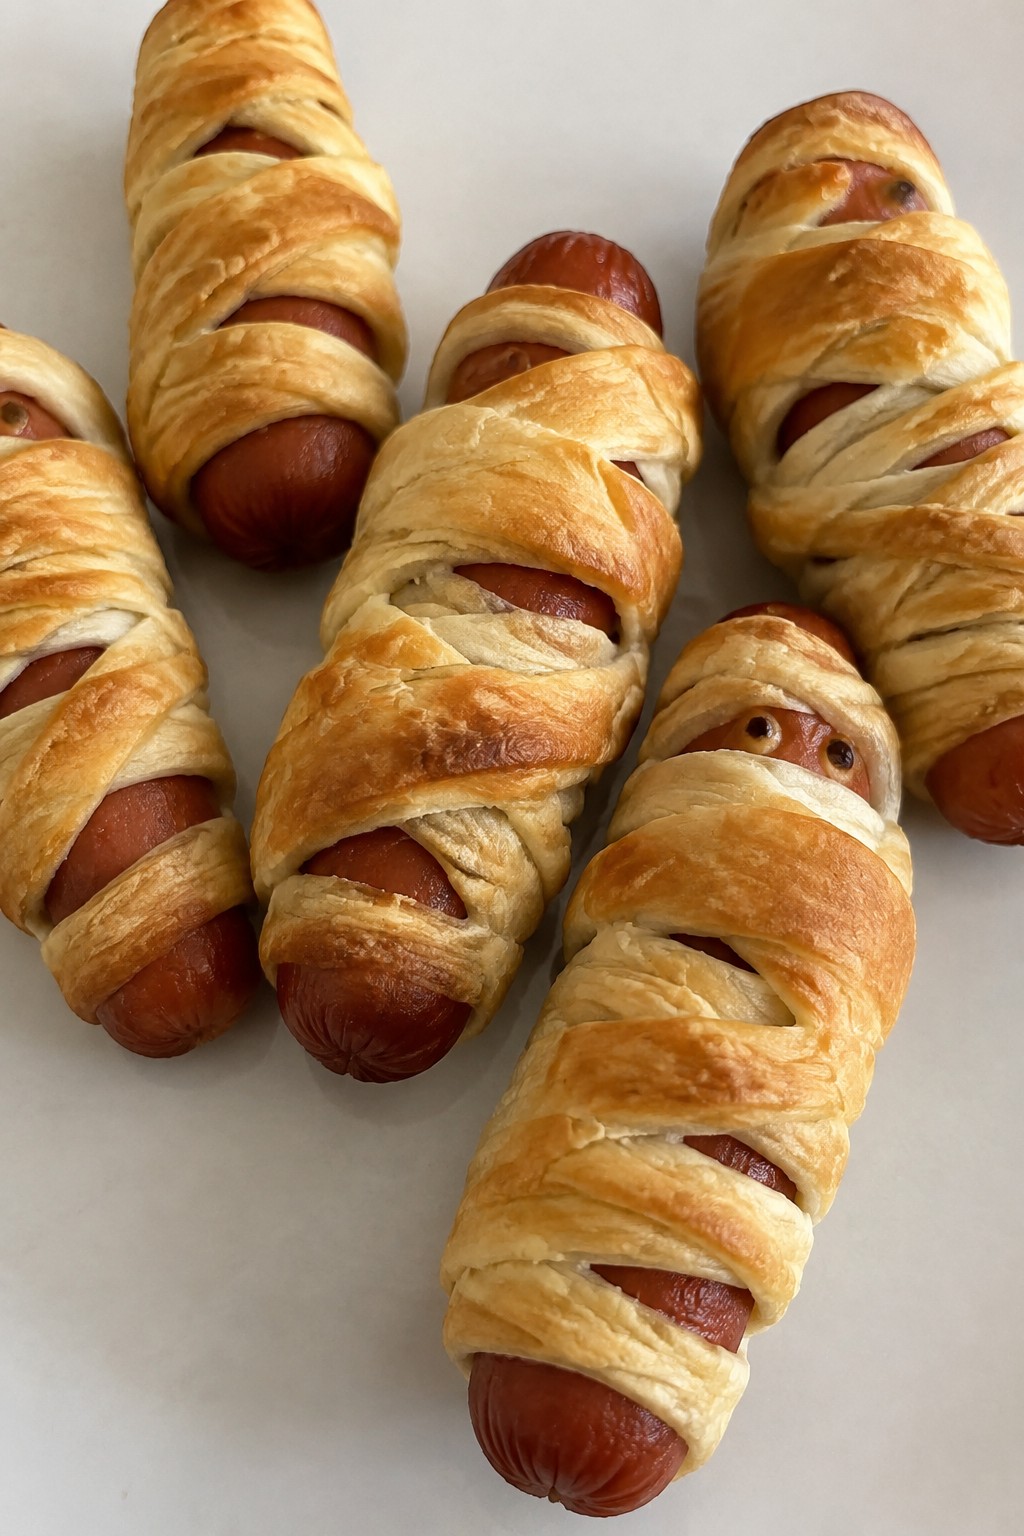
These mummy hot dogs make a fun addition to any Halloween potluck. They come together quickly with store bought dough and need little skill beyond wrapping and baking. The result is a warm snack with a crisp outer layer and a savory sausage inside.
They work well for parties because they stay good at room temperature for a while and appeal to both kids and adults. The simple shape gives them a playful look without extra decoration.
Serves 4 people.
Ingredients
- 8 all-beef hot dogs
- 1 can refrigerated crescent rolls
- 2 tablespoons yellow mustard
Instructions
- Heat the oven to 375 degrees and line a baking sheet with parchment paper.
- Open the can of crescent rolls and unroll the dough on a clean surface. Cut each triangle into thin strips about half an inch wide.
- Wrap the dough strips around each hot dog, leaving small gaps near the top for the eyes. Place the wrapped hot dogs on the prepared baking sheet.
- Bake for 12 to 15 minutes until the dough turns golden brown.
- Remove from the oven and let cool for two minutes. Use a small amount of mustard to dot eyes on each hot dog.
Extra Tips
Use kitchen shears instead of a knife to cut even dough strips quickly. If you want a milder flavor, swap yellow mustard for Dijon. These taste best served warm but can be reheated in a 300 degree oven for five minutes if made ahead. Course: Appetizer Cuisine: American Equipment: Baking sheet, Oven, Parchment paper
Spooky Spiderweb Seven-Layer Dip
This seven-layer dip adds a simple Halloween touch to potlucks with its spiderweb pattern on top. Guests can scoop into the stacked layers for a mix of creamy, chunky, and savory bites that travel well and hold up at room temperature.
The flavors stay familiar with beans, guacamole, and fresh toppings, while the web design makes it stand out on a shared table without extra work.

Serves 4 people.
Ingredients
- 1 cup refried beans
- 1/2 cup prepared salsa
- 3/4 cup guacamole
- 1 cup sour cream, divided
- 3/4 cup shredded cheddar cheese
- 1/2 cup diced tomatoes
- 1/4 cup sliced black olives
- 2 tablespoons chopped green onions
Instructions
- Spread the refried beans evenly across the bottom of a medium serving dish to form the first layer.
- Spoon the salsa over the beans and spread it gently to cover.
- Add the guacamole on top of the salsa and smooth it into an even layer.
- Mix 3/4 cup of the sour cream until smooth, then spread it over the guacamole.
- Sprinkle the shredded cheddar cheese evenly across the sour cream layer.
- Scatter the diced tomatoes, black olives, and green onions over the cheese.
- Place the remaining 1/4 cup sour cream into a small plastic bag and snip off one corner. Pipe four concentric circles on top, then drag a toothpick from the center outward in straight lines to form the web.
Extra Tips
Pipe the sour cream web right before serving so the lines stay sharp. If you make the dip ahead, cover and chill it without the web, then add the design just before guests arrive. Swap the cheddar for a Mexican blend if you want a bit more spice in the cheese layer. Course: Appetizer Cuisine: American Equipment: Medium serving dish, Spoon, Plastic bag
Jack-o’-Lantern Stuffed Bell Peppers
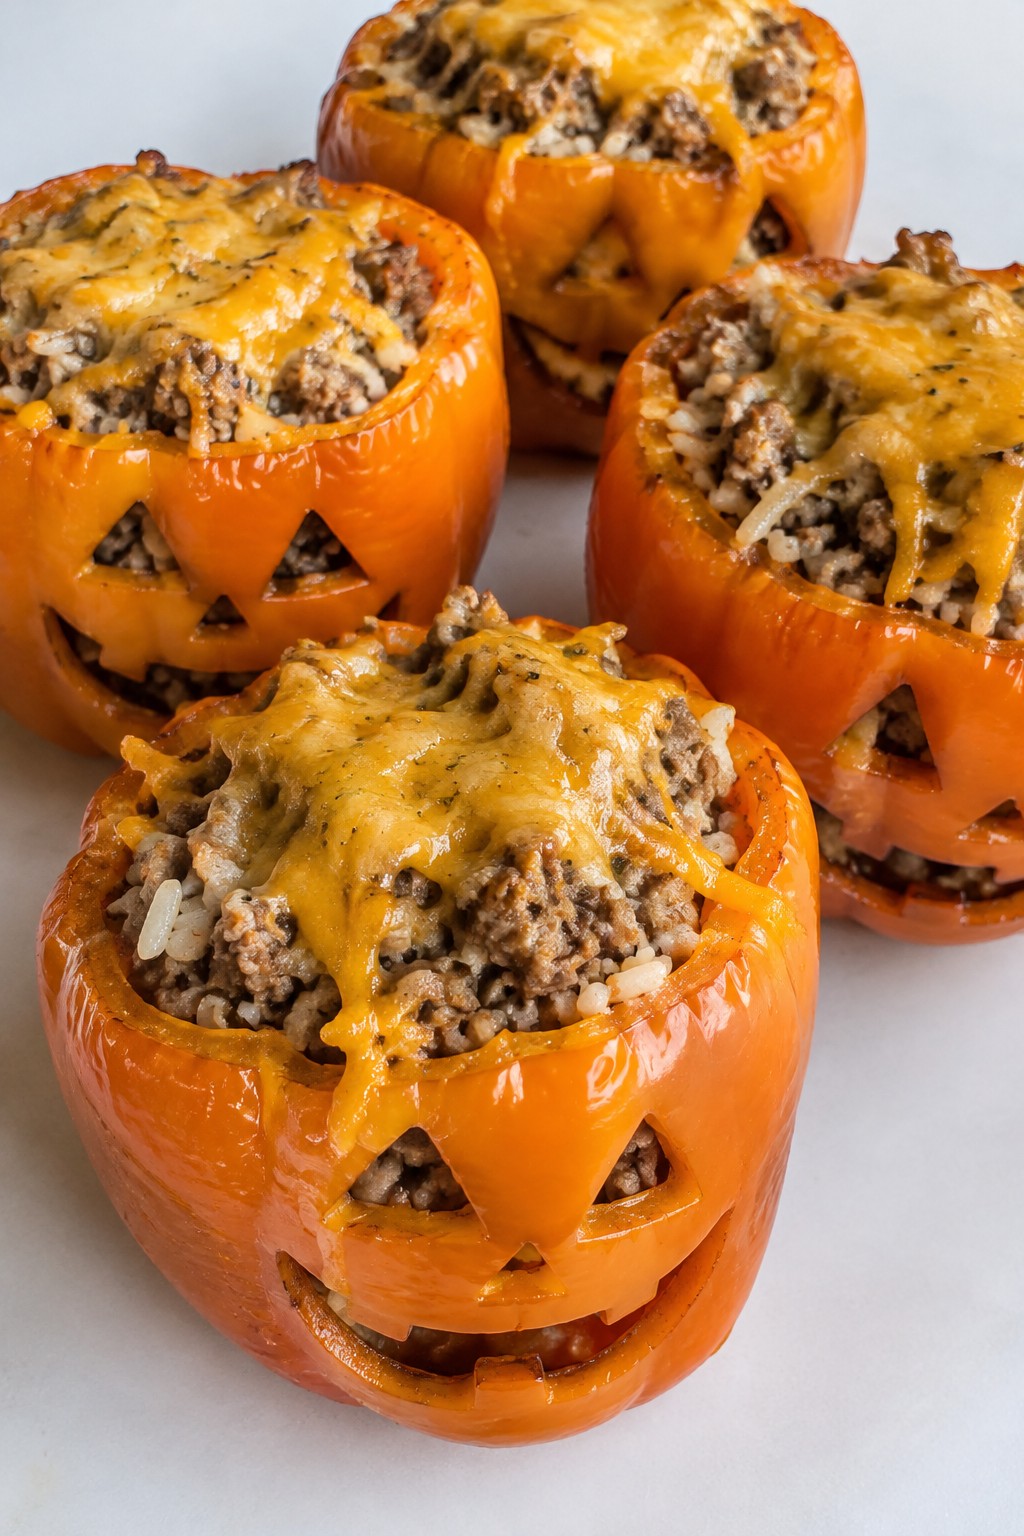
These stuffed peppers bring a fun Halloween touch to any potluck spread. Orange bell peppers get carved into jack-o’-lantern faces before filling, which makes them easy to spot on a crowded table and simple to transport. The result is a savory dish with tender peppers, a lightly seasoned rice and turkey mixture, and melted cheese on top.
This recipe works well for gatherings because it can be prepped ahead and reheated without losing texture. The filling stays moist inside the pepper shells, and the carved faces hold their shape after baking.
Serves 4 people.
Ingredients
- 4 large orange bell peppers
- 1 pound ground turkey
- 1 cup cooked white rice
- 1 small onion, diced
- 1 cup shredded cheddar cheese
- 1 teaspoon garlic powder
- 1/2 teaspoon salt
- 1/4 teaspoon black pepper
Instructions
- Preheat the oven to 375 degrees. Cut the tops off each orange bell pepper and remove the seeds and membranes. Use a small knife to carve simple jack-o’-lantern faces into the sides of the peppers.
- Place the carved peppers in a baking dish. Set the tops aside if you want to use them for presentation later.
- Heat a skillet over medium heat. Add the ground turkey and diced onion. Cook until the turkey is no longer pink and the onion softens.
- Stir in the cooked white rice, garlic powder, salt, and black pepper. Mix until everything is evenly combined and warmed through.
- Remove the skillet from heat and stir in 3/4 cup of the shredded cheddar cheese until it melts into the filling.
- Spoon the filling into each carved pepper until full. Sprinkle the remaining cheese over the tops.
- Bake for 25 minutes until the peppers are tender and the cheese is melted and lightly browned.
Extra Tips
Carve the faces a few hours ahead and store the peppers in the fridge so assembly moves faster on the day of the potluck. If the filling seems dry after mixing, add a tablespoon of water before stuffing. Leftovers reheat well in the microwave, though the carved details soften slightly. Course: Appetizer Cuisine: American Equipment: Baking dish, Skillet, Knife
Pumpkin Spice Cheesecake Bars
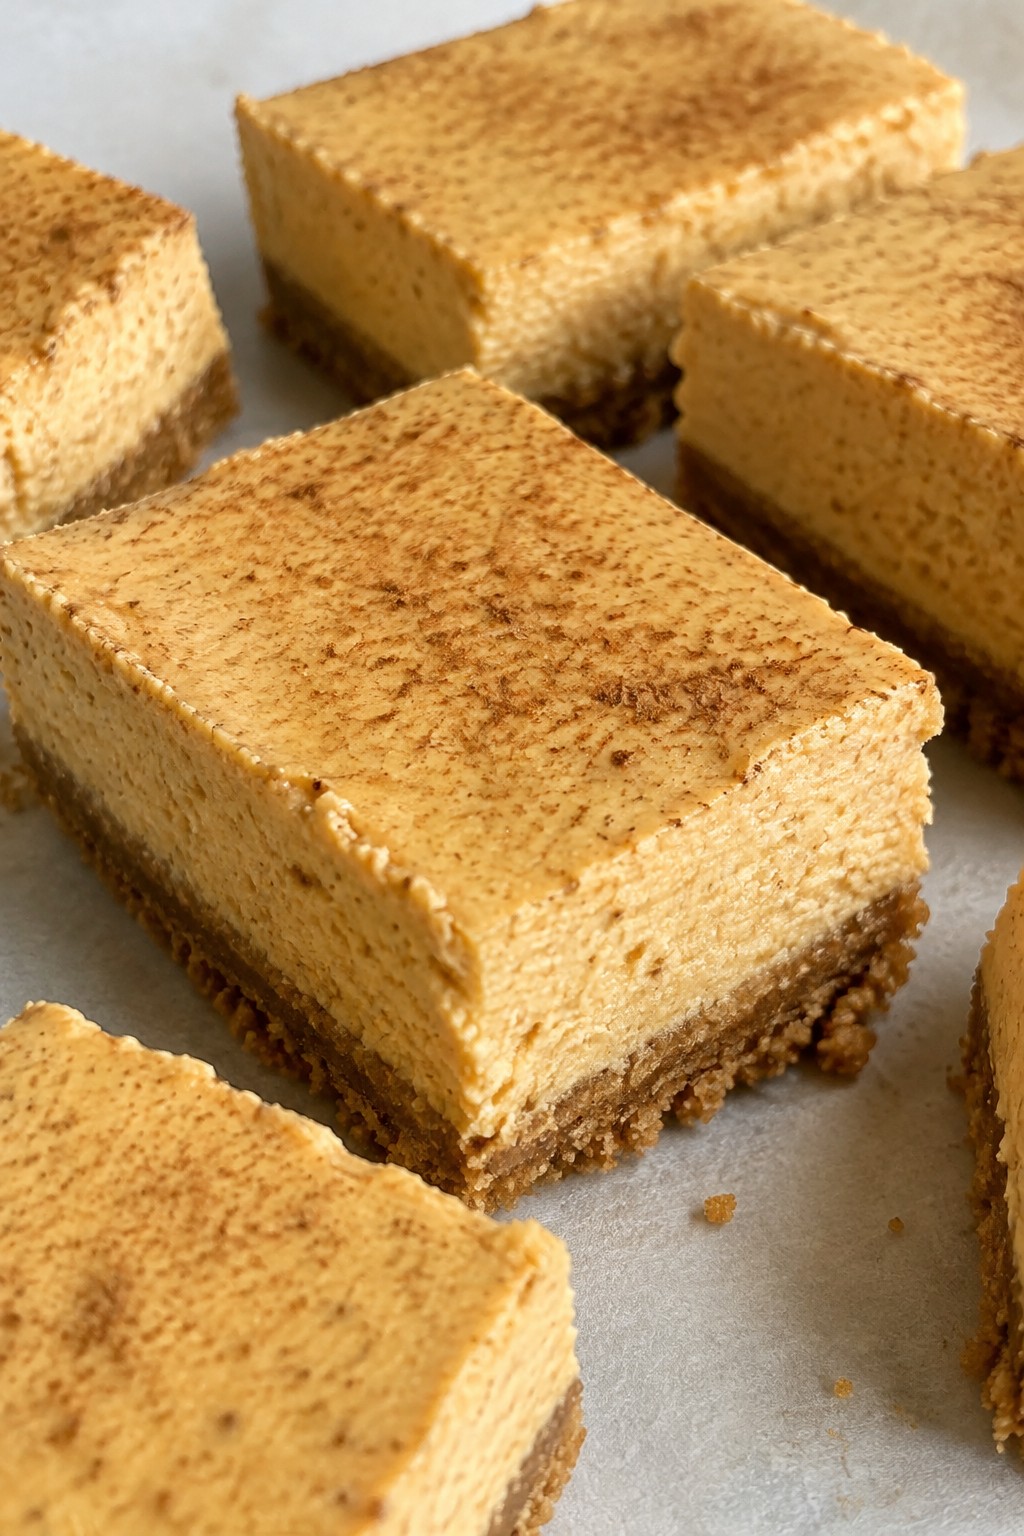
These Pumpkin Spice Cheesecake Bars offer a creamy, spiced treat that fits right into a Halloween potluck spread. They slice cleanly, travel without fuss, and give guests a familiar fall flavor in a handheld form.
The bars combine a crisp graham cracker base with a smooth pumpkin cheesecake layer. The result is rich yet light enough to enjoy after a meal, with warm spices that balance the tang of cream cheese.
Serves 4 people.
Ingredients
- 3/4 cup graham cracker crumbs
- 2 tablespoons unsalted butter, melted
- 8 ounces cream cheese, softened
- 1/4 cup granulated sugar
- 1/2 cup pumpkin puree
- 1 teaspoon pumpkin pie spice
- 1 large egg
- 1/2 teaspoon vanilla extract
Instructions
- Preheat the oven to 325 degrees and line a small loaf pan with parchment paper.
- Stir the graham cracker crumbs and melted butter together until evenly moistened, then press the mixture firmly into the bottom of the prepared pan.
- In a mixing bowl, beat the cream cheese and sugar until smooth.
- Add the pumpkin puree, pumpkin pie spice, egg, and vanilla extract. Mix until fully combined and no streaks remain.
- Pour the filling over the crust and smooth the top.
- Bake for 25 to 30 minutes until the center is just set.
- Remove from the oven and let cool to room temperature before refrigerating for at least two hours.
- Lift the bars out using the parchment and cut into four pieces.
Extra Tips
Chill the bars fully before slicing so the layers stay neat during transport. If the filling cracks slightly on top, it will still taste fine once cut. For a make-ahead option, bake the day before and keep covered in the fridge until the potluck. Course: Dessert Cuisine: American Equipment: Mixing Bowl, Loaf Pan, Oven
Bat-Wing BBQ Chicken Wings
These Bat-Wing BBQ Chicken Wings add a fun Halloween touch to any potluck spread. They are easy to bake in advance and hold up well when transported.
The wings come out crispy with a thick, smoky-sweet BBQ coating that balances heat and sweetness in each bite.

Serves 4 people.
Ingredients
- 2 pounds chicken wings, split into flats and drumettes
- 2 tablespoons olive oil
- 2 teaspoons smoked paprika
- 1 teaspoon garlic powder
- 1/2 teaspoon salt
- 1/4 teaspoon black pepper
- 1 cup barbecue sauce
Instructions
- Preheat the oven to 400 degrees F and line a baking sheet with parchment paper.
- Place the chicken wings in a large bowl and toss them with the olive oil until evenly coated.
- Sprinkle the smoked paprika, garlic powder, salt, and black pepper over the wings and mix until the seasonings are distributed.
- Arrange the wings in a single layer on the prepared baking sheet.
- Bake for 25 minutes, then flip each wing with tongs.
- Bake for another 20 minutes until the skin is golden and crisp.
- Remove the wings from the oven and transfer them back to the large bowl.
- Pour the barbecue sauce over the wings and toss until fully coated.
- Return the wings to the baking sheet and bake for 5 more minutes to set the sauce.
Extra Tips
Pat the wings dry with paper towels before adding the oil for maximum crispiness. A thick barbecue sauce clings better during the final bake. Leftovers reheat well in a 350-degree oven for 10 minutes to restore crunch without sogginess. Course: Appetizer Cuisine: American Equipment: Baking sheet, Large bowl, Tongs
Graveyard Dirt Pudding Cups
These pudding cups bring a fun Halloween touch to any potluck table. They layer creamy chocolate pudding with crunchy cookie crumbs that look like fresh dirt. Kids and adults both enjoy the playful presentation and the mix of smooth and crisp textures.
The recipe uses simple store-bought items so it comes together quickly without any baking. It travels well in individual cups and holds up during a party spread.

Serves 4 people.
Ingredients
- 1 (3.9 oz) package instant chocolate pudding mix
- 2 cups cold milk
- 20 Oreo cookies
- 1 cup whipped topping
- 8 gummy worms
- 4 whole chocolate sandwich cookies
Instructions
- Pour the cold milk into a mixing bowl and add the instant chocolate pudding mix. Whisk for two minutes until the pudding thickens.
- Place the Oreo cookies in a zip-top bag and crush them with a rolling pin until they form coarse crumbs.
- Spoon a layer of pudding into the bottom of each serving cup. Add a layer of crushed Oreo crumbs on top. Repeat the layers once more.
- Spread a small dollop of whipped topping over the final cookie layer on each cup.
- Press two gummy worms into the topping of each cup so they look like they are coming out of the dirt.
- Stand one whole chocolate sandwich cookie upright in the back of each cup to act as a tombstone.
Extra Tips
Crush the cookies just before assembling so they stay crisp. You can prepare the pudding and crush the cookies a few hours ahead, then assemble the cups right before the potluck. If you need to transport them, cover each cup tightly with plastic wrap. Course: Dessert Cuisine: American Equipment: Mixing Bowl, Whisk, Serving Cups
Witch Finger Pretzel Rods with Cheese Dip
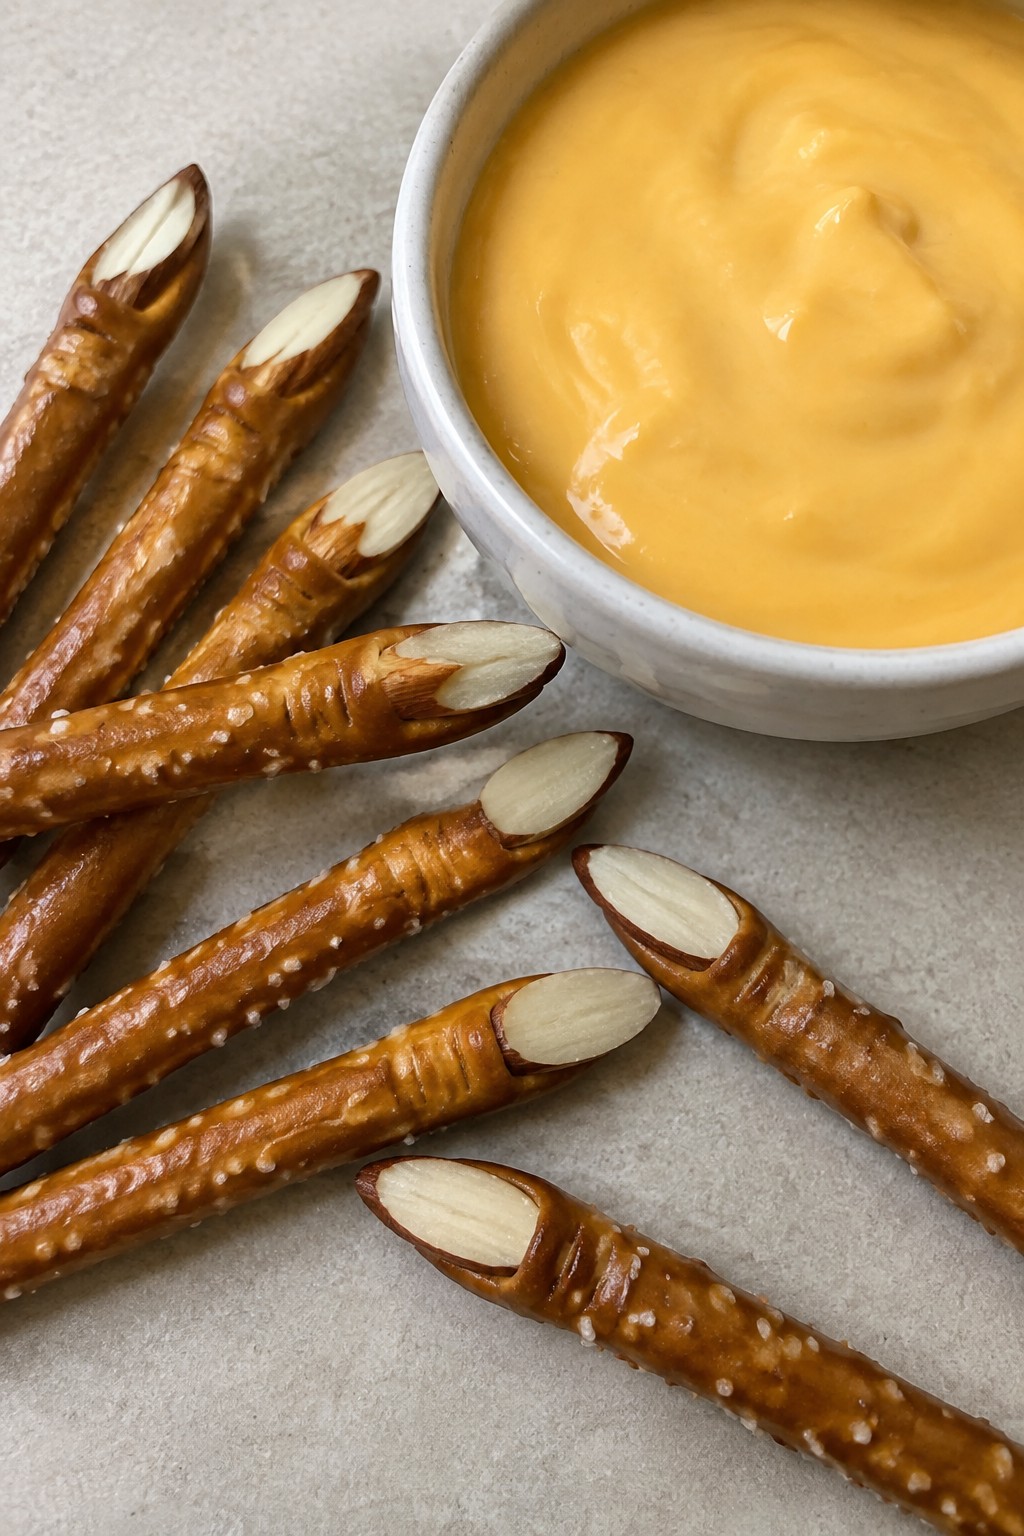
These Witch Finger Pretzel Rods with Cheese Dip make a simple addition to any Halloween spread. The salty pretzels offer a crisp base while the warm cheese dip brings a creamy contrast that holds up well at a potluck table.
The almond slices at the ends give the rods a playful finger shape without extra steps. This combination stays easy to prepare and travels well for sharing.
Serves 4 people.
Ingredients
- 12 pretzel rods
- 12 sliced almonds
- 8 ounces cheddar cheese, shredded
- 1/2 cup milk
- 1 tablespoon butter
- 1 tablespoon all-purpose flour
- 1/4 teaspoon salt
Instructions
- Place one sliced almond at the tip of each pretzel rod to form the fingernail shape. Set the rods aside on a plate.
- Melt the butter in a saucepan over medium heat. Stir in the flour and cook for one minute to form a smooth paste.
- Slowly whisk in the milk until the mixture thickens slightly. Add the shredded cheddar cheese a handful at a time, stirring until fully melted and smooth.
- Stir in the salt. Remove the saucepan from the heat.
- Arrange the prepared pretzel rods on a serving plate and place the warm cheese dip in a bowl beside them.
Extra Tips
Make the cheese dip right before serving so it stays smooth and dippable. If it thickens while sitting, stir in a splash of milk to loosen it. Keep the pretzel rods separate from the dip until the last minute to maintain their crunch. Course: Appetizer Cuisine: American Equipment: Saucepan, Whisk, Serving plate
Caramel Apple Nachos with Toppings
This recipe turns fresh apple slices into a shareable treat that works well at Halloween potlucks. Guests can pick up a few pieces without needing plates or utensils, and the mix of crisp fruit, sticky caramel, and crunchy toppings keeps it light enough after heavier dishes.
The result tastes like a caramel apple in nacho form. Tart apple slices stay firm under a warm caramel drizzle, while chocolate, nuts, and sprinkles add contrasting textures and a bit of festive color.

Serves 4 people.
Ingredients
- 4 large Granny Smith apples
- ½ cup caramel sauce
- ¼ cup semi-sweet chocolate chips
- ¼ cup chopped pecans
- 2 tablespoons Halloween sprinkles
- ¼ cup crushed graham crackers
Instructions
- Wash the apples and slice each one into thin wedges, removing the cores as you go. Arrange the slices in a single overlapping layer on a large serving platter.
- Warm the caramel sauce in a microwave-safe bowl for 15 to 20 seconds until it loosens enough to drizzle easily.
- Drizzle the warm caramel evenly over the apple slices.
- Sprinkle the chocolate chips, chopped pecans, Halloween sprinkles, and crushed graham crackers across the top so every section gets a mix of toppings.
- Serve right away while the apples remain crisp.
Extra Tips
Warm the caramel just until it flows smoothly so it coats the apples without turning them soggy. If you prepare the apples ahead, keep the slices in a bowl of lemon water to prevent browning, then pat them dry before arranging. Leftovers lose their crunch quickly, so this dish is best assembled right before serving. Course: Dessert Cuisine: American Equipment: Serving platter, Microwave-safe bowl, Knife
Bloody Eyeball Caprese Skewers
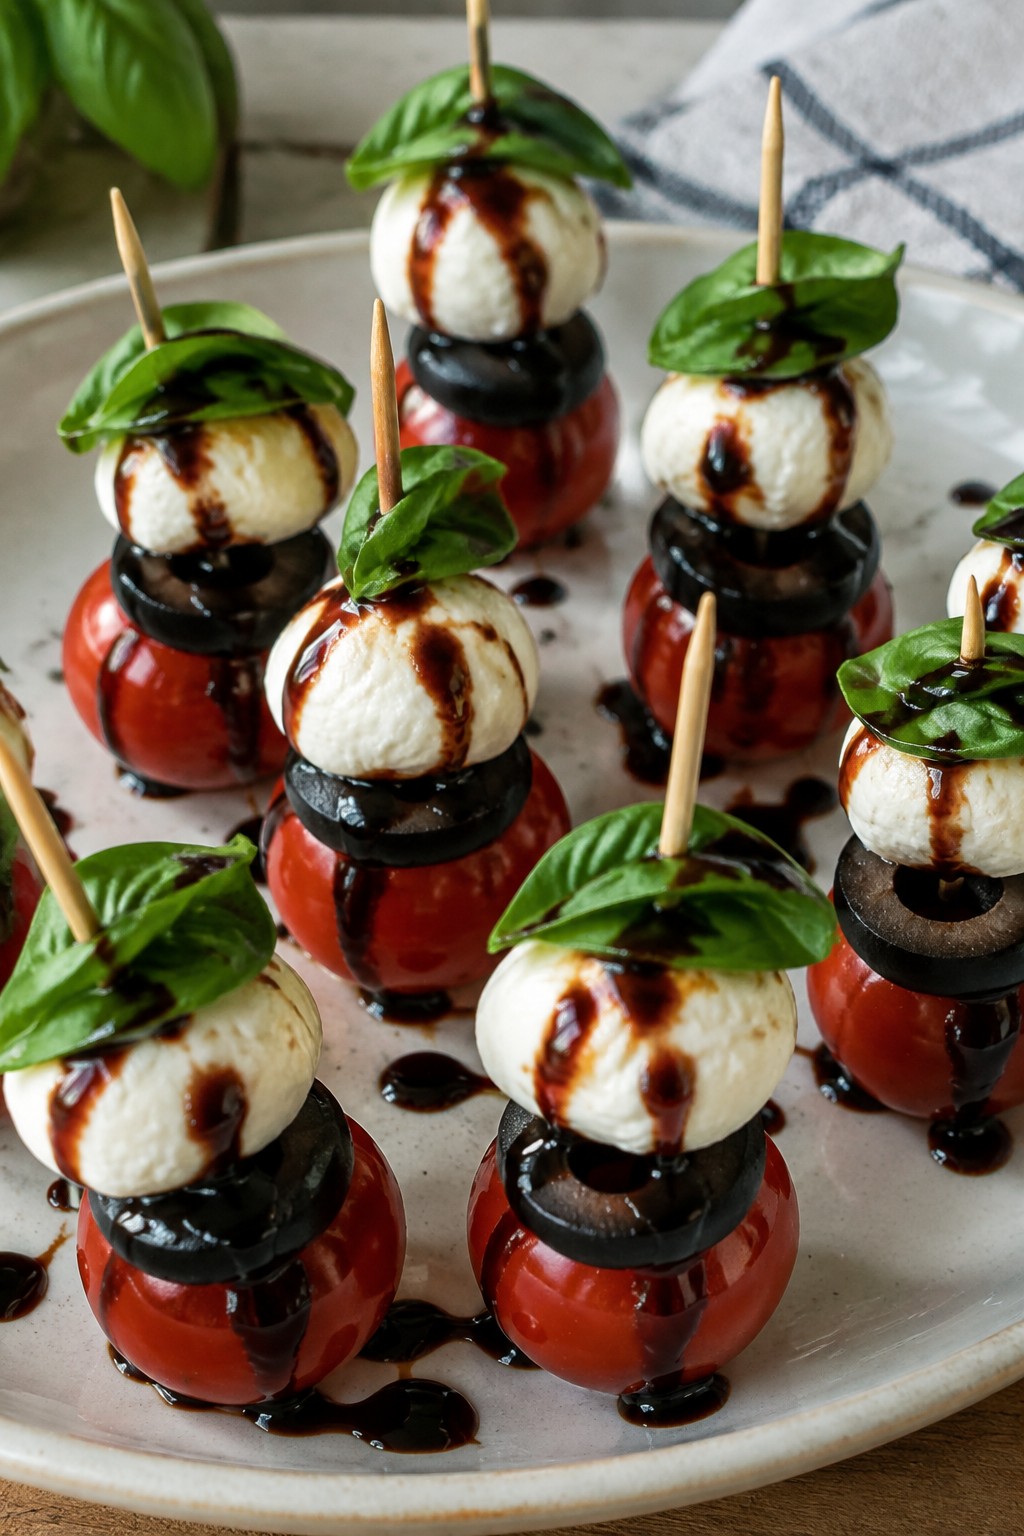
These skewers bring a spooky twist to a classic Caprese salad. They work well at Halloween potlucks because they need no cooking and can be assembled ahead of time. The fresh mozzarella and tomatoes stay light while the balsamic glaze adds a dark, bloody look that fits the theme.
The texture stays soft from the cheese and juicy from the tomatoes. Basil adds a bright note without overpowering the simple stack.
Serves 4 people.
Ingredients
- 12 cherry tomatoes
- 12 bocconcini mozzarella balls
- 12 fresh basil leaves
- 6 black olives, sliced into rings
- 2 tablespoons balsamic glaze
- 1 tablespoon olive oil
- Salt and pepper to taste
- 12 wooden skewers
Instructions
- Place one cherry tomato on each wooden skewer near the tip.
- Add one basil leaf next to the tomato.
- Thread one bocconcini mozzarella ball onto the skewer so it sits against the basil.
- Press one black olive ring onto the front of each mozzarella ball to form the pupil.
- Repeat with the remaining ingredients until all 12 skewers are assembled.
- Arrange the skewers on a serving plate.
- Drizzle the olive oil and balsamic glaze over the skewers.
- Sprinkle lightly with salt and pepper before serving.
Extra Tips
Assemble the skewers no more than two hours ahead so the mozzarella stays firm. Keep the balsamic glaze in a small squeeze bottle for easy drizzling that looks like veins. If you need a milder flavor, use a thinner layer of glaze on top rather than soaking the cheese. Course: Appetizer Cuisine: Italian Equipment: Wooden skewers, Small bowl
Frankenstein Avocado Deviled Eggs
These Frankenstein Avocado Deviled Eggs bring a fun green twist to a classic potluck dish. The avocado replaces mayo to create a naturally vibrant filling that fits right into a Halloween spread. They work well for parties because they travel easily and need little last-minute work.
The flavor is creamy and mild with a touch of tang from lime. The egg whites stay firm while the filling pipes or spoons in smoothly for a playful monster look.

Serves 4 people.
Ingredients
- 6 large eggs
- 1 ripe avocado
- 1 tablespoon lime juice
- 1/2 teaspoon salt
- 1/4 teaspoon black pepper
- 8 black olives
Instructions
- Place the eggs in a pot and cover with cold water. Bring to a boil, then simmer for 10 minutes.
- Drain the eggs and run them under cold water until cool enough to handle. Peel off the shells.
- Slice each egg in half lengthwise and remove the yolks. Place the yolks in a bowl.
- Add the avocado, lime juice, salt, and black pepper to the bowl with the yolks. Mash everything together until smooth.
- Spoon or pipe the green filling back into the egg white halves.
- Slice the black olives and use the pieces to create eyes and a mouth on each filled egg.
Extra Tips
Make the filling a few hours ahead and keep it covered in the fridge so the color stays bright. Press plastic wrap directly on the surface to prevent browning. Use firm egg whites so the faces hold their shape when you add the olive pieces. Course: Appetizer Cuisine: American Equipment: Pot, Mixing Bowl, Knife
Harvest Stuffed Mushroom Caps
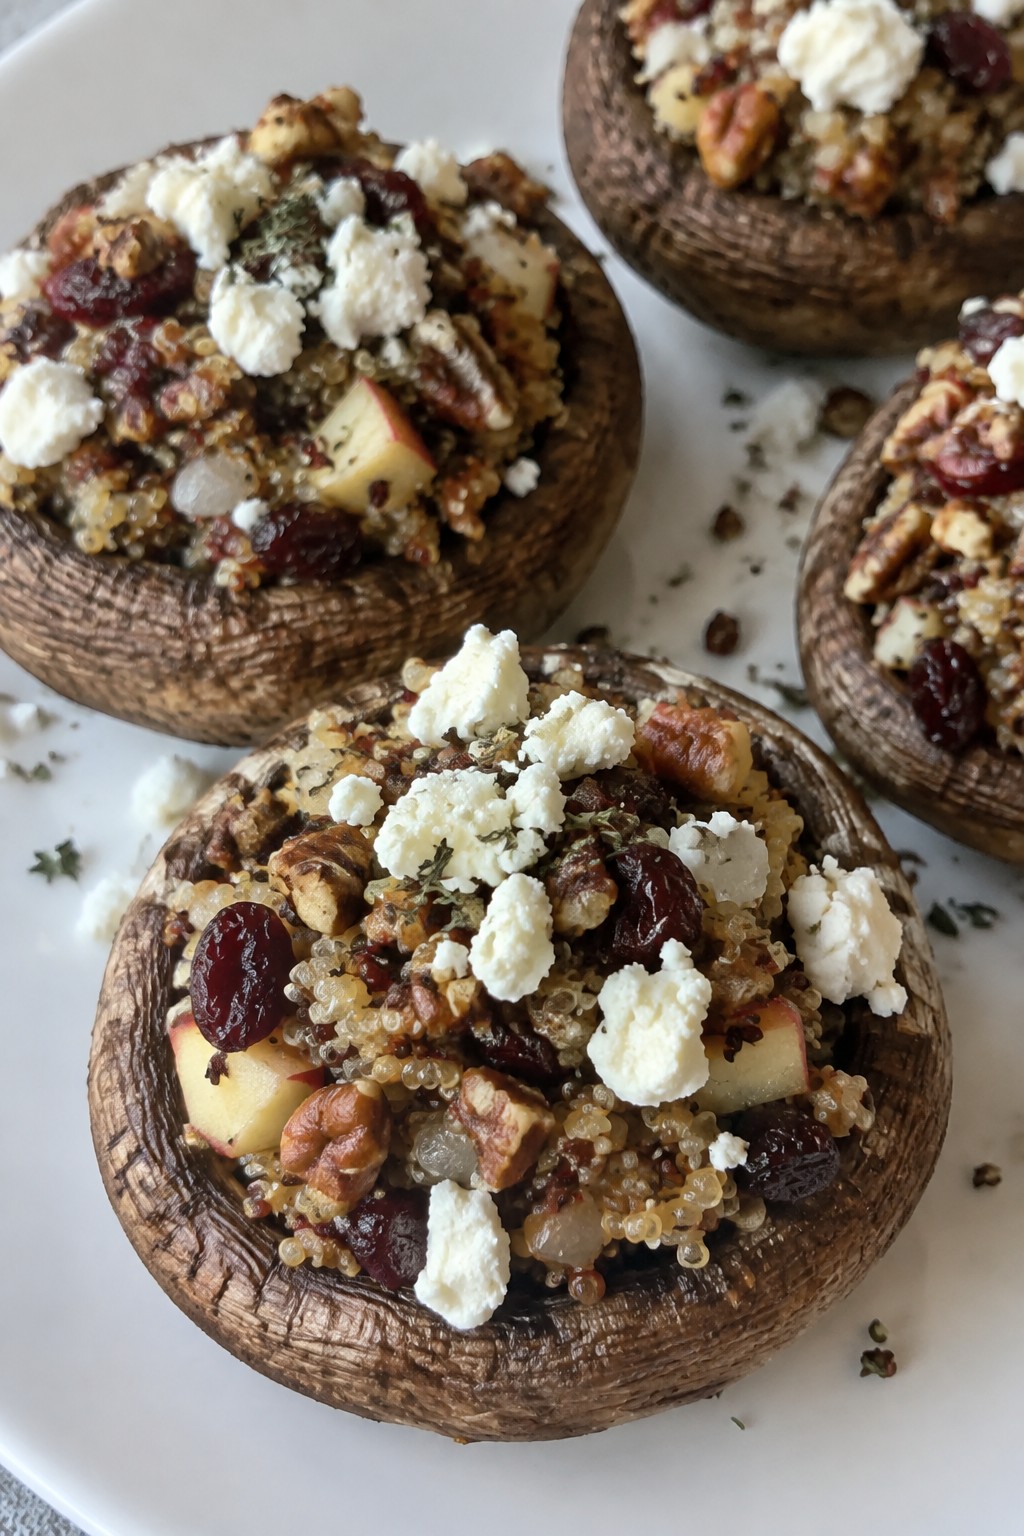
These stuffed mushrooms bring together the best of fall flavors in one easy bite. Sweet apples, tart cranberries, and crunchy nuts fill earthy mushroom caps for a dish that feels seasonal without much effort. They travel well to potluck gatherings and hold up nicely whether served warm or at room temperature.
The filling stays savory with a hint of herb and a creamy finish from goat cheese. Each mushroom offers a mix of soft and crisp textures that guests enjoy picking up with a napkin.
Serves 4 people.
Ingredients
- 12 large button mushrooms
- 2 tablespoons olive oil
- 1/2 cup diced onion
- 1 small apple, finely diced
- 1/4 cup dried cranberries
- 1/4 cup chopped pecans
- 1 cup cooked quinoa
- 1 teaspoon dried thyme
- 1/2 teaspoon salt
- 1/4 teaspoon black pepper
- 1/4 cup crumbled goat cheese
Instructions
- Preheat the oven to 375 degrees. Wipe the mushrooms clean with a damp cloth and remove the stems. Finely chop the stems and set them aside.
- Heat 1 tablespoon of olive oil in a skillet over medium heat. Add the onion and cook for 3 minutes until softened. Stir in the chopped mushroom stems and diced apple. Cook for another 4 minutes.
- Add the cooked quinoa, dried cranberries, pecans, thyme, salt, and black pepper to the skillet. Stir everything together and cook for 2 minutes until heated through. Remove from heat.
- Brush the mushroom caps with the remaining tablespoon of olive oil and place them on a baking sheet. Spoon the quinoa mixture into each cap, pressing lightly to fill. Sprinkle goat cheese over the tops.
- Bake for 18 to 20 minutes until the mushrooms are tender and the cheese has softened. Let them rest for 5 minutes before serving.
Extra Tips
Cook the quinoa ahead and store it in the fridge so assembly takes only minutes on the day of the potluck. If the filling seems dry after mixing, add a teaspoon of water while it warms in the skillet. These reheat well in a 350-degree oven for 8 minutes if made the night before. Course: Appetizer Cuisine: American Equipment: Baking sheet, Skillet, Mixing bowl
Red Velvet Monster Cupcakes
These red velvet cupcakes bring a fun Halloween twist to any potluck table. The bright red cake pairs with tangy cream cheese frosting, and candy eyes turn each one into a playful monster face. They travel well and need no special skills to put together.
The texture stays moist thanks to buttermilk, while the cocoa gives a mild chocolate note without overpowering the red color. Kids and adults both reach for them, making them a reliable choice when you want something festive but still simple.

Serves 4 people.
Ingredients
- ¾ cup all-purpose flour
- 1 tablespoon unsweetened cocoa powder
- ½ teaspoon baking soda
- ¼ teaspoon salt
- ¼ cup unsalted butter, softened
- ½ cup granulated sugar
- 1 large egg
- ½ cup buttermilk
- 2 teaspoons red food coloring
- ½ teaspoon vanilla extract
- 4 ounces cream cheese, softened
- 2 tablespoons unsalted butter, softened
- 1 cup powdered sugar
- 12 candy eyes
- 2 tablespoons green sprinkles
Instructions
- Preheat the oven to 350°F and line a muffin tin with 4 paper liners.
- In a small bowl, whisk together the flour, cocoa powder, baking soda, and salt.
- In a medium bowl, beat the ¼ cup softened butter with the granulated sugar until light. Add the egg, buttermilk, red food coloring, and vanilla extract and mix until smooth.
- Stir the dry ingredients into the wet mixture until just combined. Divide the batter evenly among the 4 liners.
- Bake for 18 to 20 minutes, or until a toothpick inserted in the center comes out clean. Let the cupcakes cool completely in the tin.
- While the cupcakes cool, beat the cream cheese and 2 tablespoons butter together until creamy. Gradually add the powdered sugar and mix until smooth.
- Spread or pipe the frosting on the cooled cupcakes. Press three candy eyes onto each cupcake while the frosting is still soft, then scatter green sprinkles around the eyes.
Extra Tips
Make the cupcakes a day ahead and store them unfrosted in an airtight container at room temperature. Add the frosting and candy eyes right before the potluck so the eyes stay bright and the sprinkles do not bleed. If the frosting feels too thick, stir in a teaspoon of milk to loosen it for easier piping. Course: Dessert Cuisine: American Equipment: Mixing bowls, Muffin tin, Electric mixer
Slow-Cooker Pumpkin Chili
This slow-cooker pumpkin chili brings a subtle sweetness from pumpkin that balances the spices in a hearty, one-pot meal. It travels well to potlucks and stays warm in the cooker without much attention.
The texture turns thick and comforting after hours of simmering, making it easy to ladle into bowls for a crowd on Halloween night.

Serves 4 people.
Ingredients
- 1 lb ground turkey
- 1 medium onion, diced
- 3 cloves garlic, minced
- 1 (15 oz) can pumpkin puree
- 1 (15 oz) can kidney beans, drained and rinsed
- 1 (14.5 oz) can diced tomatoes
- 1 cup vegetable broth
- 2 tablespoons chili powder
- 1 teaspoon ground cumin
- 1/2 teaspoon cinnamon
- Salt and pepper to taste
- Shredded cheddar cheese, for serving
- Chopped green onions, for serving
Instructions
- Heat a large skillet over medium heat and add the ground turkey. Cook until browned, breaking it up with a spoon as it cooks.
- Add the diced onion and minced garlic to the skillet with the turkey. Cook for 3 to 4 minutes until the onion softens.
- Transfer the turkey mixture to the slow cooker. Stir in the pumpkin puree, kidney beans, diced tomatoes, vegetable broth, chili powder, cumin, cinnamon, salt, and pepper.
- Cover and cook on low for 6 to 8 hours, stirring once halfway through if possible.
- Taste and adjust salt or pepper before serving. Ladle into bowls and top with shredded cheddar cheese and chopped green onions.
Extra Tips
Stir the chili well right before serving so the pumpkin stays evenly distributed. Leftovers keep in the fridge for three days and reheat smoothly on the stovetop with a splash of broth to loosen the texture if needed. Skip the cheese for a dairy-free version. Course: Soup Cuisine: American Equipment: Slow Cooker, Large Skillet
Ghostly White Chocolate Popcorn Mix
This ghostly white chocolate popcorn mix brings a sweet and crunchy snack to Halloween potlucks. It comes together quickly with basic ingredients and looks festive without extra decoration.
The mix balances creamy white chocolate with salty pretzels and soft marshmallows. It travels well and holds up in a serving bowl for guests to scoop.

Serves 4 people.
Ingredients
- 10 cups popped popcorn
- 1 1/2 cups white chocolate chips
- 1 cup mini marshmallows
- 1/2 cup crushed pretzels
- 2 tablespoons white nonpareils
- Candy eyes, for garnish
Instructions
- Add the popped popcorn, mini marshmallows, and crushed pretzels to a large bowl and stir to combine.
- Place the white chocolate chips in a microwave-safe bowl and heat in 30-second bursts, stirring between each until fully melted and smooth.
- Pour the melted white chocolate over the popcorn mixture and toss gently until everything is evenly coated.
- Spread the coated mixture onto a baking sheet lined with parchment paper in a single layer.
- While the chocolate is still soft, sprinkle the white nonpareils over the top and press a few candy eyes onto some of the clusters.
- Allow the mix to set at room temperature until the chocolate firms up, then break into pieces for serving.
Extra Tips
Let the mix sit for a few extra minutes after setting if you want softer bites, since the white chocolate can harden quickly. For potlucks, pack it in a sealed container and break clusters right before guests arrive so the candy eyes stay in place. Course: Snack Cuisine: American Equipment: Large Bowl, Microwave-Safe Bowl, Baking Sheet, Parchment Paper
Skull-Shaped Pepperoni Pizza Bites
These skull-shaped pepperoni pizza bites turn regular pizza into a playful finger food that fits right in at a Halloween potluck. The shape makes them stand out on a shared table without extra effort. They deliver a crisp crust, melted cheese, and classic pepperoni taste in every bite.
The bites stay easy to eat while still feeling hearty enough for a crowd. Cheese stretches slightly when warm, and the edges turn golden from a quick brush of oil.

Serves 4 people.
Ingredients
- 1 (13.8 oz) can refrigerated pizza dough
- 2 tablespoons all-purpose flour
- 1/2 cup pizza sauce
- 1 1/2 cups shredded mozzarella cheese
- 20 slices pepperoni
- 1 tablespoon olive oil
- 1/2 teaspoon garlic powder
Instructions
- Heat the oven to 425°F and line a baking sheet with parchment paper.
- Lightly dust a clean surface with the flour and unroll the pizza dough onto it.
- Roll the dough to an even thickness, then cut out skull shapes with a cookie cutter.
- Transfer the shapes to the prepared baking sheet and spread a thin layer of pizza sauce on each one.
- Sprinkle mozzarella cheese evenly over the sauce on every piece.
- Lay two or three pepperoni slices on top of the cheese.
- Brush the edges of each skull with olive oil and dust lightly with garlic powder.
- Bake for 10 to 12 minutes until the crust turns golden and the cheese melts.
Extra Tips
Cut the dough while it is still cold for the cleanest skull outlines. Serve the bites straight from the baking sheet with any leftover pizza sauce for dipping. Leftovers reheat best in a 350°F oven for five minutes to restore crisp edges. Course: Appetizer Cuisine: American Equipment: Baking Sheet, Rolling Pin, Skull-Shaped Cookie Cutter
