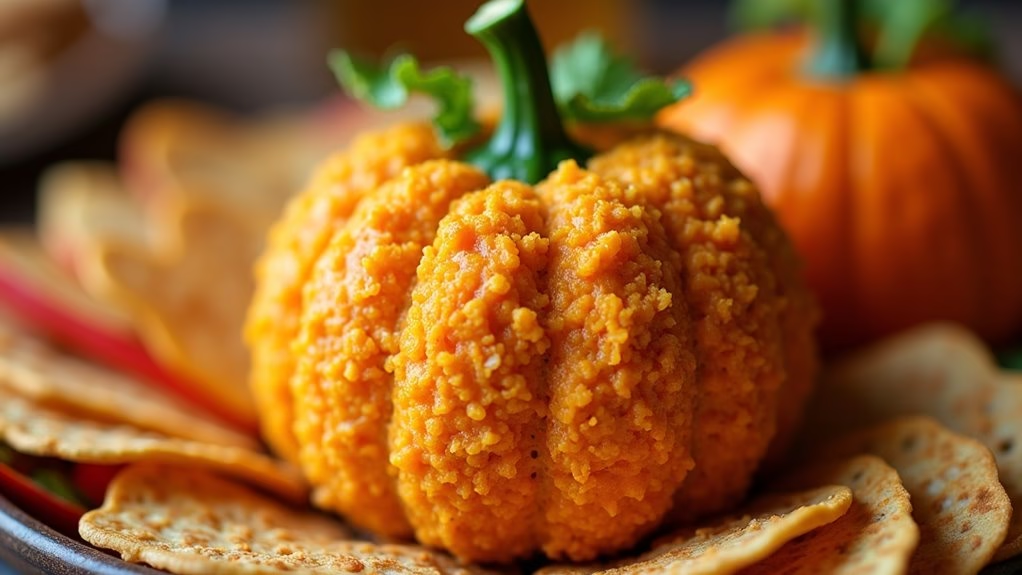
Throwing a Halloween party that leaves your guests spellbound is all about the food spread. Picture the tantalizing Witch’s Finger Breadsticks, both eerie and delicious. Or those adorable Mummy Hot Dogs, offering a fun twist for everyone. These spooky and creative treats set the mood with their charm and flavors. Ready to transform your gathering into a memorable feast?
Witch’s Finger Breadsticks
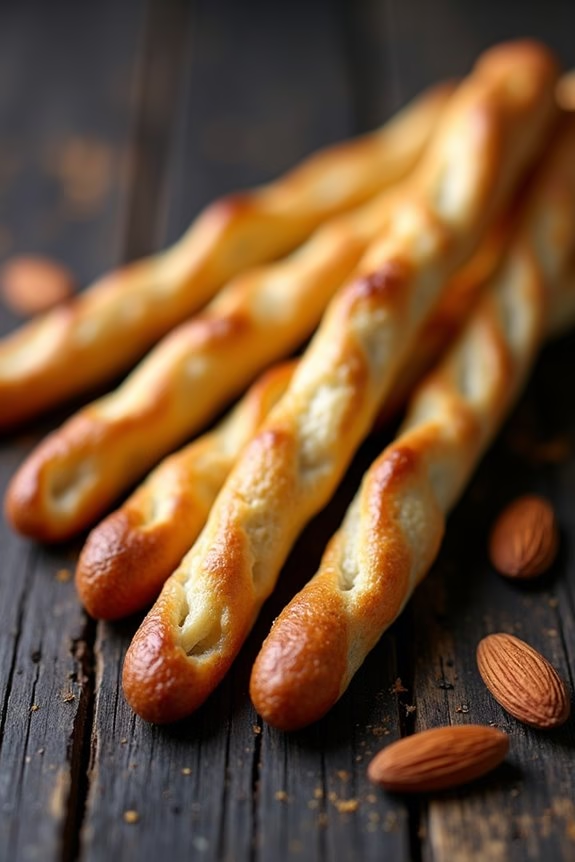
Bring a touch of spooky fun to your Halloween party with these eerie yet delicious Witch’s Finger Breadsticks. Perfectly crisp on the outside and soft on the inside, these breadsticks are shaped to resemble creepy witch fingers, complete with almond nails for a truly ghoulish presentation.
Whether you’re hosting a Halloween gathering or simply want to enjoy a themed treat, these breadsticks are sure to delight both kids and adults alike. Serve them with a side of marinara sauce or a creamy dip to further enhance the flavors and add to the frightful fun.
These Witch’s Finger Breadsticks aren’t only fun to make but also surprisingly easy. The dough is seasoned with Italian herbs to give it a savory taste that pairs wonderfully with the almond “nails.”
The key to achieving the realistic finger look is in the shaping and the small details like creating knuckle lines. Once baked to golden perfection, these breadsticks will be the highlight of your Halloween spread. Whether served as appetizers or as part of a larger meal, they’re bound to be a conversation starter.
Ingredients for 4-6 servings:
- 1 packet (2 1/4 teaspoons) active dry yeast
- 1 cup warm water (about 110°F/45°C)
- 2 1/2 cups all-purpose flour
- 1 tablespoon sugar
- 1 teaspoon salt
- 2 tablespoons olive oil
- 1 teaspoon dried Italian herbs (oregano, basil, thyme)
- 24 whole almonds
- 1 egg, beaten (for egg wash)
- Red food coloring (optional, for added effect)
Cooking Instructions:
- Activate the Yeast: In a large mixing bowl, dissolve the sugar in warm water. Sprinkle the yeast over the water and let it stand for about 5-10 minutes until it becomes frothy. This indicates the yeast is active.
- Prepare the Dough: Add the flour, salt, olive oil, and Italian herbs to the yeast mixture. Stir until the dough begins to come together. Turn it out onto a floured surface and knead for about 5-7 minutes until smooth and elastic.
- First Rise: Place the dough in a lightly oiled bowl, cover it with a damp cloth or plastic wrap, and let it rise in a warm place for about 1 hour or until doubled in size.
- Shape the Breadsticks: Preheat your oven to 375°F (190°C). Punch down the risen dough and divide it into 24 equal pieces. Roll each piece into a thin log, about the length of a finger. Pinch one end slightly to form a fingertip shape.
- Add Almond Nails: Press a whole almond into the fingertip end of each breadstick to resemble a nail. Use a small knife to make three shallow horizontal cuts in the middle of each breadstick to mimic knuckles.
- Final Rise and Bake: Place the shaped breadsticks on a baking sheet lined with parchment paper. Let them rise for another 20 minutes. Brush each breadstick with beaten egg for a golden finish. If desired, use a small amount of red food coloring on the almond nails for a bloody effect.
- Bake: Bake in the preheated oven for 18-22 minutes or until the breadsticks are golden brown and cooked through. Allow them to cool slightly before serving.
Extra Tips:
For an extra spooky twist, serve these Witch’s Finger Breadsticks with a side of “blood-red” marinara sauce. If you prefer a more neutral appearance, skip the red food coloring.
Be sure to shape the dough carefully and make the knuckle lines distinct to enhance the finger-like appearance. If you find the dough sticky while shaping, lightly dust your hands and work surface with flour.
These breadsticks are best enjoyed fresh out of the oven but can be reheated slightly before serving if made in advance.
Spider Web Nachos

Get ready to spookify your snack table with a Halloween favorite—Spider Web Nachos. This eerie dish combines the classic flavors of nachos with a creepy twist that’s perfect for any festive gathering. Topped with melted cheese, seasoned beef, and a web of sour cream, these nachos aren’t just delicious but also a centerpiece that will draw everyone’s attention.
Whether you’re hosting a Halloween party or just trying to get into the spooky spirit, this dish will surely delight and fright in equal measure.
Spider Web Nachos aren’t only fun to make but also provide an interactive element for your guests. The “web” is created by drizzling sour cream over the nachos in a spider web design, adding a creative touch that makes this dish stand out.
With layers of crunchy tortilla chips, seasoned meat, gooey cheese, and fresh toppings, these nachos deliver a burst of flavor in every bite. Perfect for serving 4-6 people, this snack is both a treat for the eyes and the taste buds.
Ingredients (Serves 4-6):
- 1 pound ground beef
- 1 packet taco seasoning
- 1 tablespoon olive oil
- 1 bag (14 ounces) tortilla chips
- 2 cups shredded cheddar cheese
- 1 cup sour cream
- 1 cup salsa
- 1/2 cup sliced black olives
- 1/2 cup chopped green onions
- 1/2 cup chopped tomatoes
- 1 jalapeño, sliced (optional)
- Salt and pepper to taste
Cooking Instructions:
1. Prepare the Beef: In a large skillet, heat the olive oil over medium heat. Add the ground beef and cook until browned, breaking it apart with a spatula as it cooks. Drain excess fat, if necessary.
2. Season the Beef: Add the taco seasoning to the browned beef. Stir in 1/4 cup of water and let it simmer for about 5 minutes until the seasoning is well incorporated and the beef is fully cooked. Season with salt and pepper to taste.
3. Layer the Nachos: Preheat your oven to 350°F (175°C). On a large baking sheet, spread out a layer of tortilla chips. Evenly distribute the seasoned beef over the chips, followed by a generous sprinkling of shredded cheddar cheese.
4. Melt the Cheese: Place the baking sheet in the oven and bake for about 10 minutes, or until the cheese is fully melted and bubbly.
5. Create the Spider Web: While the nachos are baking, prepare the sour cream web. Spoon the sour cream into a plastic sandwich bag and snip off a small corner. Once the nachos are out of the oven, drizzle the sour cream over the nachos in a spiral pattern starting from the center.
Use a toothpick to drag lines from the center to the edges, creating a web effect.
6. Add Fresh Toppings: Top the nachos with salsa, sliced black olives, chopped green onions, and chopped tomatoes. For an extra kick, add sliced jalapeños if desired.
Extra Tips:
For the best presentation, serve the Spider Web Nachos immediately after creating the web design to maintain the visual appeal.
If you prefer a vegetarian version, substitute the ground beef with black beans or a meat substitute. Additionally, you can use a squeeze bottle for the sour cream to achieve a more precise web design.
Feel free to customize the toppings based on your guests’ preferences, adding guacamole, corn, or even hot sauce to suit different tastes. Enjoy your creepy culinary creation!
Mummy Hot Dogs

If you’re looking for a fun and spooky treat for your Halloween party, Mummy Hot Dogs are the perfect choice. These adorable hot dogs wrapped in crescent roll dough aren’t only delicious but also incredibly easy to make. They’re bound to be a hit with both kids and adults, adding a playful touch to your Halloween-themed spread.
With just a few simple ingredients and minimal prep time, you’ll have a festive appetizer ready to delight your guests.
Mummy Hot Dogs are as fun to make as they’re to eat. The process involves wrapping crescent roll dough around hot dogs to create the appearance of a mummy, adding eyes with edible decorations, and baking them to golden perfection. Not only do they look impressive, but they also offer a tasty blend of buttery, flaky dough and savory hot dogs.
Whether served as a snack or a party appetizer, these Mummy Hot Dogs will definitely add a whimsical element to your Halloween festivities.
Ingredients (Serves 4-6):
- 8 hot dogs
- 1 can of refrigerated crescent roll dough
- 1 tablespoon of mustard or ketchup (for eyes)
- Cooking spray
Cooking Instructions:
- Preheat the Oven: Start by preheating your oven to 375°F (190°C). This guarantees that your Mummy Hot Dogs will bake evenly and have a nice golden-brown finish.
- Prepare the Dough: Unroll the crescent roll dough and separate it into 8 triangles. Cut each triangle into thin strips, about 1/4 inch wide. These strips will serve as the mummy’s “bandages.”
- Wrap the Hot Dogs: Take one hot dog and begin wrapping it with the dough strips. Start at one end and continue wrapping towards the other end, leaving a small space for the “face.” Confirm the dough overlaps slightly to create the mummy effect. Repeat this process for all hot dogs.
- Place on Baking Sheet: Lightly coat a baking sheet with cooking spray. Place the wrapped hot dogs on the sheet, leaving a little space between each one to confirm even baking.
- Bake: Place the baking sheet in the preheated oven and bake for 12-15 minutes or until the dough is golden brown.
- Add Eyes: Remove the hot dogs from the oven and let them cool for a few minutes. Use a toothpick or a small piping bag to dot mustard or ketchup onto the hot dogs to create eyes.
Extra Tips:
For a more festive presentation, consider serving the Mummy Hot Dogs with a variety of dipping sauces such as mustard, ketchup, or cheese sauce.
If you’re making these in advance, you can assemble the mummies and refrigerate them until you’re ready to bake. Confirm the dough is wrapped tightly around the hot dogs to prevent it from unraveling during baking.
For a vegetarian option, you can use veggie dogs. Enjoy your spooky creation!
Ghostly Pizza Bites

Ghostly Pizza Bites are the perfect spooky addition to your Halloween festivities. These fun and flavorful mini pizzas are shaped like little ghosts, making them a hit among both kids and adults. With a crispy crust, gooey cheese, and your choice of toppings, Ghostly Pizza Bites are guaranteed to disappear quickly from the party table. Not only are they easy to make, but they also bring a festive spirit to any Halloween gathering.
Whether you’re hosting a Halloween party or simply enjoying a themed dinner at home, Ghostly Pizza Bites are a versatile dish that can be customized to suit different tastes. You can use a variety of toppings, from classic pepperoni to creative veggie combinations, assuring that there’s something for everyone. Best of all, these bites are small and handheld, making them perfect for mingling and snacking.
Ingredients for 4-6 people:
- 1 pound pizza dough
- 1 cup pizza sauce
- 1 1/2 cups shredded mozzarella cheese
- 24 slices of pepperoni or other preferred toppings
- 1 tablespoon olive oil
- 1 teaspoon garlic powder
- 1 teaspoon Italian seasoning
- Black olives (for eyes)
- Flour (for dusting)
Cooking Instructions:
- Preparation of Dough: Preheat your oven to 425°F (220°C). Lightly flour a clean surface and roll out the pizza dough to about 1/4-inch thickness. Use a ghost-shaped cookie cutter to cut out as many shapes as possible from the dough.
- Assemble the Bites: Place the ghost-shaped dough pieces onto a baking sheet lined with parchment paper. Brush each piece lightly with olive oil to help the crust turn golden and crispy.
- Add Sauce and Cheese: Spread a small spoonful of pizza sauce over each dough shape, leaving a small border around the edges. Sprinkle a generous amount of shredded mozzarella cheese on top of the sauce.
- Add Toppings and Seasoning: Place two slices of pepperoni or your preferred toppings on each pizza bite. Sprinkle a little garlic powder and Italian seasoning over the top for added flavor.
- Create Ghost Faces: Slice black olives into small rounds and place them on the cheese to create the eyes for your ghostly faces.
- Bake: Place the baking sheet in the preheated oven and bake for 10-12 minutes, or until the cheese is melted and bubbly, and the crust is golden brown.
- Serve: Remove the Ghostly Pizza Bites from the oven and let them cool for a few minutes before serving. Enjoy them warm for the best flavor.
Extra Tips:
For a crispier crust, pre-bake the ghost-shaped dough for 3-4 minutes before adding the sauce and toppings. This step guarantees that the crust holds its shape better and doesn’t become soggy from the sauce.
If you don’t have a ghost-shaped cookie cutter, you can use a knife to freehand the shapes or opt for traditional round mini pizzas. Additionally, encourage creativity by setting up a toppings bar with various options, allowing guests to customize their own Ghostly Pizza Bites for a more interactive experience.
Monster Eye Deviled Eggs

Halloween is the perfect time to get creative in the kitchen, and Monster Eye Deviled Eggs are a spooky yet delicious addition to any Halloween themed party. These devilish treats aren’t only visually striking but also simple to prepare, making them a hit among both kids and adults.
By using a few clever tricks, you can transform a classic deviled egg into a creepy and fun dish that adds a fun, eerie touch to your party spread. The key to achieving the eye-catching look of Monster Eye Deviled Eggs lies in the details. A combination of strategically placed ingredients and a little artistic flair helps turn ordinary deviled eggs into ghoulish, eye-like bites.
The result is a platter of eggs that stare back at you, making them a standout appetizer. Whether you’re hosting a Halloween bash or just want to surprise your family with something fun, these deviled eggs are sure to impress.
Ingredients for 4-6 People:
- 12 large eggs
- 1/2 cup mayonnaise
- 1 tablespoon Dijon mustard
- Salt and pepper to taste
- Red food coloring
- Black olives
- Green olives
- Paprika (optional)
Cooking Instructions:
- Boil the Eggs: Place the eggs in a single layer in a saucepan and cover them with water. Bring the water to a boil over medium-high heat. Once boiling, cover the saucepan, remove it from the heat, and let the eggs sit for 10-12 minutes.
- Cool and Peel: After the eggs have cooked, transfer them to a bowl of ice water to cool for about 5 minutes. Once cooled, gently peel the eggs under running water to remove the shells.
- Prepare the Filling: Slice each egg in half lengthwise and carefully remove the yolks, placing them in a mixing bowl. Add mayonnaise, mustard, salt, and pepper to the yolks and mash with a fork until smooth and creamy.
- Create the Monster Eye Look: Add a few drops of red food coloring to the yolk mixture and stir until you reach a desired shade of “bloody” red. Fill each egg white half with a spoonful of the yolk mixture.
- Add the Eyeball Details: Slice black olives into thin rings and place one ring on top of each filled egg to form the pupil. Cut green olives into round slices and place them around the black olive to mimic the iris.
- Optional Touch: For an extra creepy effect, sprinkle a little paprika around the edges of the yolk mixture to add a “veiny” look to your monster eyes.
Extra Tips:
For best results, use food coloring gel instead of liquid for more vibrant colors without altering the texture of your yolk mixture.
It’s important to gently peel the eggs to avoid any damage to the whites, and you can also use a piping bag for a more polished look when filling the eggs. If you want to prepare them in advance, store the filled egg halves in the refrigerator and add the olive details just before serving to keep them fresh and visually appealing.
Bloody Berry Punch

Transform your Halloween party into a spooktacular event with this deliciously sinister Bloody Berry Punch. The deep red color of this punch will add a creepy flair to your drink table, giving your guests the perfect mix of fright and delight. Not only is this punch visually appealing, but it also boasts a tantalizing blend of berries and citrus, creating a rejuvenating yet eerie beverage that everyone will enjoy.
Whether you’re hosting a gathering for children or adults, this punch can be adapted to suit all ages, guaranteeing everyone gets into the Halloween spirit.
This Bloody Berry Punch is an easy-to-make beverage that combines the sweetness of mixed berries with the tartness of citrus juices, creating a balanced flavor that’s both invigorating and bold. For an added touch of Halloween fun, you can float lychee “eyeballs” or gummy worms in the punch bowl, making it as much a treat for the eyes as it’s for the taste buds.
This recipe is perfect for serving 4-6 people, making it an ideal choice for small gatherings or as a centerpiece for a larger party spread.
Ingredients:
- 2 cups cranberry juice
- 1 cup pomegranate juice
- 1 cup orange juice
- 1 cup sparkling water
- 1 cup mixed berries (fresh or frozen)
- 1/4 cup lime juice
- 1/4 cup simple syrup (adjust to taste)
- Ice cubes
- Lychee “eyeballs” or gummy worms (optional for decoration)
Instructions:
- Prepare the Punch Base: In a large pitcher or punch bowl, combine the cranberry juice, pomegranate juice, and orange juice. Stir well to confirm all juices are thoroughly mixed.
- Add Citrus and Sweetness: Pour in the lime juice and simple syrup, stirring the mixture again. Taste the punch at this stage and adjust the sweetness by adding more simple syrup if desired.
- Incorporate Berries: Add the mixed berries to the punch. If using frozen berries, they’ll help keep the punch cold. Stir gently to distribute the berries evenly throughout the punch.
- Finish with Fizz: Just before serving, add the sparkling water. This will give the punch a delightful effervescence. Stir gently to combine, making sure not to lose too much of the fizz.
- Serve and Decorate: Fill glasses with ice cubes and pour the punch over them. For a spooky effect, add lychee “eyeballs” or gummy worms to each glass or float them in the punch bowl.
Extra Tips:
To make the lychee “eyeballs”, simply stuff canned or fresh lychees with a small blueberry or a red grape before adding them to the punch. This will create a realistic eye-like appearance that’s sure to impress your guests.
If you’re serving this punch to adults, consider adding a splash of vodka or rum for an extra kick. Always taste the punch before serving to confirm the flavors are balanced to your preference, as personal taste can vary.
Finally, if you’re using fresh berries, consider freezing them beforehand to help keep the punch chilled without diluting it with too much ice.
Goblin Guacamole
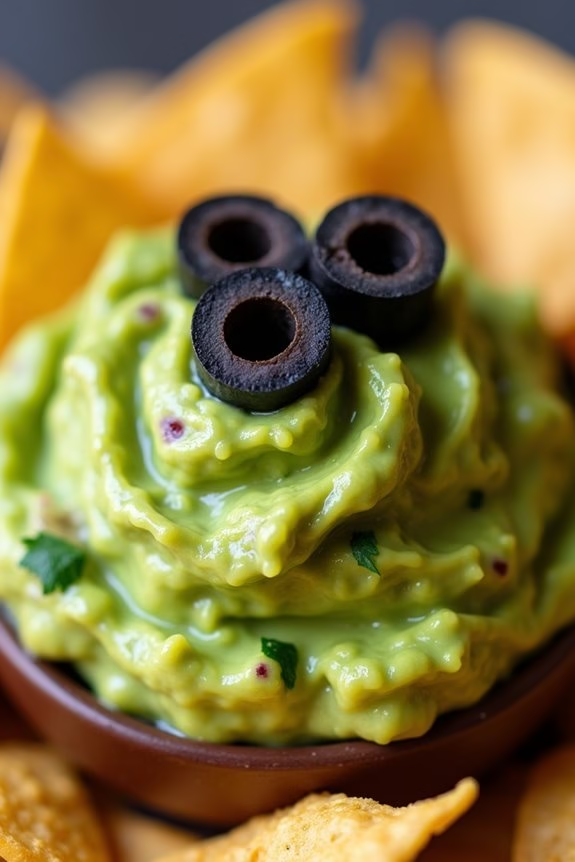
Goblin Guacamole is a spooktacular twist on the classic guacamole, perfect for adding some frightful fun to your Halloween festivities. This eerie green dip maintains the creamy, rich taste of traditional guacamole but is given a ghoulish makeover with the addition of a few special ingredients. Goblin Guacamole isn’t only visually appealing, but it also offers a delicious blend of flavors that will have your party guests coming back for more.
Imagine a cauldron bubbling with mysterious green goo, ready to be scooped up with crispy tortilla chips. The Goblin Guacamole is a crowd-pleaser that balances the creaminess of ripe avocados with zesty lime juice, the heat of jalapeños, and the earthy taste of cilantro. This dish is a great way to engage your guests with a Halloween theme, bringing a bit of the supernatural to your snack table. It’s quick to prepare, making it ideal for busy hosts who want to impress without spending hours in the kitchen.
Ingredients (Serving Size: 4-6 people):
- 4 ripe avocados
- 1 lime, juiced
- 1 teaspoon salt
- 1/2 cup diced red onion
- 3 tablespoons chopped fresh cilantro
- 2 roma tomatoes, diced
- 1 teaspoon minced garlic
- 1 jalapeño, seeded and minced
- 1/4 cup sour cream
- Green food coloring (optional)
- Black olives, sliced for garnish
- Tortilla chips for serving
Cooking Instructions:
- Prepare the Avocados: Cut the avocados in half, remove the pits, and scoop the flesh into a mixing bowl. Use a fork or potato masher to mash the avocados until you’ve reached your desired consistency. For a smoother guacamole, mash thoroughly; for a chunkier texture, leave some avocado pieces intact.
- Add Lime and Salt: Squeeze the juice of one lime over the mashed avocados to enhance flavor and prevent browning. Add salt to the mixture and stir well to combine.
- Mix in Vegetables: Add the diced red onion, chopped cilantro, diced tomatoes, minced garlic, and minced jalapeño to the avocado mixture. Stir until all the ingredients are evenly distributed throughout the guacamole.
- Incorporate Sour Cream: Fold in the sour cream to give the guacamole a creamy texture. This also helps to balance the flavors and create a more luxurious dip.
- Create the Goblin Effect: If desired, add a few drops of green food coloring to intensify the green hue, creating a more eerie appearance. Mix well until the color is evenly distributed.
- Garnish and Serve: Transfer the Goblin Guacamole to a serving bowl. Arrange sliced black olives on top to resemble spooky eyes. Serve with tortilla chips and watch your guests enjoy this Halloween treat.
Extra Tips:
For the best results, use ripe avocados that give slightly when pressed. Overly firm avocados will be difficult to mash and may not provide the desired creamy texture.
If you’re preparing Goblin Guacamole in advance, place a piece of plastic wrap directly on the surface of the guacamole to prevent oxidation and browning.
This dish is easily customizable; feel free to adjust the amount of jalapeño to control the heat level or add other ingredients like corn or black beans for additional texture and flavor. Enjoy your ghostly guacamole!
Creepy Crawly Cupcakes
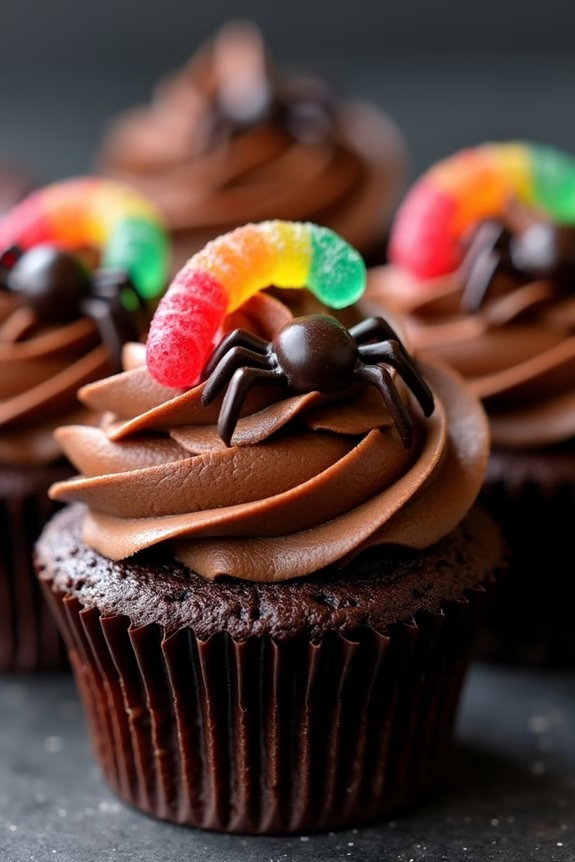
Creepy Crawly Cupcakes are a fun and spooky treat perfect for your Halloween festivities. These cupcakes aren’t only delicious but also come with a bit of a fright, as they’re topped with edible creepy crawlies that will delight both kids and adults.
The base of these cupcakes is a rich, moist chocolate cake, while the frosting is a decadent chocolate buttercream. The finishing touch comes from the creative use of gummy worms and candy spiders, making these cupcakes the talk of your Halloween party.
These cupcakes are easy to make and can be prepared in advance, giving you more time to focus on other party preparations. The recipe provided will yield 12 cupcakes, making it ideal for serving 4-6 people, assuming each person might enjoy 2 cupcakes.
Whether you’re hosting a large gathering or a small get-together, Creepy Crawly Cupcakes will add a festive and eerie charm to your Halloween dessert table.
Ingredients (Serves 4-6):
- 1 cup all-purpose flour
- 1 cup granulated sugar
- 1/3 cup unsweetened cocoa powder
- 1 teaspoon baking powder
- 1/2 teaspoon baking soda
- 1/4 teaspoon salt
- 1/2 cup whole milk
- 1/4 cup vegetable oil
- 1 large egg
- 1 teaspoon vanilla extract
- 1/2 cup boiling water
- 1/2 cup unsalted butter, softened
- 1 1/2 cups powdered sugar
- 1/4 cup unsweetened cocoa powder (for frosting)
- 2 tablespoons heavy cream
- 1 teaspoon vanilla extract (for frosting)
- Gummy worms
- Chocolate candy spiders
Cooking Instructions:
- Prepare the Oven and Cupcake Liners: Preheat your oven to 350°F (175°C). Line a 12-cup muffin tin with cupcake liners.
- Mix Dry Ingredients: In a large bowl, combine the flour, granulated sugar, cocoa powder, baking powder, baking soda, and salt. Whisk them together to guarantee even distribution.
- Combine Wet Ingredients: In a separate bowl, mix the milk, vegetable oil, egg, and vanilla extract until thoroughly combined.
- Create the Batter: Gradually add the wet ingredients to the dry ingredients, mixing until just combined. Slowly stir in the boiling water until the batter is smooth and thin.
- Bake the Cupcakes: Pour the batter evenly into the cupcake liners, filling each about two-thirds full. Bake in the preheated oven for 18-20 minutes, or until a toothpick inserted into the center comes out clean. Remove from the oven and let them cool completely on a wire rack.
- Prepare the Frosting: In a medium bowl, beat the softened butter until creamy. Gradually add the powdered sugar and cocoa powder, beating well after each addition. Add the heavy cream and vanilla extract, and continue to beat until the frosting is smooth and fluffy.
- Frost the Cupcakes: Once the cupcakes are completely cool, use a piping bag or a spatula to frost the tops with chocolate buttercream.
- Decorate with Creepy Crawlies: Place gummy worms and chocolate candy spiders on top of the frosted cupcakes to create the creepy crawly effect.
Extra Tips:
For an even spookier effect, consider adding a few drops of red food coloring to the frosting for a gory look or sprinkle some edible glitter to mimic shimmering webs.
If you prefer a different flavor, you can substitute the chocolate buttercream with vanilla or cream cheese frosting. Additionally, you can make these cupcakes a day in advance and store them in an airtight container to keep them fresh.
When decorating, get creative with different colors and shapes of candy to personalize your Creepy Crawly Cupcakes, making them as eerie or as fun as you like!
Vampire Bat Wings
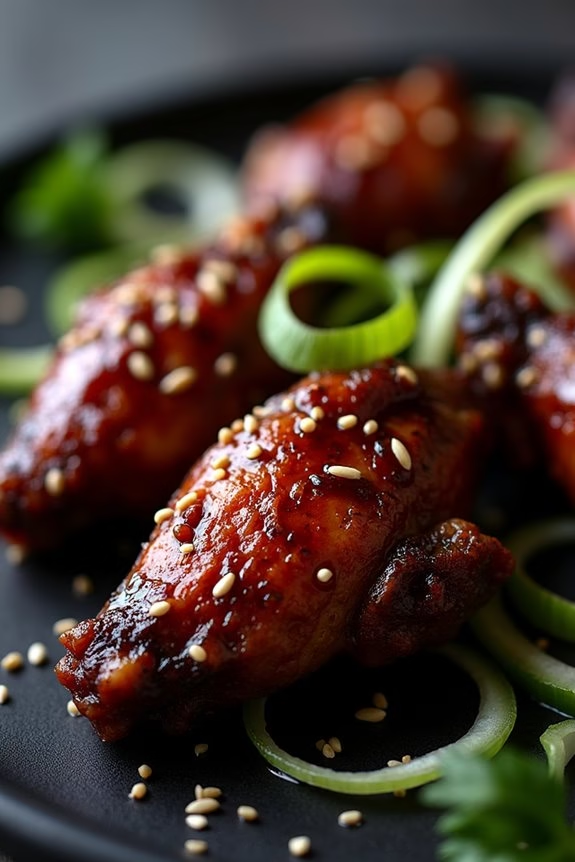
Vampire Bat Wings are a spooky and delicious addition to any Halloween-themed party. These wings aren’t only flavorful but also add a fun, eerie twist with their dark, sticky glaze that gives them a bat-like appearance. Perfect for feeding a crowd, this recipe will have your guests coming back for more as they enjoy the sweet and tangy flavors mingling with a hint of spice.
Whether you’re serving them as an appetizer or the main attraction, Vampire Bat Wings are sure to be a hit at your next Halloween bash.
The key to making Vampire Bat Wings lies in the marinade, which imparts deep flavor and a dark, glossy finish. The marinade combines soy sauce, balsamic vinegar, and honey, creating a balance of savory, sweet, and tangy notes. A touch of sriracha adds a subtle heat, while garlic and ginger enhance the overall complexity of the dish.
Roasting the wings in the oven allows them to become tender and juicy, while the glaze caramelizes to form a perfect coating. Let’s explore the ingredients and instructions to bring these ghoulishly good wings to life.
Ingredients for Vampire Bat Wings (Serves 4-6):
- 3 pounds chicken wings
- 1/2 cup soy sauce
- 1/4 cup balsamic vinegar
- 1/4 cup honey
- 2 tablespoons sriracha
- 4 cloves garlic, minced
- 1 tablespoon fresh ginger, grated
- 1 tablespoon olive oil
- 1 tablespoon cornstarch
- 1 tablespoon water
- Salt and pepper to taste
- Green onions, thinly sliced (for garnish)
- Sesame seeds (for garnish)
Cooking Instructions:
1. Prepare the Marinade:
In a large mixing bowl, combine the soy sauce, balsamic vinegar, honey, sriracha, minced garlic, and grated ginger. Whisk together until thoroughly mixed.
2. Marinate the Wings:
Add the chicken wings to the bowl, making certain they’re well coated in the marinade. Cover the bowl with plastic wrap and refrigerate for at least 2 hours, or overnight for best results.
3. Preheat the Oven:
Preheat your oven to 400°F (200°C). Line a baking sheet with aluminum foil and lightly brush with olive oil to prevent sticking.
4. Bake the Wings:
Arrange the marinated wings in a single layer on the prepared baking sheet. Reserve the marinade for later. Bake in the preheated oven for 35-40 minutes, turning halfway through to guarantee even cooking.
5. Thicken the Glaze:
While the wings are baking, pour the reserved marinade into a small saucepan. Bring it to a boil over medium heat. In a small bowl, mix the cornstarch with water to form a slurry, then stir it into the boiling marinade. Continue cooking until the sauce thickens, about 2-3 minutes.
6. Coat the Wings:
Once the wings are fully cooked, remove them from the oven and brush them generously with the thickened glaze. Return to the oven and bake for an additional 5-10 minutes, allowing the glaze to caramelize.
7. Garnish and Serve:
Transfer the finished wings to a serving platter. Garnish with sliced green onions and sesame seeds. Serve hot and enjoy your Vampire Bat Wings!
Extra Tips:
For the best flavor, marinate the wings overnight to allow the spices and sauces to fully penetrate the meat. If you prefer extra crispy wings, you can broil them for the last few minutes of cooking to achieve a crispier exterior.
Adjust the level of spiciness by increasing or decreasing the amount of sriracha according to your taste preference. Remember to keep an eye on the wings while they’re in the oven to prevent the glaze from burning. Enjoy your spooky and scrumptious Halloween treat!
Ghoulish Gummy Worm Dirt Cups
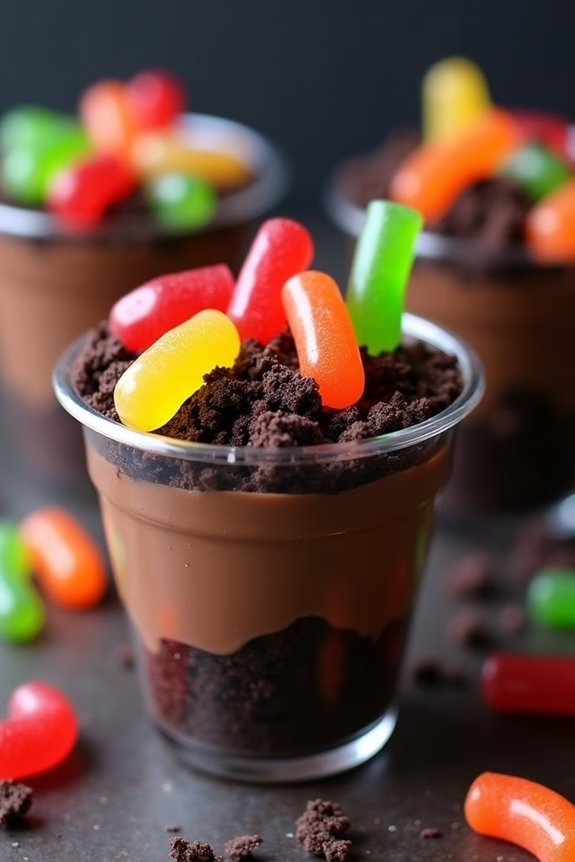
Ghoulish Gummy Worm Dirt Cups are a spooktacular treat perfect for any Halloween party! These creepy yet delicious desserts are sure to be a hit with both kids and adults. The combination of silky chocolate pudding, crumbly chocolate cookies, and chewy gummy worms creates a fun and festive dish that’s as delightful to make as it’s to eat.
Whether you’re hosting a large Halloween bash or just having a cozy family gathering, these dirt cups add a creepy-crawly charm to your celebration.
Not only are Ghoulish Gummy Worm Dirt Cups visually striking, but they’re also incredibly easy to prepare. You don’t need to be a seasoned chef to whip up these spooky sweets! With just a few simple ingredients and some creative flair, you can serve up a dessert that looks like it was crafted in a haunted kitchen.
Perfect for serving 4-6 people, these dirt cups can be made in advance, allowing you to focus on enjoying the festivities with your guests.
Ingredients (Serves 4-6)
- 2 cups of cold milk
- 1 package (3.9 ounces) chocolate instant pudding mix
- 1 package (14.3 ounces) chocolate sandwich cookies
- 1 package gummy worms
- 1 cup whipped topping
- Clear plastic cups or small glass jars
Instructions
- Prepare the Pudding: In a large mixing bowl, pour in the cold milk and add the chocolate instant pudding mix. Whisk the mixture for about 2 minutes until it thickens. Once done, set it aside to let it set further.
- Crush the Cookies: Take the chocolate sandwich cookies and place them in a resealable plastic bag. Using a rolling pin or a food processor, crush the cookies into fine crumbs. Make sure the crumb size resembles dirt, with a few chunkier bits for texture.
- Layer the Cups: Begin by spooning a layer of chocolate pudding into the bottom of each cup or jar. Add a generous layer of crushed cookies on top of the pudding. Continue to alternate layers of pudding and cookie crumbs until you reach the top of the cup, finishing with a layer of cookie crumbs.
- Add the Gummy Worms: Press a few gummy worms into the top layer of cookie crumbs, letting them peek out for a creepy effect. This adds an extra spooky touch to your dirt cups.
- Top with Whipped Topping: If desired, add a dollop of whipped topping to each cup. This can resemble a ghostly figure emerging from the dirt or can be used to create other spooky designs.
- Chill Before Serving: Place the completed dirt cups in the refrigerator for at least 30 minutes to allow the pudding to set completely and for the flavors to meld together.
Extra Tips
For an even spookier presentation, consider using small toy spiders or themed Halloween decorations on top of each cup.
If you’re making these treats for a larger crowd, you can easily double or triple the recipe. Additionally, you can experiment with different flavored pudding mixes to add a unique twist to the traditional dirt cup.
Adjust the amount of gummy worms to cater to your audience – more worms for the kids and fewer for adults who might prefer a more sophisticated presentation.
Frankenfruit Kabobs
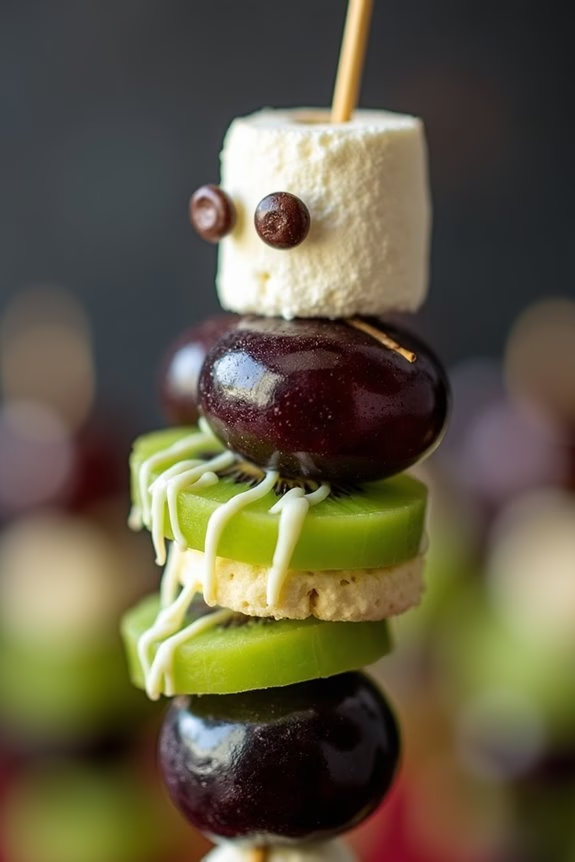
Halloween is the perfect time to get creative with your party foods, and what better way to bring a little spook to the table than with Frankenfruit Kabobs? These fun and healthy snacks are a great way to add some frightful flair to your Halloween gathering while guaranteeing your guests have a revitalizing and nutritious treat.
With a mix of vibrant fruits and ghoulish decorations, these kabobs are as delightful to look at as they’re to eat. Frankenfruit Kabobs are an easy-to-make dish that requires minimal preparation but delivers maximum impact. Perfect for a party of 4-6 people, these kabobs will have your guests marveling at your culinary creativity.
Whether you’re hosting a kids’ Halloween party or an adult costume bash, these kabobs are versatile enough to fit any spooky theme. Plus, they’re a great option for guests who might be looking for a lighter, healthier option amidst the sea of candies and chocolates.
Ingredients (Serves 4-6):
- 2 kiwis
- 1 cup green grapes
- 1 cup black grapes
- 2 bananas
- 1/2 cup mini marshmallows
- 1/2 cup chocolate chips
- 1/4 cup melted white chocolate
- 12 wooden skewers
Instructions:
- Prepare the Fruits: Peel the kiwis and cut them into thick slices. Peel the bananas and cut them into thick slices as well. Wash the green and black grapes thoroughly and pat them dry with a paper towel.
- Assemble the Kabobs: Take a wooden skewer and start by sliding a black grape onto it. Follow with a slice of banana, then a kiwi slice, a mini marshmallow, and finally a green grape. Repeat the pattern until the skewer is filled, leaving some space at the top for handling. Continue this process with all skewers.
- Decorate the Kabobs: Melt the white chocolate in a microwave-safe bowl by heating it in 15-second intervals, stirring in between until smooth. Using a toothpick or a small brush, draw spooky faces on the kiwis and bananas with the melted white chocolate. Attach chocolate chips as eyes on the marshmallows by dipping them in a bit of melted chocolate to help them stick.
- Chill the Kabobs: Place the completed kabobs on a large platter and refrigerate them for about 10-15 minutes to allow the chocolate to set and the fruit to cool.
- Serve and Enjoy: Once chilled, remove the kabobs from the fridge and serve them on a festive Halloween-themed platter. Watch your guests enjoy these creative and healthy treats!
Extra Tips:
For a more varied kabob, consider adding other seasonal fruits like cantaloupe or honeydew melon, which can easily be cut into fun shapes using small cookie cutters.
If you want to make the kabobs more kid-friendly, you can offer a small dish of yogurt or fruit dip on the side. Additionally, if some guests have dietary restrictions, make certain that the chocolate chips and marshmallows you use are appropriate for them (e.g., vegan or allergen-free options).
Finally, remember to handle the skewers with caution, especially around children, as the pointed ends can be sharp.
Pumpkin Cheese Ball
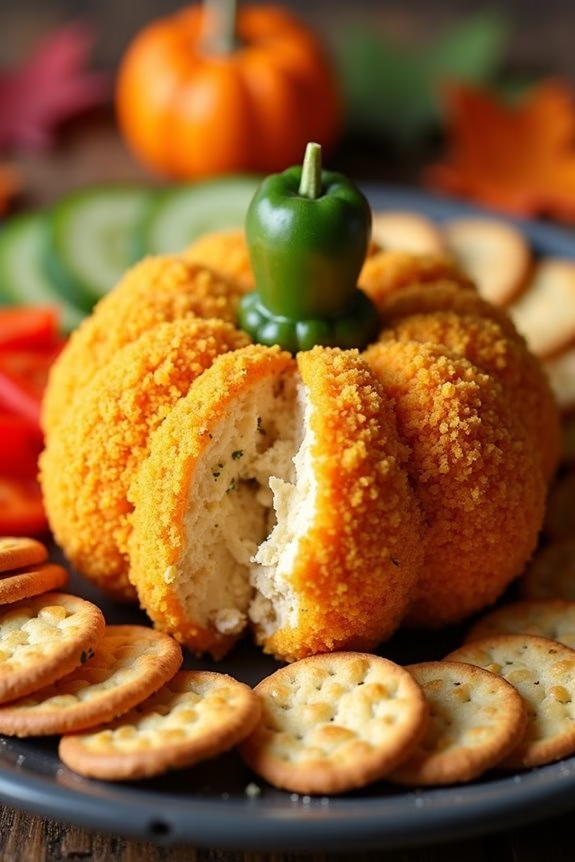
Halloween is the perfect time to get creative with your party foods, and nothing says “festive” like a Pumpkin Cheese Ball. This appetizer isn’t only visually appealing, resembling a mini pumpkin, but it’s also a crowd-pleaser with its savory flavors.
Made with a blend of cheeses and spices, it’s the perfect centerpiece for your Halloween spread. Whether you’re hosting a spooky soirée or attending a potluck, this dish is bound to delight both kids and adults alike.
The best part about the Pumpkin Cheese Ball is that it can be made ahead of time, allowing you to focus on other party preparations. The combination of cream cheese, cheddar, and spices creates a rich and creamy texture with a hint of sharpness, while the crushed tortilla chips add a satisfying crunch.
Shaping the cheese mixture into a pumpkin adds a touch of whimsy and can be customized with different garnishes for added flair. Serve it with an array of crackers, vegetables, or even apple slices, and watch it disappear quickly!
Ingredients (Serves 4-6 people):
- 16 ounces cream cheese, softened
- 2 cups shredded sharp cheddar cheese
- 2 teaspoons Worcestershire sauce
- 1 teaspoon garlic powder
- 1/2 teaspoon paprika
- Salt and pepper to taste
- 1 cup crushed tortilla chips
- 1 bell pepper stem (for decoration)
- Crackers or sliced vegetables for serving
Cooking Instructions:
- Prepare the Cheese Mixture: In a large mixing bowl, combine the softened cream cheese and shredded cheddar cheese. Mix them together using a hand mixer or a sturdy spatula until well combined and smooth.
- Season the Mixture: Add the Worcestershire sauce, garlic powder, paprika, and a pinch of salt and pepper to the cheese mixture. Mix thoroughly to guarantee the spices are evenly distributed throughout.
- Shape the Cheese Ball: Line a small bowl with plastic wrap, leaving enough overhang to cover the cheese mixture. Transfer the cheese mixture into the bowl and shape it into a round ball. Gather the plastic wrap tightly around the cheese, twisting it to maintain a firm shape, and refrigerate for at least 2 hours or until firm.
- Coat the Cheese Ball: Once firm, remove the cheese ball from the refrigerator and unwrap it from the plastic. Roll the cheese ball in the crushed tortilla chips until it’s completely coated, giving it the appearance of a pumpkin.
- Add the Stem: For the final touch, press the bell pepper stem into the top of the cheese ball to mimic a pumpkin’s stem.
- Serve: Place the finished Pumpkin Cheese Ball onto a platter and surround it with your choice of crackers, sliced vegetables, or apple slices. Serve chilled and enjoy!
Extra Tips:
For an added flavor boost, consider mixing in additional ingredients like chopped chives or bacon bits into the cheese mixture.
If you want a more vibrant orange color for your pumpkin, you can add a drop or two of food coloring to the cheese mixture. For easy handling, slightly wet your hands when shaping the cheese ball.
To make the presentation even more festive, surround the Pumpkin Cheese Ball with small decorative pumpkins or autumn leaves on the serving platter. Enjoy the playful and delicious addition to your Halloween gathering!

