
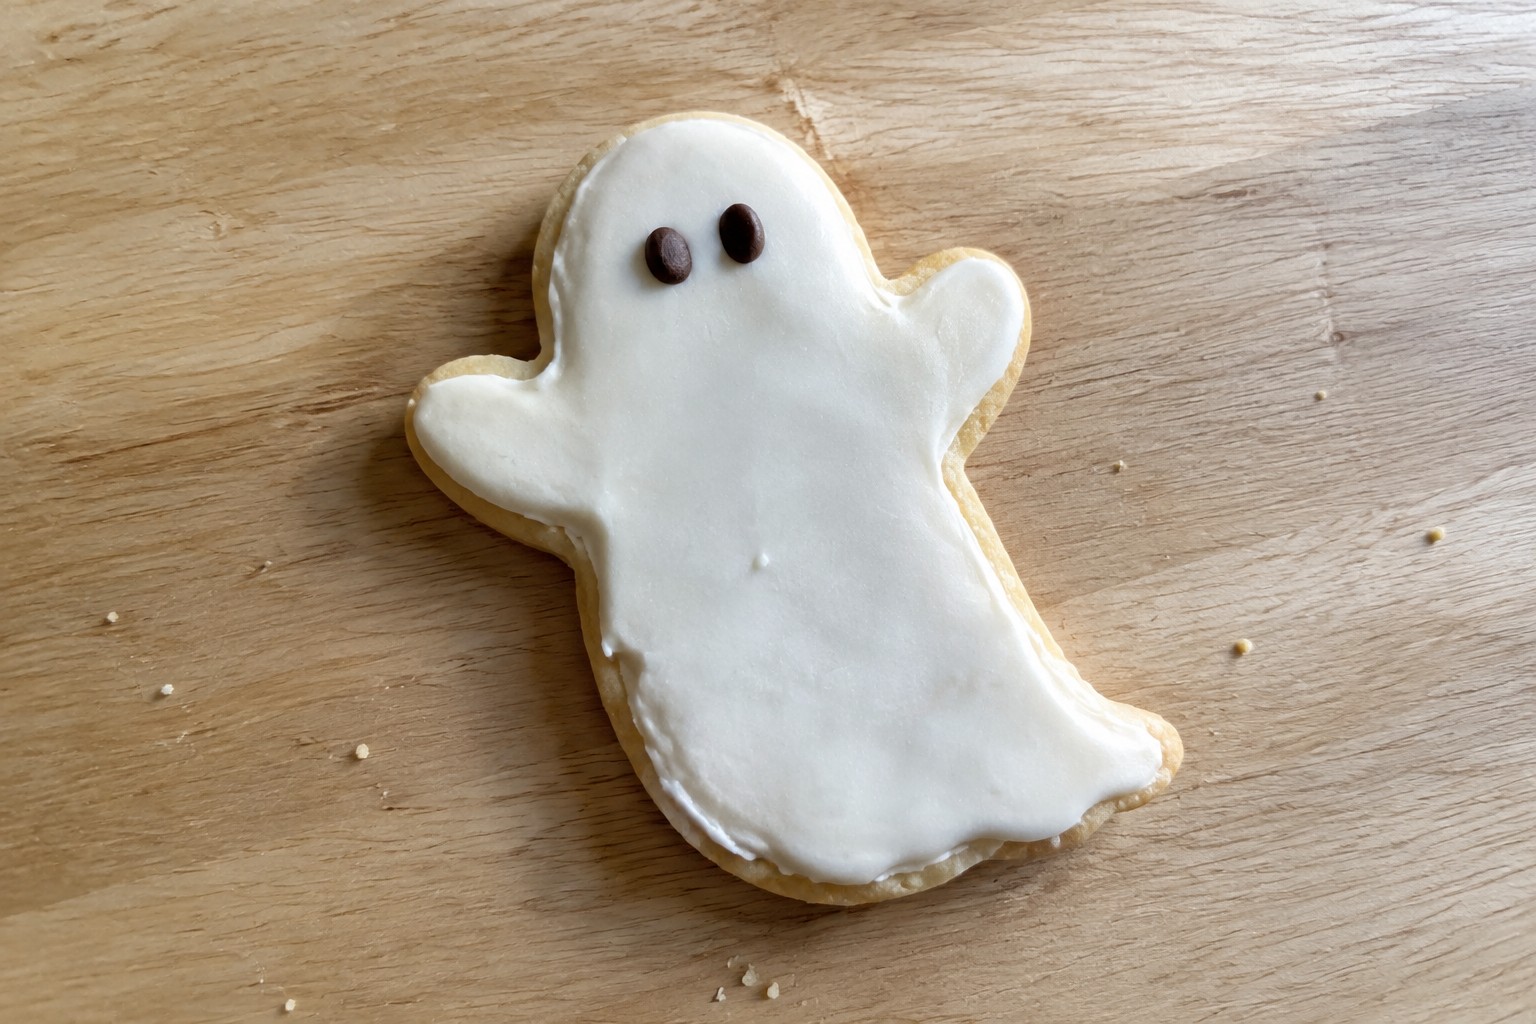
With Halloween around the corner it helps to have a few quick dessert ideas on hand. These recipes use simple ingredients and short steps so they fit into a busy day. You will find options that work for last minute plans or school events. Each one keeps the prep light while still looking festive for the occasion. They should give you practical ways to add something sweet without extra stress.
Helpful Tips Before You Start
A little planning keeps these desserts quick and stress free.
Stock Up on Mixes and Bases
Use boxed cake mix, cookie dough, or brownie mix as your starting point. This cuts down on measuring and lets you focus on the fun Halloween details.
Sort Decorations Ahead of Time
Pull out sprinkles, candy eyes, and melting chocolate before you start. Having everything in reach speeds up the final steps.
Add One or Two No-Bake Recipes
No-bake options like chocolate bark or marshmallow treats save oven space and usually finish in 15 minutes or less.
Use the Freezer to Set Faster
Place finished treats in the freezer for 10 minutes instead of waiting for the fridge. This works well for chocolate coatings and helps them firm up quickly.
No-Bake Pumpkin Cheesecake Mousse Cups
These cups bring together the familiar flavors of pumpkin pie and cheesecake in a light, creamy mousse. They come together quickly without any oven time, which makes them useful for last-minute Halloween gatherings or when you need a make-ahead dessert that still feels seasonal.
The texture stays smooth and airy from the whipped cream folded into the pumpkin and cream cheese base. A layer of graham cracker crumbs at the bottom adds a little crunch to balance the mousse.
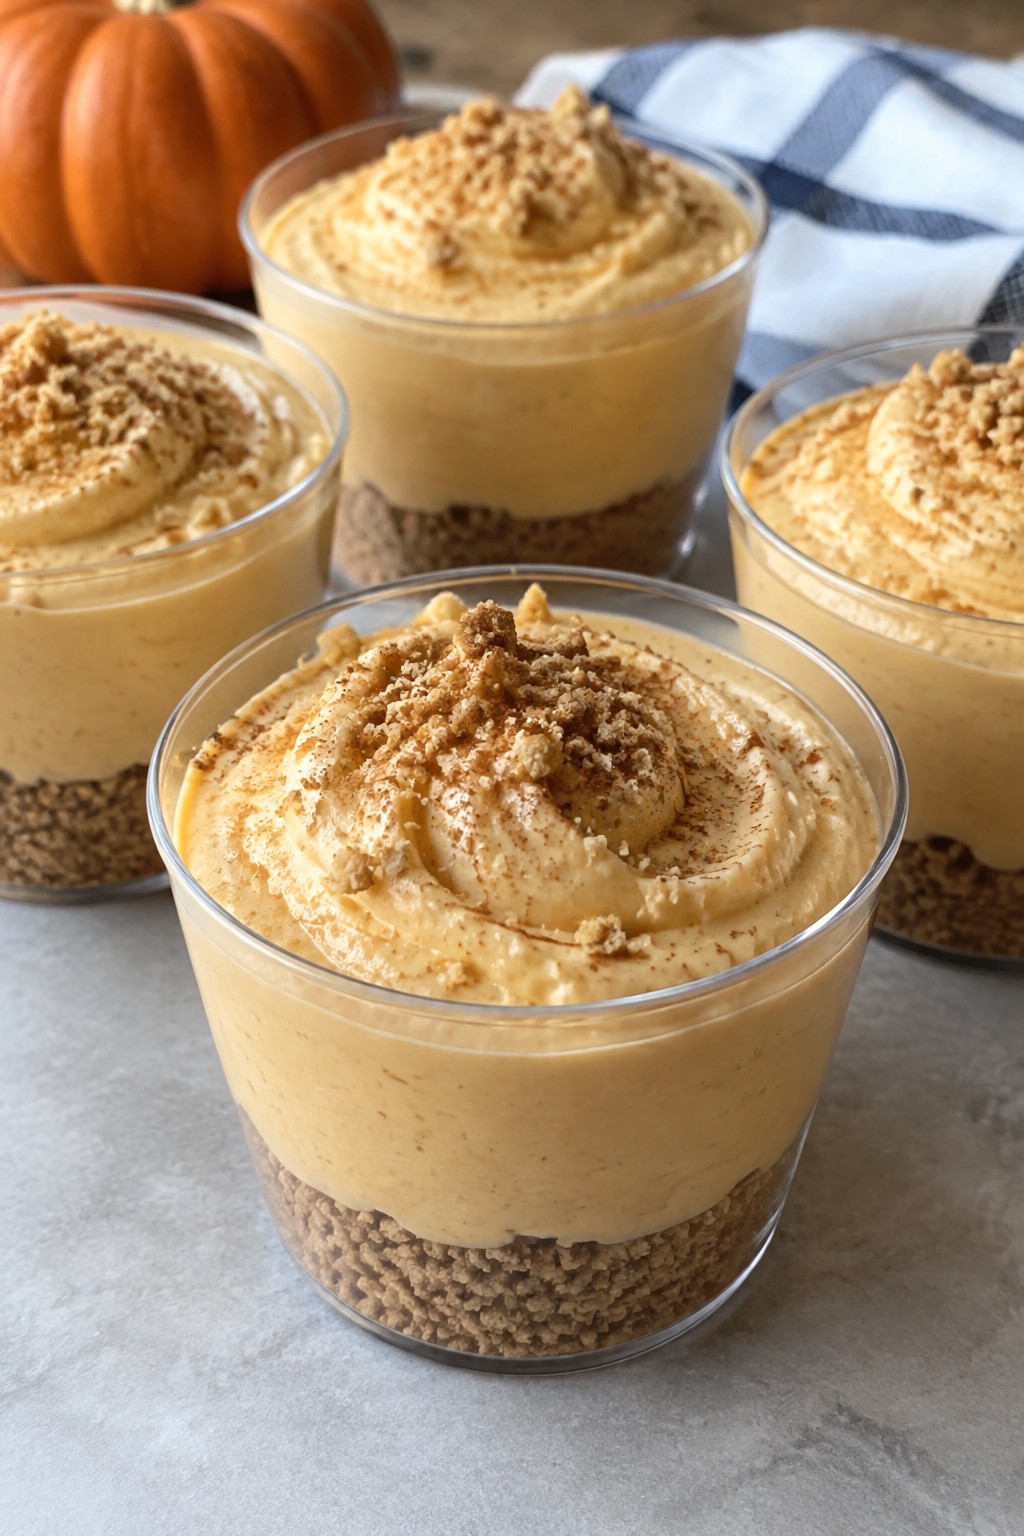
Serves 4 people.
Ingredients
- 8 ounces cream cheese, softened
- 1 cup pumpkin puree
- 1/2 cup powdered sugar
- 1 teaspoon vanilla extract
- 1 teaspoon pumpkin pie spice
- 1 cup heavy whipping cream
- 1/2 cup graham cracker crumbs
Instructions
- Place the graham cracker crumbs in the bottom of four small serving cups or jars, dividing them evenly to form a thin base layer.
- In a mixing bowl, beat the softened cream cheese until smooth. Add the pumpkin puree, powdered sugar, vanilla extract, and pumpkin pie spice. Continue beating until the mixture is fully combined and creamy.
- In a separate bowl, whip the heavy whipping cream until stiff peaks form. Gently fold the whipped cream into the pumpkin mixture until no streaks remain and the mousse is light and uniform.
- Spoon or pipe the mousse over the graham cracker crumbs in each cup, filling them to the top. Smooth the surface if needed.
- Chill the cups for at least 30 minutes before serving to help the mousse set.
Extra Tips
Chill the cups a little longer if you want a firmer mousse that holds its shape when scooped. The graham cracker layer softens slightly after a few hours, so assemble close to serving time if you prefer more crunch. You can swap the pumpkin pie spice for cinnamon and a pinch of nutmeg if that is what you have on hand. Course: Dessert Cuisine: American Equipment: Mixing bowls, Electric mixer, Serving cups
Ghostly White Chocolate-Dipped Strawberries
These strawberries offer a quick Halloween treat that needs no baking and minimal effort. They work well for last-minute parties or when you want something festive without much fuss. The white coating gives a clean ghostly look while the berries stay fresh and juicy underneath.
The flavor balances sweet, creamy chocolate with bright berry taste. Dark chocolate accents add a simple contrast that feels playful rather than heavy.
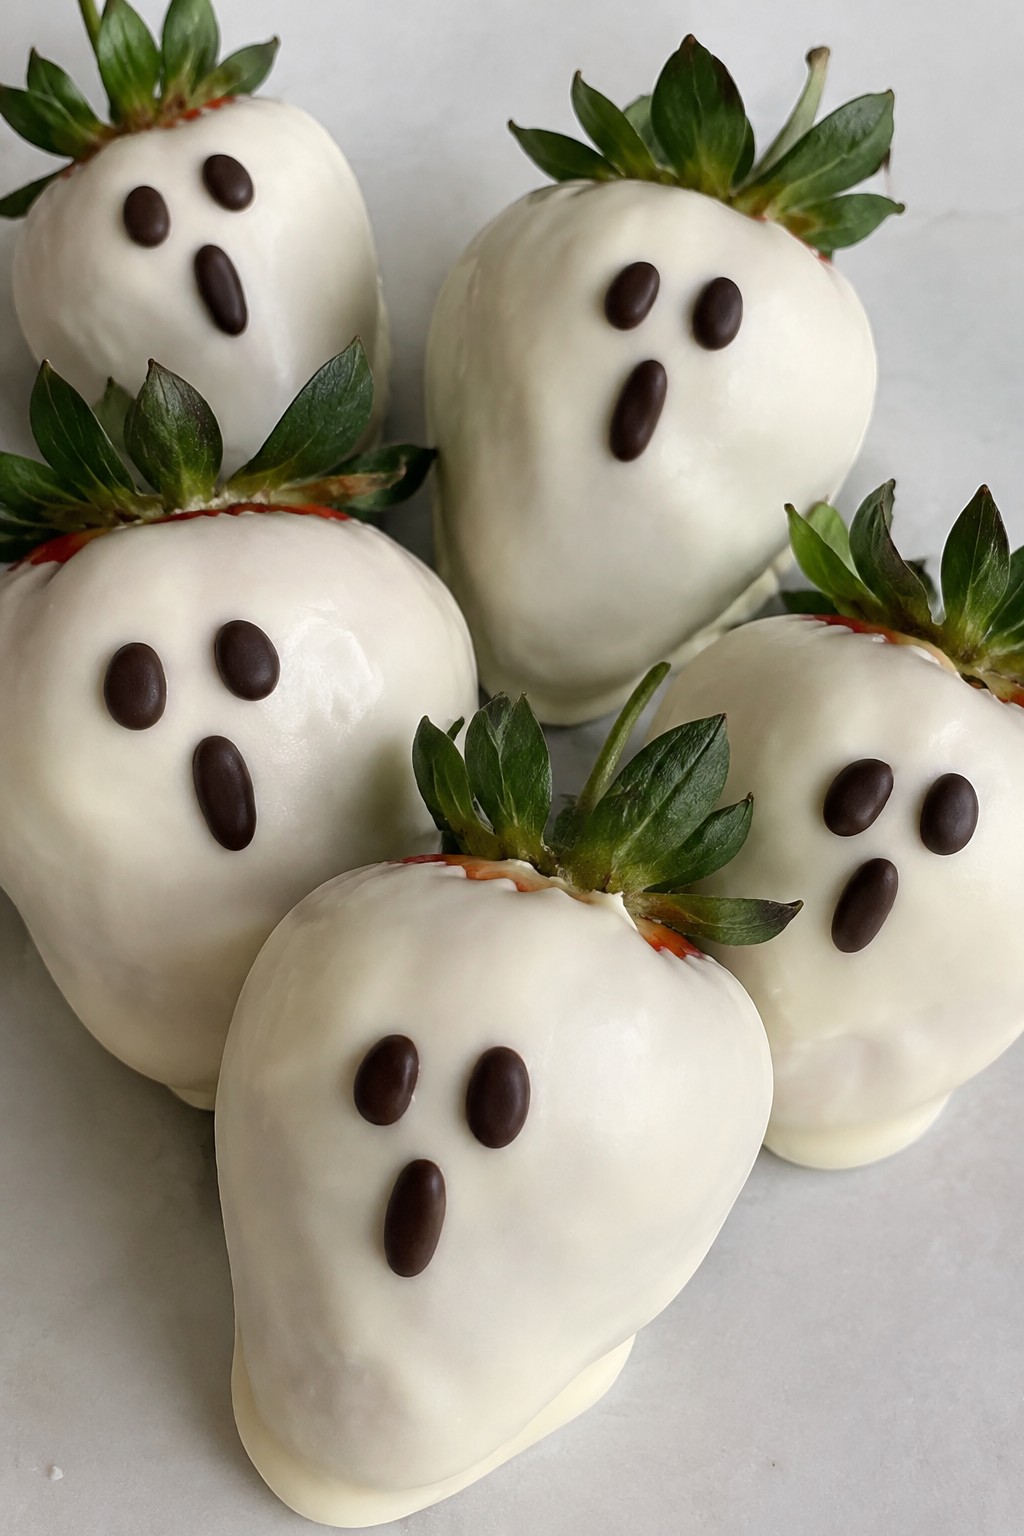
Serves 4 people.
Ingredients
- 12 large strawberries, stems on
- 8 ounces white chocolate chips
- 1/4 cup dark chocolate chips
Instructions
- Rinse the strawberries and pat them completely dry with paper towels. Any moisture will prevent the chocolate from sticking.
- Place the white chocolate chips in a microwave-safe bowl and heat in 30-second bursts, stirring between each until fully melted and smooth.
- Hold each strawberry by the stem and dip it into the melted white chocolate, leaving a small section near the stem uncovered for the ghost effect.
- Set the dipped strawberries on a baking sheet lined with parchment paper, spacing them apart so they do not touch.
- Melt the dark chocolate chips in a separate small bowl using the same microwave method. Spoon the melted dark chocolate into a zip-top bag and snip off a tiny corner.
- Pipe small dots for eyes and a simple mouth shape onto each white-coated strawberry.
- Chill the baking sheet in the refrigerator for 10 to 15 minutes until the chocolate sets firmly.
Extra Tips
Dry the strawberries very well before dipping so the white chocolate forms an even layer without slipping. If the melted white chocolate starts to thicken while you work, give it a quick 10-second reheat. These hold best on the baking sheet in the fridge until just before serving, since the chocolate can develop moisture spots if left out too long.
Course: Dessert Cuisine: American Equipment: Microwave-safe bowls, Parchment-lined baking sheet, Zip-top bagSpooky Oreo Truffle Spiders
These no-bake Oreo truffles turn into spiders with a few simple additions. They come together fast and make a fun treat for Halloween parties or after-school snacks. The creamy filling pairs with a crisp chocolate shell and salty pretzel legs for a mix of textures.
The flavor is rich and chocolatey with a slight tang from the cream cheese. Kids and adults both enjoy assembling them, and the finished spiders look playful without much effort.
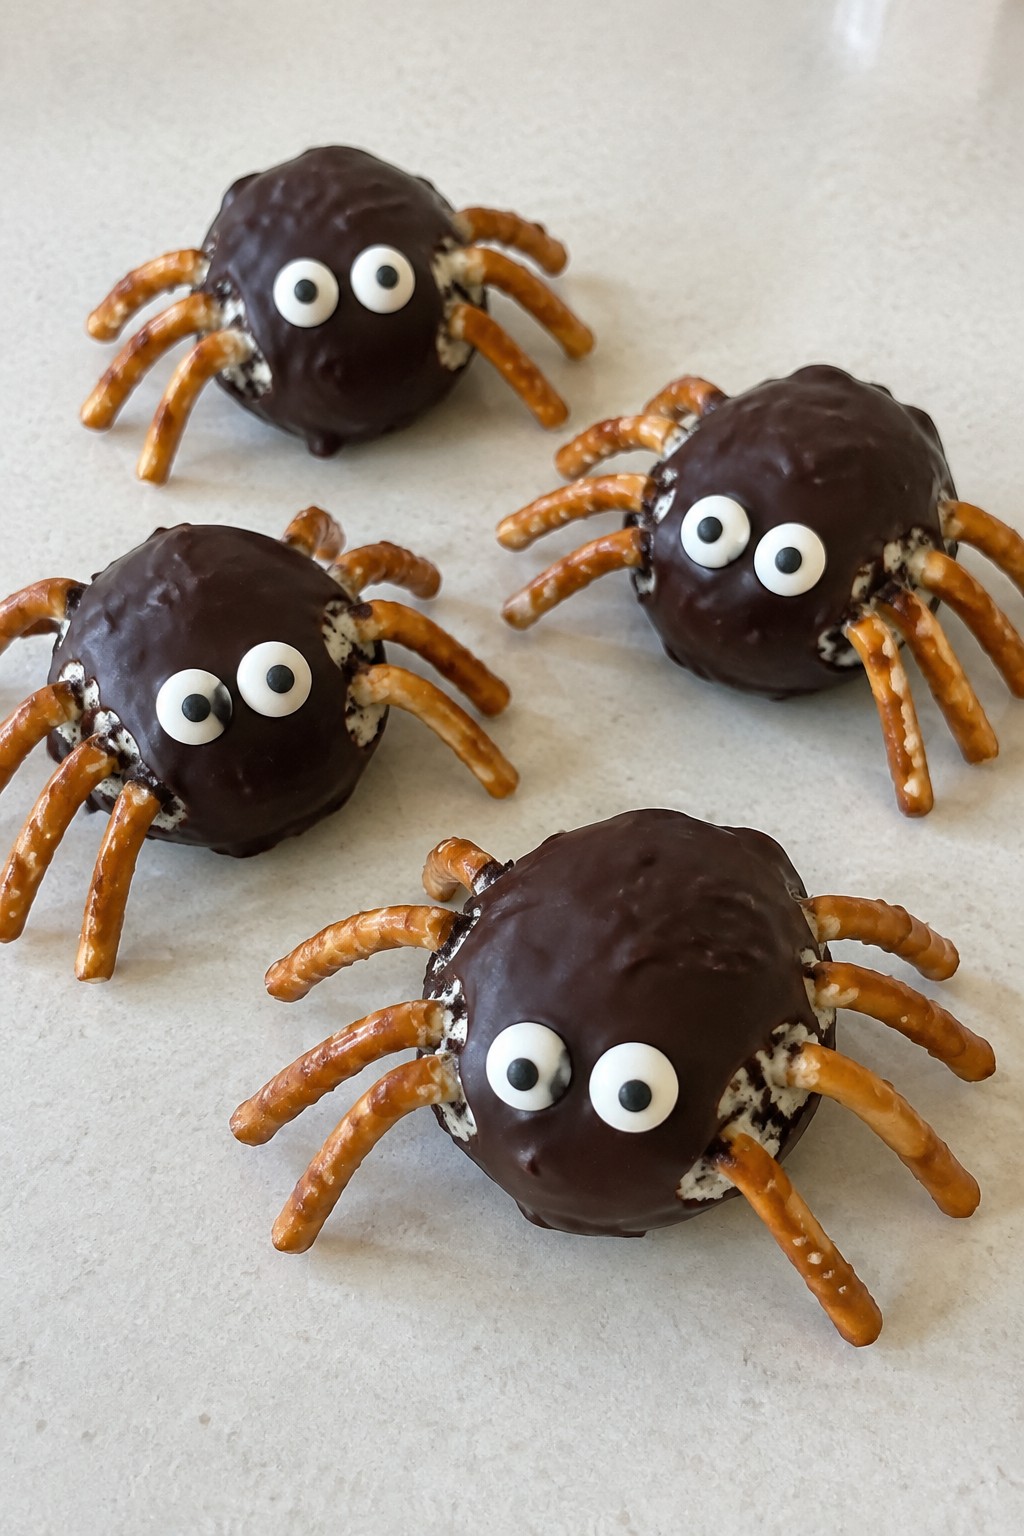
Serves 4 people.
Ingredients
- 12 Oreo cookies
- 4 ounces cream cheese, softened
- 8 ounces semisweet chocolate chips
- 32 thin pretzel sticks
- 8 candy eyeballs
Instructions
- Place the Oreo cookies in a zip-top bag and crush them into fine crumbs with a rolling pin. Transfer the crumbs to a mixing bowl.
- Add the softened cream cheese to the bowl and stir until the mixture forms a thick, uniform dough.
- Divide the dough into four equal portions and roll each into a smooth ball.
- Insert eight pretzel sticks into each ball to create the spider legs, spacing them evenly around the sides.
- Place the chocolate chips in a microwave-safe bowl and heat in 30-second bursts, stirring between each, until fully melted and smooth.
- Dip each spider into the melted chocolate to coat the body, letting excess drip off. Set on a parchment-lined tray.
- Press two candy eyeballs onto the top of each coated spider while the chocolate is still soft. Let the chocolate set at room temperature.
Extra Tips
Break the pretzel sticks in half if you want shorter legs that are easier to balance on smaller truffles. If the dough feels too sticky to roll, chill it for ten minutes before shaping. Store finished spiders in an airtight container in the fridge for up to three days; bring them out for twenty minutes before serving so the chocolate softens slightly. Course: Dessert Cuisine: American Equipment: Mixing bowl, Rolling pin, Microwave-safe bowl, Baking sheet
Quick Candy Corn Chocolate Bark
This quick candy corn chocolate bark needs only two ingredients and comes together fast for a festive Halloween treat. It works well when you want something sweet to share at a party or to pack in lunchboxes without turning on the oven for long.
The result is a thin layer of creamy chocolate that holds pieces of chewy candy corn for a colorful and satisfying bite.

Serves 4 people.
Ingredients
- 12 ounces milk chocolate chips
- 1 cup candy corn
Instructions
- Line a baking sheet with parchment paper and set it aside.
- Place the milk chocolate chips in a microwave-safe bowl and heat them in 30-second bursts, stirring after each interval until the chocolate is fully melted and smooth.
- Pour the melted chocolate onto the prepared parchment and spread it into a thin, even layer with a spatula.
- While the chocolate is still soft, scatter the candy corn evenly across the surface and gently press the pieces down so they stick.
- Let the bark sit at room temperature until it hardens completely, then break it into pieces.
Extra Tips
Break the bark into irregular shards so each serving has a good mix of chocolate and candy corn. If the chocolate cools too quickly while spreading, warm it for a few seconds to loosen it again. Store any leftovers in an airtight container at room temperature for up to three days. Course: Dessert Cuisine: American Equipment: Microwave-safe bowl, Baking sheet, Parchment paper
Witch Finger Pretzel Rods with Almond Nails
These witch finger pretzels come together fast with just a few ingredients and make a fun addition to any Halloween spread. They offer a salty crunch from the pretzel rods paired with sweet coating and a simple almond detail that gives them a playful look. Kids and adults both enjoy making them, and they work well for last-minute gatherings or school parties.
The finished treat has a crisp texture with a smooth chocolate-like shell that sets quickly. The almonds stay in place once the coating firms up, creating a clear finger shape without extra steps.

Serves 4 people.
Ingredients
- 12 pretzel rods
- 8 ounces green candy melts
- 12 whole blanched almonds
- 1 teaspoon red gel food coloring
Instructions
- Line a baking sheet with parchment paper and set it aside. Place the green candy melts in a microwave-safe bowl and heat them in 30-second intervals, stirring between each one until fully melted and smooth.
- Dip one end of each pretzel rod into the melted candy melts, coating about two-thirds of the rod. Lay the coated pretzel on the prepared baking sheet.
- Press one blanched almond onto the undipped tip of each pretzel to form the nail. Use a toothpick to add a small dab of red gel food coloring near the base of the almond and at the middle of the coated section to create knuckle details. Let the rods sit at room temperature until the coating hardens completely.
Extra Tips
Work with the candy melts while they are warm but not hot so the almonds stick without sliding. If the melts thicken during dipping, warm them for 10 seconds more. Store the finished rods in an airtight container at room temperature for up to two days to keep the pretzels crisp. Course: Dessert Cuisine: American Equipment: Microwave-safe bowl, Baking sheet, Parchment paper
Halloween Sprinkle Sugar Cookie Bars
These Halloween Sprinkle Sugar Cookie Bars offer a simple way to add color to your holiday spread. They use everyday ingredients and turn out soft with bursts of festive sprinkles in every bite. The bars work well for quick parties or last-minute treats when time is short.
The flavor stays classic and buttery while the sprinkles give a light crunch and bright look. Kids and adults both enjoy them as an easy dessert that feels special without extra steps.

Serves 4 people.
Ingredients
- 1/2 cup unsalted butter, softened
- 1/2 cup granulated sugar
- 1 large egg
- 1 teaspoon vanilla extract
- 1 1/4 cups all-purpose flour
- 1/2 teaspoon baking powder
- 1/4 teaspoon salt
- 1/3 cup Halloween sprinkles, divided
Instructions
- Preheat the oven to 350 degrees F and line an 8×8 inch baking pan with parchment paper.
- In a mixing bowl, cream the softened butter and sugar together until light and fluffy.
- Add the egg and vanilla extract to the bowl and mix until fully combined.
- Stir in the flour, baking powder, and salt until a soft dough forms.
- Fold in half of the Halloween sprinkles, then press the dough evenly into the prepared pan.
- Sprinkle the remaining sprinkles over the top and press them lightly into the surface.
- Bake for 18 to 20 minutes until the edges turn lightly golden.
- Let the bars cool completely in the pan before cutting into squares.
Extra Tips
Press the dough firmly into the pan so the bars hold together after baking. Add the second batch of sprinkles right before the pan goes into the oven for the best color and stick. Store cooled bars in an airtight container at room temperature for up to three days. Course: Dessert Cuisine: American Equipment: Mixing Bowl, 8×8 Baking Pan, Oven
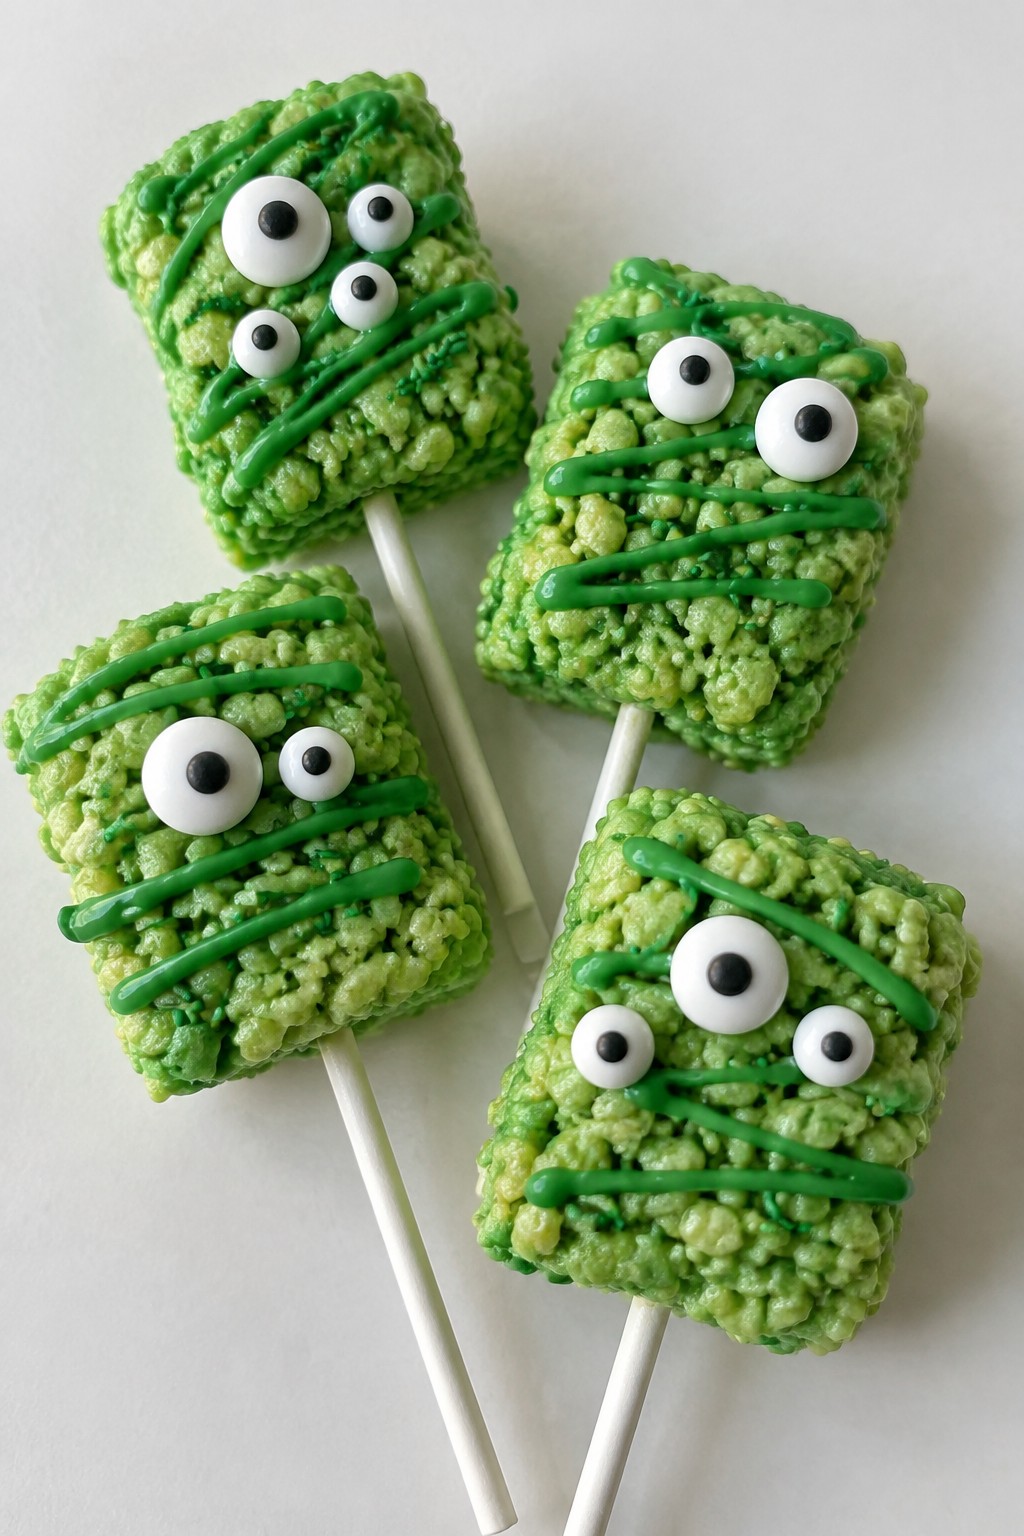
Monster Marshmallow Cereal Treat Pops
These pops turn a classic marshmallow cereal treat into a quick Halloween snack. They come together on the stovetop in minutes and give you something fun to serve at parties or hand out to kids.
The treats stay chewy from the melted marshmallows and gain crunch from the cereal. Candy eyes and a bit of melted candy make each pop look like a friendly monster.
Serves 4 people.
Ingredients
- 3 cups crispy rice cereal
- 3 cups mini marshmallows
- 3 tablespoons butter
- 4 popsicle sticks
- 8 candy eyes
- 2 tablespoons green candy melts
- 4 drops green food coloring
Instructions
- Place the butter in a large saucepan over low heat and stir until fully melted.
- Add the mini marshmallows and food coloring to the pan. Stir until the marshmallows melt into a smooth green mixture.
- Remove the pan from heat and quickly fold in the crispy rice cereal until every piece is coated.
- Lightly grease your hands and shape the mixture into four even balls. Push one popsicle stick into the base of each ball.
- Melt the green candy melts in a small microwave-safe bowl in 15-second bursts, stirring between each burst.
- Drizzle a small amount of melted candy over each pop and press two candy eyes into place while the candy is still soft. Let the pops set at room temperature.
Extra Tips
Work quickly once the cereal is mixed so the treats hold their shape on the sticks. If the mixture starts to stiffen, warm it briefly over low heat to make shaping easier. Store finished pops in an airtight container at room temperature for up to two days to keep the cereal crisp. Course: Dessert Cuisine: American Equipment: Saucepan, Mixing bowl, Microwave-safe bowl
Black Cat Fudgy Brownie Bites
These brownie bites deliver a deep chocolate flavor with a dense, fudgy center that holds up well for decorating. The dark color from black cocoa makes them a natural fit for Halloween, and the small size means they come together fast for parties or school events.
The finished bites get simple cat faces using chocolate and candy, turning basic brownies into a themed treat without extra steps or special skills.

Serves 4 people.
Ingredients
- 1/2 cup unsalted butter
- 1 cup granulated sugar
- 2 large eggs
- 1/3 cup black cocoa powder
- 1/2 cup all-purpose flour
- 1/4 teaspoon salt
- 1/4 cup semi-sweet chocolate chips
- 16 candy eyes
- 8 thin black licorice strings, cut into 24 short pieces
Instructions
- Preheat the oven to 350 degrees F and grease a mini muffin tin.
- Melt the butter in a microwave-safe bowl, then stir in the sugar until combined. Add the eggs one at a time and mix well.
- Stir in the black cocoa powder, flour, and salt until no dry streaks remain. The batter will be thick.
- Scoop the batter evenly into 8 mini muffin cups, filling each about two-thirds full. Bake for 12 to 14 minutes until the tops look set but still slightly soft in the center.
- Let the brownie bites cool in the tin for 5 minutes, then move them to a wire rack to cool completely.
- Melt the chocolate chips in short microwave bursts. Use a small amount to attach two candy eyes to each bite. Add three licorice pieces on each side of the eyes to form whiskers. Place two chocolate chips point-side down at the top of each bite for ears.
Extra Tips
Press the licorice pieces gently into the chocolate while it is still soft so they stay in place. If the brownies feel too soft after decorating, chill them for 10 minutes to firm the chocolate. Store leftovers in an airtight container at room temperature for up to two days to keep the fudgy texture. Course: Dessert Cuisine: American Equipment: Mixing bowl, Mini muffin tin, Microwave-safe bowl, Wire rack
Caramel Apple Nachos with Halloween Toppings
These caramel apple nachos turn classic fall flavors into a fun, shareable treat that works well for quick Halloween parties or after-school snacks. Crisp apple slices stand in for chips and get topped with warm caramel plus a handful of festive candies. The result is sweet, tart, and crunchy all at once.
The recipe keeps prep minimal so you can have it on the table in minutes. It also lets you use whatever Halloween candies you already have in the pantry.

Serves 4 people.
Ingredients
- 4 large apples
- ½ cup caramel sauce
- ¼ cup candy corn
- 2 tablespoons mini chocolate chips
- 1 tablespoon Halloween sprinkles
- 2 tablespoons chopped pecans
Instructions
- Core the apples and slice them into thin wedges. Arrange the slices in a single layer on a large serving plate.
- Warm the caramel sauce in a microwave-safe bowl for 10 seconds, then drizzle it evenly over the apple slices.
- Scatter the candy corn, mini chocolate chips, and Halloween sprinkles across the top.
- Finish with the chopped pecans for added crunch and serve right away.
Extra Tips
Choose firm apples like Granny Smith or Honeycrisp so the slices stay crisp under the caramel. If the caramel thickens while sitting, give it another quick 5-second warm-up before drizzling. Add the candies just before serving to keep them from sinking into the sauce. Course: Dessert Cuisine: American Equipment: Serving plate, Microwave-safe bowl, Knife
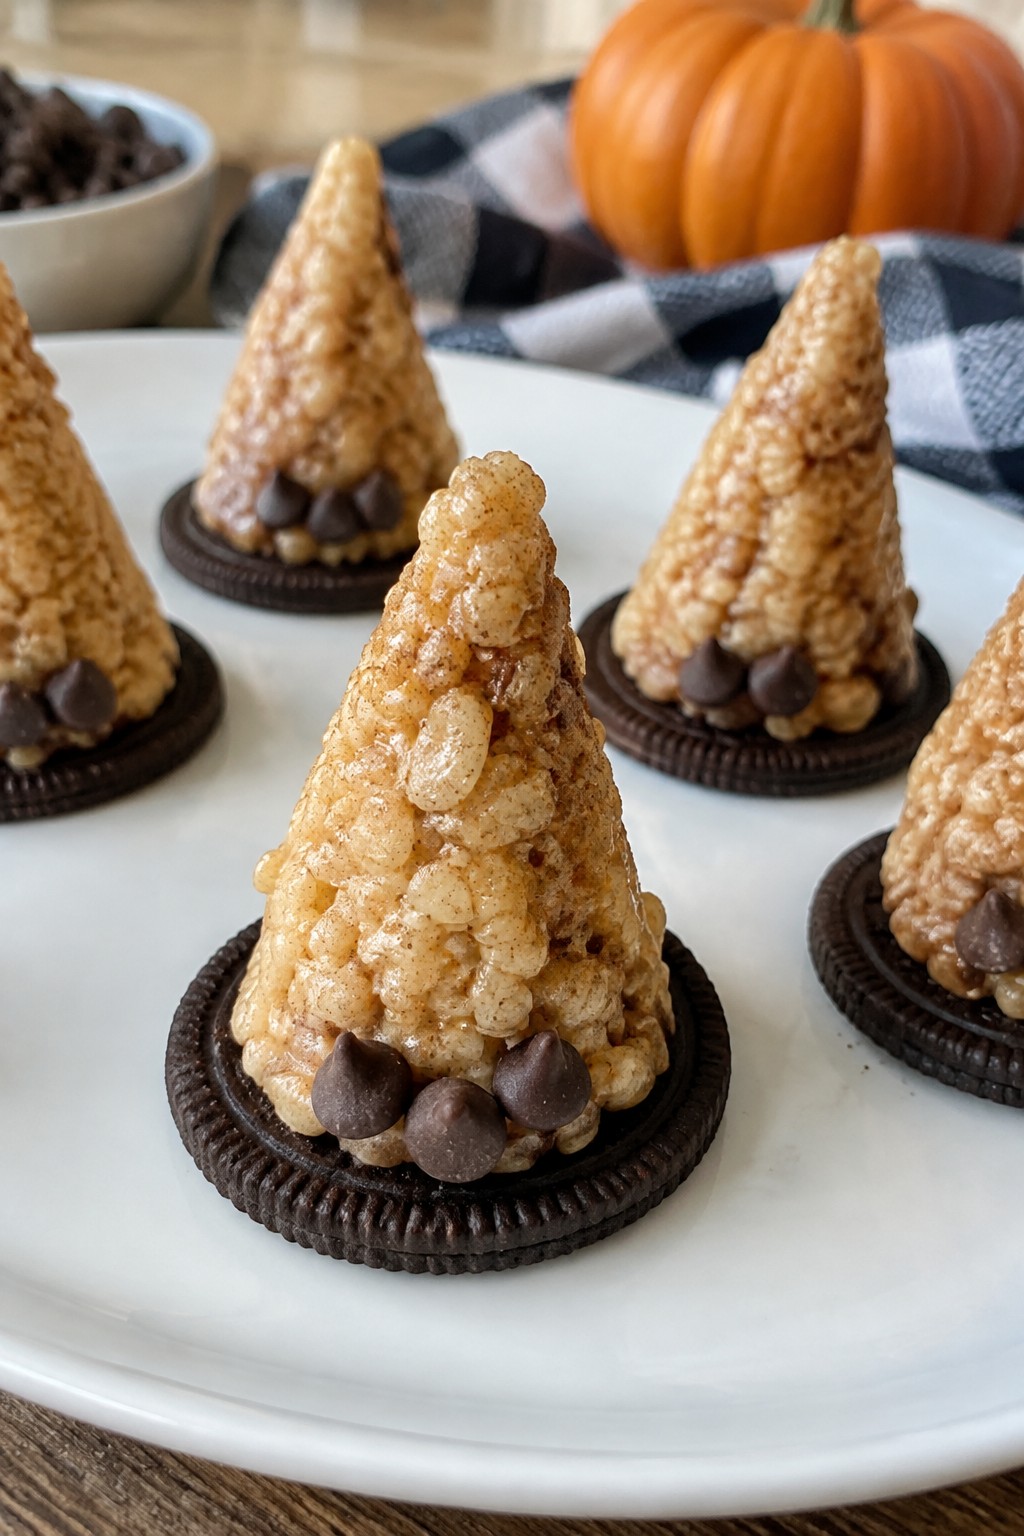
Pumpkin Spice Rice Krispie Witches Hats
These treats bring the familiar crunch of cereal bars together with the cozy taste of pumpkin spice. They make a quick addition to a Halloween spread when you need something fun without much fuss. The result is a lightly spiced, chewy bar shaped into simple pointed hats that sit on cookie bases.
Serves 4 people.
Ingredients
- 2 tablespoons unsalted butter
- 2 cups mini marshmallows
- 1 teaspoon pumpkin pie spice
- 3 cups Rice Krispies cereal
- 1/4 cup chocolate chips
- 4 round chocolate cookies
Instructions
- Melt the butter in a saucepan over medium heat. Add the mini marshmallows and pumpkin pie spice, then stir until the marshmallows are fully melted and the mixture is smooth.
- Remove the pan from the heat and stir in the Rice Krispies cereal until every piece is coated.
- Let the mixture cool slightly until it is safe to handle. Lightly grease your hands and divide the mixture into four equal portions. Shape each portion into a cone to form the hat tops.
- Place the chocolate chips in a small microwave-safe bowl and heat in 20-second bursts, stirring between each, until melted. Use a small amount of melted chocolate to attach the base of each cone to the center of a chocolate cookie.
- Let the hats set for a few minutes until the chocolate firms up before serving.
Extra Tips
Work quickly while the cereal mixture is still warm so the cones hold their shape without crumbling. If the mixture sticks to your hands, lightly coat them with butter or cooking spray. Store any leftovers in an airtight container at room temperature for up to two days to keep the texture crisp. Course: Dessert Cuisine: American Equipment: Saucepan, Mixing Bowl, Baking Sheet
