

There’s something truly magical about cherry cakes, isn’t there?
Picture vibrant red cherries nestled in the soft embrace of a perfectly baked sponge.
Whether it’s a classic cherry sponge cake with its light and airy texture or a cherry almond bundt cake with a nutty aroma, each bite offers a sweet surprise.
And who could resist the allure of a rich chocolate cherry cake or the unexpected delight of cherry yogurt?
Let’s embark on this delicious journey together!
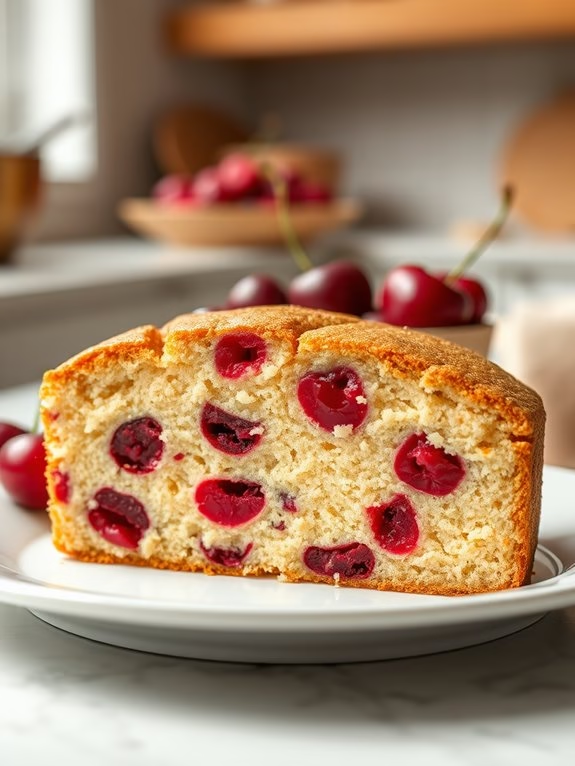
Classic Cherry Sponge Cake
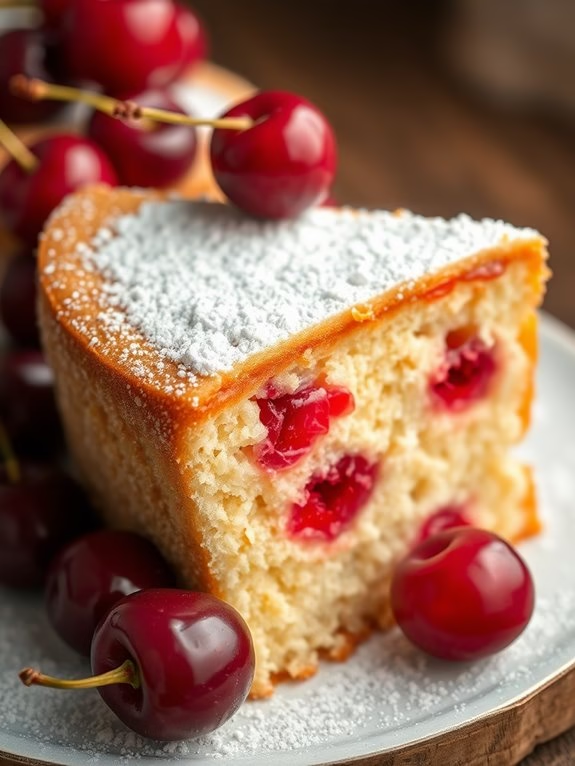
Classic Cherry Sponge Cake
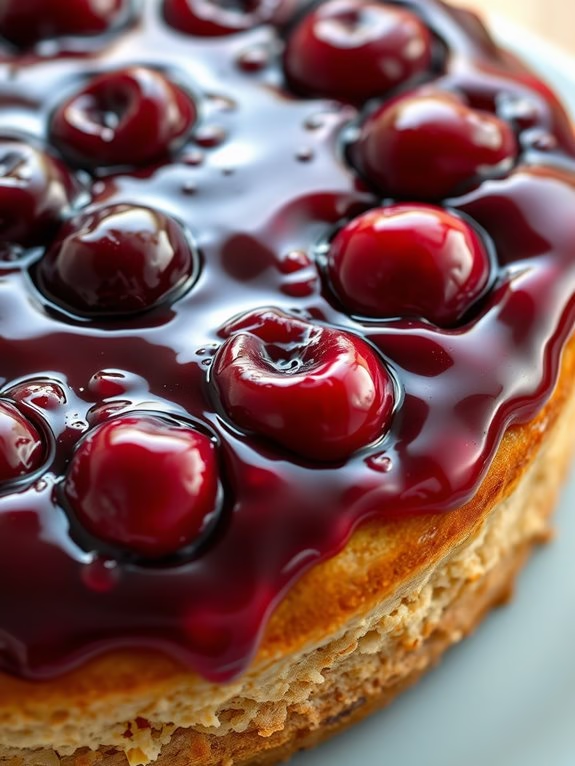
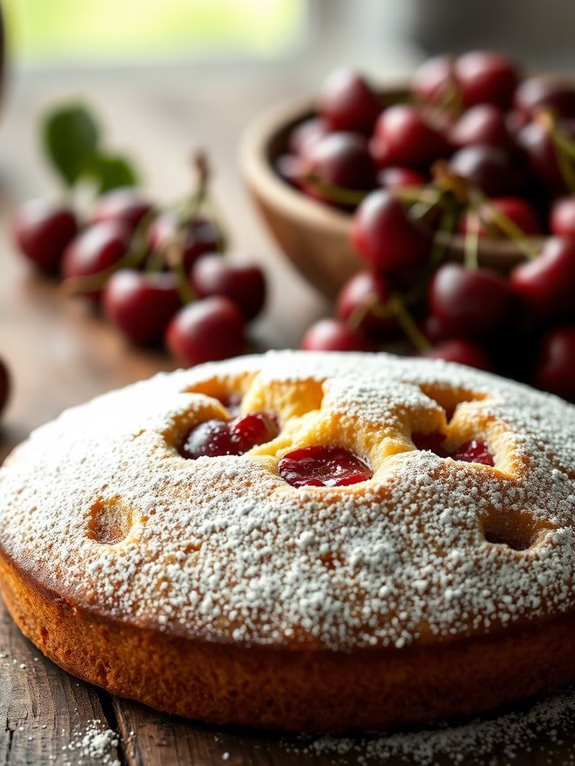
The Classic Cherry Sponge Cake is a timeless dessert that combines the light, airy texture of sponge cake with the sweet and slightly tart flavor of cherries. Perfect for any occasion, this cake offers a delightful blend of flavors and a beautiful presentation.
Whether served as a centerpiece for a celebration or as a simple treat for an afternoon tea, this cherry sponge cake is sure to impress your family and guests alike.
This recipe creates a cake with a moist, fluffy interior and a golden crust, generously studded with juicy cherries. The use of fresh cherries enhances the cake’s flavor and adds a natural sweetness that complements the vanilla and almond extracts.
When making this cake, the key is to beat the eggs and sugar well to incorporate plenty of air, which gives the sponge its characteristic lightness. Be certain to follow each step closely, and you’ll have a delicious Classic Cherry Sponge Cake ready to enjoy.
Ingredients (Serves 4-6):
- 1 cup all-purpose flour
- 1 teaspoon baking powder
- 1/4 teaspoon salt
- 4 large eggs, room temperature
- 1 cup granulated sugar
- 1 teaspoon vanilla extract
- 1/2 teaspoon almond extract
- 1/4 cup unsalted butter, melted and cooled
- 1 1/2 cups fresh cherries, pitted and halved
- Powdered sugar for dusting
Cooking Instructions:
- Preheat and Prepare: Preheat your oven to 350°F (175°C). Grease a 9-inch round cake pan, then line the bottom with parchment paper to prevent sticking.
- Mix Dry Ingredients: In a medium bowl, sift together the flour, baking powder, and salt. Set aside.
- Beat Eggs and Sugar: In a large mixing bowl, beat the eggs and sugar with an electric mixer on high speed until the mixture is thick, pale, and tripled in volume, about 5-7 minutes. This step is essential for a light sponge texture.
- Add Flavors: Gently fold in the vanilla and almond extracts into the egg mixture using a spatula. Be careful not to deflate the mixture.
- Incorporate Dry Ingredients: Gradually sift the dry ingredients into the egg mixture, folding carefully after each addition. Confirm there are no lumps, but don’t overmix.
- Add Butter: Slowly drizzle the melted butter down the side of the bowl and fold it into the batter until just combined.
- Prepare Cherries: Gently fold in the pitted and halved cherries, ensuring they’re evenly distributed throughout the batter.
- Transfer to Pan: Pour the batter into the prepared cake pan, smoothing the top with a spatula.
- Bake: Place the cake in the preheated oven and bake for 30-35 minutes, or until a toothpick inserted into the center comes out clean.
- Cool and Serve: Allow the cake to cool in the pan for 10 minutes, then turn it out onto a wire rack to cool completely. Dust with powdered sugar before serving.
Extra Tips:
To guarantee the best results, use fresh, ripe cherries for the most flavorful cake. If cherries are out of season, you can substitute with frozen cherries, but be sure to thaw and drain them well before use.
Also, avoid overmixing the batter after adding the dry ingredients to maintain the light and airy texture of the sponge. If you want to add an extra layer of flavor, consider brushing the cooled cake with a simple syrup made with cherry juice. This won’t only enhance the cherry flavor but also keep the cake moist.
Cherry Almond Bundt Cake
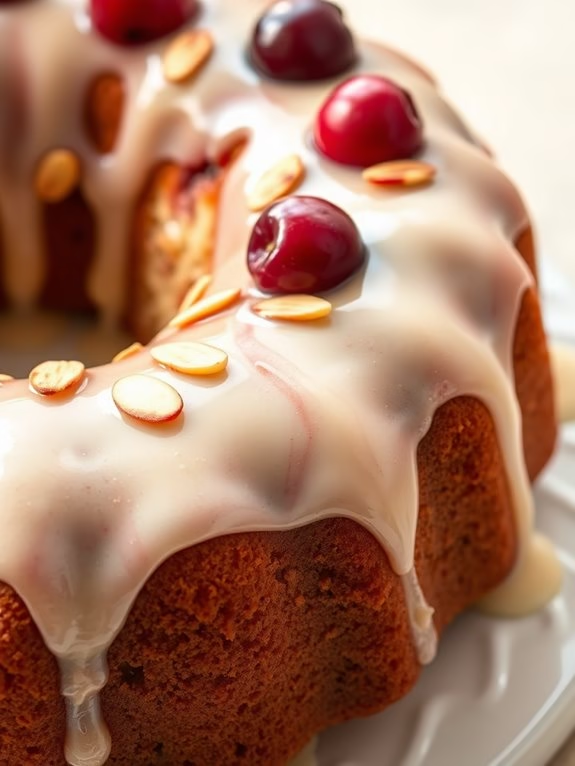
Cherry Almond Bundt Cake
Indulge in the delightful combination of sweet cherries and nutty almonds with this Cherry Almond Bundt Cake. Perfect for any occasion, this moist and flavorful cake is sure to impress your friends and family. The cake is infused with almond extract, lending a rich and aromatic taste that complements the tartness of the cherries beautifully.
Whether served as a dessert or a sweet treat to accompany your afternoon tea, this bundt cake is a crowd-pleaser. This recipe yields a cake suitable for serving 4-6 people, making it ideal for small gatherings or family desserts. The preparation involves simple ingredients that come together to create a luscious and tender crumb.
The use of fresh or frozen cherries adds bursts of flavor and color to every bite, while the almond glaze provides a glossy finish that’s both visually appealing and deliciously sweet.
Ingredients:
- 1 ½ cups all-purpose flour
- 1 cup granulated sugar
- ½ cup unsalted butter, softened
- 2 large eggs
- 1 teaspoon almond extract
- ½ teaspoon vanilla extract
- 1 teaspoon baking powder
- ¼ teaspoon salt
- ½ cup sour cream
- 1 ½ cups fresh or frozen cherries, pitted and halved
- ½ cup sliced almonds
- For the glaze: 1 cup powdered sugar, 2 tablespoons milk, ½ teaspoon almond extract
Cooking Instructions:
- Preheat and Prepare the Pan: Preheat your oven to 350°F (175°C). Thoroughly grease a bundt pan with butter or non-stick spray, then lightly flour the pan to guarantee easy release of the cake after baking.
- Mix the Dry Ingredients: In a medium bowl, whisk together the flour, baking powder, and salt. This will guarantee that the dry ingredients are evenly distributed throughout the cake batter.
- Cream Butter and Sugar: In a large mixing bowl, beat the softened butter and granulated sugar together using an electric mixer on medium speed until light and fluffy, approximately 3-4 minutes.
- Add Eggs and Extracts: Add the eggs one at a time to the butter mixture, beating well after each addition. Stir in the almond extract and vanilla extract until evenly combined.
- Incorporate Dry Ingredients and Sour Cream: Gradually add the dry ingredients to the wet mixture, alternating with the sour cream. Begin and end with the dry ingredients. Mix until just combined, being careful not to overmix.
- Fold in Cherries and Almonds: Gently fold in the cherries and sliced almonds using a spatula, ensuring they’re evenly distributed throughout the batter.
- Fill the Bundt Pan: Pour the batter into the prepared bundt pan, spreading it evenly with a spatula.
- Bake the Cake: Place the bundt pan in the preheated oven and bake for 40-45 minutes, or until a toothpick inserted into the center of the cake comes out clean.
- Cool and Glaze the Cake: Allow the cake to cool in the pan for about 10 minutes before inverting it onto a wire rack to cool completely. Once cooled, prepare the glaze by whisking together powdered sugar, milk, and almond extract. Drizzle the glaze over the cooled cake.
Extra Tips:
For the best results, verify your butter is at room temperature to achieve a smooth and fluffy batter. If using frozen cherries, don’t thaw them before adding to the batter; this helps prevent the cherries from bleeding color into the cake.
Additionally, for a more pronounced almond flavor, consider toasting the sliced almonds before incorporating them into the batter. This Cherry Almond Bundt Cake can be stored in an airtight container at room temperature for up to 3 days, maintaining its moist texture and delightful flavor.
Easy Cherry Cheesecake

Easy Cherry Cheesecake is a delightful dessert that combines the creamy texture of a classic cheesecake with the fruity brightness of cherries. This simple yet delicious recipe is perfect for any occasion, whether you’re hosting a dinner party or simply want to treat your family to something special.
With its rich filling and a buttery graham cracker crust, this cheesecake is certain to be a hit. The cherry topping adds a beautiful pop of color and a burst of flavor that complements the smooth, tangy cheesecake. This recipe is designed to serve 4-6 people, making it ideal for small gatherings or an intimate family dessert.
It’s easy to prepare and doesn’t require any fancy equipment, so even beginner bakers can achieve a professional-looking result.
Ingredients:
- 1 ½ cups graham cracker crumbs
- ¼ cup granulated sugar
- ½ cup unsalted butter, melted
- 16 oz cream cheese, softened
- ½ cup granulated sugar
- 1 tsp vanilla extract
- 2 large eggs
- 1 cup cherry pie filling
Instructions:
1. Prepare the Crust: Preheat your oven to 325°F (163°C). In a medium bowl, combine the graham cracker crumbs and ¼ cup granulated sugar. Stir in the melted butter until the mixture resembles wet sand. Press the mixture firmly into the bottom of a 9-inch springform pan to form the crust. Set aside.
2. Make the Filling: In a large mixing bowl, beat the softened cream cheese with an electric mixer on medium speed until smooth and creamy. Gradually add ½ cup sugar and continue to beat until well combined. Mix in the vanilla extract.
Add the eggs one at a time, beating well after each addition until the mixture is smooth.
3. Assemble the Cheesecake: Pour the cream cheese mixture over the prepared crust in the springform pan. Use a spatula to smooth the top.
4. Bake the Cheesecake: Place the pan in the preheated oven and bake for 40-45 minutes, or until the edges are set and the center is slightly jiggly. Remove from the oven and allow it to cool at room temperature.
5. Add the Topping: Once the cheesecake has cooled, spread the cherry pie filling evenly over the top. Cover the cheesecake with plastic wrap and refrigerate for at least 4 hours, or overnight for best results.
6. Serve: Before serving, carefully remove the sides of the springform pan. Slice and serve chilled.
Extra Tips:
For the best result, verify that all your ingredients are at room temperature before you begin making the cheesecake. This helps the cream cheese blend smoothly and prevents lumps in your filling.
If you don’t have a springform pan, you can use a regular cake pan; just be careful when removing the cheesecake to avoid damaging it. For a more sophisticated flavor, consider adding a teaspoon of lemon zest to the cream cheese filling.
Chocolate Cherry Cake
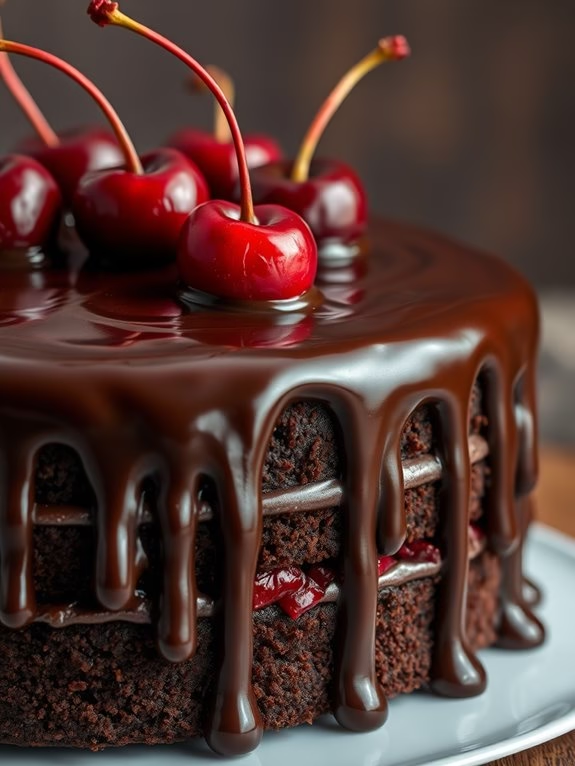
Chocolate Cherry Cake
Indulge in the rich and decadent experience of a Chocolate Cherry Cake, a perfect treat for any occasion. This delightful dessert combines the luscious sweetness of cherries with the deep, velvety flavor of chocolate, creating a harmonious blend that satisfies any sweet tooth.
Whether you’re celebrating a birthday, anniversary, or simply craving a homemade confection, this cake promises to be a show-stopper at your gathering. The moist cake layers, interspersed with juicy cherries and enveloped in a smooth chocolate glaze, make every bite a celebration of flavors.
Ideal for 4-6 people, this recipe is straightforward, allowing both novice and experienced bakers to achieve impressive results. The cake itself is easy to prepare and requires basic ingredients that are typically found in most kitchens.
With the additional touch of a silky chocolate ganache and a sprinkle of fresh cherries, this cake not only tastes divine but also looks stunning when served. Follow the detailed instructions below to create your very own Chocolate Cherry Cake masterpiece.
Ingredients for 4-6 servings:
- 1 cup all-purpose flour
- 1 cup granulated sugar
- 1/2 cup unsweetened cocoa powder
- 1 teaspoon baking powder
- 1 teaspoon baking soda
- 1/2 teaspoon salt
- 2 large eggs
- 1/2 cup vegetable oil
- 1 cup whole milk
- 1 teaspoon vanilla extract
- 1 cup pitted and chopped fresh cherries
- 1/2 cup semi-sweet chocolate chips
- 1/2 cup heavy cream
Cooking Instructions:
- Preheat and Prepare: Preheat your oven to 350°F (175°C). Grease and flour two 8-inch round cake pans to prevent sticking and guarantee easy removal.
- Mix Dry Ingredients: In a large mixing bowl, combine the flour, sugar, cocoa powder, baking powder, baking soda, and salt. Whisk together until thoroughly mixed.
- Combine Wet Ingredients: In another bowl, beat the eggs, then add the vegetable oil, milk, and vanilla extract. Mix until well blended.
- Create the Batter: Gradually add the wet ingredients to the dry ingredients, stirring gently to combine. Be careful not to over-mix; a few small lumps are okay.
- Add Cherries: Fold in the chopped cherries gently, guaranteeing they’re evenly distributed throughout the batter.
- Bake the Cake: Divide the batter evenly between the prepared cake pans. Bake for 30-35 minutes, or until a toothpick inserted into the center comes out clean. Allow the cakes to cool in the pans for 10 minutes, then turn them out onto wire racks to cool completely.
- Make the Ganache: In a small saucepan over low heat, warm the heavy cream until it just begins to simmer. Remove from heat and add the chocolate chips, stirring until smooth and glossy. Let it cool slightly.
- Assemble the Cake: Place one cake layer on a serving plate. Spread a portion of the chocolate ganache on top, then place the second cake layer over it. Pour the remaining ganache over the top, letting it drip down the sides for a smooth finish.
- Decorate (Optional): Garnish with additional fresh cherries or chocolate shavings for an extra touch of elegance.
Extra Tips:
For the best results, confirm your cherries are ripe and sweet to enhance the cake’s flavor. If fresh cherries aren’t available, you can use canned cherries, but make sure to drain them thoroughly before use.
When making the ganache, be cautious not to overheat the cream, as this can cause the chocolate to seize. Additionally, for a more intense chocolate flavor, consider using dark chocolate chips instead of semi-sweet.
Allow the cake to sit for a few hours before serving, as this lets the flavors meld together beautifully.
Cherry Upside-Down Cake
Cherry Upside-Down Cake is a delightful dessert that seamlessly combines the sweet and tangy flavors of cherries with a moist, buttery cake. Perfect for any occasion, this cake not only impresses with its taste but also with its beautiful presentation. The caramelized cherry topping is revealed when the cake is flipped upside-down, creating a stunning visual that’s sure to wow your family and friends.
This cake is a nostalgic favorite, often reminiscent of summer picnics or cozy family gatherings. The soft, fluffy cake base is the perfect complement to the syrupy, cherry topping, offering a balance of sweetness and tartness in every bite. With a preparation that’s both straightforward and rewarding, Cherry Upside-Down Cake is an excellent choice for both novice and experienced bakers.
Ingredients for Cherry Upside-Down Cake (Serves 4-6):
- 1/2 cup unsalted butter, melted
- 1 cup packed brown sugar
- 2 cups pitted sweet cherries (fresh or frozen, thawed)
- 1 1/2 cups all-purpose flour
- 1 1/2 teaspoons baking powder
- 1/4 teaspoon salt
- 1/2 cup unsalted butter, softened
- 1 cup granulated sugar
- 2 large eggs
- 1 teaspoon vanilla extract
- 1/2 cup whole milk
Cooking Instructions:
- Preheat the Oven: Begin by preheating your oven to 350°F (175°C). This guarantees that the oven is ready when you finish preparing the cake batter.
- Prepare the Cherry Topping: Pour the melted butter into a 9-inch round cake pan. Sprinkle the brown sugar evenly over the butter. Distribute the cherries in a single layer over the sugar, assuring an even covering. Set the pan aside while you prepare the batter.
- Mix Dry Ingredients: In a medium-sized bowl, whisk together the all-purpose flour, baking powder, and salt. This helps to evenly distribute the raising agents throughout the flour.
- Cream Butter and Sugar: In a separate large mixing bowl, use an electric mixer to cream together the softened butter and granulated sugar until light and fluffy. This should take about 3-4 minutes and is essential for a light cake texture.
- Add Eggs and Vanilla: Beat in the eggs one at a time, making sure each one is fully incorporated before adding the next. Mix in the vanilla extract until combined.
- Combine Wet and Dry Ingredients: Gradually add the dry flour mixture to the creamed butter and sugar, alternating with the milk. Begin and end with the flour mixture. Mix until just combined, being careful not to overmix.
- Assemble and Bake: Pour the batter over the prepared cherry and sugar mixture in the cake pan, spreading it evenly with a spatula. Bake in the preheated oven for 45-50 minutes, or until a toothpick inserted into the center comes out clean.
- Cool and Invert the Cake: Allow the cake to cool in the pan for about 10 minutes. Carefully run a knife around the edge of the pan to loosen the cake, then place a serving plate over the pan and invert them together to release the cake. Let it cool completely before serving.
Extra Tips:
For the best results, use fresh, ripe cherries if they’re in season. If using frozen cherries, make sure they’re fully thawed and drained to prevent excess moisture from affecting the cake.
Be patient when allowing the cake to cool slightly before inverting it; this helps the caramelized topping to set and reduces the risk of it sticking to the pan. Additionally, serving the cake with a dollop of whipped cream or a scoop of vanilla ice cream can enhance the flavors and provide a delightful contrast to the rich cherry topping.
Cherry Crumble Cake
Cherry Crumble Cake
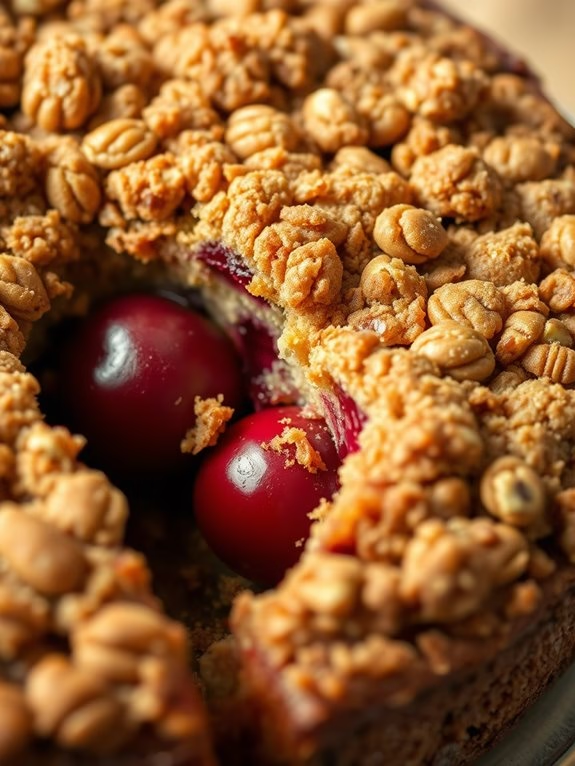
Cherry Crumble Cake is a delightful dessert that combines the tangy sweetness of cherries with the buttery richness of a crumble topping, all nestled on a soft, moist cake base. This dessert is perfect for a cozy family gathering or a special occasion, offering a balance of flavors and textures that will please even the most discerning palate.
The juicy cherries burst with flavor as you bite into the cake, while the crumble adds a satisfying crunch, creating a harmonious blend that’s simply irresistible.
Creating a Cherry Crumble Cake is a rewarding experience that fills your kitchen with the comforting aroma of baked cherries and buttery crumble. This recipe is designed to serve 4-6 people, making it an ideal choice for a small dinner party or a weeknight treat. The preparation process is straightforward, allowing both novice and experienced bakers to craft a delicious cake that looks as good as it tastes.
Ingredients (for 4-6 servings):
- 1 cup all-purpose flour
- 1/2 cup granulated sugar
- 1/4 cup unsalted butter, softened
- 1/2 teaspoon baking powder
- 1/4 teaspoon salt
- 1 large egg
- 1 teaspoon vanilla extract
- 1/2 cup milk
- 2 cups fresh or frozen cherries, pitted
- 1/2 cup brown sugar
- 1/2 cup rolled oats
- 1/4 cup cold unsalted butter, cubed
- 1/4 cup chopped nuts (optional)
- 1 teaspoon ground cinnamon
Instructions:
- Preheat and Prepare: Preheat your oven to 350°F (175°C). Grease a 9-inch round cake pan with butter or non-stick spray, making sure the entire surface is covered to prevent the cake from sticking.
- Mix Cake Batter: In a large mixing bowl, combine the flour, granulated sugar, baking powder, and salt. Add the softened butter and mix until the mixture resembles coarse crumbs. Stir in the egg, vanilla extract, and milk, mixing until smooth and well combined.
- Add Cherries: Gently fold the pitted cherries into the cake batter, making sure they’re evenly distributed throughout the mixture. Pour the batter into the prepared cake pan, spreading it evenly with a spatula.
- Prepare Crumble Topping: In a separate bowl, mix the brown sugar, rolled oats, and cinnamon. Add the cold, cubed butter and use your fingers or a pastry cutter to blend until the mixture forms coarse crumbs. If using, add the chopped nuts at this stage.
- Top and Bake: Sprinkle the crumble topping evenly over the cake batter. Place the pan in the preheated oven and bake for 40-45 minutes, or until a toothpick inserted into the center of the cake comes out clean.
- Cool and Serve: Remove the cake from the oven and allow it to cool in the pan for about 10 minutes. Transfer the cake to a wire rack to cool completely before slicing and serving.
Extra Tips:
For an extra burst of flavor, consider adding a splash of almond extract to the cake batter to complement the cherries. If fresh cherries aren’t available, frozen cherries can be used; just be sure to thaw and drain them before adding to the batter.
Additionally, to guarantee a perfect crumble, keep the butter cold and work quickly when combining it with the dry ingredients. If you’re looking to serve this dessert warm, pair it with a scoop of vanilla ice cream for a truly indulgent experience.
Gluten-Free Cherry Cake
Gluten-Free Cherry Cake Recipe
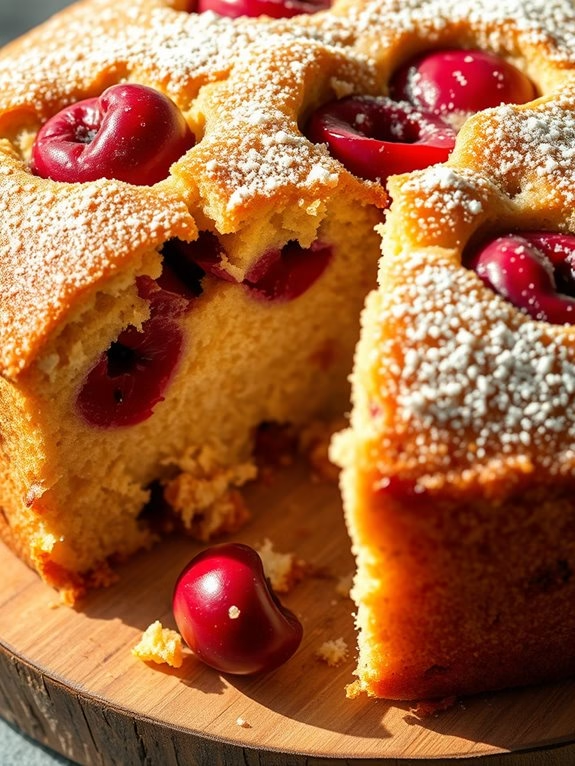
Indulge in the delightful and moist flavors of a Gluten-Free Cherry Cake, a perfect treat for those who prefer a diet without gluten. This cake combines the sweet taste of cherries with a light, fluffy texture that will please everyone at your table. Whether you’re serving it for a special occasion or simply as a sweet afternoon snack, this cake is sure to become a favorite.
Crafted using almond flour and fresh cherries, this cake isn’t only gluten-free but also packed with nutritious ingredients. The almond flour provides a rich, nutty flavor that complements the natural sweetness of the cherries. With a hint of vanilla and a touch of lemon zest, this cake offers a revitalizing and satisfying taste that will delight your senses. This recipe serves 4-6 people.
Ingredients:
- 1 ½ cups almond flour
- ½ cup granulated sugar
- 1 teaspoon baking powder
- ¼ teaspoon salt
- 3 large eggs
- 1 teaspoon vanilla extract
- ¼ cup unsalted butter, melted
- 1 tablespoon lemon zest
- 1 ½ cups fresh cherries, pitted and halved
- Powdered sugar for dusting (optional)
Cooking Instructions:
- Preheat the Oven: Start by preheating your oven to 350°F (175°C). This guarantees that the oven is hot enough when the cake goes in, allowing it to cook evenly.
- Prepare the Baking Pan: Grease a 9-inch round cake pan with a little butter or non-stick spray. Line the bottom with parchment paper to prevent the cake from sticking.
- Mix Dry Ingredients: In a medium-sized bowl, whisk together the almond flour, granulated sugar, baking powder, and salt. This will make sure that the dry ingredients are well combined.
- Combine Wet Ingredients: In another bowl, beat the eggs until they’re lightly frothy. Add the vanilla extract, melted butter, and lemon zest, mixing until all the wet ingredients are well incorporated.
- Create the Batter: Gradually add the dry ingredients to the wet ingredients, stirring gently until just combined. Be careful not to over-mix, as this can make the cake dense.
- Fold in the Cherries: Gently fold the pitted and halved cherries into the batter, making certain they’re evenly distributed throughout the mixture.
- Transfer to Pan: Pour the batter into the prepared cake pan, spreading it out evenly with a spatula.
- Bake the Cake: Place the cake pan in the preheated oven and bake for 30-35 minutes, or until a toothpick inserted into the center comes out clean. The top should be golden brown.
- Cool and Serve: Allow the cake to cool in the pan for 10 minutes before transferring it to a wire rack to cool completely. Once cooled, dust with powdered sugar if desired before serving.
Extra Tips:
For best results, use fresh, ripe cherries to enhance the flavor and juiciness of the cake. If fresh cherries aren’t available, frozen ones can be used, but make sure to thaw and drain them well before adding to the batter.
Additionally, you can experiment with adding a handful of chopped nuts for extra texture. Remember to keep an eye on the cake during the final few minutes of baking to avoid over-browning.
Enjoy your gluten-free cherry cake with a dollop of whipped cream or a scoop of vanilla ice cream for an extra special treat.
Cherry Swirl Pound Cake
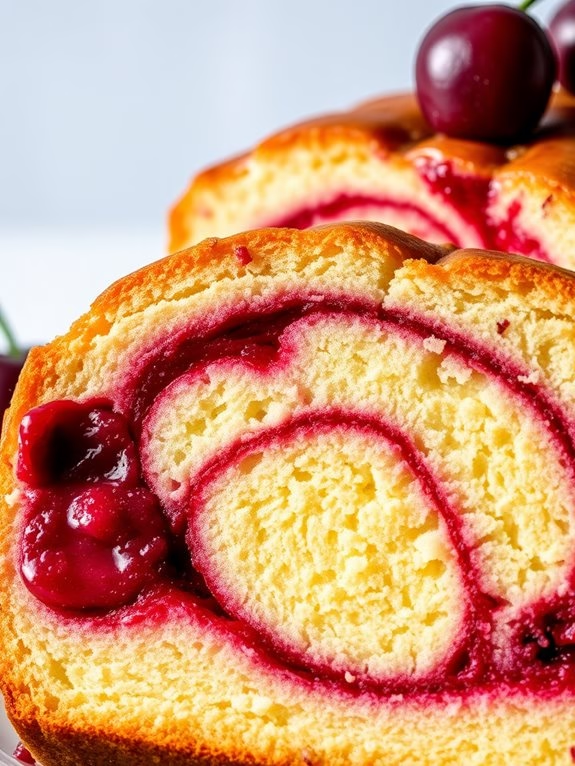
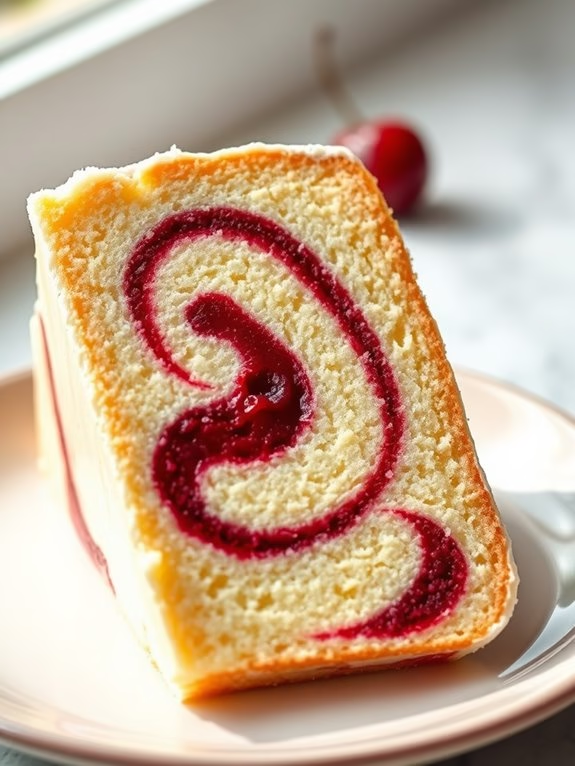
Cherry Swirl Pound Cake is a delightful and elegant dessert that combines the rich, buttery flavor of a classic pound cake with the vibrant taste and color of cherries. This cake is perfect for any occasion, from casual family gatherings to formal celebrations.
The beautiful cherry swirls not only add a pop of color but also infuse the cake with a burst of fruity flavor, making each bite both visually appealing and deliciously satisfying. Whether you’re a seasoned baker or just starting out, this recipe is straightforward and results in a stunning cake that’s sure to impress.
To make the perfect Cherry Swirl Pound Cake, you’ll start by preparing a basic pound cake batter and a cherry compote that will be swirled into the batter to create a marbled effect. The key to achieving the best results is to use fresh or high-quality frozen cherries, as they’ll provide the best flavor and texture.
Once baked to a golden perfection, the cake isn’t only moist and tender but also showcases a beautiful pattern that’s sure to be the centerpiece of any dessert table.
Ingredients (Serves 4-6)
- 1 cup unsalted butter, softened
- 1 1/2 cups granulated sugar
- 4 large eggs
- 1 teaspoon vanilla extract
- 2 cups all-purpose flour
- 1/2 teaspoon baking powder
- 1/4 teaspoon salt
- 1/2 cup whole milk
- 1 cup cherries, pitted and halved
- 2 tablespoons sugar (for cherry compote)
- 1 tablespoon lemon juice
Cooking Instructions
- Preheat and Prepare Pan: Preheat your oven to 350°F (175°C). Grease and flour a 9×5 inch loaf pan or line it with parchment paper to facilitate easy removal of the cake after baking.
- Make Cherry Compote: In a small saucepan over medium heat, combine the cherries, 2 tablespoons of sugar, and 1 tablespoon of lemon juice. Cook until the cherries have softened and released their juices, stirring occasionally for about 5-7 minutes. Remove from heat and let it cool slightly.
- Cream Butter and Sugar: In a large mixing bowl, cream together the softened butter and granulated sugar using an electric mixer on medium speed until light and fluffy, about 3-5 minutes.
- Add Eggs and Vanilla: Add the eggs one at a time, beating well after each addition. Stir in the vanilla extract until just combined.
- Combine Dry Ingredients: In another bowl, whisk together the flour, baking powder, and salt. Gradually add the dry ingredients to the butter mixture alternately with the milk, beginning and ending with the flour mixture. Mix until just combined, being careful not to overmix.
- Assemble the Cake: Pour half of the batter into the prepared loaf pan. Spoon half of the cherry compote over the batter and use a knife or skewer to gently swirl the cherries through the batter. Repeat with the remaining batter and cherry compote.
- Bake the Cake: Bake in the preheated oven for 50-60 minutes, or until a toothpick inserted into the center of the cake comes out clean. If the top of the cake begins to brown too quickly, cover it loosely with aluminum foil.
- Cool and Serve: Allow the cake to cool in the pan for about 10 minutes before transferring it to a wire rack to cool completely. Slice and serve the cake once it has cooled.
Extra Tips
For the best Cherry Swirl Pound Cake, make certain that all your ingredients are at room temperature before you start, as this helps them combine more smoothly and evenly.
If using frozen cherries, make sure to thaw them completely and drain any excess liquid to prevent the cake from becoming too moist. If you prefer a more pronounced cherry flavor, consider adding a teaspoon of almond extract to the batter, which complements cherries beautifully.
Finally, for an extra touch of elegance, dust the cooled cake with powdered sugar or drizzle with a simple glaze made of powdered sugar and milk.
Vegan Cherry Cake
Vegan Cherry Cake is a delightful dessert that combines the rich flavors of cherries with the moist, fluffy texture of a cake, all while being completely plant-based. This cake is perfect for those who follow a vegan lifestyle or anyone looking to try a delicious, dairy-free dessert option.
With a mixture of fresh or frozen cherries, this cake is bursting with juicy flavor, and its vibrant pink hue makes it an eye-catching centerpiece for any gathering.
The secret to a great Vegan Cherry Cake lies in its ingredients and preparation. By using plant-based substitutes such as almond milk and apple cider vinegar, this cake maintains its moistness and rise without the need for eggs or dairy.
Additionally, the inclusion of almond flour and coconut oil not only enriches the flavor but also enhances the cake’s texture. Whether for a birthday, a simple family dinner, or a summer picnic, this cake is sure to impress both vegans and non-vegans alike.
Ingredients (serves 4-6 people)
- 1 1/2 cups all-purpose flour
- 1/2 cup almond flour
- 1 cup granulated sugar
- 1/2 cup unsweetened almond milk
- 1/4 cup coconut oil, melted
- 1/4 cup unsweetened applesauce
- 1 tablespoon apple cider vinegar
- 1 teaspoon vanilla extract
- 1 teaspoon baking powder
- 1/2 teaspoon baking soda
- 1/2 teaspoon salt
- 1 1/2 cups pitted cherries (fresh or frozen)
- 1 tablespoon cornstarch
Instructions
- Preheat the Oven: Begin by preheating your oven to 350°F (175°C). Grease a 9-inch round cake pan with coconut oil or line it with parchment paper to prevent sticking.
- Prepare the Cherries: If using fresh cherries, pit and halve them. If using frozen cherries, thaw them completely and drain any excess liquid. Toss the cherries with the cornstarch to coat them evenly. This helps to thicken the juices as the cake bakes.
- Mix Dry Ingredients: In a large mixing bowl, combine the all-purpose flour, almond flour, sugar, baking powder, baking soda, and salt. Stir well to guarantee all dry ingredients are evenly distributed.
- Combine Wet Ingredients: In another bowl, whisk together the almond milk, melted coconut oil, applesauce, apple cider vinegar, and vanilla extract until smooth.
- Make the Batter: Gradually add the wet ingredients to the dry ingredients, stirring gently until just combined. Be careful not to overmix, as this can make the cake dense.
- Incorporate Cherries: Fold the coated cherries into the batter, ensuring they’re evenly dispersed throughout.
- Bake the Cake: Pour the batter into the prepared cake pan, spreading it evenly. Bake in the preheated oven for 35-40 minutes, or until a toothpick inserted into the center of the cake comes out clean.
- Cool and Serve: Allow the cake to cool in the pan for about 10 minutes before transferring it to a wire rack to cool completely. Once cooled, slice and serve as desired.
Extra Tips
For best results, verify all ingredients are at room temperature before beginning the baking process. This helps to create a smoother batter and a more even bake.
If you prefer a sweeter cake, consider dusting the top with powdered sugar or serving it with a dollop of vegan whipped cream. Additionally, feel free to experiment with different fruit fillings such as raspberries or blueberries for a unique twist on this vegan delight.
Cherry Lemon Drizzle Cake
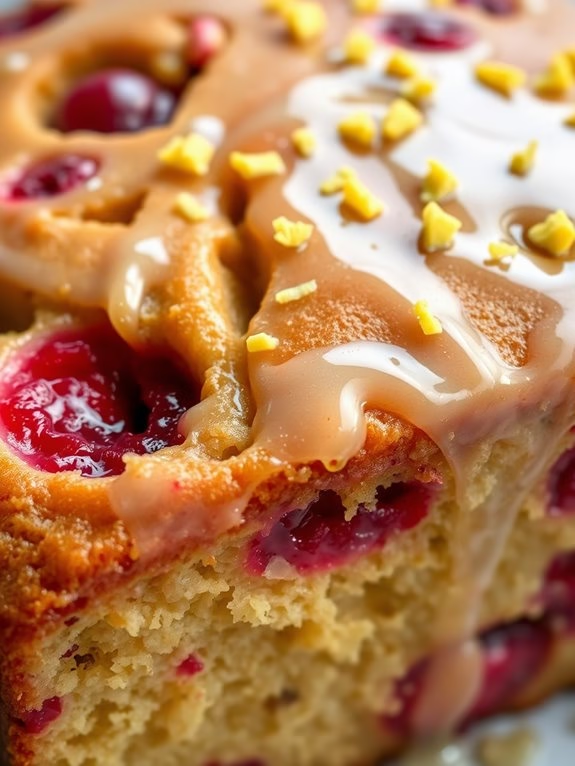
Cherry Lemon Drizzle Cake is a delightful fusion of tart cherries and zesty lemon that will tantalize your taste buds with its invigorating and vibrant flavors. This moist and delicious cake is perfect for any occasion, whether it be a family gathering, a cozy afternoon tea, or a special celebration.
The combination of the sweet cherry cake with the tangy lemon drizzle creates a balance that’s both satisfying and memorable. The vibrant red of the cherries and the bright yellow of the lemon drizzle make this cake as visually appealing as it’s delicious.
In this recipe, we’ll guide you through the process of creating a Cherry Lemon Drizzle Cake that serves 4-6 people. You’ll be using fresh or frozen cherries for the cake batter and a simple lemon glaze that will be drizzled over the top, infusing it with a burst of citrusy flavor.
The key to this recipe is maintaining the moistness of the cake while guaranteeing the lemon drizzle is perfectly absorbed, creating a luscious finish.
Ingredients:
- 1 cup of fresh or frozen cherries, pitted and halved
- 1½ cups all-purpose flour
- 1 teaspoon baking powder
- ½ teaspoon baking soda
- ¼ teaspoon salt
- ½ cup unsalted butter, softened
- 1 cup granulated sugar
- 2 large eggs
- 1 teaspoon vanilla extract
- ½ cup buttermilk
- Zest of 1 lemon
- ¼ cup freshly squeezed lemon juice
- 1 cup powdered sugar
Instructions:
- Preheat and Prepare: Begin by preheating your oven to 350°F (175°C). Grease and flour a 9-inch round cake pan or line it with parchment paper to guarantee easy removal of the cake once baked.
- Mix Dry Ingredients: In a medium bowl, whisk together the flour, baking powder, baking soda, and salt. This helps to evenly distribute the leavening agents throughout the flour, guaranteeing the cake rises properly.
- Cream Butter and Sugar: In a large mixing bowl, beat the softened butter and granulated sugar together until light and fluffy. This process should take about 3-4 minutes and is important for incorporating air into the batter.
- Add Eggs and Vanilla: Beat in the eggs, one at a time, making sure each is fully incorporated before adding the next. Stir in the vanilla extract.
- Combine Wet and Dry Ingredients: Add the dry ingredients to the butter mixture in three parts, alternating with the buttermilk. Begin and end with the dry ingredients. Mix until just combined to avoid overmixing, which can lead to a dense cake.
- Fold in Cherries and Lemon Zest: Gently fold in the cherries and lemon zest using a spatula. Be careful not to break the cherries to maintain their texture and juiciness.
- Bake: Pour the batter into the prepared cake pan and spread it evenly. Bake for 30-35 minutes or until a toothpick inserted into the center comes out clean. Allow the cake to cool in the pan for 10 minutes before transferring it to a wire rack to cool completely.
- Prepare Lemon Drizzle: In a small bowl, mix together the lemon juice and powdered sugar until smooth and well combined.
- Drizzle the Cake: Once the cake has cooled, use a fork to poke holes all over the top. Slowly pour the lemon drizzle over the cake, allowing it to seep into the holes. This will infuse the cake with a tangy lemon flavor.
Extra Tips:
For the best results, use fresh cherries when they’re in season for ideal flavor. However, if using frozen cherries, make sure they’re fully thawed and drained to prevent excess moisture in the cake.
When making the lemon drizzle, adjust the consistency by adding more powdered sugar for a thicker glaze or more lemon juice for a thinner one. A little lemon zest can be sprinkled on top of the cake for added decoration and a burst of citrus aroma.
Enjoy your Cherry Lemon Drizzle Cake with a cup of tea or coffee for a delightful treat!
Cherry Coffee Cake

Cherry Coffee Cake
Cherry Coffee Cake is a delightful dessert that combines the sweet and tart flavors of cherries with the comforting taste of coffee cake. This classic treat is perfect for breakfast, brunch, or as a sweet afternoon snack. With its tender crumb and luscious cherry topping, this cake is guaranteed to become a favorite in your home.
Whether you use fresh, frozen, or canned cherries, the result is a moist and flavorful cake that pairs beautifully with a hot cup of coffee or tea. The recipe for Cherry Coffee Cake is straightforward and requires common baking ingredients, making it accessible for both novice and experienced bakers.
The cake features a soft, buttery base topped with a generous layer of cherries and a crumbly streusel topping. The combination of textures and flavors guarantees that each bite is as satisfying as the last. With a few simple steps, you can have this delicious cake ready to serve in no time, delighting family and friends alike.
Ingredients (serves 4-6):
- 1 1/2 cups all-purpose flour
- 1/2 cup granulated sugar
- 1/4 cup unsalted butter, softened
- 1/2 cup milk
- 1 large egg
- 2 teaspoons baking powder
- 1/2 teaspoon salt
- 1 teaspoon vanilla extract
- 1 can (21 oz) cherry pie filling or 2 cups fresh/frozen cherries
- 1/2 cup all-purpose flour (for streusel)
- 1/4 cup brown sugar (for streusel)
- 1/4 cup unsalted butter, melted (for streusel)
- 1/2 teaspoon ground cinnamon (for streusel)
Instructions:
- Preheat the Oven: Begin by preheating your oven to 350°F (175°C). Lightly grease a 9-inch square baking pan or line it with parchment paper for easy removal.
- Prepare the Batter: In a large mixing bowl, cream together the softened butter and granulated sugar until light and fluffy. Add the egg and vanilla extract, beating well to combine.
- Mix Dry Ingredients: In a separate bowl, whisk together 1 1/2 cups of flour, baking powder, and salt. Gradually add the dry ingredients to the creamed mixture, alternating with milk, and mix until just combined. Avoid overmixing to keep the cake tender.
- Assemble the Cake: Spread the batter evenly into the prepared baking pan. Spoon the cherry pie filling or fresh cherries evenly over the batter, allowing some of the fruit to sink into the cake as it bakes.
- Prepare the Streusel Topping: In a small bowl, combine 1/2 cup flour, brown sugar, melted butter, and cinnamon. Mix with a fork until crumbly. Sprinkle the streusel mixture evenly over the cherries.
- Bake the Cake: Place the pan in the preheated oven and bake for 35-40 minutes, or until a toothpick inserted into the center of the cake comes out clean. The top should be golden brown and the edges slightly pulling away from the pan.
- Cool and Serve: Allow the cake to cool in the pan for at least 10 minutes before slicing. Serve warm or at room temperature. Enjoy it plain or with a dollop of whipped cream or a scoop of vanilla ice cream.
Extra Tips:
For the best results, make certain all your ingredients are at room temperature before you start mixing. This helps the batter come together more smoothly and results in a more even bake.
If using fresh or frozen cherries, consider tossing them with a tablespoon of flour before adding to the batter to prevent them from sinking to the bottom. Additionally, feel free to add a handful of chopped nuts to the streusel topping for extra crunch and flavor.
Cherry Layer Cake
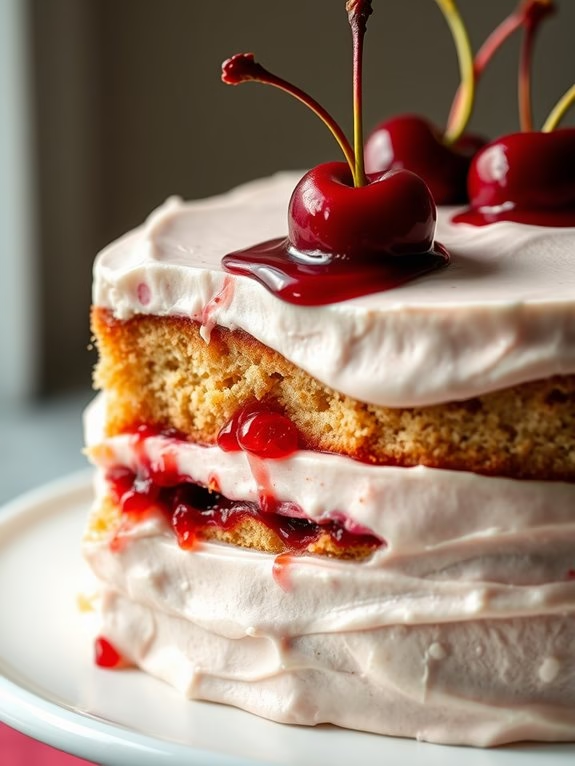
Cherry Layer Cake Recipe
Indulge in the delightful flavors of a Cherry Layer Cake, a perfect dessert for any occasion. This cake combines the sweetness of cherries with the rich and moist texture of a classic layer cake, making it a favorite among cherry lovers.
Whether you’re celebrating a birthday, an anniversary, or simply craving a sweet treat, this Cherry Layer Cake will satisfy your taste buds and impress your guests with its beautiful presentation and delicious taste.
This recipe yields a cake that serves 4-6 people, making it ideal for small gatherings or family celebrations. The cake consists of fluffy sponge layers filled and topped with a cherry-infused frosting and garnished with fresh cherries.
The combination of textures and flavors creates a harmonious balance, making each bite a delightful experience. Follow this recipe to create a Cherry Layer Cake that isn’t only visually stunning but also scrumptious.
Ingredients:
- 1 ½ cups all-purpose flour
- 1 cup granulated sugar
- ½ cup unsalted butter, softened
- 2 large eggs
- 1 teaspoon vanilla extract
- 1 ½ teaspoons baking powder
- ½ teaspoon salt
- ¾ cup milk
- 1 cup fresh or frozen cherries, pitted and chopped
- 1 ½ cups heavy cream
- ½ cup powdered sugar
- ½ cup cherry jam
- Fresh cherries for garnish
Instructions:
- Preheat the Oven and Prepare the Pans: Preheat your oven to 350°F (175°C). Grease and flour two 8-inch round cake pans to prevent sticking.
- Mix the Dry Ingredients: In a medium bowl, whisk together the all-purpose flour, baking powder, and salt. Set aside.
- Cream the Butter and Sugar: In a large mixing bowl, beat the softened butter and granulated sugar together until light and fluffy. This should take about 3-4 minutes.
- Add the Eggs and Vanilla: Add the eggs one at a time, mixing well after each addition. Stir in the vanilla extract until fully incorporated.
- Combine Wet and Dry Ingredients: Gradually add the dry ingredient mixture to the creamed butter and sugar, alternating with the milk. Begin and end with the dry ingredients, mixing until just combined.
- Fold in Cherries: Gently fold the chopped cherries into the batter, ensuring they’re evenly distributed.
- Bake the Cake Layers: Divide the batter evenly between the prepared cake pans. Bake in the preheated oven for 25-30 minutes, or until a toothpick inserted into the center comes out clean. Allow the cakes to cool completely before frosting.
- Prepare the Cherry Frosting: In a separate bowl, whip the heavy cream and powdered sugar together until stiff peaks form. Gently fold in the cherry jam to create a smooth cherry-infused frosting.
- Assemble the Cake: Place one cake layer on a serving plate. Spread a generous amount of cherry frosting over the top. Place the second cake layer on top, pressing gently. Frost the top and sides of the cake with the remaining cherry frosting.
- Garnish and Serve: Decorate the cake with fresh cherries on top. Refrigerate for at least 30 minutes before serving to allow the frosting to set.
Extra Tips:
For an even more intense cherry flavor, you can add a few drops of cherry extract to the frosting.
If using frozen cherries, make sure to thaw and drain them before chopping to avoid excess moisture in the cake.
To achieve a smooth and even frosting, use a spatula dipped in warm water.
Finally, for a more dramatic presentation, consider adding chocolate shavings or toasted almonds on top of the cake for added texture and flavor contrast.
Cherry Yogurt Cake
Cherry Yogurt Cake Recipe
Indulge in the delightful flavors of a Cherry Yogurt Cake, a moist and tender dessert that perfectly combines the tartness of cherries with the creaminess of yogurt. This cake is a lovely treat for any occasion, offering a balance of sweetness and tang that’s sure to please everyone’s palate.
Whether you’re hosting a party or simply looking to enjoy a slice with your afternoon tea, this Cherry Yogurt Cake will surely become a favorite in your recipe collection.
The secret to this cake’s unique texture lies in its use of yogurt, which imparts a subtle tanginess and keeps the cake wonderfully moist. Fresh or frozen cherries are folded into the batter, adding bursts of juicy flavor in every bite. This recipe serves 4-6 people, making it perfect for a small gathering or family dessert.
Follow the steps below to create this delicious Cherry Yogurt Cake.
Ingredients:
- 1 1/2 cups all-purpose flour
- 1 teaspoon baking powder
- 1/2 teaspoon baking soda
- 1/4 teaspoon salt
- 1/2 cup unsalted butter, softened
- 3/4 cup granulated sugar
- 2 large eggs
- 1 teaspoon vanilla extract
- 1 cup plain Greek yogurt
- 1 1/2 cups pitted cherries (fresh or frozen)
- Powdered sugar, for dusting (optional)
Cooking Instructions:
- Preheat the Oven and Prepare the Pan: Preheat your oven to 350°F (175°C). Grease a 9-inch round cake pan with butter or non-stick spray and line the bottom with parchment paper for easy removal.
- Mix the Dry Ingredients: In a medium bowl, whisk together the all-purpose flour, baking powder, baking soda, and salt. Set this aside as you prepare the wet ingredients.
- Cream Butter and Sugar: In a large mixing bowl, using a hand mixer or stand mixer, beat the softened butter and granulated sugar together until light and fluffy, about 3-5 minutes. This step is essential for incorporating air into the batter, giving the cake its fluffy texture.
- Add Eggs and Vanilla: Add the eggs one at a time, beating well after each addition. Stir in the vanilla extract until everything is well combined.
- Incorporate Yogurt: Add the Greek yogurt to the batter and mix until just combined. The yogurt will add moisture and a slight tanginess to the cake.
- Combine Dry and Wet Ingredients: Gradually add the dry ingredients to the wet ingredients, mixing on low speed until just combined. Be careful not to overmix, as this can result in a dense cake.
- Fold in Cherries: Gently fold in the pitted cherries using a spatula, making sure they’re evenly distributed throughout the batter.
- Bake the Cake: Pour the batter into the prepared cake pan and smooth the top with a spatula. Bake in the preheated oven for 35-40 minutes, or until a toothpick inserted into the center of the cake comes out clean.
- Cool and Serve: Allow the cake to cool in the pan for about 10 minutes before transferring it to a wire rack to cool completely. Once cooled, dust the top with powdered sugar if desired before slicing and serving.
Extra Tips:
For best results, make certain all your ingredients are at room temperature before starting. This helps in achieving a smooth batter and even baking.
If using frozen cherries, don’t thaw them before adding to the batter to prevent the cake from becoming overly moist. You can also experiment with adding a touch of almond extract for an extra layer of flavor that complements the cherries beautifully.
Cherry Marble Cake
Cherry Marble Cake Recipe
Indulge in the delightful fusion of flavors with this Cherry Marble Cake, a perfect treat for any occasion. The mesmerizing swirls of cherry and vanilla create a stunning visual appeal, while the moist, tender crumb melts in your mouth with every bite. This cake isn’t only a feast for the eyes but also a celebration of taste, ideal for serving at family gatherings or as a special dessert.
The Cherry Marble Cake combines the classic richness of a vanilla cake with the sweet and tangy burst of cherries, resulting in a harmonious blend of flavors. Whether you’re a seasoned baker or trying your hand at baking for the first time, this recipe is straightforward and guarantees a rewarding experience. Follow the instructions carefully to achieve the perfect marbled effect, and watch as your family and friends are enchanted by this delicious creation.
Ingredients (Serving Size: 4-6 people):
- 1 ½ cups all-purpose flour
- 1 teaspoon baking powder
- ½ teaspoon baking soda
- ¼ teaspoon salt
- ½ cup unsalted butter, softened
- 1 cup granulated sugar
- 2 large eggs
- 1 teaspoon vanilla extract
- ½ cup sour cream
- ¾ cup cherry preserves or puree
- Red food coloring (optional)
Cooking Instructions:
- Prepare the Oven and Pan: Preheat your oven to 350°F (175°C). Grease and flour a 9-inch round cake pan to prevent the cake from sticking.
- Mix Dry Ingredients: In a medium bowl, whisk together the all-purpose flour, baking powder, baking soda, and salt. Set aside this mixture for later use.
- Cream Butter and Sugar: In a large mixing bowl, beat the softened butter and granulated sugar together using an electric mixer on medium speed until light and fluffy, approximately 3-4 minutes.
- Add Eggs and Vanilla: Add the eggs one at a time, beating well after each addition. Mix in the vanilla extract until fully incorporated.
- Combine Wet and Dry Ingredients: Gradually add the flour mixture to the butter mixture, alternating with the sour cream, beginning and ending with the flour mixture. Mix until just combined and smooth.
- Prepare Cherry Batter: In a separate bowl, combine 1/3 of the cake batter with the cherry preserves or puree. Optionally, add a few drops of red food coloring to enhance the cherry swirl’s color.
- Create Marble Effect: Pour half of the plain batter into the prepared cake pan. Add dollops of the cherry batter on top, then cover with the remaining plain batter. Using a skewer or knife, gently swirl the batters together to create a marbled effect. Be careful not to overmix.
- Bake the Cake: Place the pan in the preheated oven and bake for 35-40 minutes, or until a toothpick inserted into the center of the cake comes out clean.
- Cool and Serve: Allow the cake to cool in the pan for 10 minutes before transferring it to a wire rack to cool completely. Once cooled, slice and serve as desired.
Extra Tips:
To achieve the best results, confirm that all your ingredients are at room temperature before you start baking. This will help them blend more smoothly and create a more uniform batter.
If you prefer a more pronounced cherry flavor, consider adding a teaspoon of almond extract to the cherry batter. For an added touch, dust the cooled cake with powdered sugar or drizzle with a simple glaze made from powdered sugar and milk.
Cherry Coconut Cake
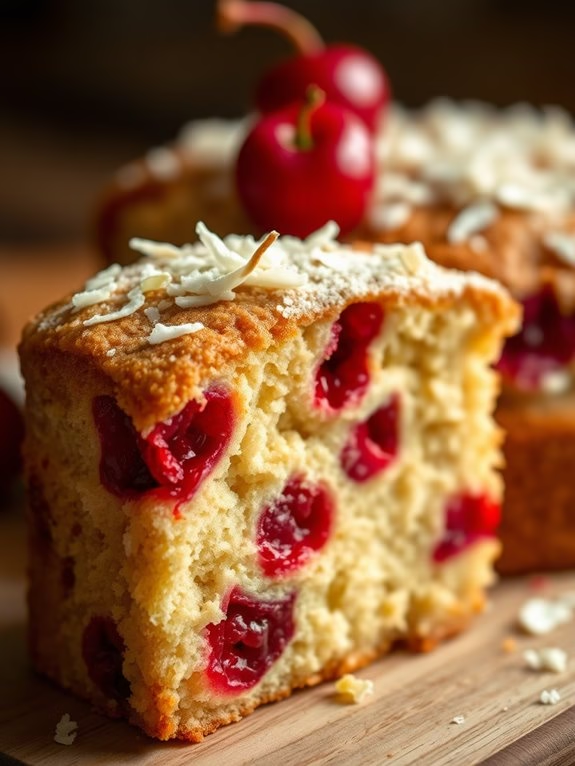
Cherry Coconut Cake is a delightful dessert that combines the tartness of cherries with the tropical flavor of coconut, resulting in a moist and flavorful cake. This cake is perfect for any occasion, whether it be a festive gathering or a simple family dinner. The combination of cherries and coconut creates a unique taste that’s both invigorating and comforting, making it a favorite among cake lovers.
This cake is easy to make and requires simple ingredients that can be found in most pantries. The process involves preparing a basic cake batter and incorporating cherries and coconut to enhance the flavor and texture. The end result is a deliciously moist cake with a beautiful blend of sweet and tangy flavors. Serve it with a dollop of whipped cream or a scoop of vanilla ice cream for an extra special treat.
Ingredients for 4-6 servings:
- 1 1/2 cups all-purpose flour
- 1 cup granulated sugar
- 1/2 cup unsweetened shredded coconut
- 2 teaspoons baking powder
- 1/2 teaspoon salt
- 1/2 cup unsalted butter, softened
- 3/4 cup whole milk
- 2 large eggs
- 1 teaspoon vanilla extract
- 1 1/2 cups fresh or frozen cherries, pitted and halved
- 1/4 cup coconut flakes, for topping (optional)
Cooking Instructions:
- Preheat and Prepare Pan: Preheat your oven to 350°F (175°C). Grease and flour a 9-inch round cake pan or line it with parchment paper to prevent sticking.
- Mix Dry Ingredients: In a medium-sized bowl, whisk together the all-purpose flour, granulated sugar, shredded coconut, baking powder, and salt. This guarantees even distribution of the dry ingredients.
- Cream Butter and Sugar: In a large mixing bowl, cream the softened butter and sugar together until light and fluffy using an electric mixer on medium speed. This should take about 2-3 minutes.
- Add Wet Ingredients: Add the eggs, one at a time, beating well after each addition. Mix in the vanilla extract. Gradually add the milk, mixing until smooth.
- Combine Dry and Wet Mixtures: Slowly add the dry ingredients to the wet mixture, mixing on low speed until just combined. Be careful not to overmix to maintain a light texture.
- Fold in Cherries: Gently fold in the cherries using a spatula. Confirm even distribution without breaking the cherries.
- Pour and Bake: Pour the batter into the prepared cake pan. Spread it evenly with a spatula. If desired, sprinkle coconut flakes on top. Bake for 30-35 minutes or until a toothpick inserted into the center comes out clean.
- Cool and Serve: Allow the cake to cool in the pan for about 10 minutes before transferring it to a wire rack to cool completely. Serve the cake at room temperature.
Extra Tips:
For the best results, guarantee that all ingredients are at room temperature before starting. This helps in achieving a smoother batter and better texture.
If using frozen cherries, make sure to thaw and drain them well to avoid excess moisture in the cake. Feel free to experiment with different types of cherries; sweet cherries will yield a different flavor profile compared to tart cherries.
Enjoy your Cherry Coconut Cake with a sprinkle of powdered sugar for an elegant presentation.