

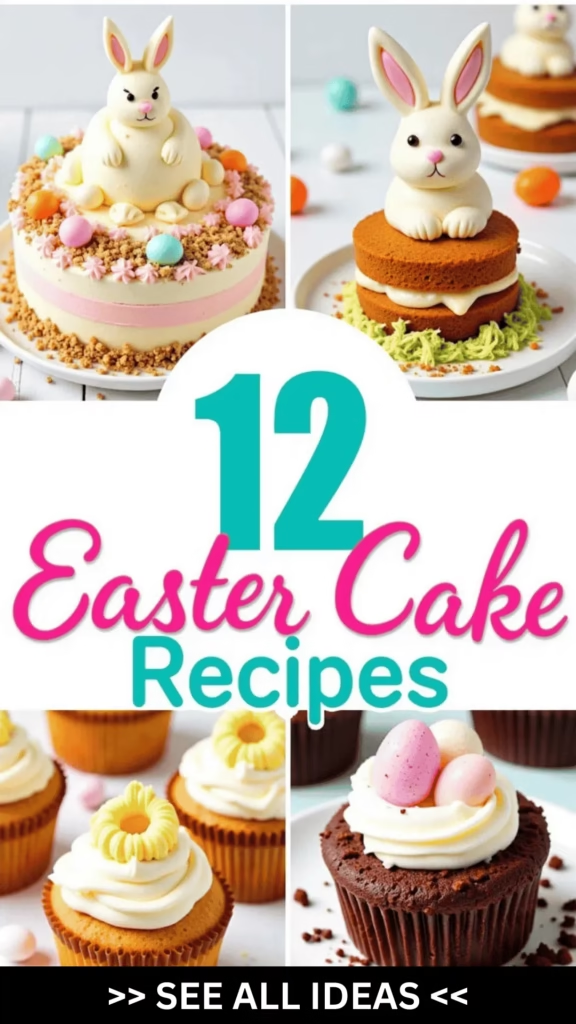
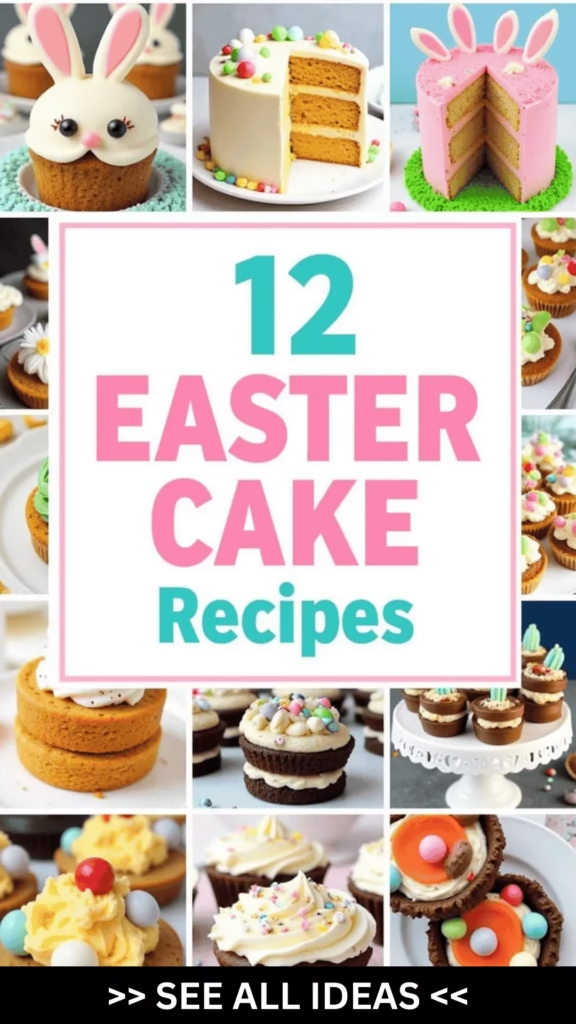
When Easter is just around the corner, the kitchen becomes a canvas filled with laughter and the delightful scent of fresh cakes.
Little hands eagerly craft whimsical treats, like Bunny Carrot Cakes with charming ears or Mini Egg Nest Cakes that are almost too cute to eat.
These recipes not only tickle taste buds but also ignite creativity, making them a perfect holiday activity for kids. But these delightful confections are just the start of the fun.
There’s a colorful world of Easter baking waiting to inspire your celebrations.
Bunny Carrot Cake

Bunny Carrot Cake
Easter is a time for fun, celebration, and of course, delicious treats! One of the perfect ways to engage kids in the festive spirit is by baking a delightful Bunny Carrot Cake. This cake not only delights with its moist texture and sweet flavors but also brings a whimsical element to your Easter table with its bunny-themed decoration.
It’s an easy and fun recipe that kids will enjoy both making and eating. Carrot cakes are known for their rich flavor, often enhanced with warm spices like cinnamon and nutmeg, and this Bunny Carrot Cake is no exception. The addition of a creamy, tangy cream cheese frosting complements the sweetness of the cake perfectly.
The best part? You can decorate the cake to resemble a cute bunny, making it an adorable centerpiece for your Easter celebration. Let’s explore the ingredients and steps needed to create this charming cake for 4-6 people.
Ingredients:
- 2 cups all-purpose flour
- 1 ½ teaspoons baking powder
- 1 teaspoon baking soda
- 1 teaspoon ground cinnamon
- ½ teaspoon ground nutmeg
- ½ teaspoon salt
- 1 cup granulated sugar
- 1 cup light brown sugar, packed
- 1 cup vegetable oil
- 4 large eggs
- 2 teaspoons vanilla extract
- 2 cups grated carrots
- ½ cup crushed pineapple, drained
- ½ cup chopped walnuts (optional)
- 8 ounces cream cheese, softened
- ½ cup unsalted butter, softened
- 2 cups powdered sugar
- 1 teaspoon vanilla extract
- 1-2 tablespoons milk (as needed for consistency)
- Food coloring (optional, for decoration)
- Marshmallows, candies, and sprinkles for decoration
Cooking Instructions:
1. Preheat the Oven: Start by preheating your oven to 350°F (175°C). Grease and flour two 9-inch round cake pans, then set them aside.
2. Mix Dry Ingredients: In a large mixing bowl, whisk together the flour, baking powder, baking soda, cinnamon, nutmeg, and salt. This guarantees that the leavening agents and spices are evenly distributed.
3. Prepare Wet Ingredients: In another bowl, beat together the granulated sugar, brown sugar, and vegetable oil until well combined. Add in the eggs one at a time, mixing well after each addition. Stir in the vanilla extract.
4. Combine and Add Carrots: Gradually add the dry ingredients to the wet ingredients, mixing until just combined. Fold in the grated carrots, crushed pineapple, and chopped walnuts (if using).
5. Bake the Cake: Divide the batter evenly between the prepared cake pans. Smooth the tops with a spatula. Bake in the preheated oven for 25-30 minutes or until a toothpick inserted into the center comes out clean. Let the cakes cool in their pans for 10 minutes before transferring them to a wire rack to cool completely.
6. Make the Cream Cheese Frosting: While the cakes are cooling, prepare the frosting. In a large bowl, beat the softened cream cheese and butter until creamy. Gradually add the powdered sugar and continue to beat until smooth. Stir in the vanilla extract.
If the frosting is too thick, add milk a tablespoon at a time until the desired consistency is reached.
7. Assemble and Decorate: Once the cakes are completely cool, spread a layer of frosting on top of one cake layer. Place the second layer on top and frost the top and sides of the entire cake. Use food coloring to tint a portion of the frosting if desired for decoration.
Use marshmallows, candies, and sprinkles to decorate the cake like a bunny, creating eyes, a nose, and ears.
Extra Tips:
To guarantee your Bunny Carrot Cake is as moist and flavorful as possible, be sure to finely grate the carrots. This helps them blend well into the cake batter, providing moisture without leaving large chunks.
For an extra touch of flavor, you can toast the walnuts before adding them to the batter. When decorating, let the kids get creative with the bunny theme—using different candies and sprinkles can make the cake uniquely fun and festive.
Mini Egg Nest Cake
Mini Egg Nest Cake is a delightful Easter-themed treat that’s perfect for kids and adults alike. This whimsical cake combines a moist chocolate sponge with a rich, creamy frosting, topped with adorable mini egg candies that mimic a bird’s nest. It’s not only a feast for the taste buds but also a joy to create and decorate, making it an excellent activity to engage children in the kitchen during the Easter holidays.
The Mini Egg Nest Cake is designed to serve 4-6 people, making it a great option for small gatherings or family celebrations. The recipe is straightforward, with simple ingredients that are easy to find, guaranteeing that even novice bakers can achieve delicious results. The combination of chocolate and mini eggs provides a perfect balance of flavors and textures, while the playful presentation adds a touch of fun and festivity to any Easter table.
Ingredients:
- 1 cup all-purpose flour
- 1 cup granulated sugar
- 1/2 cup unsweetened cocoa powder
- 1 teaspoon baking powder
- 1/2 teaspoon baking soda
- 1/4 teaspoon salt
- 2 large eggs
- 1/2 cup milk
- 1/4 cup vegetable oil
- 1 teaspoon vanilla extract
- 1/2 cup boiling water
- 1/2 cup unsalted butter, softened
- 2 cups confectioners’ sugar
- 1/4 cup cocoa powder
- 3 tablespoons milk
- 1 teaspoon vanilla extract
- 1 cup mini chocolate eggs (or candy-coated chocolate eggs)
Instructions:
- Preheat the Oven: Start by preheating your oven to 350°F (175°C). Grease and flour a round cake pan to guarantee the cake doesn’t stick.
- Mix Dry Ingredients: In a large mixing bowl, combine the flour, granulated sugar, cocoa powder, baking powder, baking soda, and salt. Whisk together until well blended.
- Add Wet Ingredients: Add the eggs, milk, vegetable oil, and vanilla extract to the dry ingredients. Beat on medium speed until the mixture is smooth and well combined.
- Incorporate Boiling Water: Carefully add the boiling water to the batter, mixing on low speed until the water is fully incorporated and the batter is smooth. The batter will be thin.
- Bake the Cake: Pour the batter into the prepared cake pan and bake for 30-35 minutes, or until a toothpick inserted into the center comes out clean. Allow the cake to cool in the pan for 10 minutes, then transfer it to a wire rack to cool completely.
- Prepare the Frosting: While the cake is cooling, prepare the frosting. In a medium bowl, beat the softened butter until creamy. Gradually add the confectioners’ sugar and cocoa powder, alternating with the milk, and beat until the frosting is smooth and fluffy. Stir in the vanilla extract.
- Frost the Cake: Once the cake is completely cool, spread the frosting evenly over the top and sides of the cake using a spatula.
- Decorate with Mini Eggs: Arrange the mini chocolate eggs on top of the cake in a circular pattern to resemble a bird’s nest. Press them gently into the frosting to secure them in place.
Extra Tips:
To guarantee your cake turns out perfectly, make sure all your ingredients are at room temperature before you start baking, as this helps them combine more smoothly.
If you want to add a bit of extra flair, consider adding a sprinkle of shredded coconut dyed green to resemble grass around the nest. Additionally, if you have leftover batter, you can bake a few cupcakes alongside the cake, which can also be decorated with mini eggs for individual servings.
Chick Cupcakes

Easter is a festive time that calls for adorable and delicious treats, and Chick Cupcakes are the perfect addition to any springtime celebration. These cupcakes are as fun to make as they’re to eat, making them an excellent activity for kids.
With their cute, fluffy appearance and delightful flavor, Chick Cupcakes are sure to be a hit at Easter gatherings or any spring-themed party. Chick Cupcakes aren’t only visually appealing but also offer a great opportunity for children to get creative in the kitchen. They can help mix the batter, decorate with frosting, and add the finishing touches to transform regular cupcakes into charming little chicks.
This recipe yields enough cupcakes to serve 4-6 people, making it ideal for a small family or group of friends.
Ingredients for Chick Cupcakes (Serves 4-6):
- 1 cup all-purpose flour
- 1/2 cup granulated sugar
- 1/4 cup unsalted butter, softened
- 1/2 cup milk
- 1 large egg
- 1 teaspoon vanilla extract
- 1 teaspoon baking powder
- 1/4 teaspoon salt
- Yellow food coloring
- 1 cup vanilla frosting
- 1/2 cup shredded coconut
- Mini chocolate chips
- Orange candy-coated chocolates or jelly beans
Instructions:
- Preheat and Prepare: Preheat your oven to 350°F (175°C) and line a muffin tin with cupcake liners to prevent sticking and guarantee easy removal after baking.
- Mix the Batter: In a large mixing bowl, cream together the softened butter and sugar until light and fluffy. Beat in the egg and vanilla extract until well combined.
- Combine Dry Ingredients: In a separate bowl, whisk together the flour, baking powder, and salt. Gradually add this dry mixture to the wet ingredients, alternating with milk, beginning and ending with the flour mixture. Mix until just combined.
- Add Food Coloring: Stir in a few drops of yellow food coloring until the batter reaches your desired shade of yellow, reminiscent of a chick’s feathers.
- Bake the Cupcakes: Spoon the batter into the lined muffin tin, filling each cup about two-thirds full. Bake in the preheated oven for 18-20 minutes, or until a toothpick inserted into the center comes out clean. Allow the cupcakes to cool completely on a wire rack.
- Prepare the Frosting: While the cupcakes cool, tint the vanilla frosting with yellow food coloring. Stir until the color is even.
- Decorate: Once the cupcakes are cool, spread a layer of yellow frosting on each one. Sprinkle shredded coconut over the frosting to give the appearance of fluffy feathers.
- Add Features: Use mini chocolate chips to create eyes on each cupcake. Place an orange candy-coated chocolate or jelly bean as the beak, pressing gently into the frosting to secure.
Extra Tips: For extra fun, involve your kids in the decoration process; they can practice their creativity by arranging the eyes and beaks in different expressions.
If you prefer less coconut, you can omit it entirely or reduce the amount. Additionally, if you want to make the cupcakes extra moist, consider adding a tablespoon of sour cream to the batter. Finally, store any leftover cupcakes in an airtight container to keep them fresh for up to two days.
Lamb-Shaped Cake
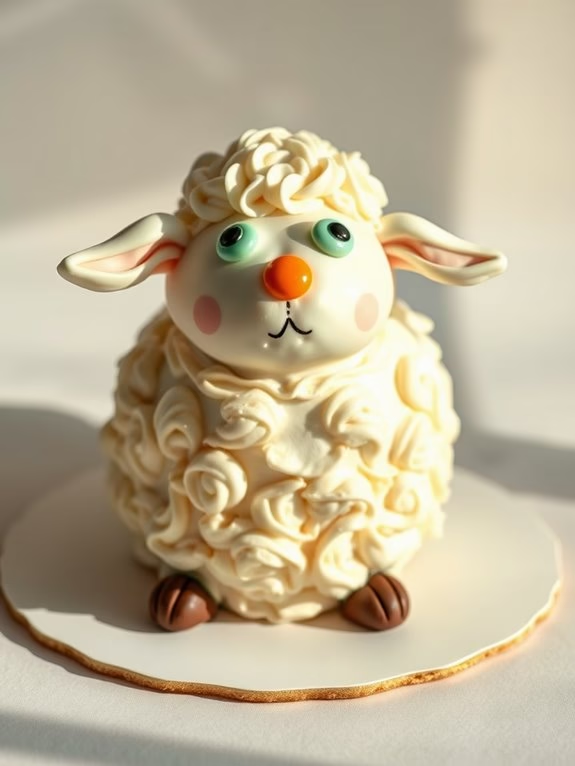
Lamb-Shaped Cake
Creating a lamb-shaped cake is a delightful and festive way to celebrate Easter with kids. This charming cake makes for a great centerpiece at your holiday gathering and is sure to bring smiles to everyone’s faces. The lamb shape is achieved using a special mold, which can be found at most baking supply stores. With a combination of a moist and fluffy cake, a creamy frosting, and some creative decoration, this cake is both fun to make and delicious to eat.
The lamb-shaped cake is a wonderful project for kids to get involved in, from mixing the batter to decorating the finished product. Not only is this cake a treat for the taste buds, but it also serves as a fun and educational baking activity. By following the steps below, you and your little ones can create a memorable dessert that captures the joyful spirit of Easter.
Ingredients for 4-6 servings:
- 2 ½ cups all-purpose flour
- 2 ½ teaspoons baking powder
- ½ teaspoon salt
- 1 ½ cups granulated sugar
- ¾ cup unsalted butter, softened
- 4 large eggs
- 1 teaspoon vanilla extract
- 1 cup milk
- 2 cups confectioners’ sugar
- ½ cup unsalted butter, softened (for frosting)
- 2 tablespoons milk (for frosting)
- 1 teaspoon vanilla extract (for frosting)
- Assorted candies for decoration (e.g., jelly beans, gumdrops)
- Food coloring (optional)
Cooking Instructions:
- Preheat and Prepare: Preheat your oven to 350°F (175°C). Grease and flour a lamb-shaped cake mold to guarantee that the cake doesn’t stick.
- Mix Dry Ingredients: In a medium bowl, whisk together the flour, baking powder, and salt. Set aside for later use.
- Cream Butter and Sugar: In a large mixing bowl, cream together the softened butter and granulated sugar until light and fluffy, about 3-4 minutes.
- Add Eggs and Vanilla: Beat in the eggs one at a time, mixing well after each addition. Stir in the vanilla extract for added flavor.
- Combine Dry and Wet Ingredients: Gradually add the dry ingredient mixture to the creamed mixture, alternating with the milk. Begin and end with the dry ingredients. Mix until just combined.
- Pour and Bake: Carefully pour the batter into the prepared lamb-shaped mold. Gently tap the mold on the counter to remove any air bubbles. Bake in the preheated oven for 45-50 minutes, or until a toothpick inserted into the center comes out clean.
- Cool and Remove: Allow the cake to cool in the mold for about 15 minutes before gently removing it. Let it cool completely on a wire rack before frosting.
- Make Frosting: In a medium bowl, beat together the softened butter, confectioners’ sugar, milk, and vanilla extract until smooth and creamy. If desired, add a few drops of food coloring to create pastel shades.
- Decorate the Cake: Once the cake is cool, use a spatula to spread the frosting evenly over the entire cake. Use assorted candies to create the lamb’s eyes, nose, and any additional decorative features.
Extra Tips:
When making a lamb-shaped cake, it’s important to grease and flour the mold thoroughly to prevent sticking. If you don’t have a lamb mold, you can use a regular cake pan and cut the cake into a lamb shape after it’s baked.
Be sure to let the cake cool completely before frosting to avoid melting the frosting. For added fun, involve the kids in the decoration process by letting them choose and place the candies.
This cake is best enjoyed fresh, but it can be stored in an airtight container for up to 3 days.
Speckled Egg Cake
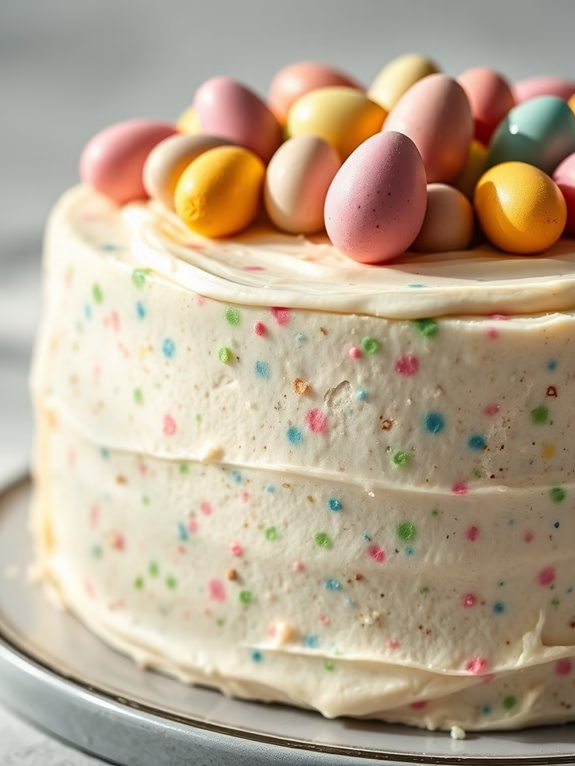
Speckled Egg Cake is a delightful and visually enchanting dessert that’s perfect for Easter celebrations with the kids. This cake is designed to resemble a speckled egg, making it not only a treat for the taste buds but also a feast for the eyes. The cake itself is soft and moist, layered with a creamy frosting that ties all the flavors together. The speckled effect is achieved using a fun technique with edible food coloring, adding a whimsical touch that kids will adore.
This recipe for Speckled Egg Cake is designed to serve 4-6 people, making it ideal for a small family gathering or a festive Easter brunch. Kids will enjoy both the process of making the cake and the excitement of seeing the final speckled creation. The cake can be personalized with your favorite colors and flavors, guaranteeing it becomes a cherished Easter tradition in your household.
Ingredients
- 2 cups all-purpose flour
- 1 ½ teaspoons baking powder
- ½ teaspoon baking soda
- ¼ teaspoon salt
- 1 cup unsalted butter, softened
- 1 cup granulated sugar
- 3 large eggs
- 1 teaspoon vanilla extract
- ¾ cup buttermilk
- 2 cups powdered sugar
- ½ cup unsalted butter, softened (for frosting)
- 2 tablespoons heavy cream (for frosting)
- ¼ teaspoon vanilla extract (for frosting)
- Edible food coloring (blue, green, pink, or any desired color)
- Chocolate mini eggs or candies for topping
Cooking Instructions
- Preheat and Prepare Pans: Preheat your oven to 350°F (175°C). Grease and flour two 8-inch round cake pans and set aside.
- Combine Dry Ingredients: In a medium bowl, whisk together the flour, baking powder, baking soda, and salt. Set this dry mixture aside.
- Cream Butter and Sugar: In a large mixing bowl, beat the softened butter and granulated sugar together on medium speed until light and fluffy, about 3-4 minutes.
- Add Eggs and Vanilla: Add the eggs one at a time, beating well after each addition. Stir in the vanilla extract.
- Mix Wet and Dry Ingredients: Gradually add the dry ingredients to the creamed mixture alternately with the buttermilk, beginning and ending with the dry ingredients. Mix until just combined.
- Bake the Cake: Divide the batter evenly between the prepared cake pans. Bake for 25-30 minutes, or until a toothpick inserted into the center comes out clean. Let the cakes cool in the pans for 10 minutes, then turn them out onto wire racks to cool completely.
- Prepare the Frosting: In a medium bowl, beat together the softened butter, powdered sugar, heavy cream, and vanilla extract until smooth and creamy.
- Frost the Cake: Once the cakes are completely cool, spread a layer of frosting on top of one cake. Place the second cake on top and cover the entire cake with a thin layer of frosting, known as the crumb coat. Chill for 15 minutes, then apply a final coat of frosting.
- Create Speckled Effect: In a small bowl, mix a few drops of food coloring with a little water. Dip a clean paintbrush into the mixture and flick it onto the cake to create a speckled effect.
- Decorate with Mini Eggs: Arrange chocolate mini eggs or candies on top of the cake to enhance the Easter theme.
Extra Tips
To achieve an even more vibrant speckled effect, experiment with different colors and layer them for a multi-dimensional look. Confirm that the cake is completely cool before applying the frosting to prevent it from melting.
If you’re baking with kids, let them have fun with the speckling technique and decorating the cake with their favorite candies. For added flavor, you can incorporate citrus zest into the batter or frosting, providing a revitalizing contrast to the sweet treats.
Rainbow Peeps Cake
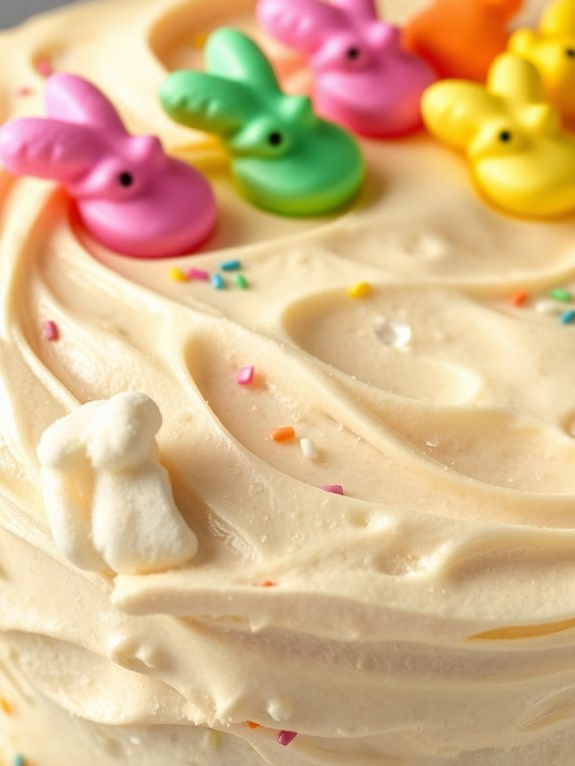
Rainbow Peeps Cake is a whimsical and colorful Easter treat that kids will absolutely love. This cake combines the soft, fluffy texture of a traditional cake with the vibrant colors and sweet flavors of marshmallow Peeps. It’s the perfect centerpiece for a festive Easter celebration, and children will enjoy both helping to make and eating it.
The Rainbow Peeps Cake isn’t only visually appealing but also offers a delightful combination of flavors and textures, making it a surefire hit for any family gathering or Easter party.
To make this special cake, you’ll start with a basic vanilla cake base, which you can make from scratch or from a box mix for convenience. The key to this cake’s charm is the creative decoration using Peeps marshmallows, which come in a spectrum of colors and add both a fun design and a sweet, marshmallowy taste.
The cake is topped with a layer of smooth, creamy frosting, providing the perfect canvas to arrange your rainbow of Peeps. This recipe serves 4-6 people, making it ideal for a small celebration or gathering.
Ingredients
- 1 box of vanilla cake mix (or homemade vanilla cake recipe)
- 3 large eggs
- 1 cup of water
- 1/3 cup of vegetable oil
- 1 tub of vanilla frosting (or homemade frosting)
- 1 pack of assorted color Peeps marshmallows
- Food coloring (optional, for coloring frosting)
- Sprinkles (optional, for additional decoration)
Cooking Instructions
1. Prepare the Cake Batter:
Preheat your oven to 350°F (175°C). In a large mixing bowl, combine the cake mix, eggs, water, and vegetable oil. Mix until the batter is smooth and lump-free.
2. Bake the Cake:
Grease and flour a 9×13-inch baking pan. Pour the prepared batter into the pan, spreading it evenly. Place the pan in the preheated oven and bake for 25-30 minutes, or until a toothpick inserted into the center comes out clean. Allow the cake to cool completely.
3. Frost the Cake:
Once the cake has cooled, spread a generous layer of vanilla frosting over the top. If desired, you can tint the frosting with food coloring to match the colors of the Peeps for an added visual effect.
4. Decorate with Peeps:
Arrange the Peeps marshmallows on top of the frosting, creating a rainbow pattern. You can alternate colors or organize them in groups, depending on your preference. Gently press each Peep into the frosting to secure it in place.
5. Add Sprinkles:
If using, sprinkle your choice of sprinkles over the top of the cake to add an extra layer of fun and color.
Extra Tips
When decorating the Rainbow Peeps Cake, involve the kids in arranging the Peeps and adding the sprinkles. It’s a great way to engage them in the kitchen and let them express their creativity.
For a more personalized touch, you can use a variety of Peep shapes and colors to create unique designs. If you’re making this cake ahead of time, store it in a cool place to prevent the Peeps from melting or becoming too sticky.
Enjoy your colorful creation as a delightful Easter dessert!
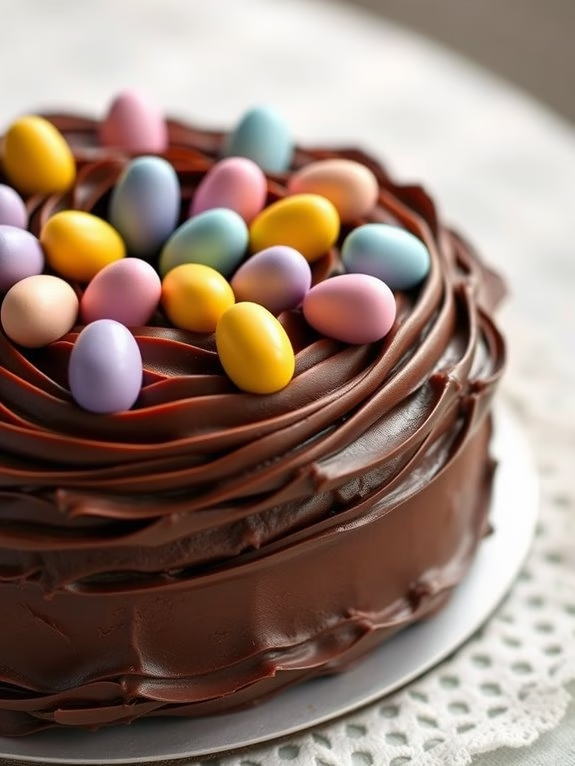
Chocolate Egg Hunt Cake
Chocolate Egg Hunt Cake
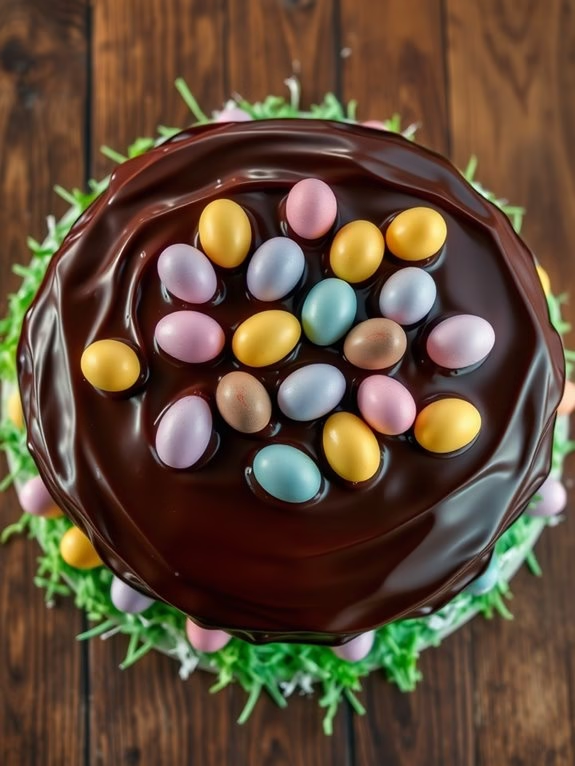
Easter is a time for family fun, and what better way to celebrate than with a delightful Chocolate Egg Hunt Cake? This whimsical cake is perfect for kids, offering both a delicious treat and a playful activity. The cake is rich and moist, with layers of chocolate goodness that will delight both children and adults alike. Topped with a creamy chocolate frosting and adorned with colorful mini chocolate eggs, it invites little ones to initiate their very own egg hunt right there on the cake!
Creating a Chocolate Egg Hunt Cake is a fantastic way to get children involved in the kitchen. With simple, easy-to-follow steps, kids can help with mixing, decorating, and of course, the all-important task of hiding the mini eggs. This recipe is designed for a serving size of 4-6 people, making it perfect for a small family gathering or an Easter playdate. Gather your ingredients, follow the steps, and watch as your chocolate egg hunt cake comes to life!
Ingredients:
- 1 and 1/2 cups all-purpose flour
- 1 cup granulated sugar
- 1/2 cup unsweetened cocoa powder
- 1 teaspoon baking soda
- 1/2 teaspoon salt
- 1 cup water
- 1/3 cup vegetable oil
- 1 tablespoon white vinegar
- 1 teaspoon vanilla extract
- 1 cup heavy cream
- 2 cups semi-sweet chocolate chips
- 1 bag of mini chocolate eggs (for decorating)
- Optional: green-tinted coconut flakes or green sprinkles for “grass”
Instructions:
- Preheat and Prepare: Preheat your oven to 350°F (175°C). Grease and flour an 8-inch round cake pan to make sure the cake doesn’t stick.
- Mix Dry Ingredients: In a large bowl, combine the flour, sugar, cocoa powder, baking soda, and salt. Mix thoroughly to make sure even distribution of the dry ingredients.
- Combine Wet Ingredients: In a separate bowl, mix the water, vegetable oil, vinegar, and vanilla extract. Stir well until all the liquid ingredients are combined.
- Create Cake Batter: Slowly add the wet ingredients to the dry ingredients, stirring constantly to form a smooth batter. Make sure there are no lumps remaining.
- Bake the Cake: Pour the batter into the prepared cake pan. Bake in the preheated oven for 30-35 minutes, or until a toothpick inserted into the center of the cake comes out clean.
- Make the Chocolate Frosting: While the cake is baking, prepare the frosting by heating the heavy cream in a saucepan until it begins to simmer. Remove from heat and pour over the chocolate chips in a heatproof bowl. Let it sit for 5 minutes, then whisk until smooth and glossy.
- Cool and Frost: Once the cake is baked, allow it to cool in the pan for 10 minutes before transferring it to a wire rack to cool completely. Spread the chocolate frosting generously over the top and sides of the cooled cake.
- Decorate: Scatter the mini chocolate eggs across the top of the cake, pressing them gently into the frosting. For added fun, you can sprinkle green-tinted coconut flakes or sprinkles to create a grassy effect.
Extra Tips:
- Make sure all ingredients are at room temperature before starting, especially the eggs and butter, to make sure even mixing.
- If you want to make it a bit healthier, you can substitute applesauce for half of the oil.
- When decorating, involve the kids by letting them choose where to place the eggs and sprinkle the “grass.”
- Store the cake in an airtight container to keep it fresh for up to 3 days, though it’s unlikely to last that long once the kids discover it!
Flower Garden Cake
Flower Garden Cake
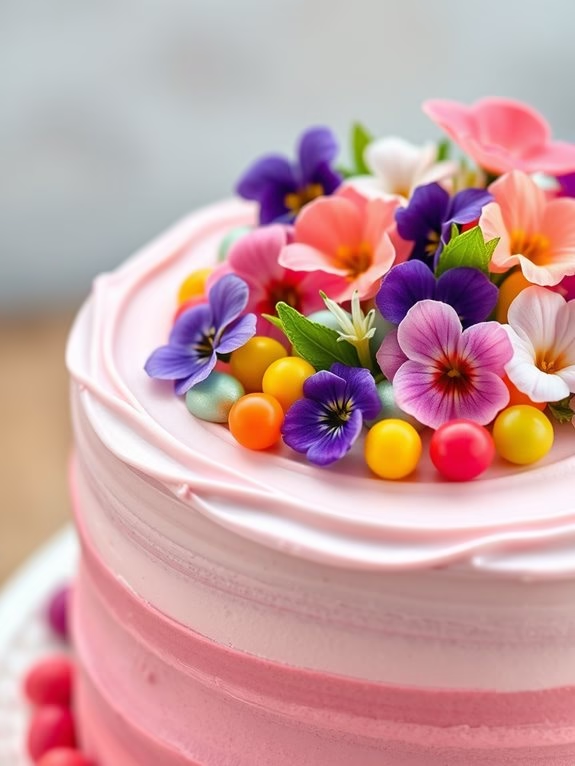
Easter is the perfect time to indulge in delightful treats that capture the essence of spring. What better way to celebrate than with a Flower Garden Cake? This enchanting cake isn’t only visually stunning but also a delicious treat that kids will love to create and eat. With vibrant colors and charming edible flowers, the Flower Garden Cake is a fun and interactive way to introduce kids to the joys of baking. This cake is designed to be simple enough for young bakers to follow, yet impressive enough to be the centerpiece of your Easter celebration.
Creating a Flower Garden Cake involves layering moist cake with a creamy frosting and decorating it with an array of colorful edible flowers and candies. The beauty of this cake lies in its creativity, allowing kids to explore their artistic side while experimenting with different toppings and designs. This recipe is perfect for serving 4-6 people, making it an ideal choice for a family-friendly Easter gathering.
Ingredients:
- 1 box of vanilla cake mix
- 1 cup water
- 1/3 cup vegetable oil
- 3 large eggs
- 1 cup unsalted butter, softened
- 4 cups powdered sugar
- 1 teaspoon vanilla extract
- 2-3 tablespoons milk
- Assorted food coloring (pastel shades preferred)
- Edible flowers (such as pansies or violets)
- Assorted candies (like jelly beans or candy eggs)
Instructions:
1. Prepare the Cake Batter:
Preheat your oven to 350°F (175°C). Grease and flour two 8-inch round cake pans. In a large mixing bowl, combine the vanilla cake mix, water, vegetable oil, and eggs. Use an electric mixer to beat the mixture on medium speed for about 2 minutes until the batter is smooth and well combined.
2. Bake the Cakes:
Divide the batter evenly between the prepared cake pans. Bake in the preheated oven for 25-30 minutes or until a toothpick inserted into the center of the cakes comes out clean. Remove from the oven and let the cakes cool in the pans for about 10 minutes, then transfer them to a wire rack to cool completely.
3. Make the Frosting:
In a large bowl, beat the softened butter until creamy. Gradually add the powdered sugar, one cup at a time, mixing well after each addition. Stir in the vanilla extract and 2 tablespoons of milk. If the frosting is too thick, add an additional tablespoon of milk until you reach the desired consistency.
4. Color the Frosting:
Divide the frosting into separate bowls, one for each color you wish to use. Add a few drops of food coloring to each bowl and mix until you achieve your desired pastel shades.
5. Assemble the Cake:
Place one cake layer on a serving platter. Spread a layer of frosting over the top, then place the second cake layer on top. Frost the top and sides of the cake with a thin layer of frosting to create a “crumb coat.” Chill the cake in the refrigerator for about 20 minutes to set the crumb coat.
6. Decorate the Cake:
Apply a final layer of frosting to the cake, making certain it’s smooth and even. Arrange the edible flowers and candies on top of the cake to create a beautiful flower garden effect. Let the kids get creative with the placement and design.
7. Serve:
Once decorated, the Flower Garden Cake is ready to serve. Slice and enjoy with family and friends!
Extra Tips:
When working with edible flowers, always verify they’re pesticide-free and safe for consumption. You can find edible flowers at specialty grocery stores or online.
For an extra special touch, try using different piping tips to create textured grass or flower designs with the frosting. Encourage kids to experiment with different color combinations and candy arrangements to personalize their Flower Garden Cake. Enjoy the process and remember that the fun is in the creativity!
Marshmallow Bunny Cake
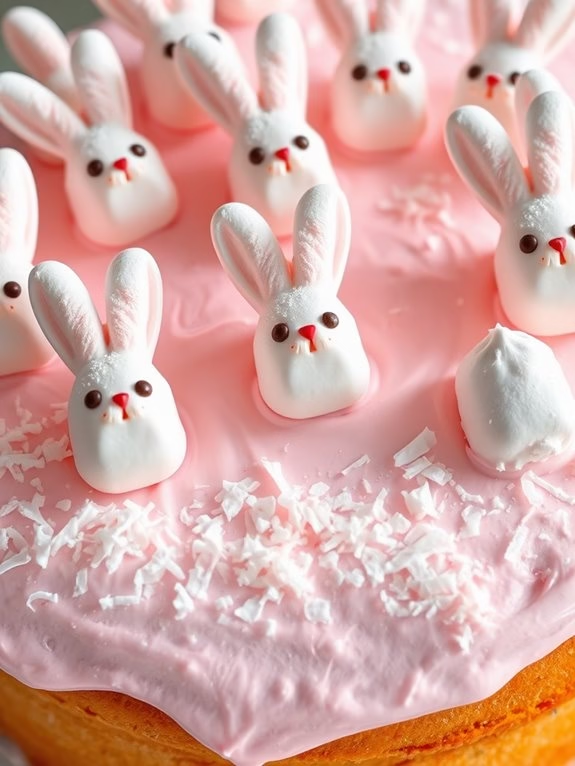
Marshmallow Bunny Cake is a delightful and whimsical dessert that’s perfect for celebrating Easter with kids. This adorable cake isn’t only fun to make, but it also brings a touch of creativity and imagination to your Easter festivities. The fluffy marshmallow bunnies sitting atop a moist and delicious cake are sure to be a hit with children and adults alike.
Creating this cake is a great way to spend quality time with your kids in the kitchen, allowing them to express their creativity while learning some basic baking skills.
The Marshmallow Bunny Cake features a simple vanilla cake base, generously topped with a smooth, creamy frosting. The star of the show, however, is the array of marshmallow bunnies that adorn the cake, making it a cute and festive centerpiece for your Easter table. This recipe serves 4-6 people, making it ideal for small family gatherings or Easter parties.
Ingredients:
- 1 ½ cups all-purpose flour
- 1 teaspoon baking powder
- ½ teaspoon baking soda
- ¼ teaspoon salt
- ½ cup unsalted butter, softened
- 1 cup granulated sugar
- 2 large eggs
- 1 teaspoon vanilla extract
- ½ cup buttermilk
- 1 cup marshmallow creme
- 1 cup shredded sweetened coconut (optional)
- 24 large marshmallows
- Pink food coloring
- 12 small candy eyes
- ¼ cup mini chocolate chips
- ¼ cup almond slivers
Cooking Instructions:
- Preheat the Oven: Start by preheating your oven to 350°F (175°C). Grease and flour a 9-inch round cake pan to guarantee the cake doesn’t stick.
- Mix Dry Ingredients: In a medium-sized bowl, whisk together the flour, baking powder, baking soda, and salt. Set aside.
- Cream Butter and Sugar: In a large bowl, use an electric mixer to cream the softened butter and sugar until light and fluffy, about 3 minutes.
- Add Eggs and Vanilla: Beat in the eggs one at a time, making sure each egg is fully incorporated before adding the next. Mix in the vanilla extract.
- Combine Wet and Dry Ingredients: Gradually add the dry ingredients to the butter mixture, alternating with the buttermilk. Begin and end with the dry ingredients. Mix until just combined.
- Bake the Cake: Pour the batter into the prepared cake pan and smooth the top with a spatula. Bake for 25-30 minutes or until a toothpick inserted into the center comes out clean. Let the cake cool in the pan for 10 minutes, then transfer it to a wire rack to cool completely.
- Prepare Marshmallow Bunnies: While the cake cools, tint the marshmallow creme with pink food coloring. Cut each large marshmallow in half diagonally to create bunny ears. Spread a little pink marshmallow creme on each ear and attach candy eyes and mini chocolate chips for noses.
- Assemble the Cake: Once the cake is completely cool, spread the remaining marshmallow creme over the top and sides of the cake. Sprinkle shredded coconut over the top for a fluffy “bunny fur” effect, if using.
- Decorate with Bunnies: Arrange the marshmallow bunnies on top of the cake, pressing gently to adhere them to the marshmallow creme.
Extra Tips:
When creating the Marshmallow Bunny Cake, make sure to let the cake cool completely before adding the marshmallow creme and decorations to prevent melting.
If preferred, you can use colored shredded coconut to add more visual interest to the cake. For added fun, involve your kids in decorating the cake; they can create different expressions on the marshmallow bunnies using the candy eyes and mini chocolate chips.
Enjoy this festive and adorable cake as a sweet ending to your Easter celebrations!
Pastel Layer Cake
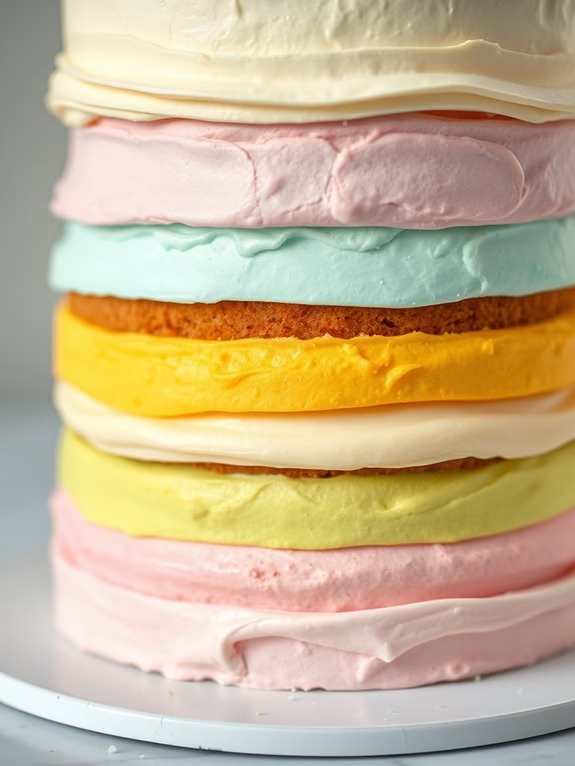
Pastel Layer Cake
Easter is a wonderful time to gather with family and celebrate with delicious treats, and what could be more festive than a Pastel Layer Cake? This delightful cake isn’t only a feast for the eyes with its soft pastel hues but also a treat for the taste buds. Perfect for involving kids in the kitchen, this cake is an excellent way to teach them about baking while having some fun with colors.
The layers of this cake are light and fluffy, with a creamy frosting that ties everything together, making it a perfect centerpiece for your Easter celebrations. This pastel layer cake is designed to serve 4-6 people and is an ideal project for a weekend baking session. Kids will love watching the cake layers come to life as they mix different food colorings to create the pastel shades.
The recipe calls for basic cake ingredients along with a selection of food coloring to achieve the desired pastel effect. By following this recipe, you can create a stunning and delicious cake that will surely impress your family and friends.
Ingredients:
- 2 cups all-purpose flour
- 1 ½ cups granulated sugar
- 3 ½ tsp baking powder
- ½ tsp salt
- 4 large eggs
- 1 cup whole milk
- ½ cup unsalted butter, melted
- 2 tsp vanilla extract
- Food coloring (pink, blue, yellow, green)
- 3 cups powdered sugar
- 1 cup unsalted butter, softened
- 2 tbsp heavy cream
- 2 tsp vanilla extract
Instructions:
- Preheat and Prepare Pans: Preheat your oven to 350°F (175°C). Grease and line four 8-inch round cake pans with parchment paper. This will guarantee easy removal of the cake layers after baking.
- Combine Dry Ingredients: In a large mixing bowl, sift together the flour, granulated sugar, baking powder, and salt. Mix well to combine these dry ingredients.
- Mix Wet Ingredients: In a separate bowl, whisk together the eggs, milk, melted butter, and vanilla extract until well blended. This mixture will add moisture and flavor to your cake.
- Create the Batter: Gradually add the wet ingredients to the dry ingredients, mixing until you have a smooth batter. Be careful not to over-mix as this can make the cake dense.
- Color the Batter: Divide the batter evenly into four separate bowls. Add a few drops of pink food coloring to one bowl, blue to another, yellow to the third, and green to the last. Stir each bowl gently until the color is evenly distributed.
- Bake the Layers: Pour each colored batter into the prepared cake pans. Bake in the preheated oven for 20-25 minutes or until a toothpick inserted in the center comes out clean. Allow the cakes to cool in the pans for 10 minutes before transferring them to a wire rack to cool completely.
- Prepare the Frosting: In a large bowl, beat the softened butter until creamy. Gradually add the powdered sugar, heavy cream, and vanilla extract. Beat until the frosting is light and fluffy.
- Assemble the Cake: Once the cake layers are completely cool, place the first layer on a serving plate and spread a layer of frosting over it. Continue stacking the layers, alternating colors, and spreading frosting between each layer.
- Frost the Cake: Use the remaining frosting to coat the outside of the cake. Smooth the frosting with a spatula for a clean finish, or create decorative swirls if desired.
Extra Tips:
When working with food coloring, start with a small amount and gradually add more to achieve the desired pastel shade. It’s easier to add more coloring than to lighten a color that’s too dark.
Make sure your cake layers are completely cool before frosting to prevent the frosting from melting. This cake can be made a day in advance; just keep it covered in the refrigerator and allow it to come to room temperature before serving.
Let the kids get creative with the colors and design; it’s all about having fun and making memories!
Carrot Patch Cake
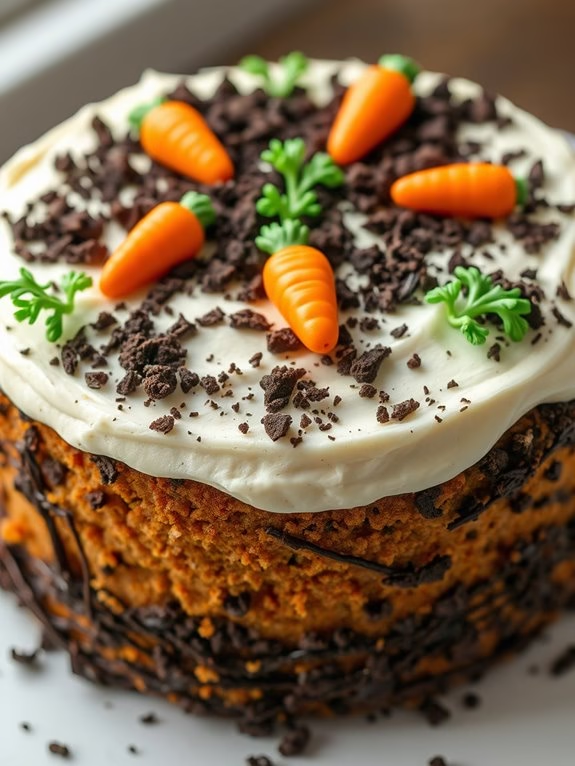
Carrot Patch Cake is a delightful Easter treat that brings the charm of a garden to your dessert table. This cake isn’t only visually appealing with its vibrant decorations but also deliciously moist and flavorful, thanks to the incorporation of carrots and spices. Perfect for kids, this cake can be a fun baking project that ends with a sweet, satisfying reward. The concept of turning a classic carrot cake into an exciting carrot patch is sure to capture the imagination of children, making it an ideal dessert for Easter celebrations.
The Carrot Patch Cake is designed to serve 4-6 people, making it a great choice for small family gatherings or playdates during the Easter holiday. The recipe involves baking a moist carrot cake, topping it with creamy frosting, and decorating it to resemble a whimsical carrot patch. This creative approach not only enhances the presentation but also adds an element of fun for kids to participate in.
With the right ingredients and a little creativity, you can transform a simple cake into a festive masterpiece, complete with edible decorations that mimic a garden setting.
Ingredients for Carrot Patch Cake (Serves 4-6)
- 1 cup all-purpose flour
- 1 teaspoon baking powder
- 1/2 teaspoon baking soda
- 1/2 teaspoon ground cinnamon
- 1/4 teaspoon salt
- 1/2 cup granulated sugar
- 1/2 cup brown sugar, packed
- 2 large eggs
- 1/2 cup vegetable oil
- 1 teaspoon vanilla extract
- 1 1/2 cups grated carrots
- 1/2 cup crushed pineapple, drained
- 1/2 cup chopped walnuts (optional)
- 1 cup cream cheese frosting
- 1/2 cup crushed chocolate cookies (for dirt)
- 12-15 candy carrots or carrot-shaped candies
Cooking Instructions
- Preheat the Oven: Preheat your oven to 350°F (175°C). Grease and flour a round 9-inch cake pan or line it with parchment paper to prevent sticking.
- Mix Dry Ingredients: In a medium bowl, whisk together the flour, baking powder, baking soda, cinnamon, and salt. Set aside.
- Combine Wet Ingredients: In a large mixing bowl, beat together the granulated sugar, brown sugar, and eggs until well combined. Add in the vegetable oil and vanilla extract, mixing until smooth.
- Incorporate Carrots and Pineapple: Stir in the grated carrots and crushed pineapple into the wet mixture until evenly distributed.
- Combine Wet and Dry Ingredients: Gradually add the dry ingredients to the wet mixture, stirring until just combined. Fold in the chopped walnuts if using.
- Bake the Cake: Pour the batter into the prepared cake pan. Smooth the top with a spatula and bake for 30-35 minutes, or until a toothpick inserted into the center comes out clean.
- Cool and Frost: Allow the cake to cool in the pan for about 10 minutes, then transfer it to a wire rack to cool completely. Once cooled, spread the cream cheese frosting evenly over the top and sides of the cake.
- Decorate the Cake: Sprinkle the crushed chocolate cookies over the top of the frosted cake to create the appearance of dirt. Arrange the candy carrots on top, pressing them gently into the frosting to resemble a carrot patch.
Extra Tips
For a richer flavor, consider toasting the walnuts before adding them to the cake batter. If you want to make the cake more colorful, you can add a few drops of food coloring to the cream cheese frosting.
When crushing the chocolate cookies, use a food processor for a finer texture that resembles garden soil. Finally, make sure the cake is completely cool before frosting; otherwise, the frosting may melt and not adhere properly.
This recipe is highly adaptable, so feel free to get creative with decorations to make your Carrot Patch Cake uniquely festive!
Spring Confetti Cake

Spring Confetti Cake is a delightful and colorful treat that’s perfect for celebrating Easter with kids. This cake isn’t only visually appealing with its vibrant sprinkles, but it also offers a light, fluffy texture that’s bound to please young taste buds. Baking this cake can be a fun and interactive activity for children, allowing them to get involved in the kitchen by measuring ingredients, mixing the batter, and decorating the finished product.
The magic of the Spring Confetti Cake lies in its simplicity and the joy it brings once served. The cake is made from a basic vanilla batter, enhanced with a generous amount of rainbow sprinkles. This not only adds a burst of color but also a playful element that kids adore. Topped with a creamy vanilla frosting, the cake becomes a canvas for further decoration, allowing kids to express their creativity with additional sprinkles, candies, or any other Easter-themed decorations they desire.
Ingredients (Serves 4-6):
- 2 ½ cups all-purpose flour
- 2 ½ teaspoons baking powder
- ½ teaspoon salt
- ¾ cup unsalted butter, softened
- 1 ¾ cups granulated sugar
- 3 large eggs
- 1 tablespoon vanilla extract
- 1 cup whole milk
- ½ cup rainbow sprinkles
- 1 ½ cups vanilla frosting
- Extra sprinkles for decoration
Cooking Instructions:
- Preheat the Oven: Begin by preheating your oven to 350°F (175°C). Grease and flour two 8-inch round cake pans to prevent the cake from sticking.
- Mix Dry Ingredients: In a medium bowl, whisk together the flour, baking powder, and salt. This guarantees the baking powder is evenly distributed throughout the flour.
- Cream Butter and Sugar: In a large mixing bowl, cream the softened butter and sugar together using an electric mixer on medium speed until the mixture is light and fluffy. This should take about 3-4 minutes.
- Add Eggs and Vanilla: Beat in the eggs one at a time, confirming each egg is fully incorporated before adding the next. Mix in the vanilla extract.
- Combine Wet and Dry Ingredients: Gradually add the dry ingredients to the creamed mixture, alternating with the milk. Begin and end with the flour mixture, mixing just until combined. Be careful not to overmix, as this can make the cake dense.
- Fold in Sprinkles: Gently fold in the rainbow sprinkles with a spatula. Confirm they’re evenly distributed without overmixing to prevent the colors from bleeding.
- Bake the Cakes: Divide the batter evenly between the prepared cake pans. Smooth the tops with a spatula and bake in the preheated oven for 25-30 minutes, or until a toothpick inserted into the center comes out clean.
- Cool the Cakes: Let the cakes cool in the pans for about 10 minutes before transferring them to a wire rack to cool completely.
- Frost and Decorate: Once the cakes are completely cool, spread a layer of vanilla frosting on top of one cake. Place the second cake on top and frost the top and sides. Finish by decorating with extra sprinkles.
Extra Tips:
For the best results, confirm that all ingredients are at room temperature before starting. This helps in achieving a smoother batter and a more even bake.
If baking with kids, pre-measure the ingredients to make the process smoother and more enjoyable for them. Encourage them to be creative with the decoration; the more colorful, the better!
If you prefer a taller cake, you can double the recipe and use three cake pans.
Finally, store any leftovers in an airtight container to keep the cake fresh. Enjoy your Spring Confetti Cake with a glass of milk or a scoop of vanilla ice cream for a truly delightful Easter treat!