
There’s something truly magical about a pound cake, isn’t there?
The way it fills the kitchen with that buttery aroma is just the beginning.
Picture a Lemon-Lavender Pound Cake with its floral and citrusy dance or the indulgent Chocolate-Espresso Pound Cake, ideal for a rainy day.
Each recipe transforms simple ingredients into something special.
Let’s explore the secret ingredient that makes each of these cakes irresistibly moist.

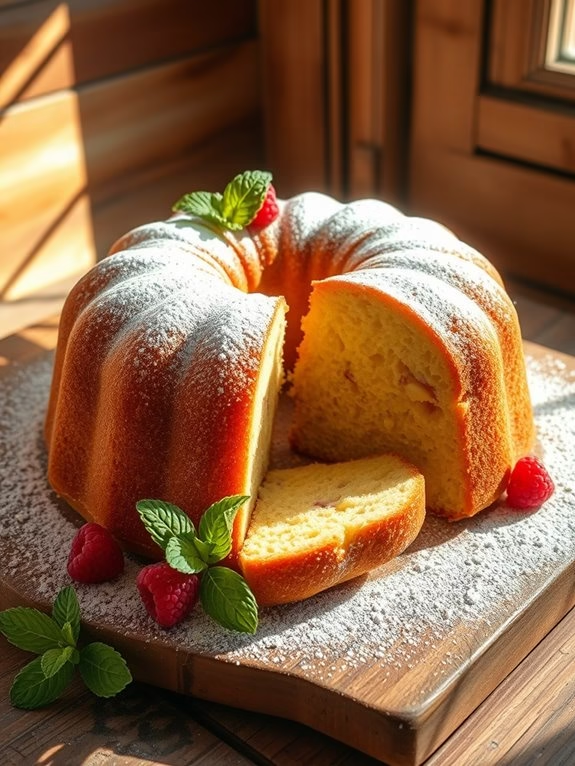
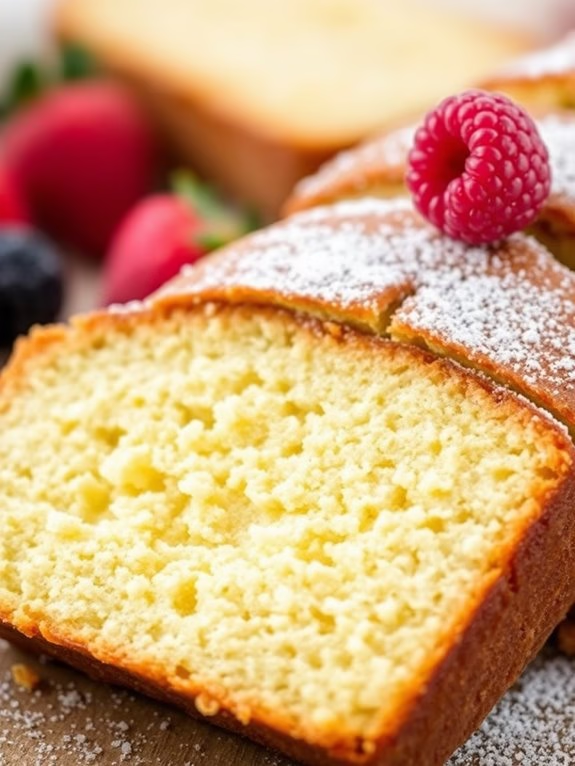
Classic Vanilla Pound Cake
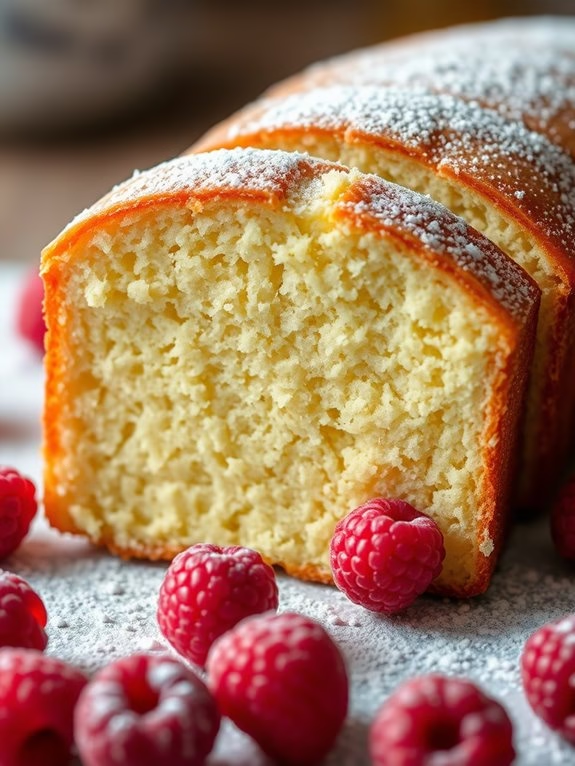
Classic Vanilla Pound Cake is a timeless dessert that has been cherished for generations. Known for its rich, buttery flavor and dense, moist texture, this cake is the epitome of simplicity and elegance. Perfect for any occasion, whether it’s a family gathering or a casual afternoon tea, this cake is sure to impress with its delicate crumb and subtle vanilla aroma.
The beauty of a pound cake lies in its versatility; it can be enjoyed plain or topped with a variety of accompaniments, such as fresh berries, whipped cream, or a drizzle of glaze.
To achieve the perfect Classic Vanilla Pound Cake, it’s important to use high-quality ingredients and follow the recipe carefully. This cake traditionally gets its name from the original recipe, which called for a pound each of flour, butter, sugar, and eggs. While modern recipes have been adjusted for convenience and health, the essence of the cake remains the same.
This recipe serves 4-6 people, making it ideal for small gatherings or as a delightful treat for your household.
Ingredients:
- 1 cup unsalted butter, softened
- 2 cups granulated sugar
- 4 large eggs
- 1 tablespoon vanilla extract
- 3 cups all-purpose flour
- 1/2 teaspoon baking powder
- 1/2 teaspoon salt
- 1 cup whole milk
Instructions:
- Preheat the Oven: Begin by preheating your oven to 325°F (163°C). Grease and flour a 9×5 inch loaf pan to guarantee the cake doesn’t stick.
- Cream Butter and Sugar: In a large mixing bowl, use an electric mixer to cream the softened butter and granulated sugar together until the mixture is light and fluffy. This should take about 4-5 minutes.
- Add Eggs and Vanilla: Add the eggs one at a time, beating well after each addition. This step helps to incorporate air into the batter, which will give the cake a tender texture. Then, mix in the vanilla extract.
- Combine Dry Ingredients: In a separate bowl, whisk together the all-purpose flour, baking powder, and salt. This guarantees that the baking powder and salt are evenly distributed throughout the flour.
- Mix Dry and Wet Ingredients: Gradually add the dry mixture to the creamed butter and sugar, alternating with the milk. Begin and end with the flour mixture. Mix each addition just until incorporated to avoid overmixing, which can make the cake tough.
- Pour and Bake: Pour the batter into the prepared loaf pan, smoothing the top with a spatula. Bake in the preheated oven for 60-70 minutes, or until a toothpick inserted into the center of the cake comes out clean.
- Cool and Serve: Allow the cake to cool in the pan for 10 minutes before transferring it to a wire rack to cool completely. Once cooled, slice and serve as desired.
Extra Tips:
For the best results, always use room temperature ingredients, as they help to create a smoother batter and guarantee even baking.
If you want to add a twist to the classic recipe, consider incorporating lemon zest into the batter for a hint of citrus flavor.
To avoid a dry cake, be mindful not to overbake it; start checking for doneness around the 60-minute mark.
Finally, if you’re planning to dress up your pound cake, a simple glaze made from powdered sugar and milk can add a touch of sweetness and visual appeal.
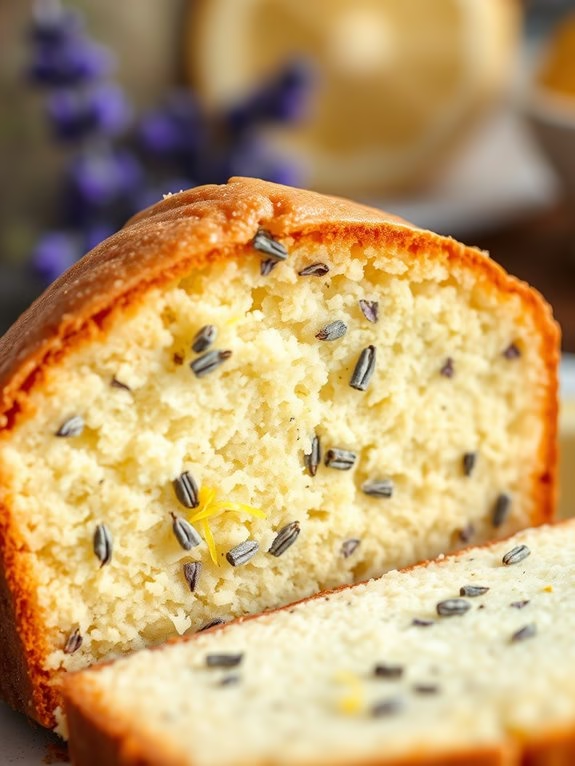
Lemon-Lavender Pound Cake
Lemon-Lavender Pound Cake Recipe
Lemon-Lavender Pound Cake is a delightful twist on the classic pound cake, infused with the subtle floral notes of lavender and the bright, zesty flavor of lemon. This cake is perfect for spring and summer gatherings, offering a rejuvenating and aromatic treat that’s sure to impress your guests.
The combination of these flavors creates a delicate balance that tantalizes the taste buds, making each bite a delicious experience. This recipe makes enough for 4-6 servings, ideal for a small gathering or as a delightful treat for your family.
Preparing this cake involves simple steps, and the result is a moist, fragrant cake with a tender crumb. The use of fresh lemon juice, zest, and culinary lavender guarantees a fresh and natural flavor profile, free from artificial additives. Make certain to use culinary-grade lavender, as regular lavender might be too intense for baking.
Ingredients (4-6 servings):
- 1 cup unsalted butter, softened
- 1 1/2 cups granulated sugar
- 4 large eggs
- 2 cups all-purpose flour
- 1 teaspoon baking powder
- 1/2 teaspoon salt
- 1/4 cup milk
- 2 tablespoons fresh lemon juice
- 1 tablespoon lemon zest
- 1 tablespoon culinary lavender buds
- 1 teaspoon vanilla extract
Instructions:
- Preheat the Oven: Start by preheating your oven to 350°F (175°C). Grease and flour a 9×5 inch loaf pan to prevent the cake from sticking.
- Cream Butter and Sugar: In a large mixing bowl, cream together the softened butter and granulated sugar until light and fluffy. This should take about 3-5 minutes using an electric mixer on medium speed.
- Add Eggs: Add the eggs to the butter and sugar mixture, one at a time, beating well after each addition. This guarantees the eggs are fully incorporated and the mixture remains smooth.
- Mix Dry Ingredients: In a separate bowl, sift together the all-purpose flour, baking powder, and salt. This helps to evenly distribute the baking powder and aerates the flour.
- Combine Wet Ingredients: In another small bowl, mix the milk, lemon juice, and vanilla extract. The acid from the lemon juice helps tenderize the cake and enhances the lemon flavor.
- Combine Everything: Gradually add the dry ingredients to the butter mixture, alternating with the milk mixture. Begin and end with the dry ingredients, mixing until just combined. Be careful not to overmix to keep the cake tender.
- Add Flavorings: Gently fold in the lemon zest and lavender buds until evenly distributed throughout the batter.
- Bake the Cake: Pour the batter into the prepared loaf pan and smooth the top with a spatula. Bake in the preheated oven for 50-60 minutes, or until a toothpick inserted into the center comes out clean.
- Cool and Serve: Allow the cake to cool in the pan for about 15 minutes before transferring it to a wire rack to cool completely. Slice and serve the cake once it has cooled.
Extra Tips:
When preparing the Lemon-Lavender Pound Cake, it’s essential to use culinary lavender, which is specifically grown for cooking and baking. Regular lavender may not be suitable due to its strong and sometimes bitter taste.
Also, when zesting the lemon, be careful to only remove the yellow part of the peel, as the white pith underneath can add bitterness to the cake.
Finally, for an extra burst of flavor, consider drizzling a simple lemon glaze made of powdered sugar and lemon juice over the cooled cake. This can add a sweet-tart contrast that complements the floral notes beautifully.
Chocolate-Espresso Pound Cake
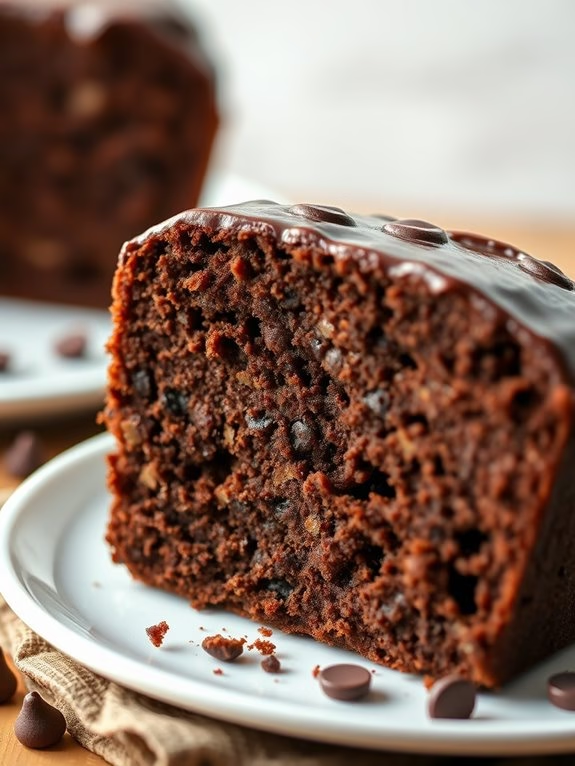
Chocolate-Espresso Pound Cake is a rich, decadent dessert that combines the deep flavors of chocolate with the bold notes of espresso, creating a perfect treat for any occasion. This pound cake is moist, dense, and full of flavor, making it an ideal choice for chocolate lovers and coffee enthusiasts alike.
Whether you’re serving it as an afternoon snack with a cup of coffee or as a dessert at a dinner party, this cake is certain to impress. The combination of chocolate and espresso not only enhances the flavor profile of the cake but also adds a sophisticated touch to a classic dessert.
The aroma of espresso permeates the cake, complementing the chocolate’s sweetness and creating a beautifully balanced flavor that lingers on the palate. This recipe yields a cake that serves 4-6 people, making it the perfect size for small gatherings or family dinners.
Ingredients (Serves 4-6):
- 1 cup unsalted butter, softened
- 1 1/2 cups granulated sugar
- 4 large eggs
- 2 cups all-purpose flour
- 1/2 cup unsweetened cocoa powder
- 1 teaspoon baking powder
- 1/2 teaspoon baking soda
- 1/2 teaspoon salt
- 1/2 cup brewed espresso, cooled
- 1 teaspoon vanilla extract
- 1/2 cup sour cream
- 1 cup semisweet chocolate chips
Cooking Instructions:
- Preheat Oven: Preheat your oven to 350°F (175°C). Grease and flour a standard loaf pan or line it with parchment paper to guarantee easy removal of the cake.
- Cream Butter and Sugar: In a large mixing bowl, using an electric mixer, cream together the softened butter and granulated sugar until light and fluffy, about 3 to 5 minutes.
- Add Eggs: Add the eggs one at a time, beating well after each addition, until fully incorporated.
- Mix Dry Ingredients: In a separate bowl, whisk together the all-purpose flour, cocoa powder, baking powder, baking soda, and salt.
- Combine Wet Ingredients: In another small bowl, mix together the brewed espresso and vanilla extract.
- Alternate Mixing: Gradually add the dry ingredients to the butter mixture, alternating with the espresso mixture, beginning and ending with the dry ingredients. Mix gently until just combined.
- Fold in Sour Cream and Chocolate Chips: Fold in the sour cream and chocolate chips until evenly distributed throughout the batter.
- Pour and Bake: Pour the batter into the prepared loaf pan, smoothing the top with a spatula. Bake in the preheated oven for 55 to 65 minutes, or until a toothpick inserted into the center of the cake comes out clean.
- Cool and Serve: Allow the cake to cool in the pan for about 10 minutes before transferring it to a wire rack to cool completely. Slice and serve.
Extra Tips:
For best results, make sure all your ingredients are at room temperature before beginning the recipe, as this guarantees a smoother batter and better overall texture.
If you prefer a stronger espresso flavor, you can increase the amount of espresso to 3/4 cup and reduce the sour cream to 1/4 cup to maintain the cake’s moisture. Additionally, you can sprinkle some powdered sugar on top of the cooled cake for an elegant finishing touch.
Enjoy your Chocolate-Espresso Pound Cake with a scoop of vanilla ice cream or a dollop of whipped cream for an extra indulgent experience.
Almond Amaretto Pound Cake
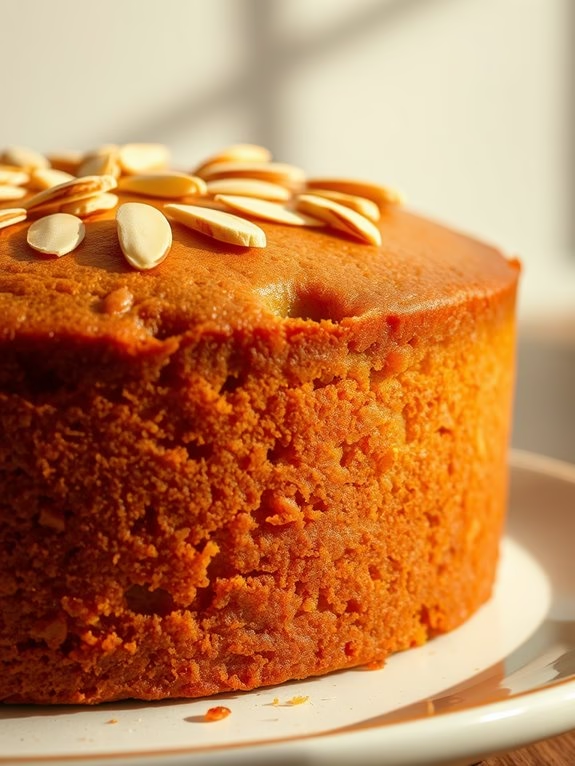
Almond Amaretto Pound Cake
The Almond Amaretto Pound Cake is a delightful fusion of rich, buttery pound cake with the nutty flavors of almond and the distinct, sweet hint of amaretto liqueur. This cake is perfect for any occasion, whether you’re hosting a dinner party or simply want to enjoy a comforting dessert at home.
The dense, moist texture pairs beautifully with a warm cup of coffee or tea, making it a versatile treat that can be enjoyed at any time of the day. This recipe yields a cake that can comfortably serve 4-6 people, making it ideal for small gatherings or family desserts.
The almond and amaretto combination is a classic one that brings a sophisticated and aromatic element to the pound cake, elevating it from a simple dessert to something truly special. With the right balance of ingredients and careful attention to baking techniques, this cake will surely become a favorite in your baking repertoire.
Ingredients (serving size: 4-6 people):
- 1 cup unsalted butter, softened
- 1 1/2 cups granulated sugar
- 4 large eggs
- 2 teaspoons vanilla extract
- 1 teaspoon almond extract
- 1/4 cup amaretto liqueur
- 2 cups all-purpose flour
- 1 teaspoon baking powder
- 1/2 teaspoon salt
- 1/4 cup almond flour
- 1/2 cup whole milk
- 1/2 cup sliced almonds (optional, for garnish)
- Powdered sugar (optional, for dusting)
Instructions:
- Preheat the Oven and Prepare the Pan: Begin by preheating your oven to 350°F (175°C). Grease a 9×5-inch loaf pan with butter or non-stick spray and lightly dust it with flour to prevent sticking.
- Cream Butter and Sugar: In a large mixing bowl, cream the softened butter and granulated sugar together using an electric mixer on medium speed until the mixture is light and fluffy. This should take about 3-4 minutes.
- Add Eggs and Flavorings: Add the eggs one at a time, beating well after each addition. Then, mix in the vanilla extract, almond extract, and amaretto liqueur until everything is well combined.
- Combine Dry Ingredients: In a separate bowl, whisk together the all-purpose flour, baking powder, salt, and almond flour. This guarantees the dry ingredients are evenly distributed.
- Incorporate Dry and Wet Ingredients: Gradually add the dry ingredients to the butter mixture, alternating with the whole milk. Start and end with the dry ingredients, mixing just until each addition is incorporated. Be careful not to overmix.
- Pour and Smooth Batter: Pour the batter into the prepared loaf pan, smoothing the top with a spatula. If desired, sprinkle sliced almonds over the top for added texture and flavor.
- Bake the Cake: Place the pan in the preheated oven and bake for 50-60 minutes, or until a toothpick inserted into the center of the cake comes out clean. Keep an eye on the cake during the final 10 minutes to prevent over-browning.
- Cool and Serve: Once baked, remove the cake from the oven and let it cool in the pan for about 10 minutes. Then, transfer it to a wire rack to cool completely. Dust with powdered sugar before serving if desired.
Extra Tips:
To guarantee the best results, make sure all ingredients are at room temperature before you start mixing, as this helps with even incorporation.
If you prefer a stronger almond flavor, you can increase the almond extract slightly, but be cautious as it can easily overpower the cake. For a more pronounced amaretto taste, consider brushing a little extra amaretto over the cooled cake before serving.
Finally, store any leftovers in an airtight container to maintain the cake’s moisture and freshness.
Coconut Lime Pound Cake
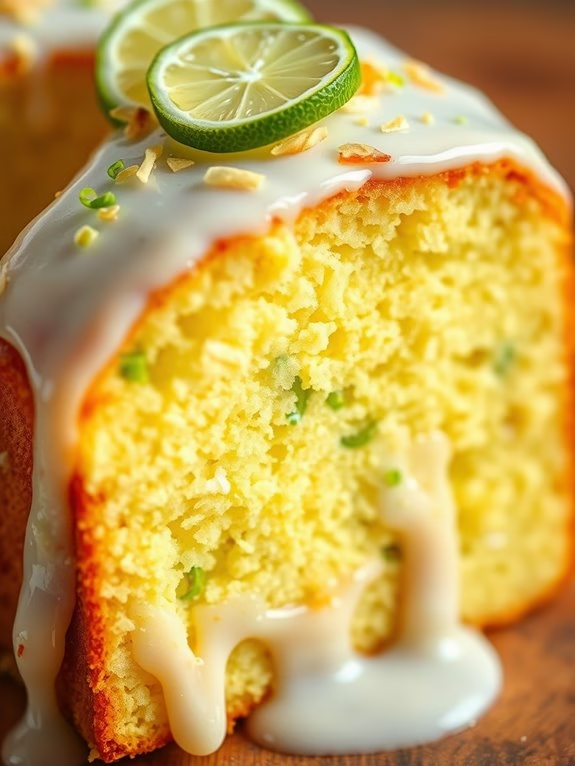
Coconut Lime Pound Cake
Coconut Lime Pound Cake is a delightful twist on the classic pound cake, infusing tropical flavors into a moist and tender crumb. This cake combines the zesty freshness of lime with the sweet, nutty taste of coconut, resulting in a dessert that’s both invigorating and indulgent.
Perfect for warm-weather gatherings or simply to brighten up your day, this cake offers a burst of flavor with every bite.
The recipe is straightforward and ideal for bakers of all skill levels. By using simple ingredients that are easy to find, you can whip up this cake in no time. The combination of coconut and lime not only adds a unique taste but also provides a pleasing aroma that will fill your kitchen as it bakes.
Once topped with a lime glaze, this cake becomes an irresistible treat.
Ingredients (Serves 4-6 people):
- 1 cup unsalted butter, softened
- 1 1/2 cups granulated sugar
- 4 large eggs
- 1 teaspoon vanilla extract
- 1 tablespoon lime zest
- 1/4 cup fresh lime juice
- 2 cups all-purpose flour
- 1 teaspoon baking powder
- 1/2 teaspoon salt
- 1 cup shredded coconut
- 1/2 cup coconut milk
Lime Glaze Ingredients:
- 1 cup powdered sugar
- 2 tablespoons fresh lime juice
- 1 tablespoon lime zest
Cooking Instructions:
- Prepare the Oven and Pan: Preheat your oven to 350°F (175°C). Grease and flour a 9×5 inch loaf pan or line it with parchment paper for easy removal.
- Cream Butter and Sugar: In a large mixing bowl, beat the softened butter and granulated sugar together until the mixture is light and fluffy. This should take about 3-5 minutes using an electric mixer.
- Add Wet Ingredients: Add the eggs one at a time, beating well after each addition. Mix in the vanilla extract, lime zest, and lime juice until fully incorporated.
- Combine Dry Ingredients: In a separate bowl, whisk together the flour, baking powder, and salt. Gradually add this dry mixture to the wet ingredients, mixing until just combined.
- Incorporate Coconut and Coconut Milk: Gently fold in the shredded coconut and coconut milk into the batter, guaranteeing an even distribution without overmixing.
- Bake the Cake: Pour the batter into the prepared loaf pan. Smooth the top with a spatula. Bake in the preheated oven for 60-70 minutes, or until a toothpick inserted into the center of the cake comes out clean.
- Prepare the Lime Glaze: While the cake is baking, whisk together the powdered sugar, lime juice, and lime zest in a small bowl until smooth.
- Cool and Glaze the Cake: Allow the cake to cool in the pan for about 10 minutes before transferring it onto a wire rack. Once fully cooled, drizzle the lime glaze over the top, letting it cascade down the sides.
Extra Tips: For the best flavor, use freshly squeezed lime juice and freshly grated lime zest. If you prefer a more pronounced coconut flavor, consider toasting the shredded coconut before adding it to the batter.
Additionally, verify all ingredients are at room temperature before starting the recipe to achieve a smoother batter. Adjust the amount of glaze according to your preference, and feel free to garnish the cake with extra lime zest or toasted coconut for a decorative touch.
Strawberry Swirl Pound Cake
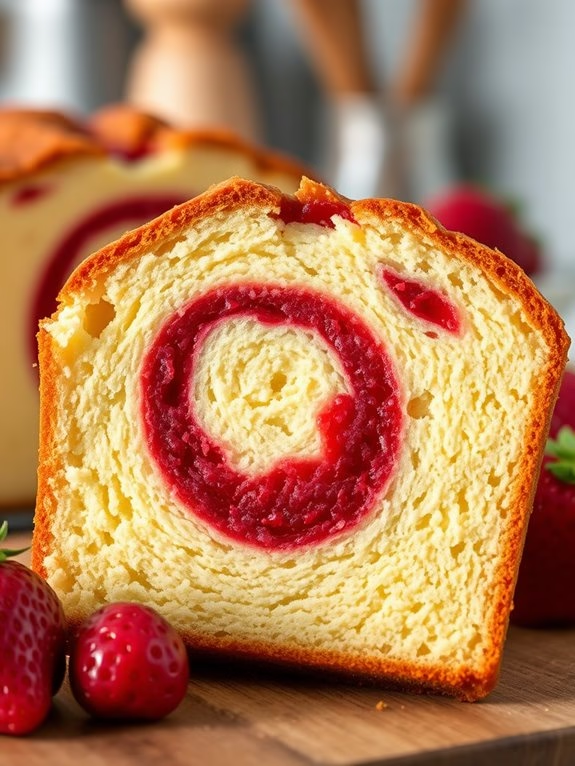
Strawberry Swirl Pound Cake
Indulge in the delightful combination of a classic pound cake with a fruity twist in this Strawberry Swirl Pound Cake. This recipe takes a rich and buttery pound cake and elevates it with a vibrant swirl of fresh strawberry puree, creating a visually stunning and delicious dessert. Perfect for a spring gathering or a simple tea-time treat, this cake offers a perfect balance of sweetness and fruity freshness, making it a favorite for both adults and kids.
The Strawberry Swirl Pound Cake isn’t only a feast for the taste buds but also an eye-catching centerpiece for any dessert table. With a moist and tender crumb, each slice reveals a beautiful swirl of red that promises a burst of strawberry flavor. The preparation involves a few simple steps and ingredients, making it an accessible recipe for bakers of all levels. Enjoy this delightful cake as is, or elevate it with a dollop of whipped cream or a scoop of vanilla ice cream.
Ingredients (serves 4-6 people):
- 1 1/2 cups all-purpose flour
- 1 teaspoon baking powder
- 1/4 teaspoon salt
- 1/2 cup unsalted butter, softened
- 1 cup granulated sugar
- 3 large eggs
- 1 teaspoon vanilla extract
- 1/2 cup sour cream
- 1 cup fresh strawberries, hulled and diced
- 2 tablespoons granulated sugar (for the strawberry puree)
Cooking Instructions:
- Preheat and Prep the Pan: Preheat your oven to 350°F (175°C). Grease and flour a 9×5-inch loaf pan, making sure all sides are well-coated to prevent sticking.
- Prepare the Strawberry Puree: In a blender or food processor, blend the diced strawberries with 2 tablespoons of sugar until smooth. Set aside the puree for swirling into the batter later.
- Mix Dry Ingredients: In a medium bowl, whisk together the flour, baking powder, and salt. This guarantees the leavening agents and salt are evenly distributed throughout the flour.
- Cream Butter and Sugar: In a large mixing bowl, beat the softened butter and 1 cup of granulated sugar together using an electric mixer on medium speed until light and fluffy, about 3-4 minutes.
- Add Eggs and Vanilla: Add the eggs one at a time, beating well after each addition. Mix in the vanilla extract until fully incorporated.
- Combine with Dry Ingredients: Gradually add the dry ingredients to the wet mixture, alternating with the sour cream. Start and end with the flour mixture, making sure everything is well-blended and smooth.
- Create the Swirl: Pour half of the batter into the prepared loaf pan. Spoon half of the strawberry puree over the batter and gently swirl with a knife. Repeat with the remaining batter and puree, swirling once more.
- Bake the Cake: Place the loaf pan in the preheated oven and bake for 50-60 minutes, or until a toothpick inserted into the center comes out clean. If the top begins to brown too quickly, cover loosely with aluminum foil.
- Cool and Serve: Allow the cake to cool in the pan for 10 minutes, then transfer to a wire rack to cool completely. Slice and serve plain or with a topping of your choice.
Extra Tips: For the best results, make sure that all your ingredients are at room temperature before starting, as this helps them to blend more smoothly and evenly.
If fresh strawberries are unavailable, frozen ones can be used, but make sure to thaw and drain them well to avoid excess moisture in the batter. Additionally, to achieve a more pronounced swirl, avoid over-mixing the strawberry puree into the batter. Enjoy experimenting with the swirl patterns to create a unique design in every loaf!
Blueberry Cream Cheese Pound Cake
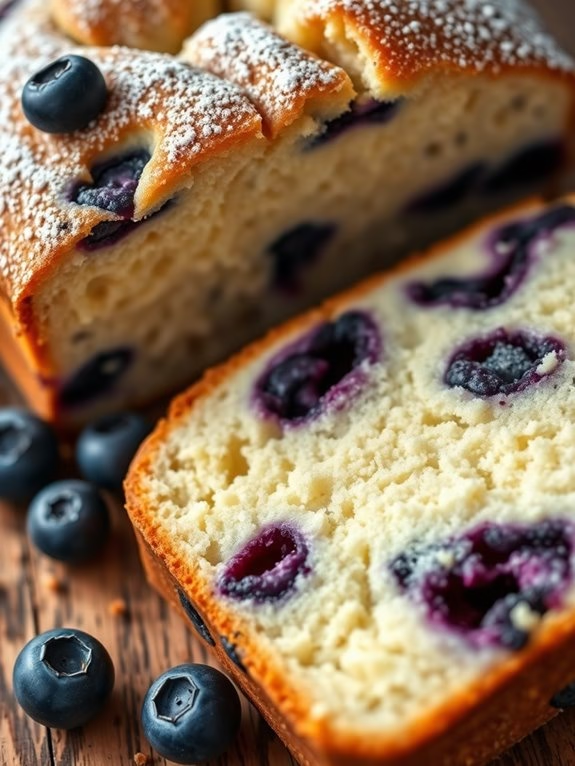
Blueberry Cream Cheese Pound Cake is a delightful twist on the classic pound cake, combining the richness of cream cheese with the sweet, juicy burst of blueberries. This cake is perfect for any occasion, whether it’s a family gathering or a special event.
The cream cheese adds a velvety texture to the cake, while the blueberries provide a fresh, fruity contrast that makes each bite irresistible. This recipe will guide you through creating a moist and flavorful cake that serves 4-6 people.
The key to a successful Blueberry Cream Cheese Pound Cake lies in the balance of ingredients and careful mixing. Using fresh or frozen blueberries guarantees that the cake is packed with flavor, and the cream cheese must be softened to achieve the desired smoothness.
Baking this cake slowly at a moderate temperature secures even cooking and a tender crumb. Let’s plunge into the recipe and explore how to create this scrumptious dessert.
Ingredients (Serves 4-6):
- 1 1/2 cups all-purpose flour
- 1/2 teaspoon baking powder
- 1/2 teaspoon salt
- 1/2 cup unsalted butter, softened
- 4 ounces cream cheese, softened
- 1 cup granulated sugar
- 2 large eggs
- 1 teaspoon vanilla extract
- 1/2 cup sour cream
- 1 cup fresh or frozen blueberries
- Powdered sugar for dusting (optional)
Instructions:
- Preheat and Prepare Pans: Preheat your oven to 350°F (175°C). Grease and flour a loaf pan or line it with parchment paper to prevent sticking.
- Mix Dry Ingredients: In a medium-sized bowl, whisk together the flour, baking powder, and salt. Set aside for later use.
- Cream Butter and Cream Cheese: In a large mixing bowl, beat the softened butter and cream cheese together using an electric mixer on medium speed until the mixture is smooth and creamy, about 2-3 minutes.
- Add Sugar and Eggs: Gradually add the granulated sugar to the butter and cream cheese, beating until light and fluffy. Add the eggs one at a time, mixing well after each addition. Stir in the vanilla extract.
- Incorporate Dry Ingredients: Slowly add the dry ingredients to the wet mixture, alternating with the sour cream. Begin and end with the flour mixture, mixing just until combined. Be careful not to overmix.
- Fold in Blueberries: Gently fold the blueberries into the batter using a spatula, being careful not to crush them.
- Transfer to Pan and Bake: Pour the batter into the prepared loaf pan, smoothing the top with a spatula. Bake in the preheated oven for 50-60 minutes, or until a toothpick inserted into the center comes out clean.
- Cool and Serve: Allow the cake to cool in the pan for about 10 minutes before transferring it to a wire rack to cool completely. Dust with powdered sugar if desired before serving.
Extra Tips:
To guarantee a perfect Blueberry Cream Cheese Pound Cake, make sure your cream cheese and butter are at room temperature before starting the recipe. This will help them cream together smoothly, preventing lumps in the batter.
If using frozen blueberries, don’t thaw them before folding into the batter to avoid excess moisture, which can affect the cake’s texture. Finally, if you prefer a more pronounced lemon flavor, consider adding a teaspoon of lemon zest to the batter for an additional layer of citrusy brightness.
Orange Poppy Seed Pound Cake
Orange Poppy Seed Pound Cake is a delightful twist on the classic pound cake, offering a revitalizing burst of citrus flavor paired with the nutty crunch of poppy seeds. This moist and flavorful cake is perfect for any occasion, whether it’s a casual afternoon tea or an elegant dessert course.
The balance of sweetness and tartness, combined with the unique texture of the poppy seeds, makes this cake a favorite among those who enjoy a little zest in their desserts.
To make the perfect Orange Poppy Seed Pound Cake, it’s important to use fresh oranges for the best flavor. The orange zest and juice contribute a vibrant citrus note, while the poppy seeds add visual appeal and a subtle nutty flavor. This recipe is designed to serve 4-6 people, making it ideal for a small gathering or family dessert.
The following ingredients and instructions will guide you through the process of creating this delicious treat from scratch.
Ingredients for Orange Poppy Seed Pound Cake (Serves 4-6):
- 1 cup unsalted butter, softened
- 1 1/2 cups granulated sugar
- 4 large eggs
- 1 tablespoon orange zest
- 1/4 cup fresh orange juice
- 1 teaspoon vanilla extract
- 2 cups all-purpose flour
- 1 teaspoon baking powder
- 1/4 teaspoon salt
- 2 tablespoons poppy seeds
- 1/2 cup whole milk
Cooking Instructions:
- Preheat the Oven: Begin by preheating your oven to 350°F (175°C). Grease a 9×5-inch loaf pan with butter or non-stick spray, and set it aside.
- Cream Butter and Sugar: In a large mixing bowl, cream together the softened butter and granulated sugar until the mixture is light and fluffy. This will take about 3-4 minutes using an electric mixer on medium speed.
- Add Eggs and Flavorings: Add the eggs one at a time, beating well after each addition. Mix in the orange zest, orange juice, and vanilla extract until fully incorporated.
- Combine Dry Ingredients: In a separate bowl, whisk together the flour, baking powder, and salt. Gradually add the dry ingredients to the wet mixture, alternating with the milk. Begin and end with the flour mixture, mixing just until combined.
- Fold in Poppy Seeds: Gently fold in the poppy seeds until evenly distributed throughout the batter. Be careful not to overmix, as this can make the cake dense.
- Bake the Cake: Pour the batter into the prepared loaf pan, spreading it evenly. Bake in the preheated oven for 50-60 minutes, or until a toothpick inserted into the center of the cake comes out clean.
- Cool and Serve: Allow the cake to cool in the pan for about 10 minutes, then transfer it to a wire rack to cool completely before slicing and serving.
Extra Tips: For an added touch of citrus flavor, you can make a simple orange glaze by mixing powdered sugar with a little bit of orange juice and drizzling it over the cooled cake.
Additionally, verify that all ingredients are at room temperature before you begin, as this helps in achieving a smooth batter and even baking. If you prefer a more pronounced poppy seed flavor, you can increase the quantity to 3 tablespoons.
Enjoy your Orange Poppy Seed Pound Cake with a cup of tea or coffee for a perfect afternoon treat.

Maple Walnut Pound Cake
Maple Walnut Pound Cake is a delightful twist on the classic pound cake, incorporating the rich, sweet flavor of maple syrup and the earthy crunch of walnuts. This cake is perfect for a cozy afternoon tea or a special occasion dessert. Its moist texture and warm flavors make it a comforting treat that’s bound to please family and friends. The combination of maple and walnut not only enhances the taste but also adds a delightful aroma, making this cake a true sensory experience.
Baking a Maple Walnut Pound Cake is simple and rewarding. This recipe is designed to serve 4-6 people, making it ideal for a small gathering or a sweet indulgence for a few days. The ingredients are straightforward, and the preparation process is uncomplicated, guaranteeing that even novice bakers can achieve delicious results. By following this recipe, you’ll create a cake that’s both visually appealing and delectable, with a balance of sweetness and nuttiness that’s bound to impress.
Ingredients for 4-6 Servings:
- 1 cup unsalted butter, softened
- 1 cup granulated sugar
- 1/2 cup pure maple syrup
- 4 large eggs
- 1 teaspoon vanilla extract
- 2 cups all-purpose flour
- 1 teaspoon baking powder
- 1/4 teaspoon salt
- 1 cup chopped walnuts
- 1/2 cup whole milk
Cooking Instructions:
- Preheat the Oven: Start by preheating your oven to 350°F (175°C). Grease and flour a 9×5 inch loaf pan to prevent the cake from sticking.
- Cream Butter and Sugar: In a large mixing bowl, cream together the softened butter and granulated sugar until the mixture is light and fluffy. This should take about 3-4 minutes with an electric mixer.
- Add Wet Ingredients: Gradually add the maple syrup, beating continuously. Then add the eggs one at a time, mixing well after each addition. Stir in the vanilla extract until well combined.
- Mix Dry Ingredients: In a separate bowl, whisk together the all-purpose flour, baking powder, and salt. This guarantees that the baking powder is evenly distributed through the flour.
- Combine Mixtures: Gradually add the dry ingredients to the wet mixture, alternating with the milk. Begin and end with the flour mixture. Mix until just combined to avoid overmixing, which can lead to a dense cake.
- Fold in Walnuts: Gently fold in the chopped walnuts with a spatula, guaranteeing they’re evenly distributed throughout the batter.
- Bake the Cake: Pour the batter into the prepared loaf pan and smooth the top with a spatula. Bake for 55-65 minutes, or until a toothpick inserted into the center comes out clean.
- Cool and Serve: Allow the cake to cool in the pan for about 15 minutes before transferring it to a wire rack to cool completely. Slice and serve with a drizzle of maple syrup or a dollop of whipped cream, if desired.
Extra Tips:
For ideal flavor, use high-quality pure maple syrup, as it greatly enhances the cake’s taste. Toasting the walnuts before folding them into the batter can further enhance their nutty flavor. Additionally, verify that all ingredients are at room temperature before starting the recipe for a more uniform batter. If you prefer a more pronounced maple flavor, consider adding a few drops of maple extract to the batter. This cake can be stored in an airtight container at room temperature for up to three days or refrigerated for up to a week.
Caramel Apple Pound Cake
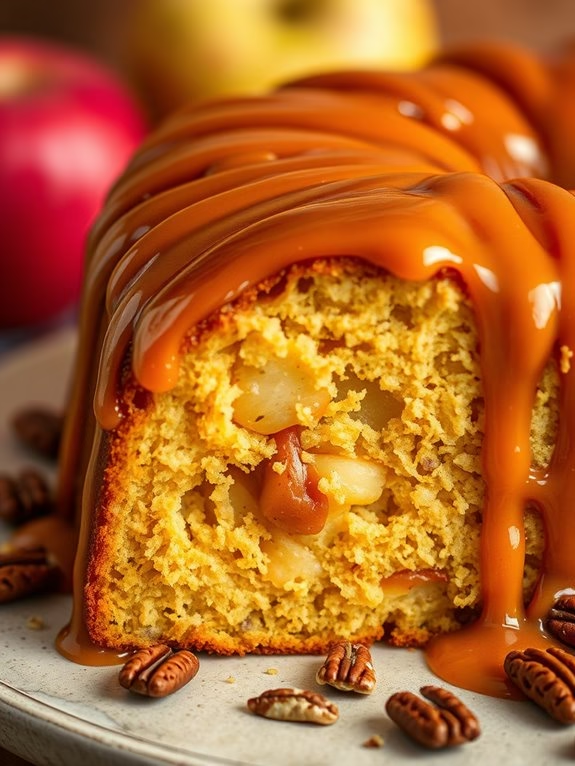
Caramel Apple Pound Cake is a delightful twist on the classic pound cake, combining rich caramel flavors with the tartness of fresh apples. This dessert is perfect for autumn gatherings or as a comforting treat to enjoy with a cup of tea. The moist, dense texture of the pound cake is beautifully complemented by the caramel glaze, making every bite a decadent indulgence.
This recipe is designed to serve 4-6 people, making it ideal for a family dessert or a small dinner party. The preparation involves baking a traditional pound cake, infusing it with apple pieces, and then drizzling it with a homemade caramel sauce. The result is a cake that’s both visually appealing and deliciously satisfying.
Ingredients
- 1 1/2 cups all-purpose flour
- 1/2 teaspoon baking powder
- 1/4 teaspoon baking soda
- 1/4 teaspoon salt
- 1/2 cup unsalted butter, softened
- 1 cup granulated sugar
- 2 large eggs
- 1 teaspoon vanilla extract
- 1/2 cup sour cream
- 1 large apple, peeled, cored, and diced
- 1/2 cup caramel sauce, plus extra for drizzling
- 1/4 cup chopped pecans (optional)
Cooking Instructions
- Preheat the Oven: Start by preheating your oven to 350°F (175°C). Grease a 9×5-inch loaf pan with butter or non-stick spray and set it aside.
- Mix Dry Ingredients: In a medium bowl, whisk together the flour, baking powder, baking soda, and salt. This guarantees the leavening agents are evenly distributed in the flour.
- Cream Butter and Sugar: In a large bowl, beat the softened butter and granulated sugar with an electric mixer until light and fluffy, about 3-4 minutes. This step is essential for incorporating air into the batter, which helps the cake rise.
- Add Eggs and Vanilla: Beat in the eggs one at a time, making certain each is well incorporated before adding the next. Mix in the vanilla extract.
- Combine with Sour Cream: Gently stir in the sour cream until the batter is smooth. The sour cream adds moisture and a slight tang to the cake.
- Incorporate Dry Ingredients: Gradually add the dry ingredients to the wet mixture, mixing just until combined. Be careful not to overmix as this can make the cake tough.
- Fold in Apples: Gently fold in the diced apples and pecans (if using) with a spatula, making sure they’re evenly distributed throughout the batter.
- Pour and Bake: Pour half of the batter into the prepared loaf pan. Drizzle with half of the caramel sauce, then top with the remaining batter. Use a knife to gently swirl the caramel into the batter. Bake for 50-60 minutes, or until a toothpick inserted into the center comes out clean.
- Cool and Glaze: Allow the cake to cool in the pan for about 10 minutes before transferring it to a wire rack to cool completely. Once cooled, drizzle with additional caramel sauce before serving.
Extra Tips
When making Caramel Apple Pound Cake, it’s important to use a firm apple variety like Granny Smith or Honeycrisp, as they hold their shape well during baking.
If you prefer a nut-free version, feel free to omit the pecans. For an added flavor boost, consider adding a teaspoon of cinnamon to the dry ingredients.
Finally, make sure your cake is completely cooled before drizzling with caramel sauce to prevent it from melting and losing its texture.
Pumpkin Spice Pound Cake
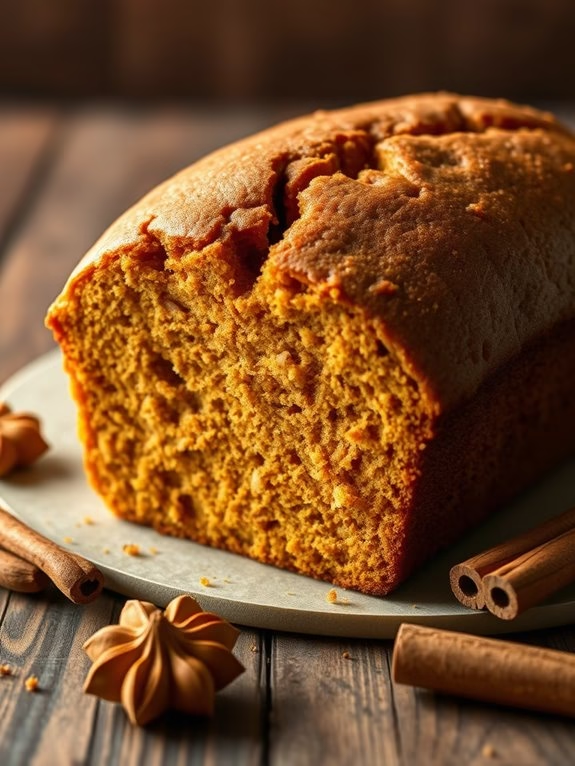
Pumpkin Spice Pound Cake is a delightful twist on the traditional pound cake, perfect for the autumn season. This moist and flavorful cake combines the rich taste of pumpkin puree with the warming spices of cinnamon, nutmeg, and cloves, creating an aromatic and comforting dessert.
Whether you’re serving it at a holiday gathering or enjoying a slice with a cup of coffee, this cake is sure to impress your family and friends with its perfect balance of sweetness and spice.
The key to a successful Pumpkin Spice Pound Cake lies in using fresh, quality ingredients and giving the batter the right amount of time to mix and bake. The result is a dense yet tender cake with a beautiful golden-brown crust. This recipe serves 4-6 people, making it an ideal choice for small gatherings or family celebrations.
Let’s explore this easy-to-follow recipe and bring the flavors of fall into your kitchen.
Ingredients:
- 1 ½ cups all-purpose flour
- 1 teaspoon baking powder
- ½ teaspoon baking soda
- 1 teaspoon ground cinnamon
- ½ teaspoon ground nutmeg
- ¼ teaspoon ground cloves
- ¼ teaspoon salt
- 1 cup unsalted butter, softened
- 1 cup granulated sugar
- 1 cup pumpkin puree
- 2 large eggs
- 1 teaspoon vanilla extract
- ½ cup buttermilk
Cooking Instructions:
- Preheat the Oven: Begin by preheating your oven to 350°F (175°C). Grease a 9×5 inch loaf pan with butter or non-stick spray and set it aside.
- Mix the Dry Ingredients: In a medium-sized bowl, whisk together the flour, baking powder, baking soda, cinnamon, nutmeg, cloves, and salt. Confirm the spices and leavening agents are evenly distributed throughout the flour.
- Cream the Butter and Sugar: In a large mixing bowl, use an electric mixer to cream the softened butter and granulated sugar together until light and fluffy, approximately 3-4 minutes. This step is essential for achieving a tender crumb.
- Incorporate the Pumpkin: Add the pumpkin puree to the butter mixture and beat until well combined. The mixture may look slightly curdled, but this is normal.
- Add Eggs and Vanilla: Beat in the eggs one at a time, followed by the vanilla extract, mixing until the batter is smooth and homogenous.
- Combine Wet and Dry Ingredients: Gradually add the dry ingredient mixture to the wet ingredients, alternating with the buttermilk. Begin and end with the dry ingredients, mixing just until everything is incorporated. Avoid overmixing to prevent a dense cake.
- Transfer to the Loaf Pan: Pour the batter into the prepared loaf pan, smoothing the top with a spatula to confirm even baking.
- Bake the Cake: Place the loaf pan in the preheated oven and bake for 55-65 minutes, or until a toothpick inserted into the center of the cake comes out clean. The top should be golden brown and slightly risen.
- Cool and Serve: Allow the cake to cool in the pan for about 10 minutes before transferring it to a wire rack to cool completely. Once cooled, slice and serve.
Extra Tips:
For a more pronounced pumpkin spice flavor, consider adding a teaspoon of pumpkin spice blend in place of some of the individual spices.
If you prefer a less sweet cake, reduce the sugar by ¼ cup without affecting the texture. For added texture and flavor, you can mix in a cup of chopped nuts or chocolate chips into the batter before baking.
Always use room temperature ingredients for more consistent mixing and a better rise. Enjoy your Pumpkin Spice Pound Cake with a dollop of whipped cream or a scoop of vanilla ice cream for a delightful treat.
Red Velvet Pound Cake
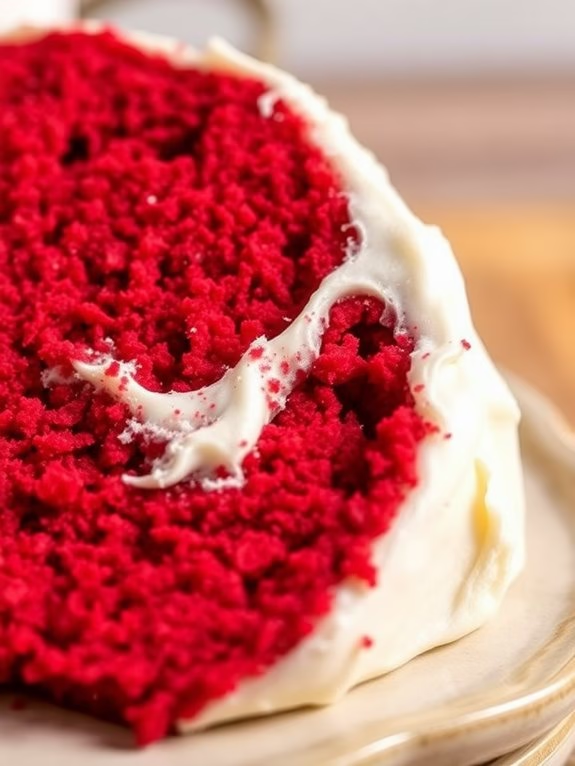
Red Velvet Pound Cake is a delightful twist on the classic pound cake, combining the rich flavors of red velvet with the dense, buttery texture of a pound cake. This cake is perfect for special occasions or as a decadent treat for any day of the week. With its vibrant red color and creamy frosting, it not only tastes delicious but also makes an impressive centerpiece for your dessert table.
The secret to a perfect Red Velvet Pound Cake lies in achieving the right balance of flavors – the cocoa, vanilla, and buttermilk create that distinctive red velvet taste, while the pound cake’s buttery richness adds depth. The cake is then topped with a smooth cream cheese frosting that perfectly complements the cake’s flavor profile. This recipe serves 4-6 people, making it ideal for a small gathering or family dinner.
Ingredients:
- 1 1/2 cups all-purpose flour
- 1/2 teaspoon baking powder
- 1/4 teaspoon salt
- 1 tablespoon unsweetened cocoa powder
- 1/2 cup unsalted butter, softened
- 1 cup granulated sugar
- 2 large eggs
- 1 teaspoon vanilla extract
- 1/2 cup buttermilk
- 1 tablespoon red food coloring
- 1 teaspoon white vinegar
- 1/2 teaspoon baking soda
For the Cream Cheese Frosting:
- 4 ounces cream cheese, softened
- 1/4 cup unsalted butter, softened
- 1 cup powdered sugar
- 1/2 teaspoon vanilla extract
Cooking Instructions:
- Preheat the Oven: Start by preheating your oven to 350°F (175°C). Grease and flour a loaf pan to prevent the cake from sticking.
- Prepare the Dry Ingredients: In a medium bowl, sift together the flour, baking powder, salt, and cocoa powder. Set aside.
- Cream the Butter and Sugar: In a large mixing bowl, beat the softened butter and granulated sugar together using an electric mixer on medium speed until light and fluffy, about 3-4 minutes.
- Add the Eggs and Vanilla: Beat in the eggs one at a time, guaranteeing each is fully incorporated before adding the next. Mix in the vanilla extract.
- Combine the Wet and Dry Ingredients: Gradually add the dry ingredient mixture to the butter and sugar mixture, alternating with the buttermilk. Begin and end with the dry ingredients, mixing until just combined.
- Add the Color and Leavening: Mix in the red food coloring, guaranteeing the batter has an even color. In a small bowl, combine the vinegar and baking soda. Allow it to fizz, then quickly fold it into the batter.
- Bake the Cake: Pour the batter into the prepared loaf pan and smooth the top with a spatula. Bake in the preheated oven for 50-60 minutes, or until a toothpick inserted in the center comes out clean.
- Prepare the Frosting: While the cake cools, beat the cream cheese and butter together until smooth. Gradually add in the powdered sugar and vanilla extract, continuing to beat until the frosting is creamy and spreadable.
- Frost the Cake: Once the cake is completely cooled, spread the cream cheese frosting evenly over the top. Slice and serve.
Extra Tips:
For the best Red Velvet Pound Cake, verify all your ingredients are at room temperature before starting, as this will help them blend more smoothly and evenly.
Be cautious not to overmix the batter once you’ve added the dry ingredients, as this can lead to a dense cake. If you prefer a more vibrant red color, you can adjust the amount of food coloring to your liking.
Ultimately, the cake can be stored in an airtight container in the refrigerator for up to 3 days, but bring it to room temperature before serving for the best texture and flavor.
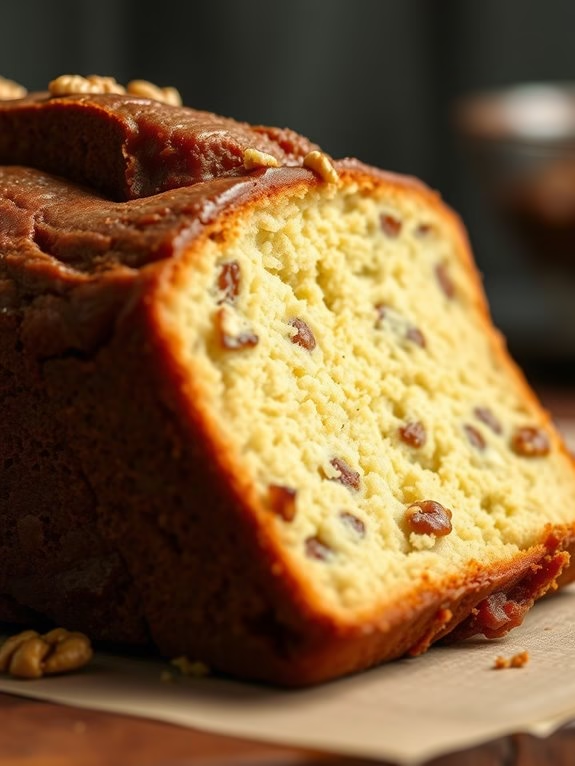
Banana Nut Pound Cake
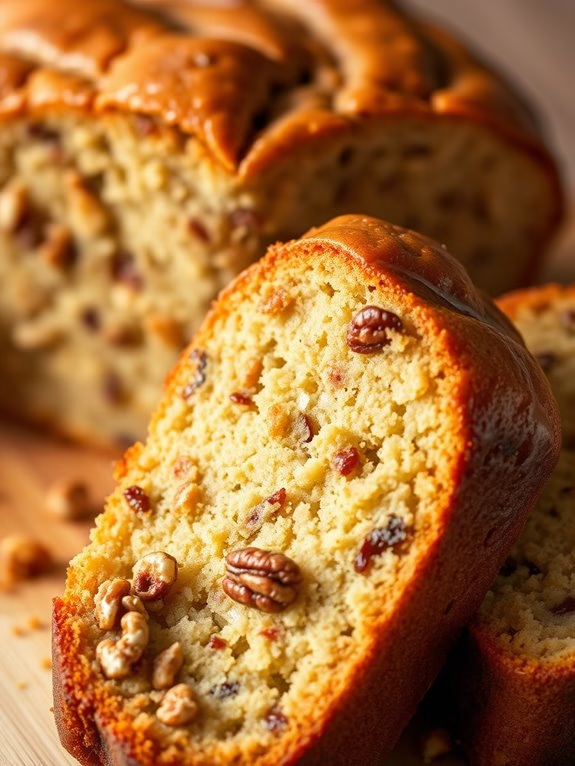
Banana Nut Pound Cake is a delightful twist on the classic pound cake, incorporating the natural sweetness of ripe bananas and the satisfying crunch of nuts. This moist and flavorful cake is perfect for any occasion, whether it’s a family gathering, a tea party, or simply a treat for yourself. The combination of bananas and nuts not only enhances the taste but also adds a nutritious element to the traditional pound cake.
The aroma of this Banana Nut Pound Cake will fill your kitchen with a comforting and inviting scent that will have everyone keenly waiting for a slice. The use of ripe bananas guarantees that the cake remains moist and rich, while the nuts add a delightful texture. This cake is best enjoyed fresh from the oven, but it can also be stored and savored over a few days.
Let’s plunge into the recipe for a serving size of 4-6 people.
Ingredients:
- 1 cup unsalted butter, softened
- 2 cups granulated sugar
- 4 large eggs
- 1 teaspoon vanilla extract
- 3 cups all-purpose flour
- 1 teaspoon baking powder
- 1/2 teaspoon baking soda
- 1/2 teaspoon salt
- 1 cup mashed ripe bananas (about 2-3 bananas)
- 1/2 cup buttermilk
- 1 cup chopped walnuts or pecans
Cooking Instructions:
- Preheat and Prepare Pan: Preheat your oven to 325°F (165°C). Grease and flour a 10-inch bundt or tube pan, making certain all crevices are covered to prevent sticking.
- Cream Butter and Sugar: In a large mixing bowl, beat the softened butter and granulated sugar together using an electric mixer on medium speed until the mixture is light and fluffy, about 3 to 5 minutes.
- Add Eggs and Vanilla: Add the eggs one at a time, beating well after each addition. Mix in the vanilla extract until fully incorporated.
- Combine Dry Ingredients: In a separate bowl, whisk together the all-purpose flour, baking powder, baking soda, and salt.
- Prepare Banana Mixture: In another bowl, combine the mashed ripe bananas with the buttermilk, mixing until smooth.
- Alternate Mixing: Gradually add the dry ingredients to the butter mixture, alternating with the banana mixture. Begin and end with the dry ingredients, mixing just until combined after each addition.
- Fold in Nuts: Gently fold in the chopped walnuts or pecans using a spatula.
- Bake the Cake: Pour the batter into the prepared pan, spreading it evenly. Bake in the preheated oven for approximately 60 to 70 minutes, or until a toothpick inserted in the center comes out clean.
- Cool and Serve: Allow the cake to cool in the pan for about 15 minutes, then invert it onto a wire rack to cool completely. Slice and serve once cooled.
Extra Tips:
For the best Banana Nut Pound Cake, make sure your bananas are very ripe, as this will enhance the sweetness and moisture of the cake. If you prefer a more pronounced nutty flavor, lightly toast the nuts before folding them into the batter.
Additionally, you can add a pinch of cinnamon or nutmeg for a hint of warmth. If you find the cake browning too quickly in the oven, cover it loosely with aluminum foil halfway through baking. Enjoy this delicious treat with a cup of tea or coffee for the perfect pairing!
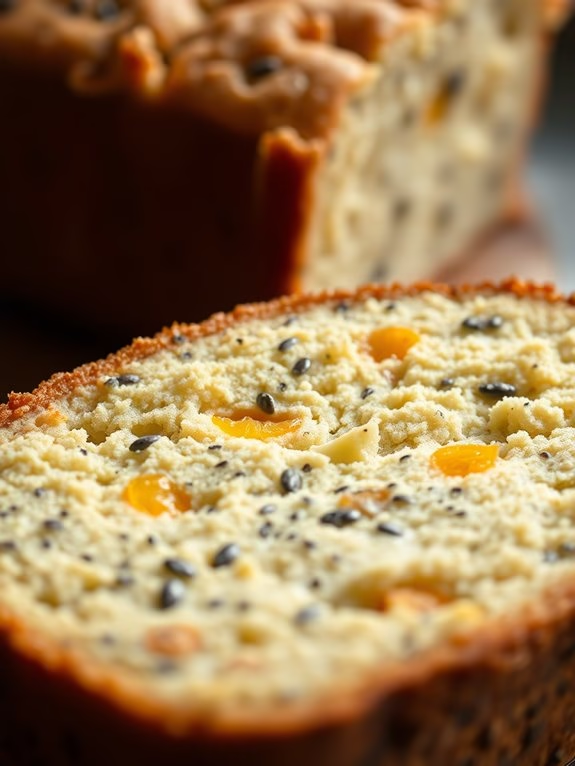
Honey Ricotta Pound Cake
Honey Ricotta Pound Cake is a delightful twist on the classic pound cake, offering a creamy and slightly tangy flavor profile thanks to the addition of ricotta cheese and honey. This cake is perfect for special occasions or as a simple dessert to satisfy your sweet tooth. The ricotta cheese adds a moist and tender crumb, while the honey imparts a natural sweetness that complements the cake beautifully.
Serve it plain, with a dusting of powdered sugar, or topped with fresh fruits and a dollop of whipped cream for an extra indulgent treat.
The preparation of Honey Ricotta Pound Cake is straightforward, yet results in a deliciously rich and flavorful cake that’s certain to impress. This cake is perfect for a gathering of 4-6 people, making it an ideal choice for small get-togethers. With its simple ingredients and easy-to-follow steps, even novice bakers can achieve an elegant and mouthwatering cake that’s sure to become a family favorite.
Ingredients (for 4-6 servings):
- 1 1/2 cups all-purpose flour
- 1 cup ricotta cheese
- 1/2 cup unsalted butter, softened
- 1 cup granulated sugar
- 1/4 cup honey
- 3 large eggs
- 1 teaspoon vanilla extract
- 1 teaspoon baking powder
- 1/2 teaspoon salt
- Zest of 1 lemon
Cooking Instructions:
- Preheat the oven: Begin by preheating your oven to 350°F (175°C). Grease a 9×5 inch loaf pan and line it with parchment paper for easy removal.
- Mix dry ingredients: In a medium bowl, whisk together the flour, baking powder, and salt. Set this mixture aside for later use.
- Cream butter and sugar: In a large mixing bowl, beat the softened butter and granulated sugar together with an electric mixer until light and fluffy, about 3-4 minutes.
- Add wet ingredients: Incorporate the ricotta cheese into the butter-sugar mixture, followed by the honey, eggs (one at a time), and vanilla extract. Beat well after each addition to guarantee a smooth batter.
- Combine dry and wet ingredients: Gradually add the dry ingredients to the wet mixture, stirring gently until just combined. Be careful not to overmix, as this can result in a dense cake.
- Add lemon zest: Fold in the lemon zest, ensuring it’s evenly distributed throughout the batter for a hint of citrusy flavor.
- Pour into pan and bake: Pour the batter into the prepared loaf pan, smoothing the top with a spatula. Bake in the preheated oven for 50-60 minutes, or until a toothpick inserted into the center comes out clean.
- Cool and serve: Allow the cake to cool in the pan for about 10 minutes before transferring it to a wire rack to cool completely. Once cooled, slice and serve as desired.
Extra Tips:
For best results, verify all your ingredients are at room temperature before starting. This helps in achieving a smooth batter and even baking. If you prefer a more pronounced lemon flavor, you can add a tablespoon of freshly squeezed lemon juice to the batter.
Additionally, this cake can be stored in an airtight container for up to three days or refrigerated for up to a week. Reheat slices in the microwave for a few seconds to enjoy the cake as if it were freshly baked.
Matcha Green Tea Pound Cake
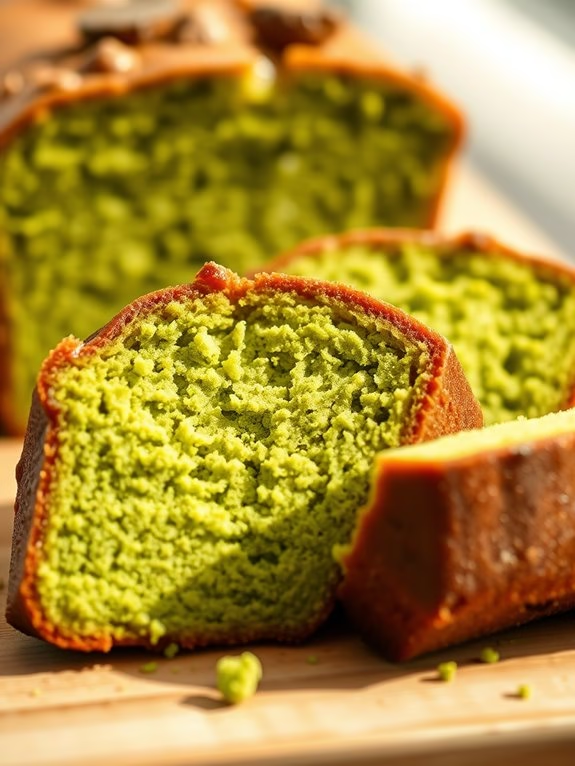
Matcha Green Tea Pound Cake Recipe
Indulging in a slice of Matcha Green Tea Pound Cake is like capturing the invigorating essence of a Japanese tea ceremony in a dessert. This delightful cake is a harmonious blend of sweet and earthy flavors, thanks to the vibrant matcha green tea powder. Its subtle bitterness is perfectly balanced by the sweetness of the cake, creating a unique taste experience.
Whether you’re serving it for an afternoon tea or as a dessert, this pound cake stands out with its striking green hue and moist, dense texture. This recipe is perfect for a serving size of 4-6 people, making it ideal for a small gathering or family dessert. The key to mastering this cake lies in using high-quality matcha powder, which not only imparts a distinct flavor but also lends the cake its beautiful color.
Follow this recipe to create a Matcha Green Tea Pound Cake that’s both visually appealing and deliciously satisfying.
Ingredients:
- 1 cup all-purpose flour
- 1 tablespoon matcha green tea powder
- 1/2 teaspoon baking powder
- 1/4 teaspoon salt
- 1/2 cup unsalted butter, softened
- 1 cup granulated sugar
- 2 large eggs
- 1/2 teaspoon vanilla extract
- 1/4 cup milk
Instructions:
- Preheat the Oven: Begin by preheating your oven to 350°F (175°C). Grease and flour a loaf pan to prevent the cake from sticking and to guarantee an even bake.
- Mix Dry Ingredients: In a medium bowl, whisk together the all-purpose flour, matcha green tea powder, baking powder, and salt. This guarantees that the matcha is evenly distributed and prevents clumping.
- Cream Butter and Sugar: In a large bowl, beat the softened butter and granulated sugar together until the mixture is light and fluffy. This step is vital for incorporating air into the batter, which helps the cake rise.
- Add Eggs and Vanilla: Add the eggs one at a time, beating well after each addition. Then, mix in the vanilla extract. This guarantees that the eggs are fully incorporated and the mixture remains smooth.
- Combine Wet and Dry Ingredients: Gradually add the flour mixture to the creamed butter mixture, alternating with the milk, starting and ending with the flour. Mix until just combined to avoid overmixing, which can make the cake tough.
- Pour and Bake: Pour the batter into the prepared loaf pan and smooth the top with a spatula. Bake for 50-60 minutes, or until a toothpick inserted into the center of the cake comes out clean.
- Cool and Serve: Allow the cake to cool in the pan for about 10 minutes before transferring it to a wire rack to cool completely. Slice and serve the cake once cooled.
Extra Tips:
For the best results, use high-quality matcha powder, which is often brighter in color and has a more pronounced flavor. If you prefer a stronger matcha taste, you can adjust the amount of matcha powder slightly, but be cautious as too much can make the cake bitter.
Additionally, verify your butter is at room temperature before creaming it with sugar for the best texture. To elevate the presentation, you might dust the top of the cake with a light sprinkle of matcha powder or confectioners’ sugar just before serving.