
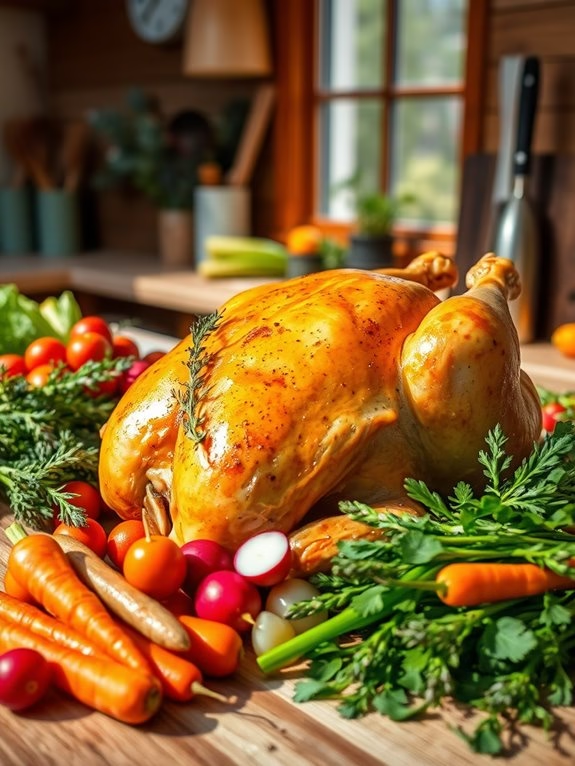
As the days grow longer and the air warms up, I can’t help but feel inspired to whip up some fresh and delightful chicken dishes.
There’s something so refreshing about a Lemon-Herb Grilled Chicken that makes it a staple for spring gatherings.
And let’s not forget about a colorful Spring Veggie Chicken Stir-Fry that brings the garden right to your plate.
Each recipe is bursting with flavors and textures, perfect for satisfying every craving.
Join me in exploring these scrumptious spring chicken recipes that will surely brighten your mealtime!
Lemon-Herb Grilled Chicken
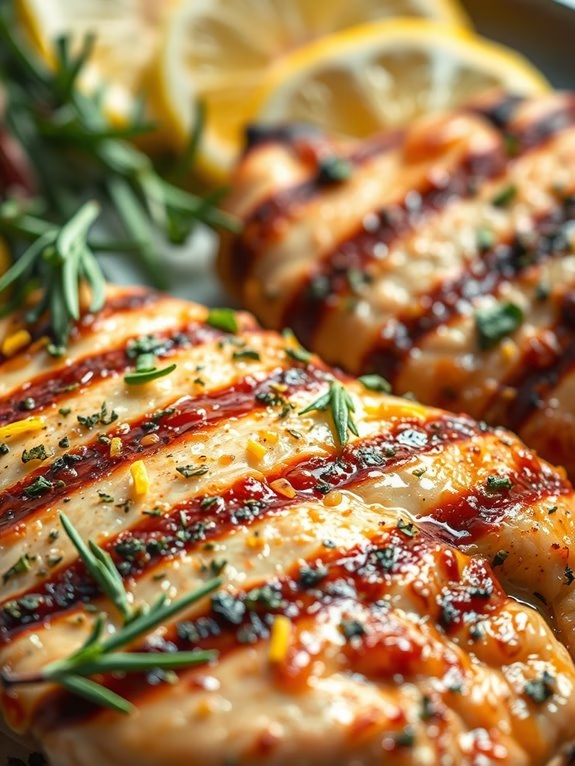
Lemon-Herb Grilled Chicken is a delightful and invigorating dish perfect for springtime dining. This recipe combines the tangy flavor of fresh lemons with a medley of aromatic herbs, creating a marinade that infuses the chicken with vibrant and zesty notes. The grilling process adds a smoky char that complements the citrusy marinade, resulting in a juicy and flavorful dish that’s sure to impress your family and guests.
Ideal for a weekend barbecue or a simple weeknight dinner, Lemon-Herb Grilled Chicken can be paired with a variety of sides such as grilled vegetables, a fresh garden salad, or buttery garlic bread.
The key to this recipe is allowing the chicken to marinate for several hours, which guarantees the flavors deeply penetrate the meat. Whether you choose to use chicken breasts, thighs, or a combination, this recipe is versatile and adaptable to various preferences. With just a few simple ingredients and some basic grilling techniques, you can create a delicious meal that highlights the fresh, vibrant flavors of spring.
This recipe serves 4-6 people, making it perfect for family gatherings or small parties.
Ingredients:
- 4-6 boneless, skinless chicken breasts or thighs
- 1/3 cup olive oil
- 1/4 cup freshly squeezed lemon juice
- Zest of 1 lemon
- 3 cloves garlic, minced
- 1 tablespoon fresh thyme leaves
- 1 tablespoon fresh rosemary, chopped
- 1 tablespoon fresh oregano, chopped
- 1 tablespoon Dijon mustard
- 1 teaspoon salt
- 1/2 teaspoon black pepper
Cooking Instructions:
- Prepare the Marinade: In a medium-sized bowl, combine olive oil, lemon juice, lemon zest, minced garlic, fresh thyme, rosemary, oregano, Dijon mustard, salt, and black pepper. Whisk together until well combined.
- Marinate the Chicken: Place the chicken pieces in a large resealable plastic bag or a shallow dish. Pour the marinade over the chicken, making sure each piece is well coated. Seal the bag or cover the dish, then refrigerate for at least 2 hours or up to overnight for maximum flavor absorption.
- Preheat the Grill: About 15 minutes before you plan to cook, preheat your grill to medium-high heat. If using a charcoal grill, make sure the coals are hot and ashy.
- Grill the Chicken: Remove the chicken from the marinade, allowing any excess to drip off. Place the chicken on the grill and cook for 6-8 minutes per side, or until the internal temperature reaches 165°F (75°C) and the chicken has a nice char.
- Rest the Chicken: Once cooked, remove the chicken from the grill and let it rest for 5 minutes. This allows the juices to redistribute, guaranteeing a juicy and tender bite.
- Serve: Slice the grilled chicken and serve it hot, garnished with fresh herbs and lemon slices if desired.
Extra Tips:
When grilling chicken, it’s crucial to avoid overcooking as it can lead to dryness. Using a meat thermometer is a reliable way to verify the chicken has reached the safe internal temperature of 165°F (75°C).
Additionally, flipping the chicken only once during grilling will help achieve those appealing grill marks. For added flavor, consider basting the chicken with the marinade during the last few minutes of cooking, but make sure it’s a fresh batch of marinade that hasn’t touched raw chicken to maintain food safety.
Spring Veggie Chicken Stir-Fry
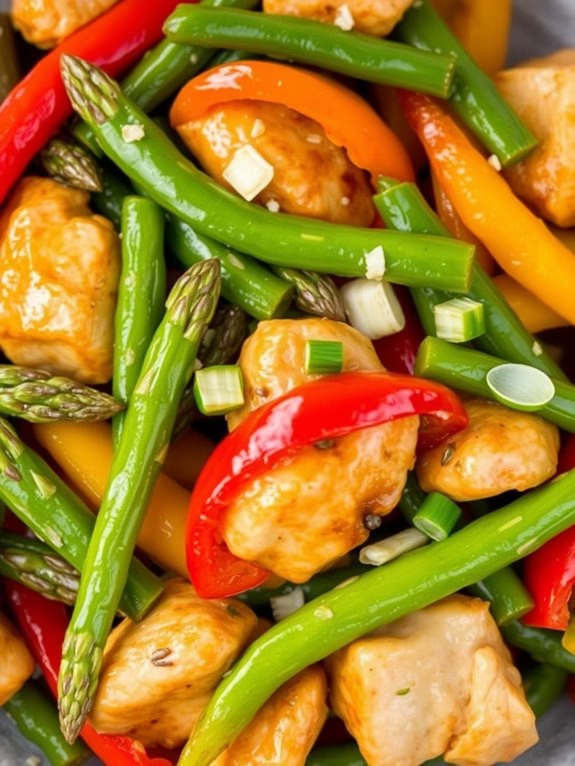
Spring is the perfect time to enjoy the vibrant colors and fresh flavors of seasonal vegetables, and what better way to do so than with a delightful Spring Veggie Chicken Stir-Fry? This dish brings together tender pieces of chicken breast, crisp spring vegetables, and a savory sauce, all cooked to perfection in a single skillet.
Perfect for a quick weeknight dinner or a light weekend meal, this stir-fry promises not only a burst of flavor but also a nutritious feast that everyone in the family will appreciate.
Incorporating the best of spring produce, this recipe includes a variety of vegetables such as asparagus, snap peas, and bell peppers, which add a delightful crunch and sweetness to the dish. The chicken is marinated in a simple mixture that enhances its natural flavors while guaranteeing it remains juicy and tender.
Served over a bed of steamed rice or noodles, this Spring Veggie Chicken Stir-Fry is a complete meal that celebrates the freshness of the season.
Ingredients for 4-6 servings:
- 1 ½ pounds boneless, skinless chicken breasts, thinly sliced
- 2 tablespoons soy sauce
- 2 tablespoons oyster sauce
- 1 tablespoon sesame oil
- 1 tablespoon cornstarch
- 2 tablespoons vegetable oil
- 1 bunch of asparagus, trimmed and cut into 2-inch pieces
- 1 cup sugar snap peas
- 1 red bell pepper, thinly sliced
- 1 yellow bell pepper, thinly sliced
- 3 cloves garlic, minced
- 1 tablespoon fresh ginger, minced
- ¼ cup chicken broth
- 1 tablespoon hoisin sauce
- 2 green onions, sliced
- Salt and pepper to taste
- Cooked rice or noodles for serving
Cooking Instructions:
- Marinate the Chicken: In a medium bowl, combine the chicken slices with soy sauce, oyster sauce, sesame oil, and cornstarch. Mix well to coat the chicken evenly and let it marinate for at least 15 minutes to absorb the flavors.
- Prepare the Vegetables: While the chicken is marinating, wash and prepare all the vegetables. Trim and slice the asparagus, snap peas, and bell peppers, and mince the garlic and ginger.
- Cook the Chicken: Heat 1 tablespoon of vegetable oil in a large skillet or wok over medium-high heat. Add the marinated chicken in batches and cook for 3-4 minutes until the chicken is golden brown and cooked through. Remove the chicken from the skillet and set aside.
- Stir-Fry the Vegetables: In the same skillet, add the remaining tablespoon of vegetable oil. Add the minced garlic and ginger, and stir-fry for about 30 seconds until fragrant. Add the asparagus, snap peas, and bell peppers to the skillet. Stir-fry for 3-4 minutes until the vegetables are tender-crisp.
- Combine and Finish: Return the cooked chicken to the skillet. Add the chicken broth and hoisin sauce, tossing everything together to combine well. Cook for an additional 2 minutes to heat through and allow the flavors to meld. Season with salt and pepper to taste.
- Garnish and Serve: Sprinkle the sliced green onions over the stir-fry before serving. Serve hot over a bed of cooked rice or noodles for a complete meal.
Extra Tips:
To guarantee even cooking, make sure to slice the chicken and vegetables thinly and uniformly. This will help them cook quickly and evenly in the stir-fry.
If you prefer a spicier dish, consider adding a dash of red pepper flakes or a splash of hot sauce to the stir-fry. Additionally, feel free to substitute or add other spring vegetables such as broccoli or carrots, based on your preferences and what’s available.
Finally, remember that stir-frying is a quick cooking process, so have all your ingredients prepped and ready before you start cooking to prevent overcooking any elements of the dish.
Honey Garlic Chicken Thighs
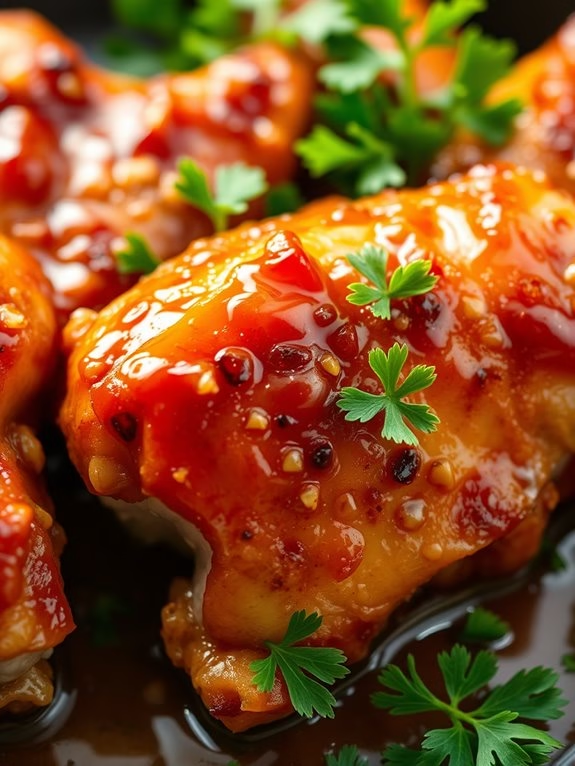
Honey Garlic Chicken Thighs are a delightful combination of sweet and savory flavors that make for a perfect springtime meal. This dish features tender, juicy chicken thighs glazed in a rich honey garlic sauce, creating a symphony of flavors that will leave your taste buds singing.
Whether you’re planning a family dinner or a gathering with friends, these chicken thighs are sure to be a crowd-pleaser. In addition to being delicious, this recipe is also surprisingly simple to prepare, requiring minimal ingredients and effort.
The key to this dish lies in balancing the sweetness of the honey with the savory notes of garlic and soy sauce, resulting in a harmonious blend that complements the natural richness of chicken thighs. With a serving size of 4-6 people, this recipe is perfect for small gatherings or a family meal.
Ingredients for 4-6 servings:
- 8 bone-in, skin-on chicken thighs
- 1/3 cup honey
- 1/4 cup soy sauce
- 2 tablespoons olive oil
- 1 tablespoon apple cider vinegar
- 4 cloves garlic, minced
- 1 teaspoon ground black pepper
- 1 teaspoon salt
- 1/2 teaspoon red pepper flakes (optional)
- 2 tablespoons chopped fresh parsley for garnish
Cooking Instructions:
1. Prepare the Chicken: Preheat your oven to 400°F (200°C). Pat the chicken thighs dry with paper towels and season them with salt and black pepper on both sides. This helps to guarantee the skin becomes crispy when cooked.
2. Sear the Chicken: In a large oven-safe skillet, heat the olive oil over medium-high heat. Once the oil is hot, add the chicken thighs skin-side down. Sear them for about 5-7 minutes, or until the skin is golden brown and crispy.
Flip the thighs and cook for an additional 2 minutes on the other side. Remove the chicken from the skillet and set aside.
3. Make the Sauce: Reduce the heat to medium and add the minced garlic to the skillet. Sauté for about 30 seconds until fragrant. Stir in the honey, soy sauce, apple cider vinegar, and red pepper flakes (if using).
Allow the sauce to simmer for about 2-3 minutes until it slightly thickens.
4. Combine and Bake: Return the chicken thighs to the skillet, skin side up. Spoon some of the sauce over each thigh to guarantee they’re well-coated. Transfer the skillet to the preheated oven and bake for 25-30 minutes, or until the chicken is cooked through and reaches an internal temperature of 165°F (74°C).
5. Garnish and Serve: Once cooked, remove the skillet from the oven and let the chicken thighs rest for a few minutes. Sprinkle with fresh parsley before serving.
Extra Tips:
For the best results, make sure the chicken thighs are at room temperature before you start cooking, as this will help them cook more evenly.
If you don’t have an oven-safe skillet, you can transfer the seared chicken and sauce to a baking dish before placing it in the oven. Additionally, feel free to adjust the amount of honey and soy sauce to suit your taste preferences, and remember to baste the chicken with the sauce occasionally during baking to keep it moist and flavorful.
Asparagus Stuffed Chicken Breasts
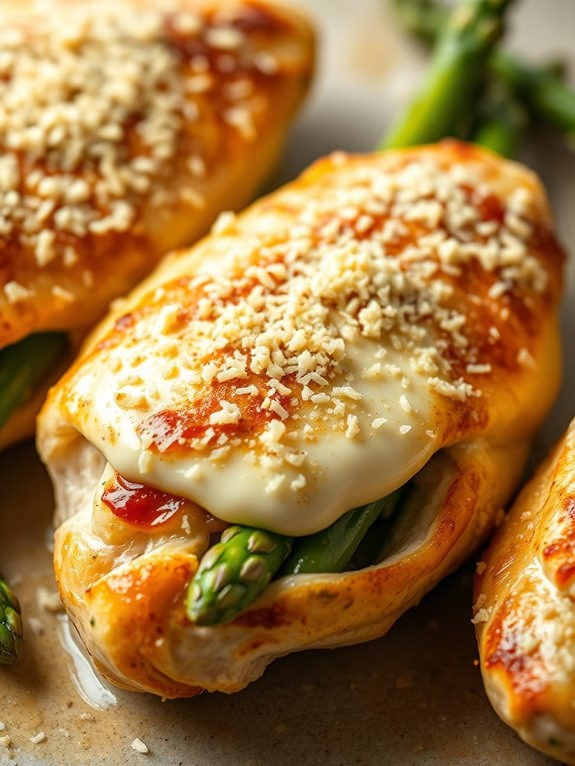
Asparagus Stuffed Chicken Breasts is a delightful dish that combines the tender juiciness of chicken breasts with the fresh, earthy flavor of asparagus. This dish is perfect for a springtime meal, celebrating the vibrant and crisp taste of seasonal asparagus. The chicken breasts are stuffed with a mixture of asparagus spears and cheese, creating a flavorful and satisfying meal that’s sure to please any crowd.
This dish isn’t only delicious but also visually appealing, making it a great choice for entertaining. The green asparagus peeking out from the golden-brown chicken breasts adds a pop of color to your plate. Serve this dish with a side of rice or a simple salad, and you have a complete meal that’s both nutritious and satisfying. With easy-to-follow steps, this recipe is perfect for both novice and experienced cooks.
Ingredients for 4-6 servings:
- 4 boneless, skinless chicken breasts
- 1 pound of fresh asparagus, trimmed
- 1 cup shredded mozzarella cheese
- 1/4 cup grated Parmesan cheese
- 2 tablespoons olive oil
- 1 teaspoon garlic powder
- 1 teaspoon onion powder
- 1 teaspoon Italian seasoning
- Salt and pepper to taste
- Toothpicks or kitchen twine for securing
Cooking Instructions:
- Preheat the Oven: Preheat your oven to 375°F (190°C). This guarantees that the oven is at the right temperature when you’re ready to bake the chicken breasts.
- Prepare the Chicken: Butterfly the chicken breasts by slicing them horizontally to create a pocket, being careful not to cut all the way through. Season both sides of the chicken with salt, pepper, garlic powder, onion powder, and Italian seasoning.
- Stuff the Chicken: Lay 3-4 asparagus spears and a generous sprinkle of mozzarella cheese inside each chicken breast. Fold the chicken over the filling and secure it with toothpicks or kitchen twine to keep the filling in place.
- Sear the Chicken: Heat olive oil in a large oven-safe skillet over medium-high heat. Add the stuffed chicken breasts and sear for 3-4 minutes on each side until they’re golden brown.
- Bake the Chicken: Transfer the skillet to the preheated oven. Bake for 20-25 minutes, or until the chicken is cooked through and the internal temperature reaches 165°F (74°C).
- Add Parmesan: In the final 5 minutes of baking, sprinkle the Parmesan cheese over the chicken breasts. This will melt and form a delicious crust.
- Rest and Serve: Remove the skillet from the oven and let the chicken rest for a few minutes before removing the toothpicks or twine. Slice and serve hot.
Extra Tips:
For the best results, choose chicken breasts that are uniform in size to guarantee even cooking. If your asparagus spears are particularly thick, consider blanching them in boiling water for a minute or two before stuffing them into the chicken. This will ensure they cook through properly.
Feel free to experiment with different types of cheese, such as cheddar or gouda, for a different flavor profile. Finally, confirm that the chicken is thoroughly cooked by using a meat thermometer; this guarantees both safety and perfect texture.
Pesto Chicken Pasta
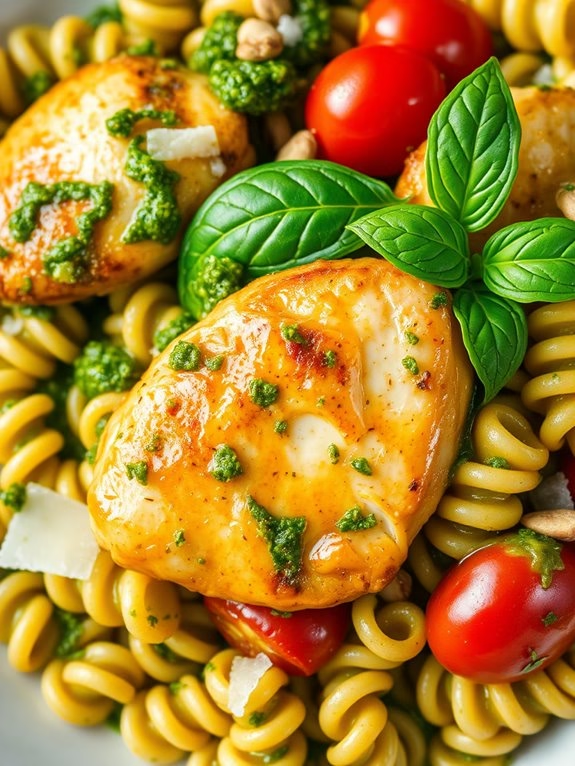
Pesto Chicken Pasta is a delightful and fresh springtime dish that combines juicy, tender chicken with the vibrant flavors of basil pesto. This recipe is perfect for those looking to enjoy a fresh and satisfying meal that doesn’t require hours in the kitchen. The basil pesto infuses the pasta with a fragrant aroma, while the chicken adds a hearty protein that makes this dish both filling and flavorful.
Whether you’re cooking for your family or hosting a small gathering, this Pesto Chicken Pasta recipe is sure to impress. It’s simple enough for a weeknight dinner yet elegant enough for entertaining guests. The bright green hue of the pesto sauce paired with the golden-brown chicken pieces creates a visually appealing dish that’s as pleasing to the eyes as it’s to the palate.
Ingredients for 4-6 servings:
- 1 pound of boneless, skinless chicken breast
- 12 ounces of pasta (penne or fusilli recommended)
- 1 cup of basil pesto
- 2 tablespoons of olive oil
- 1/2 cup of grated Parmesan cheese
- 1 cup of cherry tomatoes, halved
- Salt and pepper to taste
- Fresh basil leaves for garnish
- Optional: 1/4 cup of pine nuts, toasted
Instructions:
- Prepare the Chicken: Start by cutting the chicken breasts into bite-sized pieces. Season them with salt and pepper.
- Cook the Pasta: Bring a large pot of salted water to a boil. Add the pasta and cook according to the package instructions until al dente. Drain the pasta and set aside, reserving a cup of pasta water.
- Cook the Chicken: In a large skillet, heat the olive oil over medium-high heat. Add the chicken pieces and cook for about 5-7 minutes or until they’re golden brown and cooked through. Remove the chicken from the skillet and set aside.
- Combine Ingredients: In the same skillet, add the cooked pasta, cherry tomatoes, and cooked chicken. Stir in the basil pesto and mix until everything is well combined. If the sauce is too thick, add some reserved pasta water to reach the desired consistency.
- Finish with Cheese: Sprinkle the Parmesan cheese over the pasta and toss to combine. Cook for an additional 2-3 minutes until the cheese is melted and the ingredients are heated through.
- Serve: Transfer the Pesto Chicken Pasta to serving dishes. Garnish with fresh basil leaves and optional toasted pine nuts. Serve immediately.
Extra Tips:
To enhance the flavor of your Pesto Chicken Pasta, consider making your own basil pesto at home using fresh basil leaves, garlic, pine nuts, Parmesan cheese, and olive oil.
For a creamier texture, you can add a splash of heavy cream to the pesto sauce. Additionally, if you prefer a bit of spice, try adding a pinch of red pepper flakes to the chicken while it cooks.
Always taste and adjust the seasoning before serving to guarantee the flavors are perfectly balanced.
Citrus Marinated Chicken Skewers
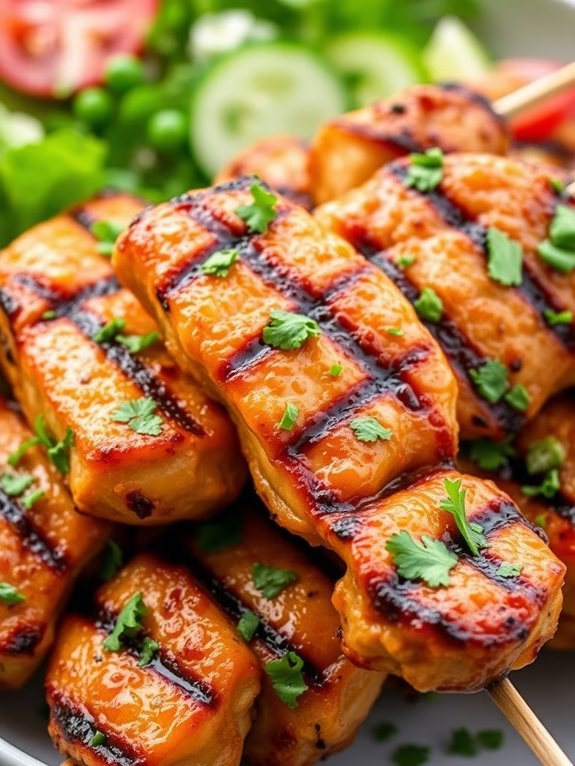
Spring is the perfect time to enjoy light and invigorating meals, and Citrus Marinated Chicken Skewers are an ideal dish to bring a burst of flavor to your table. This recipe combines the tangy essence of citrus with the savory goodness of grilled chicken, creating a harmonious blend that’s both satisfying and healthy.
The skewers are marinated in a zesty mixture of citrus juices and herbs, which tenderizes the chicken while infusing it with bright, vibrant flavors. Whether you’re hosting a backyard barbecue or simply enjoying a family meal, these skewers are sure to be a hit.
Citrus Marinated Chicken Skewers aren’t only delicious but also incredibly versatile. You can serve them over a bed of fluffy rice, alongside a fresh garden salad, or as part of a larger spread of grilled vegetables.
The marinade is simple to prepare and requires only a few hours to work its magic, making this dish both convenient and impressive. With a serving size suitable for 4-6 people, these skewers offer a delightful option for any occasion, bringing a taste of spring to your dining experience.
Ingredients (for 4-6 servings):
- 2 pounds boneless, skinless chicken breasts
- 1/4 cup fresh lemon juice
- 1/4 cup fresh orange juice
- 2 tablespoons olive oil
- 2 tablespoons soy sauce
- 3 cloves garlic, minced
- 1 teaspoon ground cumin
- 1 teaspoon paprika
- Salt and pepper to taste
- Zest of 1 lemon
- Zest of 1 orange
- 2 tablespoons fresh cilantro, chopped
- Wooden or metal skewers
Cooking Instructions:
- Prepare the Marinade: In a large mixing bowl, combine the lemon juice, orange juice, olive oil, soy sauce, minced garlic, cumin, paprika, salt, pepper, and the zest of both lemon and orange. Whisk these ingredients together until well combined to create a flavorful marinade.
- Marinate the Chicken: Cut the chicken breasts into evenly sized 1-inch cubes. Add the chicken to the bowl of marinade, making sure each piece is thoroughly coated. Cover the bowl with plastic wrap or transfer the chicken and marinade to a resealable plastic bag. Refrigerate for at least 2 hours, or overnight for maximum flavor.
- Preheat the Grill: When you’re ready to cook, preheat your grill to medium-high heat. If using wooden skewers, make sure to soak them in water for at least 30 minutes to prevent burning.
- Assemble the Skewers: Remove the chicken from the marinade and thread the pieces onto skewers, leaving a small space between each piece to guarantee even cooking.
- Grill the Skewers: Place the skewers on the preheated grill. Cook for about 12-15 minutes, turning occasionally, until the chicken is cooked through and has nice grill marks. The internal temperature should reach 165°F (75°C).
- Serve and Garnish: Remove the skewers from the grill and let them rest for a couple of minutes. Garnish with freshly chopped cilantro before serving. Enjoy your Citrus Marinated Chicken Skewers with your choice of sides.
Extra Tips:
To enhance the flavor of your Citrus Marinated Chicken Skewers, consider experimenting with different types of citrus fruits like lime or grapefruit for a unique twist.
Be sure to taste the marinade before adding the chicken to adjust the seasoning according to your preference. If you prefer a spicier kick, add a pinch of cayenne pepper or a dash of hot sauce to the marinade.
Finally, always use a meat thermometer to verify the chicken is cooked to perfection without any risk of being undercooked.
Balsamic Glazed Chicken
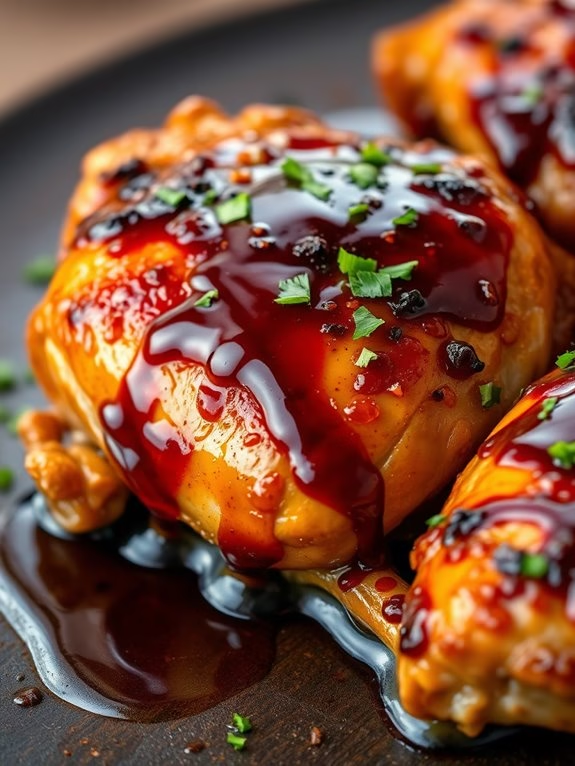
Balsamic Glazed Chicken is a delightful dish that blends the tangy sweetness of balsamic vinegar with the tender juiciness of chicken. This recipe is perfect for a spring meal, offering a fresh and vibrant flavor profile that pairs well with seasonal vegetables or a crisp salad. The glaze not only adds an enticing sheen to the chicken but also infuses it with a depth of flavor that will have your taste buds singing.
Whether you’re hosting a family dinner or simply looking to elevate a weekday meal, this Balsamic Glazed Chicken recipe is sure to impress. It’s straightforward enough for novice cooks yet sophisticated enough for a more experienced chef to appreciate. The following recipe provides the ingredients and steps necessary to create this delicious dish for a serving size of 4-6 people, making it perfect for gatherings or leftovers.
Ingredients for 4-6 servings:
- 4-6 bone-in, skin-on chicken thighs
- 1/2 cup balsamic vinegar
- 1/4 cup honey
- 2 tablespoons olive oil
- 3 cloves garlic, minced
- 1 teaspoon dried rosemary
- 1 teaspoon dried thyme
- Salt and pepper to taste
- Fresh parsley for garnish (optional)
Cooking Instructions:
- Prepare the Chicken: Preheat your oven to 400°F (200°C). Pat the chicken thighs dry with paper towels, then season them generously with salt and pepper on both sides.
- Make the Glaze: In a small bowl, whisk together the balsamic vinegar, honey, minced garlic, rosemary, and thyme until well combined.
- Sear the Chicken: Heat the olive oil in a large oven-safe skillet over medium-high heat. Add the chicken thighs, skin side down, and sear for about 5-7 minutes until the skin is golden brown and crispy. Flip the chicken and sear the other side for another 3 minutes.
- Add the Glaze: Pour the balsamic glaze over the chicken, making sure each piece is well-coated. Allow the glaze to simmer for 2-3 minutes, reducing slightly.
- Bake the Chicken: Transfer the skillet to the preheated oven. Bake for 20-25 minutes or until the chicken is cooked through and the internal temperature reaches 165°F (74°C).
- Finish and Serve: Remove the skillet from the oven and let the chicken rest for 5 minutes. Spoon the remaining glaze from the skillet over the chicken before serving. Garnish with fresh parsley if desired.
Extra Tips:
For an extra layer of flavor, consider marinating the chicken in the balsamic glaze for a few hours or overnight in the refrigerator before cooking. This allows the flavors to penetrate deeper into the meat.
If you prefer a thicker glaze, you can let it reduce further on the stovetop before adding it to the chicken. Additionally, using bone-in thighs helps retain moisture during cooking, ensuring a juicy result.
If you don’t have an oven-safe skillet, you can transfer the chicken and glaze to a baking dish for the baking step.
Spinach and Feta Chicken
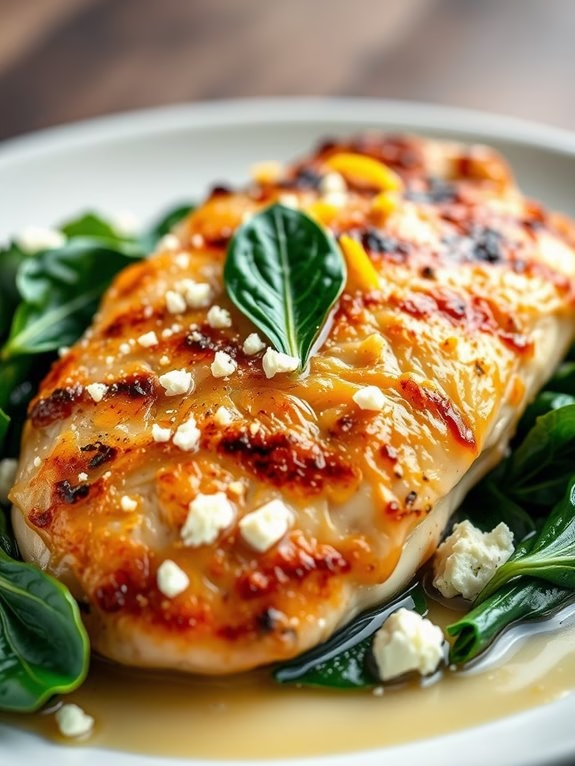
Spinach and Feta Chicken is a delightful and flavorful dish that combines the richness of tender chicken breasts with the savory taste of feta cheese and the nutritious goodness of spinach. This recipe is perfect for a family dinner or a small gathering, offering a Mediterranean twist with its combination of fresh herbs and zesty flavors. The chicken breasts are stuffed with a mixture of spinach, feta, and seasonings, then baked to perfection, resulting in a juicy and satisfying meal that pairs well with a variety of side dishes.
The beauty of Spinach and Feta Chicken lies in its simplicity and the harmonious blend of ingredients that create a dish both nutritious and indulgent. The fresh spinach provides a burst of vitamins and minerals, while the feta cheese adds a creamy, tangy element that complements the chicken perfectly. This recipe is easy to prepare and makes an impressive presentation on the plate, making it a go-to option for both novice and experienced cooks alike.
Ingredients (serves 4-6):
- 4-6 boneless, skinless chicken breasts
- 2 cups fresh spinach, chopped
- 1 cup crumbled feta cheese
- 2 cloves garlic, minced
- 1 tablespoon olive oil
- 1 teaspoon dried oregano
- 1 teaspoon dried basil
- Salt and pepper to taste
- 1 lemon (for juice and zest)
- Toothpicks or kitchen twine
Cooking Instructions:
- Preheat the Oven: Preheat your oven to 375°F (190°C) to guarantee it’s hot enough to cook the chicken evenly.
- Prepare the Stuffing: In a medium bowl, combine the chopped spinach, crumbled feta, minced garlic, olive oil, oregano, basil, salt, and pepper. Mix well to guarantee all ingredients are evenly distributed.
- Prepare the Chicken: Using a sharp knife, carefully make a horizontal slit in each chicken breast to create a pocket. Be sure not to cut all the way through.
- Stuff the Chicken: Spoon the spinach and feta mixture into each chicken breast pocket, using toothpicks or kitchen twine to secure the openings and keep the stuffing inside during cooking.
- Season the Chicken: Season the outside of the stuffed chicken breasts with additional salt, pepper, and the zest of one lemon for added flavor.
- Sear the Chicken: In a large oven-safe skillet, heat a little olive oil over medium-high heat. Sear the stuffed chicken breasts for 2-3 minutes on each side until golden brown.
- Bake the Chicken: Transfer the skillet to the preheated oven and bake for 20-25 minutes, or until the chicken is cooked through and reaches an internal temperature of 165°F (74°C).
- Rest and Serve: Once baked, let the chicken rest for a few minutes. Remove toothpicks or twine, squeeze fresh lemon juice over the top, and serve hot.
Extra Tips:
For an extra burst of flavor, consider adding sun-dried tomatoes or olives to the spinach and feta mixture. Guarantee your skillet is oven-safe to avoid transferring the chicken to another dish before baking.
If you prefer a more golden crust, broil the chicken for a couple of minutes at the end of the baking time, keeping a close eye to prevent burning. Serve with a side of roasted vegetables or a light salad to complement the rich flavors of the Spinach and Feta Chicken.
Herb-Crusted Chicken Cutlets
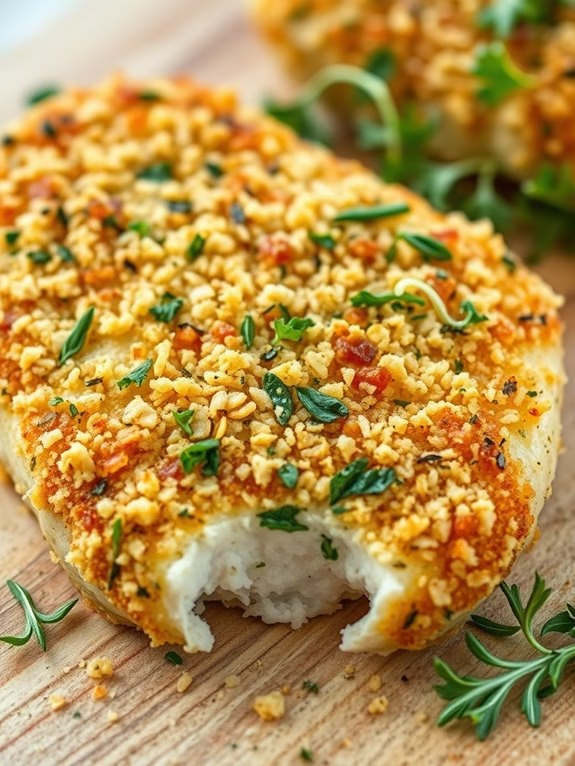
Herb-Crusted Chicken Cutlets are a delightful way to enjoy the fresh flavors of spring. This dish combines tender chicken with a crust of aromatic herbs and crispy breadcrumbs, resulting in a texture that’s both crunchy and juicy.
It’s a versatile recipe that’s perfect for a family dinner or an elegant weekend gathering, and it pairs beautifully with a variety of sides like roasted vegetables or a fresh garden salad.
The key to this recipe is the herbaceous crust, which not only adds flavor but also helps keep the chicken moist. A mix of fresh parsley, thyme, and rosemary, along with a touch of lemon zest, creates a vibrant and fragrant crust that enhances the natural flavors of the chicken.
The use of panko breadcrumbs guarantees a crispy finish, making each bite satisfyingly crunchy. This recipe is designed to serve 4-6 people, making it ideal for a small group or a few extra servings for leftovers.
Ingredients:
- 4-6 boneless, skinless chicken breast cutlets
- 1 cup panko breadcrumbs
- 1/4 cup grated Parmesan cheese
- 2 tablespoons fresh parsley, finely chopped
- 1 tablespoon fresh thyme, finely chopped
- 1 tablespoon fresh rosemary, finely chopped
- Zest of 1 lemon
- 2 cloves garlic, minced
- 1/4 cup all-purpose flour
- 2 large eggs
- 2 tablespoons milk
- Salt and pepper to taste
- 3 tablespoons olive oil
Cooking Instructions:
- Prepare the Herb Mixture: In a shallow bowl, combine the panko breadcrumbs, grated Parmesan cheese, chopped parsley, thyme, rosemary, lemon zest, and minced garlic. Mix well to guarantee the herbs are evenly distributed throughout the breadcrumbs.
- Set Up Breading Station: Place the flour in a separate shallow dish and season with salt and pepper. In another bowl, whisk together the eggs and milk until well blended.
- Bread the Chicken: Season the chicken cutlets with salt and pepper. Dredge each cutlet in the flour, shaking off the excess. Dip the floured cutlet into the egg mixture, allowing the excess to drip off. Finally, coat the cutlet in the herb-breadcrumb mixture, pressing gently to adhere.
- Heat the Oil: In a large skillet, heat the olive oil over medium-high heat. The oil should be hot but not smoking.
- Cook the Chicken: Add the breaded chicken cutlets to the skillet, making sure not to overcrowd the pan. Cook for about 4-5 minutes on each side, or until the chicken is golden brown and cooked through. The internal temperature should reach 165°F (74°C).
- Rest and Serve: Once cooked, transfer the chicken cutlets to a plate lined with paper towels to drain any excess oil. Allow them to rest for a few minutes before serving.
Extra Tips:
For best results, pound the chicken cutlets to an even thickness before breading. This guarantees they cook evenly and remain tender.
If you prefer a spicier kick, consider adding a pinch of red pepper flakes to the breadcrumb mixture. To make the dish lighter, you can bake the chicken cutlets in a preheated oven at 400°F (200°C) for about 20 minutes until golden and cooked through, flipping halfway for even browning.
Chicken and Snap Pea Salad
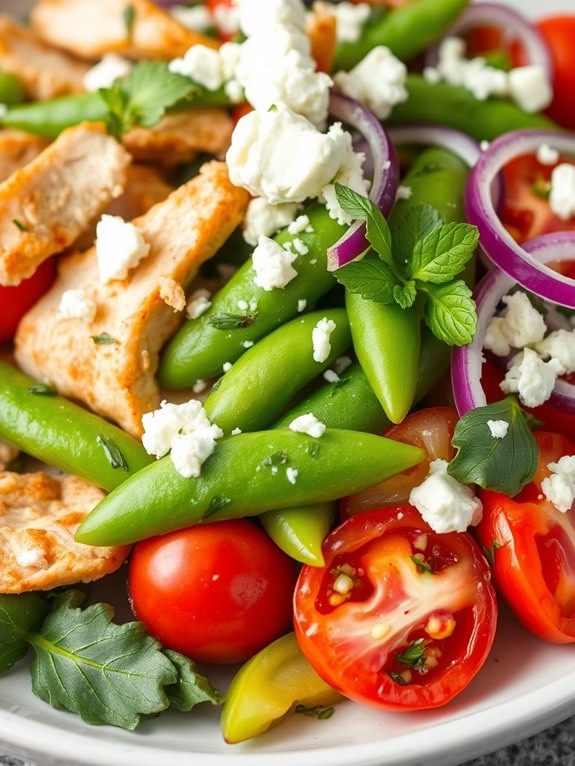
Welcome to a rejuvenating and vibrant dish that perfectly embodies the essence of spring: Chicken and Snap Pea Salad. This recipe combines tender, juicy chicken with the crisp crunch of snap peas, all brought together with a light and zesty dressing. It’s a perfect meal for those warmer days when you crave something fresh yet satisfying.
The combination of flavors and textures in this salad makes it a delightful and healthy choice for lunch or dinner. This Chicken and Snap Pea Salad isn’t only delicious but also packed with nutrients, making it a great addition to your spring menu. The salad is easy to prepare, allowing you to enjoy more time outdoors while still serving a wholesome meal.
Whether you’re hosting a springtime gathering or simply enjoying a meal with family, this recipe is sure to impress. Prepare to savor each bite of this delightful salad that celebrates the fresh produce of the season.
Ingredients (Serves 4-6):
- 2 boneless, skinless chicken breasts
- 2 cups fresh snap peas, trimmed
- 1 cup cherry tomatoes, halved
- 1/2 red onion, thinly sliced
- 1/4 cup fresh basil leaves, chopped
- 1/4 cup fresh parsley, chopped
- 1/4 cup feta cheese, crumbled
- 3 tablespoons olive oil
- 2 tablespoons lemon juice
- 1 tablespoon Dijon mustard
- Salt and pepper to taste
Cooking Instructions:
- Prepare the Chicken: Start by seasoning the chicken breasts with salt and pepper. Heat 1 tablespoon of olive oil in a skillet over medium heat. Cook the chicken breasts for about 6-7 minutes on each side, or until fully cooked through and golden brown. Remove from heat and let them rest before slicing them into thin strips.
- Blanch the Snap Peas: Bring a pot of water to a boil. Add the snap peas and blanch them for about 2 minutes. Immediately transfer them to a bowl of ice water to stop the cooking process. Drain and set aside.
- Mix the Dressing: In a small bowl, whisk together the remaining olive oil, lemon juice, Dijon mustard, salt, and pepper to create the dressing. Adjust seasoning as needed.
- Assemble the Salad: In a large salad bowl, combine the sliced chicken, blanched snap peas, cherry tomatoes, red onion, basil, and parsley. Pour the dressing over the salad and toss gently to combine.
- Add the Finishing Touches: Sprinkle the crumbled feta cheese over the top of the salad. Gently toss one more time to incorporate the cheese.
- Serve: Transfer the salad to serving plates or a large platter. Enjoy immediately as a main course or alongside your favorite springtime dishes.
Extra Tips:
To guarantee the chicken is juicy and flavorful, let it rest for a few minutes after cooking before slicing. This allows the juices to redistribute throughout the meat.
When choosing snap peas, look for ones that are bright green and firm to the touch for the best crunch. If you prefer a creamier dressing, feel free to add a tablespoon of Greek yogurt to the mix.
This salad is versatile, so feel free to customize it with additional spring vegetables such as asparagus or radishes. Enjoy your fresh and vibrant Chicken and Snap Pea Salad!
Apricot Glazed Chicken
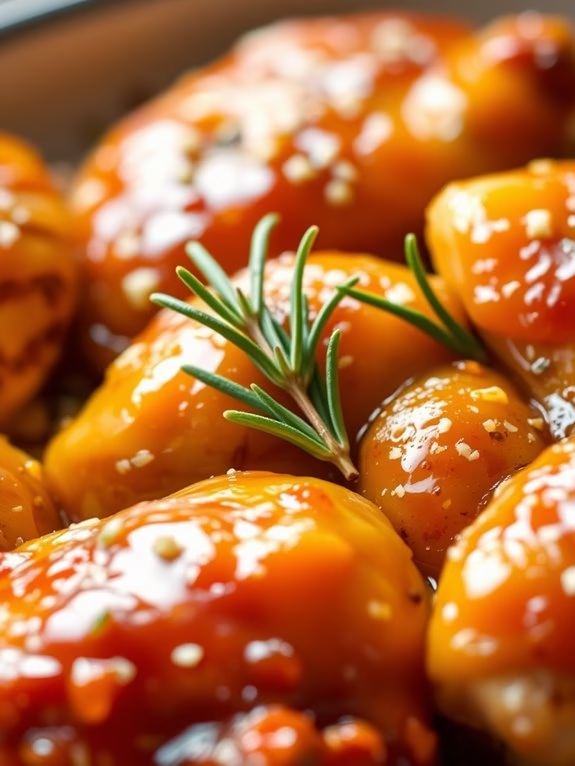
Apricot Glazed Chicken is a delightful and flavorful dish that combines the sweetness of apricots with the savory taste of chicken. This dish is perfect for a springtime meal, bringing a fresh and tangy taste to your dining table. The glaze, made primarily from apricot preserves, gives the chicken a beautiful golden color and a deliciously sticky texture that will have everyone reaching for seconds. The balance of sweet and savory flavors makes this dish a versatile choice for both casual family dinners and more formal gatherings.
The preparation of Apricot Glazed Chicken is quite straightforward, making it an ideal recipe for those who want to impress without spending hours in the kitchen. The chicken is first seasoned and seared to lock in the juices, then coated in a luscious apricot glaze and baked to perfection. The result is tender, juicy chicken with a crisp, caramelized coating that pairs beautifully with a variety of side dishes. This recipe serves 4-6 people, making it perfect for a family meal or a small dinner party.
Ingredients:
- 4-6 chicken breasts or thighs
- 1 cup apricot preserves
- 2 tablespoons soy sauce
- 2 tablespoons Dijon mustard
- 1 tablespoon apple cider vinegar
- 2 cloves garlic, minced
- Salt and pepper, to taste
- 1 tablespoon olive oil
- Fresh rosemary or thyme sprigs (optional, for garnish)
Instructions:
- Preheat the Oven: Start by preheating your oven to 375°F (190°C). This will guarantee that your chicken cooks evenly and the glaze caramelizes beautifully.
- Prepare the Chicken: Season the chicken breasts or thighs with salt and pepper on both sides. Heat the olive oil in a large oven-safe skillet over medium-high heat. Once the oil is hot, add the chicken pieces and sear for about 3-4 minutes on each side until they’re golden brown. This step helps to lock in the juices and flavor.
- Make the Glaze: While the chicken is searing, prepare the apricot glaze. In a small bowl, mix together the apricot preserves, soy sauce, Dijon mustard, apple cider vinegar, and minced garlic until well combined.
- Coat the Chicken: Once the chicken is seared, remove it from the heat and generously brush the apricot glaze over each piece, making sure they’re well coated. If using an oven-safe skillet, leave the chicken in the same pan. Otherwise, transfer the chicken to a baking dish.
- Bake the Chicken: Place the skillet or baking dish in the preheated oven. Bake for 20-25 minutes, or until the chicken reaches an internal temperature of 165°F (74°C) and the glaze is bubbly and caramelized.
- Garnish and Serve: Remove the chicken from the oven and let it rest for a few minutes. Garnish with fresh rosemary or thyme sprigs if desired. Serve warm with your choice of sides.
Extra Tips: For an even more intense flavor, marinate the chicken in the apricot glaze for a few hours or overnight in the refrigerator before cooking. Be careful not to overcook the chicken, as this can lead to dryness. If you find the glaze too thick or too sweet, adjust the soy sauce and vinegar to balance the taste. For a bit of heat, consider adding a pinch of red pepper flakes to the glaze. This dish pairs well with rice, quinoa, or a fresh spring salad.
Ginger Lime Chicken Tacos
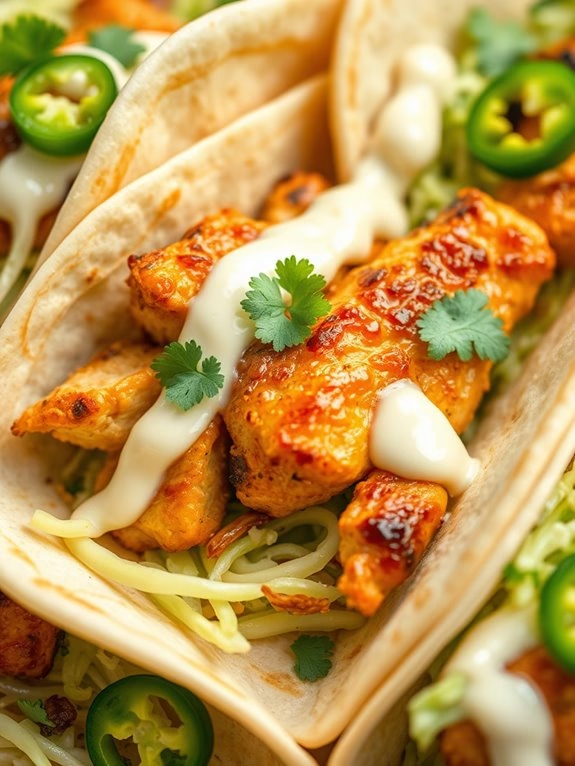
Ginger Lime Chicken Tacos are a fresh and zesty twist on classic tacos, perfect for a spring meal. These tacos combine tender, marinated chicken with the bright flavors of ginger and lime, creating a dish that’s both flavorful and satisfying. The marinade infuses the chicken with a delightful citrusy tang and warmth from ginger, while the tacos are finished with a crisp, invigorating topping of shredded cabbage and a creamy lime sauce.
Whether you’re hosting a gathering or preparing a weeknight dinner, these tacos are sure to impress. This recipe is designed to serve 4-6 people, making it ideal for a family meal or a small dinner party. The preparation is straightforward, with a focus on fresh ingredients that highlight the season’s best flavors.
The key to success is allowing the chicken to marinate for at least a couple of hours, which enhances the flavor and keeps the meat juicy and tender. With a few simple steps and a little patience, you’ll have a delicious and vibrant meal that’s perfect for spring.
Ingredients:
- 2 lbs boneless, skinless chicken thighs
- 3 tablespoons fresh lime juice
- 2 tablespoons soy sauce
- 2 tablespoons olive oil
- 2 tablespoons honey
- 1 tablespoon grated fresh ginger
- 2 cloves garlic, minced
- Salt and pepper, to taste
- 12 small corn or flour tortillas
- 2 cups shredded cabbage
- 1/2 cup chopped fresh cilantro
- 1/4 cup sour cream
- 1 lime, zested and juiced
- Optional: sliced jalapeños, for garnish
Instructions:
- Prepare the Marinade: In a large bowl, whisk together the lime juice, soy sauce, olive oil, honey, grated ginger, minced garlic, salt, and pepper. Confirm all ingredients are well combined to create a uniform marinade.
- Marinate the Chicken: Add the chicken thighs to the bowl, turning them to coat thoroughly in the marinade. Cover the bowl with plastic wrap and refrigerate for at least 2 hours, or overnight for best results.
- Cook the Chicken: Preheat a grill or a large skillet over medium-high heat. Remove the chicken from the marinade, shaking off excess. Grill or cook in the skillet for about 6-7 minutes per side, or until the internal temperature reaches 165°F (74°C) and the chicken is golden brown and slightly charred.
- Prepare the Sauce: In a small bowl, mix together the sour cream, lime zest, and lime juice until smooth and creamy. Set aside for assembling the tacos.
- Warm the Tortillas: While the chicken is resting, warm the tortillas on the grill or in a dry skillet for about 30 seconds on each side, until soft and pliable.
- Assemble the Tacos: Slice the grilled chicken into thin strips. Place a portion of chicken on each tortilla, top with shredded cabbage, a drizzle of the lime cream sauce, chopped cilantro, and optional sliced jalapeños.
- Serve: Serve the tacos immediately while the chicken is still warm, providing lime wedges on the side for an extra burst of citrus flavor.
Extra Tips:
For best results, make sure to use fresh lime juice and ginger. If possible, marinate the chicken overnight to maximize flavor.
When grilling, avoid overcrowding the grill or pan to ensure even cooking and a nice sear. Feel free to adjust the toppings according to preference, adding avocado for creaminess or extra vegetables for crunch.
If you prefer a spicier taco, incorporate more jalapeños or a dash of hot sauce into the lime cream sauce.
Creamy Mushroom Chicken
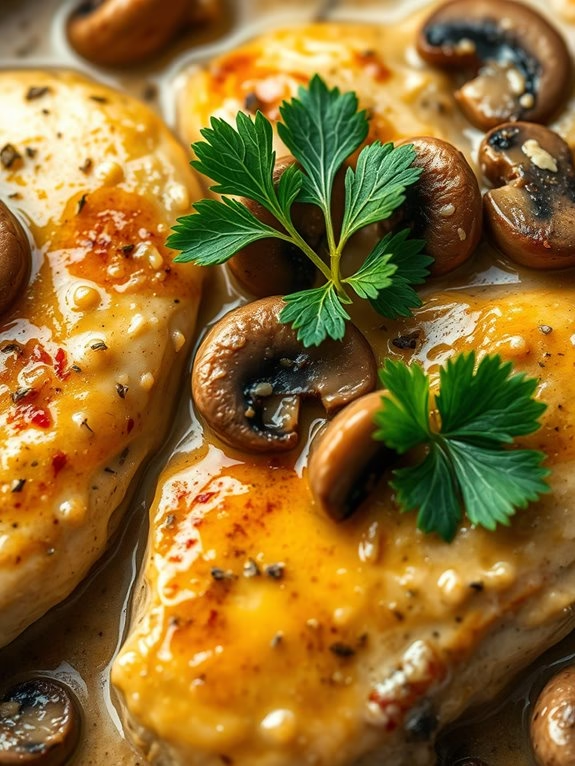
Creamy Mushroom Chicken is a delightful spring dish that combines tender chicken breasts with a rich and flavorful mushroom sauce. This recipe is perfect for a family dinner or a small gathering, offering a comforting and satisfying meal that will please everyone at the table.
The creamy sauce, infused with earthy mushrooms and aromatic herbs, complements the succulent chicken, creating a harmonious blend of flavors that’s both elegant and comforting. This recipe highlights the freshness and simplicity of spring ingredients, making it a wonderful choice for those looking to incorporate seasonal produce into their meals.
It’s straightforward to prepare, requiring minimal effort while delivering maximum taste. Whether you’re a seasoned home cook or a beginner in the kitchen, this Creamy Mushroom Chicken will quickly become a favorite in your culinary repertoire.
Ingredients (Serves 4-6):
- 4-6 boneless, skinless chicken breasts
- 1 tablespoon olive oil
- 2 tablespoons butter
- 1 pound mushrooms, sliced (button or cremini)
- 4 cloves garlic, minced
- 1 cup chicken broth
- 1 cup heavy cream
- 1 teaspoon dried thyme
- Salt and pepper to taste
- 1/4 cup grated Parmesan cheese
- Fresh parsley, chopped for garnish
Cooking Instructions:
- Prepare the Chicken: Season the chicken breasts generously with salt and pepper on both sides. Heat olive oil in a large skillet over medium-high heat. Add the chicken breasts and cook for 5-7 minutes on each side until they’re golden brown and cooked through. Remove the chicken from the skillet and set aside.
- Sauté the Mushrooms: In the same skillet, add butter and let it melt. Add the sliced mushrooms and sauté for about 5 minutes until they’re golden brown and have released their moisture. Stir in the minced garlic and cook for an additional minute until fragrant.
- Make the Sauce: Pour the chicken broth into the skillet, scraping up any brown bits from the bottom of the pan for extra flavor. Stir in the heavy cream and thyme, bringing the mixture to a simmer. Let it cook for about 5 minutes until the sauce has thickened slightly.
- Combine and Cook: Return the chicken breasts to the skillet, spooning the mushroom sauce over them. Let the chicken simmer in the sauce for an additional 5-7 minutes, allowing the flavors to meld together. Sprinkle Parmesan cheese over the top, letting it melt into the sauce.
- Serve: Garnish with freshly chopped parsley before serving. This dish pairs beautifully with a side of rice, pasta, or crusty bread to soak up the creamy sauce.
Extra Tips:
When cooking the chicken breasts, verify they’re of even thickness for uniform cooking. If necessary, pound them gently with a meat mallet.
Adjust the seasoning to your taste, and feel free to experiment with different herbs, such as rosemary or basil, for additional flavor. For a lighter version, substitute half of the heavy cream with milk or a plant-based alternative.
Additionally, this dish can be made ahead of time and reheated gently over low heat, making it a convenient option for busy weeknights or entertaining.
Mediterranean Chicken Bake
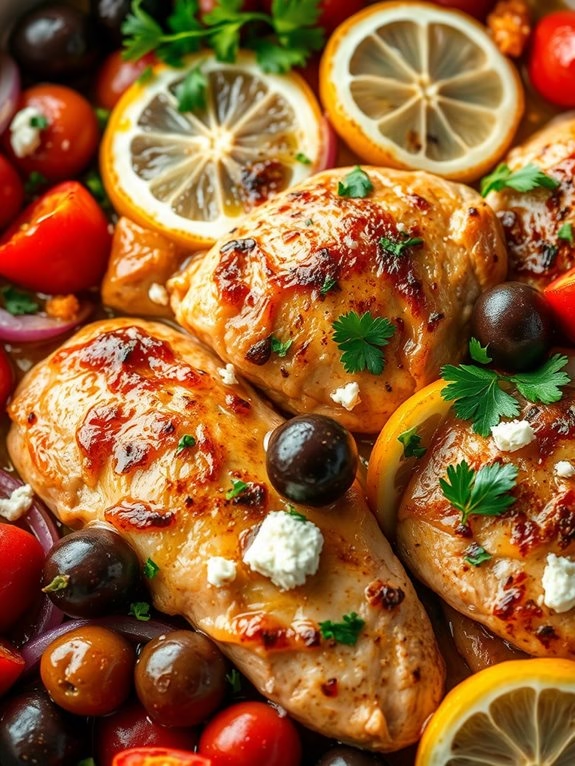
Mediterranean Chicken Bake is a flavorful and hearty dish that combines the vibrant tastes of the Mediterranean with tender, juicy chicken. This dish is perfect for a family meal or a gathering with friends, offering a delightful mix of vegetables, herbs, and spices that bring out the best in each ingredient. The combination of olives, tomatoes, and feta cheese, along with the aromatic herbs, creates an irresistible aroma and taste, making this dish a crowd-pleaser.
Not only is Mediterranean Chicken Bake delicious, but it’s also relatively easy to prepare, making it an excellent choice for both novice and experienced cooks. The simple preparation and baking process allow the flavors to meld together beautifully, resulting in a dish that’s as comforting as it’s satisfying. Serve this dish with a side of crusty bread or a fresh salad for a complete Mediterranean experience.
Ingredients (serves 4-6 people)
- 6 boneless, skinless chicken thighs
- 2 tablespoons olive oil
- 1 teaspoon dried oregano
- 1 teaspoon dried thyme
- 1 teaspoon garlic powder
- Salt and pepper, to taste
- 1 lemon, sliced
- 1 cup cherry tomatoes, halved
- 1 cup pitted kalamata olives
- 1 red onion, sliced
- 1 red bell pepper, sliced
- 1 cup crumbled feta cheese
- 2 tablespoons fresh parsley, chopped
Cooking Instructions
- Preheat the Oven: Begin by preheating your oven to 375°F (190°C). This guarantees the oven is at the right temperature for even cooking.
- Prepare the Chicken: In a large mixing bowl, combine the olive oil, oregano, thyme, garlic powder, salt, and pepper. Add the chicken thighs to the bowl and toss them well, ensuring each piece is evenly coated with the seasoning mix.
- Assemble the Bake: In a large baking dish, arrange the seasoned chicken thighs. Layer the lemon slices over the chicken, then distribute the cherry tomatoes, olives, red onion, and red bell pepper evenly over the top.
- Bake the Dish: Place the baking dish in the preheated oven and bake for 30-35 minutes. The chicken should be cooked through and the vegetables tender. An internal temperature of 165°F (74°C) indicates the chicken is done.
- Add Feta and Broil: Remove the baking dish from the oven and sprinkle the crumbled feta cheese over the top. Set your oven to broil and return the dish to the oven for an additional 3-5 minutes, or until the feta is slightly browned and bubbly.
- Finish with Parsley: Once completed, remove the dish from the oven and let it rest for a few minutes. Sprinkle the chopped fresh parsley over the top before serving.
Extra Tips
To enhance the flavors, you can marinate the chicken in the seasoning mixture for a few hours or overnight in the refrigerator. This allows the spices to penetrate deeper into the meat, making it even more flavorful.
For an added crunch, consider adding a handful of pine nuts or almonds during the last few minutes of baking. If you prefer a spicier dish, incorporate a pinch of red pepper flakes into the seasoning mix.
Finally, verify you’re using a baking dish large enough to allow airflow around the chicken pieces; overcrowding can lead to steaming rather than baking.
Tangy Barbecue Chicken Lettuce Wraps
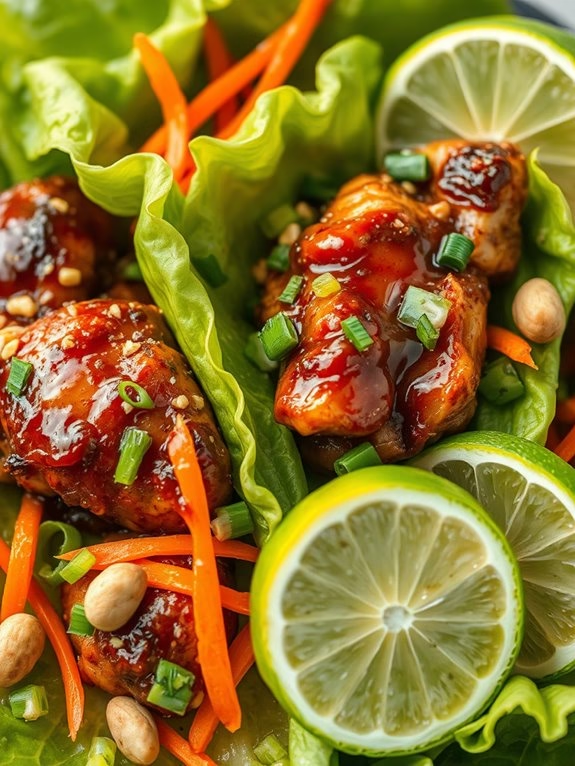
Tangy Barbecue Chicken Lettuce Wraps are a delightful addition to any spring menu, offering a new and light alternative to traditional barbecue dishes. These wraps are perfect for those who love the bold flavors of barbecue but prefer a lighter meal. This dish combines succulent chicken pieces marinated in a tangy barbecue sauce and wrapped in crisp lettuce leaves, making them both delicious and visually appealing.
The combination of textures and flavors is sure to impress your family and friends at your next gathering. Designed to serve 4-6 people, these lettuce wraps aren’t only easy to make but also allow for customization based on personal taste preferences. The key to this dish is balancing the rich, smoky barbecue sauce with the invigorating crunch of the lettuce and the additional toppings that you choose.
With a few simple ingredients and steps, you can create a memorable meal that can be enjoyed as a main course or an appetizer.
Ingredients:
- 1.5 lbs boneless, skinless chicken breasts
- 1 cup barbecue sauce
- 2 tablespoons apple cider vinegar
- 1 tablespoon honey
- 1 tablespoon olive oil
- 1 teaspoon smoked paprika
- 1 teaspoon garlic powder
- Salt and pepper, to taste
- 1 head of butter lettuce or romaine lettuce, leaves separated
- 1 cup shredded carrots
- 1/2 cup chopped green onions
- 1/2 cup chopped fresh cilantro
- 1/4 cup chopped peanuts (optional)
- Lime wedges, for serving
Instructions:
- Prepare the Marinade: In a large bowl, mix together the barbecue sauce, apple cider vinegar, honey, olive oil, smoked paprika, and garlic powder. Season with salt and pepper. Whisk until all ingredients are well combined.
- Marinate the Chicken: Cut the chicken breasts into bite-sized pieces and add them to the marinade. Make sure the chicken is well coated, cover the bowl with plastic wrap, and refrigerate for at least 1 hour, or overnight for deeper flavor.
- Cook the Chicken: Heat a large skillet over medium-high heat. Add the marinated chicken pieces and cook for about 6-8 minutes, or until the chicken is cooked through and slightly caramelized, stirring occasionally. Remove from heat and set aside.
- Prepare the Lettuce Wraps: Wash and dry the lettuce leaves. Arrange them on a serving platter, creating cups for the chicken filling.
- Assemble the Wraps: Fill each lettuce leaf with a generous scoop of the cooked chicken. Top with shredded carrots, green onions, cilantro, and peanuts if desired. Serve with lime wedges on the side for squeezing over the wraps.
- Serve and Enjoy: Arrange the completed wraps on a serving platter and serve immediately while the chicken is still warm.
Extra Tips:
For added flavor, consider grilling the chicken instead of cooking it in a skillet to impart a smoky, charred taste that complements the barbecue sauce. Additionally, you can substitute chicken with other proteins such as shrimp or tofu to cater to different dietary preferences.
When selecting lettuce, opt for leaves that are large enough to hold the filling but also tender enough to fold easily. Finally, feel free to add more toppings such as sliced avocado or a sprinkle of sesame seeds to enhance the flavor and presentation of your wraps.