Finding chicken recipes that kids will actually enjoy can feel like a daunting task.
As a busy mom, I know the struggle of wanting to serve something nutritious while keeping the little ones happy.
Crispy chicken tenders that they can’t resist or cheesy quesadillas that spark joy at the dinner table are always a win.
These easy recipes not only taste amazing but also turn cooking into a fun family activity.
Let’s make mealtime a delightful experience with these 15 chicken recipes your kids will love!
Crispy Chicken Tenders
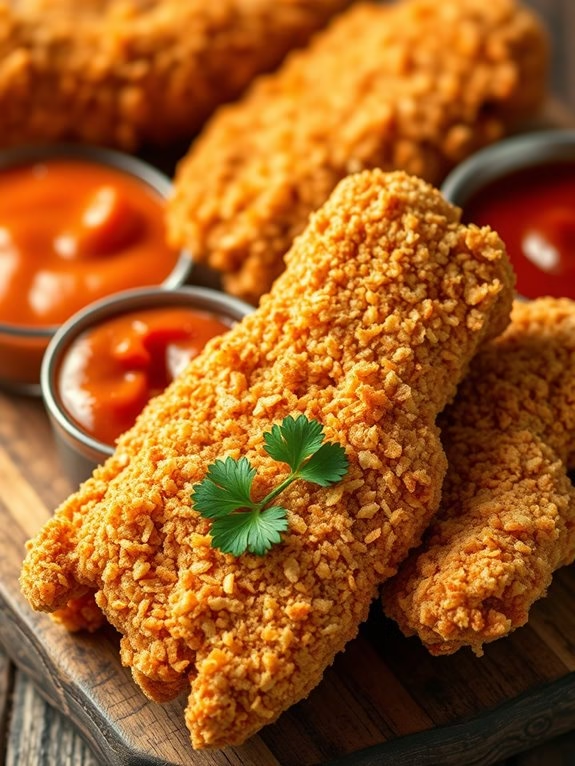
Crispy Chicken Tenders are a delightful treat that both kids and adults can enjoy. These tenders are perfectly seasoned, coated in a deliciously crunchy breading, and fried to golden brown perfection. They’re excellent for a quick lunch, a family dinner, or even as a party snack. The best part is that they’re easy to make at home, which means you can control the ingredients and guarantee they’re healthier than their fast-food counterparts.
This recipe is designed to be simple and accessible, utilizing ingredients that are likely already in your kitchen. You’ll learn to create chicken tenders that are juicy on the inside and crunchy on the outside without the need for any fancy equipment or hard-to-find ingredients. Follow the steps below to make Crispy Chicken Tenders that are sure to become a family favorite. This recipe serves 4-6 people, making it perfect for a family meal.
Ingredients:
- 1 1/2 pounds of chicken tenders or chicken breast cut into strips
- 1 cup all-purpose flour
- 1 teaspoon salt
- 1/2 teaspoon black pepper
- 1 teaspoon garlic powder
- 1 teaspoon onion powder
- 1 teaspoon paprika
- 2 large eggs
- 2 tablespoons milk
- 2 cups panko breadcrumbs
- Vegetable oil for frying
Cooking Instructions:
- Prepare the Chicken: Start by rinsing the chicken tenders under cold water and pat them dry with paper towels. If using chicken breasts, slice them into strips about 1-inch wide.
- Set Up Breading Stations: In a shallow dish, combine the flour, salt, black pepper, garlic powder, onion powder, and paprika. In a separate bowl, beat the eggs with the milk until well combined. In a third dish, place the panko breadcrumbs.
- Bread the Chicken: Take each chicken strip and dredge it in the flour mixture, shaking off any excess. Next, dip it into the egg mixture, allowing any excess to drip off. Finally, coat it thoroughly with the panko breadcrumbs, pressing gently to guarantee the breadcrumbs adhere well.
- Heat the Oil: In a large skillet, heat about 1/2 inch of vegetable oil over medium heat. The oil is ready when a small piece of bread sizzles and turns golden brown within a minute.
- Fry the Chicken: Carefully place the breaded chicken strips into the hot oil, making sure not to overcrowd the pan. Fry the chicken for about 3-4 minutes on each side, or until the tenders are golden brown and cooked through. The internal temperature should read 165°F (75°C).
- Drain and Serve: Remove the chicken tenders from the oil and place them on a plate lined with paper towels to drain any excess oil. Serve warm with your favorite dipping sauces.
Extra Tips:
For the crispiest chicken tenders, guarantee that your oil is at the correct temperature before frying. If the oil is too cool, the tenders will absorb more oil and become greasy.
Also, try using a wire rack to cool the tenders instead of paper towels to keep them crispy. Feel free to experiment with different spices in the flour mixture to suit your family’s taste preferences—adding a pinch of cayenne pepper can give them a little kick!
Cheesy Chicken Quesadillas
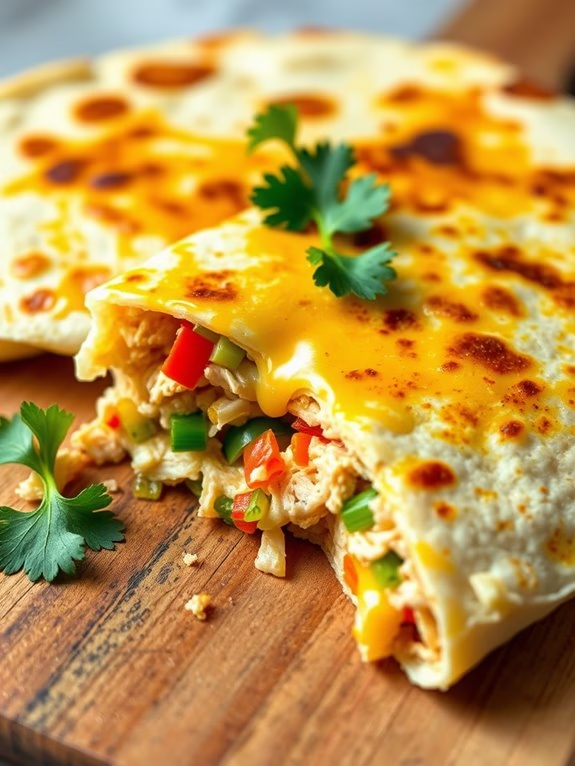
Cheesy Chicken Quesadillas are a delightful and simple meal that kids will love. This dish combines tender chicken with gooey melted cheese, all wrapped in a crispy tortilla shell. It’s perfect for lunch, dinner, or even as a snack. Not only are they quick to prepare, but they also allow for creativity with the addition of various ingredients like vegetables or spices to suit different tastes. Plus, they’re an excellent way to use leftover chicken.
These quesadillas aren’t only delicious but also nutritious, offering a balanced mix of protein, calcium, and carbohydrates. They’re a great way to introduce kids to cooking, as the recipe is straightforward and involves simple techniques like shredding cheese and assembling the quesadillas.
Let’s explore the ingredients and steps to make these mouth-watering Cheesy Chicken Quesadillas.
Ingredients (Serves 4-6)
- 2 cups cooked chicken, shredded
- 2 cups shredded cheddar cheese
- 8 large flour tortillas
- 1/2 cup chopped bell peppers
- 1/4 cup chopped green onions
- 1 tablespoon olive oil or butter
- Salt and pepper to taste
- Optional: sour cream and salsa for serving
Cooking Instructions
- Prepare the Ingredients: Start by shredding the cooked chicken into small, bite-sized pieces. Chop the bell peppers and green onions finely. This will guarantee even distribution and cooking in the quesadillas.
- Mix the Filling: In a large mixing bowl, combine the shredded chicken, cheddar cheese, chopped bell peppers, and green onions. Add a pinch of salt and pepper, then mix everything thoroughly to guarantee the flavors are evenly distributed.
- Heat the Pan: Place a large skillet over medium heat and add a small amount of olive oil or butter. Allow it to heat up until it starts to sizzle slightly, which indicates it’s ready for cooking.
- Assemble the Quesadillas: Lay out the flour tortillas on a flat surface. Spread the chicken and cheese mixture evenly over one half of each tortilla. Fold the empty half over the filling to create a semicircle.
- Cook the Quesadillas: Place the assembled quesadillas in the heated skillet. Cook each side for about 3-4 minutes or until the tortillas are golden brown and the cheese has melted completely. Press down gently with a spatula for even cooking.
- Serve: Remove the quesadillas from the skillet and let them cool slightly. Cut each quesadilla into wedges and serve them warm with optional sides of sour cream and salsa.
Extra Tips
For extra flavor, consider adding spices like cumin or paprika to the chicken mixture. You can also sneak in some veggies like spinach or mushrooms for added nutrition.
If you want a crispier finish, use a griddle or panini press to cook the quesadillas. Always keep an eye on them while cooking to prevent burning, and adjust the heat as necessary.
Enjoy your Cheesy Chicken Quesadillas with a side of fresh guacamole for an extra treat!
Sweet and Sour Chicken
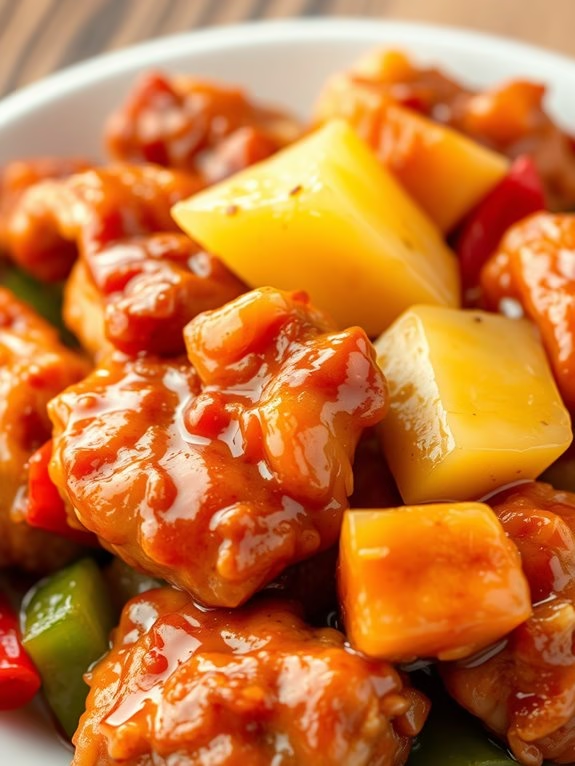
Sweet and Sour Chicken is a delightful dish that combines the tanginess of vinegar and sweetness of sugar to create a flavor profile that kids absolutely adore. It’s a classic Chinese-American dish that’s not only easy to make but also quick, making it perfect for busy weeknights.
The vibrant colors and the balance of sweet and sour flavors make it an enticing meal that even picky eaters might enjoy. The crispy chicken pieces are coated in a glossy sauce, served with pineapple chunks and colorful bell peppers, making it not only tasty but also visually appealing.
This recipe is tailored to serve 4-6 people, making it ideal for family dinners or small gatherings. Sweet and Sour Chicken can be served alongside steamed rice or noodles, which complement the dish perfectly.
With simple ingredients that are likely already in your pantry, you can whip up this family favorite in no time. Follow the straightforward steps below, and you’ll have a delicious meal on the table that your kids will keep asking for!
Ingredients:
- 1 ½ pounds boneless, skinless chicken breast, cut into 1-inch pieces
- 1 cup all-purpose flour
- 2 eggs, beaten
- 1 cup vegetable oil (for frying)
- 1 red bell pepper, chopped
- 1 green bell pepper, chopped
- 1 cup pineapple chunks (canned or fresh)
- 1/2 cup sugar
- 1/4 cup apple cider vinegar
- 3 tablespoons ketchup
- 1 tablespoon soy sauce
- 1 tablespoon cornstarch
- 1/4 cup water
- Salt and pepper to taste
Cooking Instructions:
- Prepare the Chicken: Season the chicken pieces with salt and pepper. Dip each piece into the beaten eggs, making certain they’re fully coated, then dredge in flour. Shake off any excess flour.
- Fry the Chicken: Heat the vegetable oil in a large pan over medium-high heat. Once the oil is hot, carefully add the chicken pieces in batches. Fry until they’re golden brown and cooked through, about 5-7 minutes per batch. Remove from the pan and drain on paper towels.
- Prepare the Sauce: In a small bowl, mix together the sugar, apple cider vinegar, ketchup, soy sauce, cornstarch, and water until smooth. Make sure the cornstarch is fully dissolved to avoid lumps.
- Cook the Vegetables: In the same pan, remove any excess oil, leaving about a tablespoon. Add the bell peppers and pineapple chunks to the pan, and sauté for about 3-4 minutes until the peppers are slightly tender.
- Combine Everything: Pour the sauce into the pan with the vegetables and pineapple. Stir well and let it simmer until the sauce thickens, about 2-3 minutes.
- Add the Chicken: Return the fried chicken pieces to the pan and toss everything to coat the chicken thoroughly with the sauce. Cook for another 2 minutes to make sure the chicken is heated through.
- Serve: Transfer the Sweet and Sour Chicken to a serving dish and enjoy it warm with a side of steamed rice or noodles.
Extra Tips:
When frying the chicken, make sure the oil is hot enough to prevent the chicken from absorbing too much oil and becoming greasy. A thermometer can help verify the oil is around 350°F.
Additionally, for crispier chicken, you can double fry the pieces by refrying them for a second time for about 2-3 minutes. Finally, if you prefer a thicker sauce, add an extra tablespoon of cornstarch mixed with a little water.
Chicken Alfredo Pasta
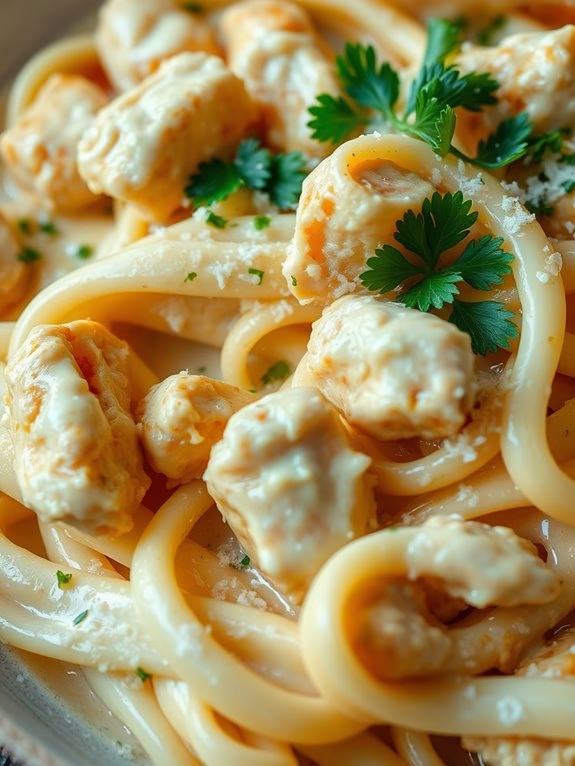
Chicken Alfredo Pasta is a delightful and creamy dish that’s perfect for kids and easy to prepare. This dish combines tender pieces of chicken with a rich Alfredo sauce, making it a comforting meal that will satisfy even the pickiest eaters. The creamy sauce clings to the pasta, creating a dish that’s both flavorful and filling.
Whether you’re looking for a quick weeknight dinner or a special meal to please the family, Chicken Alfredo Pasta is an excellent choice. This recipe is designed to serve 4-6 people and can be made in under 30 minutes, making it a convenient option for busy parents. Not only is it easy to make, but it’s also a great way to introduce children to cooking, as they can help with tasks like stirring the sauce or sprinkling cheese.
With just a few simple ingredients and straightforward steps, you’ll have a delicious homemade pasta dish that everyone will love.
Ingredients:
- 12 ounces fettuccine pasta
- 2 tablespoons olive oil
- 1 pound boneless, skinless chicken breasts, cut into bite-sized pieces
- Salt and pepper, to taste
- 2 cloves garlic, minced
- 1 cup heavy cream
- 1 cup grated Parmesan cheese
- 1/2 cup chicken broth
- 1 tablespoon butter
- 1/4 teaspoon ground nutmeg (optional)
- Fresh parsley, chopped, for garnish
Cooking Instructions:
- Cook the Pasta: Begin by boiling a large pot of salted water. Add the fettuccine pasta and cook according to the package instructions until al dente. Once cooked, drain the pasta and set aside.
- Cook the Chicken: In a large skillet, heat the olive oil over medium-high heat. Add the bite-sized chicken pieces and season with salt and pepper. Cook the chicken for about 6-8 minutes, or until fully cooked and no longer pink inside. Remove the chicken from the skillet and set aside.
- Prepare the Sauce: In the same skillet, reduce the heat to medium and add the minced garlic. Sauté for about 1 minute until fragrant. Add the chicken broth, heavy cream, and butter to the skillet. Stir the mixture and bring it to a simmer.
- Thicken the Sauce: Gradually add the grated Parmesan cheese to the skillet, stirring constantly until the cheese melts and the sauce thickens. If desired, add ground nutmeg for an extra layer of flavor.
- Combine Ingredients: Return the cooked chicken to the skillet, stirring to coat with the sauce. Add the cooked pasta and toss everything together until the pasta is thoroughly coated with the Alfredo sauce.
- Serve: Transfer the Chicken Alfredo Pasta to serving plates. Garnish with freshly chopped parsley before serving.
Extra Tips:
To guarantee a smooth and creamy Alfredo sauce, make sure that the Parmesan cheese is finely grated before adding it to the sauce. This helps it melt more evenly and prevents clumping.
If the sauce becomes too thick, you can add a little more chicken broth or pasta water to reach the desired consistency. For a bit of variety, consider adding steamed broccoli or sautéed mushrooms to the dish. These additions not only enhance the flavor but also add a healthy touch to the meal.
BBQ Chicken Pizza
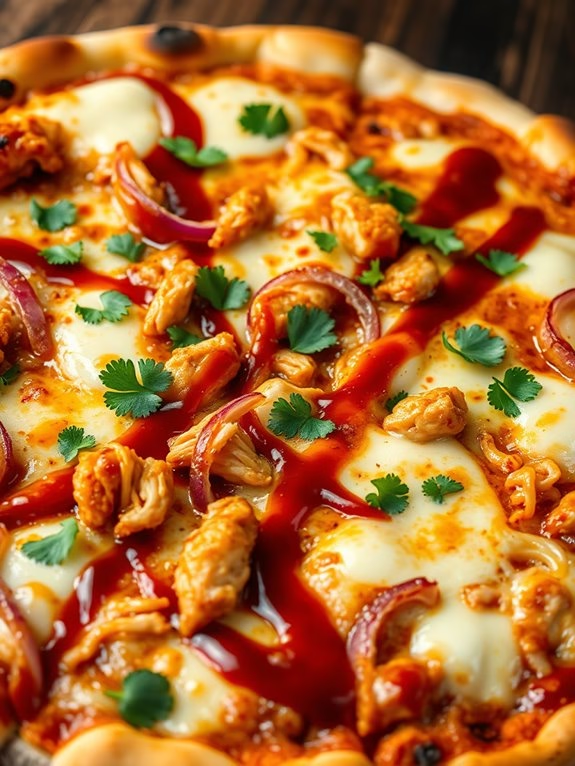
BBQ Chicken Pizza is a delightful and easy-to-make dish that kids will love. Combining the smoky sweetness of barbecue sauce with tender pieces of chicken and a crispy pizza crust, this recipe is perfect for a family dinner or a fun cooking project with your little chefs.
The blend of flavors and the exciting process of assembling the pizza will surely keep the kids engaged, and the end result is a delicious, homemade pizza that everyone will enjoy.
This BBQ Chicken Pizza recipe is designed for a serving size of 4-6 people, making it ideal for a family meal. The recipe involves simple ingredients that you might already have in your kitchen, and it requires minimal cooking skills. Plus, it’s a great way to use up leftover chicken.
So, gather the family around, roll up your sleeves, and prepare to create a pizza masterpiece that will have everyone asking for seconds.
Ingredients:
- 1 pound boneless, skinless chicken breast
- 1 tablespoon olive oil
- 1 cup barbecue sauce (plus extra for drizzling)
- 2 cups shredded mozzarella cheese
- 1 pre-made pizza crust or dough
- 1 small red onion, thinly sliced
- 1/2 cup fresh cilantro, chopped
- Cornmeal or flour (for dusting)
- Salt and pepper to taste
Instructions:
1. Prepare the Chicken: Preheat your oven to 425°F (220°C). Season the chicken breasts with salt and pepper. In a skillet over medium heat, add olive oil and cook the chicken until it’s no longer pink in the center and reaches an internal temperature of 165°F (75°C), about 6-7 minutes per side.
Remove the chicken from the skillet, let it cool slightly, and then shred it into bite-sized pieces.
2. Assemble the Pizza: Dust a baking sheet or pizza stone with cornmeal or flour to prevent sticking. Place the pizza crust or rolled-out dough on the prepared surface. Spread 1 cup of barbecue sauce evenly over the crust, leaving a small border around the edges for the crust.
3. Add Toppings: Distribute the shredded chicken evenly over the barbecue sauce layer. Sprinkle the mozzarella cheese over the chicken. Arrange the thinly sliced red onion over the top.
4. Bake the Pizza: Place the pizza in the preheated oven and bake for 12-15 minutes, or until the cheese is melted and bubbly, and the crust is golden brown.
5. Finish and Serve: Remove the pizza from the oven and let it cool for a couple of minutes. Sprinkle the chopped cilantro over the top for a fresh finish. Optionally, drizzle a little extra barbecue sauce over the pizza for added flavor. Slice and serve while warm.
Extra Tips:
For an even crispier crust, pre-bake the pizza dough for about 5 minutes before adding the toppings. If you prefer a spicier kick, add some sliced jalapeños to the pizza before baking. To save time, you can use rotisserie chicken instead of cooking the chicken breasts from scratch.
Encourage kids to help with the assembly process; they can spread sauce, sprinkle cheese, and add toppings, making this recipe not only delicious but also a fun family activity.
Chicken and Rice Casserole
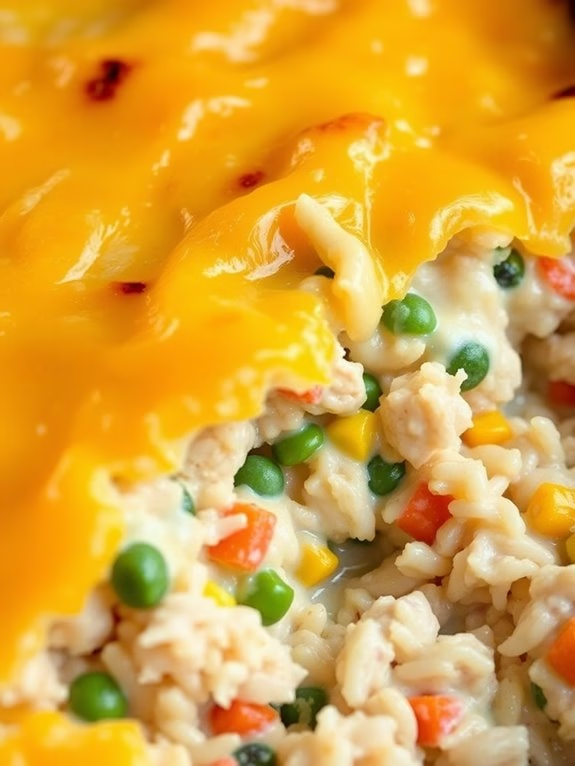
Chicken and rice casserole is a warm, comforting dish that’s perfect for family dinners or when you’re craving a hearty, homemade meal. This recipe combines tender pieces of chicken with fluffy rice, all enveloped in a creamy sauce that’s baked to golden perfection.
It’s a one-dish wonder that’s not only simple to prepare but also packed with flavors that even the pickiest eaters will enjoy. This easy chicken and rice casserole serves 4-6 people and is ideal for introducing kids to the joys of cooking.
By involving them in the preparation process, children can learn essential kitchen skills and gain confidence in their culinary abilities. The recipe uses familiar ingredients and straightforward steps, making it an excellent choice for family bonding in the kitchen.
Ingredients:
- 2 cups cooked chicken, shredded or diced
- 1 cup uncooked rice
- 2 1/2 cups chicken broth
- 1 can (10.5 oz) cream of chicken soup
- 1 cup frozen mixed vegetables (peas, carrots, and corn)
- 1/2 cup onion, finely chopped
- 1 cup shredded cheddar cheese
- 1 teaspoon garlic powder
- 1/2 teaspoon salt
- 1/2 teaspoon black pepper
- 1 tablespoon olive oil
- 1 tablespoon butter
Cooking Instructions:
1. Preheat the Oven: Begin by preheating your oven to 375°F (190°C). This guarantees that your casserole will cook evenly once it’s assembled and placed inside.
2. Cook the Rice: In a medium saucepan, bring the chicken broth to a boil. Add the uncooked rice, cover, and reduce the heat to low. Let it simmer for about 15 minutes or until the rice is tender and has absorbed most of the broth.
3. Sauté the Vegetables: While the rice is cooking, heat the olive oil and butter in a skillet over medium heat. Add the chopped onion and sauté for 3-4 minutes until they become translucent.
Stir in the frozen mixed vegetables and cook for an additional 5 minutes until they’re slightly tender.
4. Mix the Ingredients: In a large mixing bowl, combine the cooked rice, shredded chicken, sautéed vegetables, cream of chicken soup, garlic powder, salt, and pepper. Stir well to evenly distribute all the ingredients.
5. Assemble the Casserole: Lightly grease a 9×13 inch baking dish. Pour the chicken and rice mixture into the dish, spreading it out evenly. Sprinkle the shredded cheddar cheese over the top to cover the entire casserole.
6. Bake the Casserole: Place the baking dish in the preheated oven and bake for 25-30 minutes, or until the cheese is melted and bubbly with a slight golden crust on top.
7. Serve and Enjoy: Once done, remove the casserole from the oven and let it cool for a few minutes before serving. This will make it easier to cut and serve.
Extra Tips:
For an added boost of flavor, consider mixing in a teaspoon of dried herbs such as thyme or rosemary with the rice mixture.
If you prefer a creamier casserole, you can substitute half of the chicken broth with milk or cream. To make this dish even more kid-friendly, allow children to customize their portion by adding their favorite toppings like crispy breadcrumbs or extra cheese.
Finally, leftovers can be stored in the refrigerator for up to 3 days or frozen for later use, making this a versatile dish for meal planning.
Honey Garlic Chicken

Honey Garlic Chicken is a delightful dish that combines the sweet and savory flavors of honey and garlic to create a mouthwatering experience for all ages. This easy-to-make recipe is perfect for kids who are just starting to explore the joys of cooking. The tender chicken cooked in a sticky honey garlic sauce makes it an irresistible meal that your little ones will love.
With simple ingredients and easy steps, this dish can be prepared in less than 30 minutes, making it a great option for busy weeknights. The beauty of Honey Garlic Chicken lies in its simplicity and versatility. You can serve it with a side of steamed rice, a fresh salad, or even some crispy vegetables to make it a well-rounded meal.
The recipe is designed for a serving size of 4-6 people, which makes it perfect for family dinners or gatherings. So, let’s plunge into the ingredients and steps to prepare this delicious dish that will surely become a family favorite.
Ingredients for 4-6 people:
- 4 boneless, skinless chicken breasts
- 1/3 cup of honey
- 1/4 cup of soy sauce
- 2 tablespoons of apple cider vinegar
- 4 cloves of garlic, minced
- 1 tablespoon of olive oil
- 1 teaspoon of cornstarch
- 1 tablespoon of water
- Salt and pepper to taste
- Sesame seeds (optional, for garnish)
- Chopped green onions (optional, for garnish)
Cooking Instructions:
- Prepare the Chicken: Start by cutting the chicken breasts into bite-sized pieces. Season them with salt and pepper to taste.
- Make the Sauce: In a small bowl, mix together the honey, soy sauce, apple cider vinegar, and minced garlic until well combined. Set aside.
- Cook the Chicken: Heat the olive oil in a large pan over medium-high heat. Add the chicken pieces and cook them for about 5-7 minutes, or until they’re golden brown and cooked through. Remove the chicken from the pan and set aside.
- Thicken the Sauce: In the same pan, pour the honey garlic sauce mixture. Bring it to a simmer over medium heat. In a separate bowl, mix the cornstarch with water to create a slurry. Add the slurry to the sauce and stir continuously until the sauce thickens.
- Combine Chicken and Sauce: Return the cooked chicken to the pan, and toss everything together until the chicken is evenly coated with the sauce. Cook for another 2-3 minutes to allow the flavors to meld.
- Serve: Transfer the Honey Garlic Chicken to a serving platter. Garnish with sesame seeds and chopped green onions if desired. Serve with your choice of sides and enjoy!
Extra Tips:
When making Honey Garlic Chicken, it’s important to verify that the chicken pieces are cooked evenly. Cutting the chicken into uniform pieces helps with this.
If you prefer a thicker sauce, you can adjust the amount of cornstarch in the slurry to your liking. For a little extra flavor, try adding a pinch of red pepper flakes to the sauce for a subtle kick.
Ultimately, this dish can easily be adjusted for dietary preferences by using low-sodium soy sauce or substituting with gluten-free alternatives if needed.
Chicken Tacos
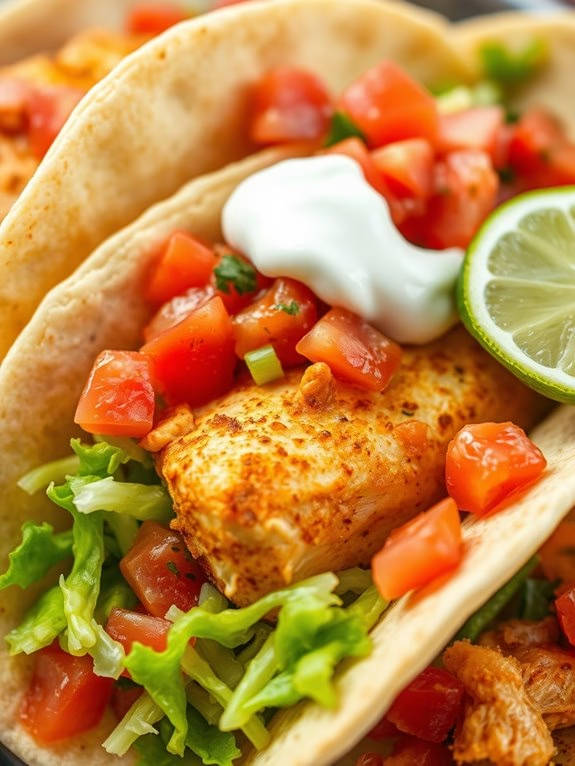
Chicken Tacos are a delightful and easy-to-make dish that kids will absolutely love. This recipe isn’t only delicious but also fun, allowing children to participate in the preparation by assembling their own tacos. With juicy, seasoned chicken wrapped in a warm tortilla, topped with fresh vegetables and cheese, this meal is sure to become a family favorite.
It’s also a great way to introduce kids to Mexican cuisine and encourage them to try new flavors. This recipe is designed to serve 4-6 people and can be a perfect dinner or lunch option. The ingredients are simple, and the preparation time is minimal, making it an ideal choice for busy families.
Whether you’re planning a taco night or just looking for a quick and nutritious meal, these Chicken Tacos won’t disappoint. Gather your ingredients, follow the steps, and enjoy a delicious meal together!
Ingredients (Serves 4-6):
- 1.5 pounds of boneless, skinless chicken breasts
- 2 tablespoons of olive oil
- 1 packet of taco seasoning mix
- 12 small flour or corn tortillas
- 1 cup of shredded lettuce
- 1 cup of diced tomatoes
- 1 cup of shredded cheddar cheese
- 1/2 cup of sour cream
- 1/2 cup of salsa
- 1 lime, cut into wedges
Cooking Instructions:
- Prepare the Chicken: Begin by cutting the chicken breasts into small, bite-sized pieces. This guarantees even cooking and makes it easier for kids to eat.
- Cook the Chicken: In a large skillet, heat the olive oil over medium heat. Add the chicken pieces and cook for about 5-7 minutes, stirring occasionally, until the chicken is fully cooked and no longer pink inside.
- Season the Chicken: Sprinkle the taco seasoning mix over the cooked chicken. Stir well to make sure that all the chicken pieces are evenly coated with the seasoning. Allow the chicken to cook for an additional 2-3 minutes so the flavors meld together.
- Warm the Tortillas: While the chicken is cooking, warm the tortillas. You can do this by placing them in a dry skillet over medium heat for about 30 seconds on each side or by wrapping them in a damp paper towel and microwaving them for about 30 seconds.
- Assemble the Tacos: Once the chicken is cooked and the tortillas are warm, it’s time to assemble the tacos. Place a few pieces of chicken onto each tortilla. Top with shredded lettuce, diced tomatoes, and shredded cheese.
- Add Toppings: Finish each taco with a dollop of sour cream and a spoonful of salsa. Squeeze a lime wedge over the top for added zest.
Extra Tips: When making Chicken Tacos, feel free to customize the toppings to suit your family’s preferences. You can add other ingredients like avocado slices, chopped onions, or jalapeños for extra flavor.
To save time, you can cook the chicken ahead of time and reheat it just before serving. Also, consider using rotisserie chicken if you’re in a hurry. Finally, remember to let kids assemble their own tacos. It’s a fun way for them to participate in the meal prep and encourages them to try new toppings.
Lemon Herb Chicken Skewers
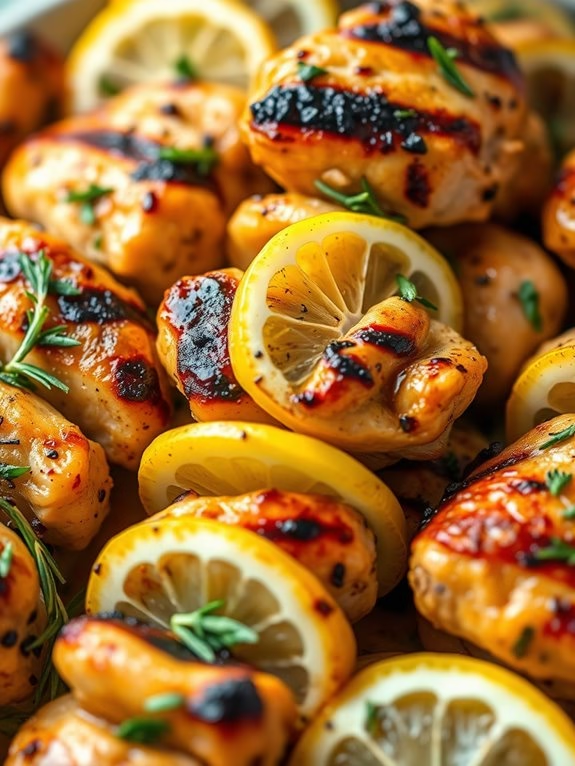
Lemon Herb Chicken Skewers are a delightful and easy-to-make dish that’s perfect for kids who enjoy flavorful yet simple meals. These skewers offer a revitalizing taste with lemon and aromatic herbs infused into tender pieces of chicken. Perfect for a family dinner or a backyard barbecue, the skewers are both fun to make and eat, encouraging kids to participate in the cooking process. The vibrant flavors of lemon and herbs make this dish a great choice for introducing young ones to new tastes.
In this recipe, chicken pieces are marinated in a mixture of lemon juice, olive oil, garlic, and a blend of fresh herbs, then threaded onto skewers and grilled to perfection. The marinade not only adds flavor but also guarantees the chicken remains juicy and tender. This dish isn’t only delicious but also nutritious, providing a good source of protein and essential vitamins. Serve these skewers with a side of rice or vegetables to complete the meal, making it a balanced option for a family of 4-6 people.
Ingredients (Serves 4-6):
- 2 pounds boneless, skinless chicken breasts, cut into bite-sized pieces
- 1/4 cup fresh lemon juice
- 1/4 cup olive oil
- 3 cloves garlic, minced
- 1 tablespoon fresh rosemary, chopped
- 1 tablespoon fresh thyme, chopped
- 1 tablespoon fresh parsley, chopped
- 1 teaspoon salt
- 1/2 teaspoon black pepper
- 1 lemon, sliced thinly for garnish
- Wooden or metal skewers
Cooking Instructions:
- Prepare the Marinade: In a large bowl, combine the lemon juice, olive oil, minced garlic, chopped rosemary, thyme, parsley, salt, and black pepper. Mix well to create a flavorful marinade.
- Marinate the Chicken: Add the chicken pieces to the bowl with the marinade, making sure all pieces are well-coated. Cover the bowl with plastic wrap and refrigerate for at least 30 minutes, or up to 2 hours for more intense flavor.
- Prepare the Skewers: If using wooden skewers, soak them in water for about 30 minutes to prevent them from burning during grilling. This step isn’t necessary for metal skewers.
- Thread the Chicken: Remove the marinated chicken from the fridge. Thread the chicken pieces onto the skewers, alternating with thin lemon slices for added flavor and visual appeal.
- Preheat the Grill: Heat your grill to medium-high heat. Make sure the grates are clean and lightly oiled to prevent sticking.
- Grill the Skewers: Place the chicken skewers on the grill and cook for about 5-7 minutes on each side, or until the chicken is cooked through and has nice grill marks. The internal temperature of the chicken should reach 165°F (75°C).
- Serve: Remove the skewers from the grill and let them rest for a few minutes before serving. Enjoy the skewers with your choice of sides.
Extra Tips:
For the best flavor, try using fresh herbs rather than dried ones, as they provide a more vibrant taste. If you prefer a milder garlic flavor, you can use roasted garlic instead of fresh.
Additionally, if you don’t have a grill, these skewers can also be cooked in an oven preheated to 400°F (200°C) for about 20-25 minutes, turning halfway through.
Finally, always remember to handle the skewers carefully, especially with young children around, as they can be quite hot after cooking.
Chicken Noodle Soup
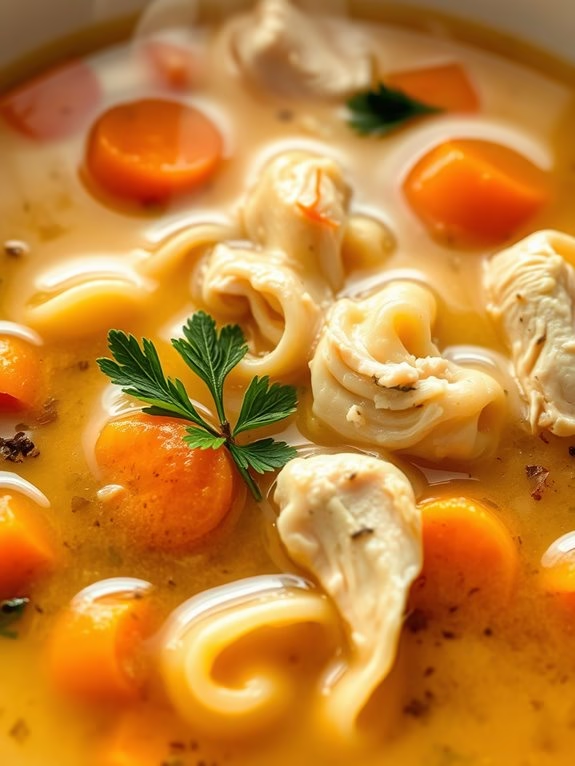
Chicken Noodle Soup is a classic comfort dish that children love due to its warm, soothing flavors and simple ingredients. This homemade recipe is ideal for a family dinner, providing a nourishing and delicious meal that’s easy to prepare. Packed with tender chicken, hearty vegetables, and savory broth, this soup is sure to become a family favorite.
To make this Chicken Noodle Soup, you’ll need basic kitchen staples and a little bit of time to bring out the rich flavors. This recipe serves 4-6 people, making it perfect for a family meal or for having leftovers to enjoy the next day. The simplicity of the ingredients and the straightforward cooking process make it an easy and enjoyable meal to prepare, even for young chefs.
Ingredients:
- 1 tablespoon olive oil
- 1 medium onion, diced
- 2 cloves garlic, minced
- 2 medium carrots, sliced
- 2 celery stalks, sliced
- 8 cups chicken broth
- 2 cups cooked chicken, shredded
- 1 cup egg noodles
- 1 teaspoon dried thyme
- 1 teaspoon dried parsley
- Salt and pepper to taste
- Optional: Fresh parsley for garnish
Cooking Instructions:
- Prepare the Vegetables: Begin by heating the olive oil in a large pot over medium heat. Add the diced onion and minced garlic, sautéing them until the onion becomes translucent and the garlic is fragrant, about 2-3 minutes.
- Add Carrots and Celery: Stir in the sliced carrots and celery, cooking for an additional 5 minutes until they start to soften. This will add a lovely sweetness and depth to the soup.
- Incorporate the Broth and Seasonings: Pour in the chicken broth and bring the mixture to a boil. Add the dried thyme and dried parsley, stirring to combine the flavors. Season with salt and pepper to taste.
- Simmer the Soup: Reduce the heat to low and let the soup simmer for about 15 minutes, allowing the vegetables to become tender and the flavors to meld together.
- Add Chicken and Noodles: Stir in the shredded cooked chicken and egg noodles. Continue to simmer for another 10 minutes, or until the noodles are cooked to your desired tenderness.
- Adjust Seasoning: Taste the soup and adjust the seasoning if necessary, adding more salt or pepper according to your preference.
- Serve: Ladle the soup into bowls and garnish with fresh parsley if desired. Serve warm and enjoy the comforting flavors of homemade Chicken Noodle Soup.
Extra Tips:
When making Chicken Noodle Soup, using homemade chicken broth can enhance the flavor greatly, though store-bought broth works well too.
If you prefer a thicker soup, you can add a tablespoon of flour to the sautéed vegetables before adding the broth.
Additionally, you can substitute the egg noodles with other pasta types like rotini or ditalini if your kids prefer different shapes.
For an extra boost of flavor, add a splash of lemon juice or a pinch of chili flakes before serving.
Teriyaki Chicken Stir-Fry
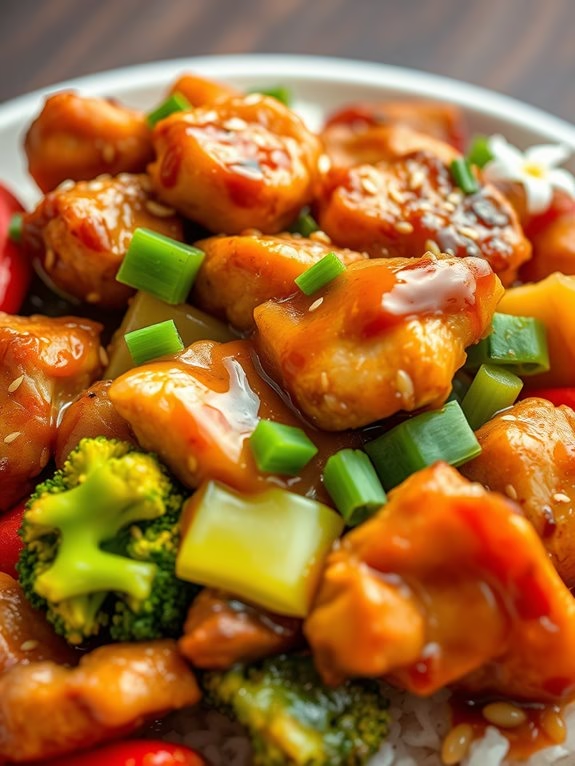
Teriyaki Chicken Stir-Fry is a delightful dish that combines the savory and sweet flavors of teriyaki sauce with tender pieces of chicken and colorful vegetables. It’s an ideal recipe for kids, as it’s both healthy and easy to prepare. This dish can be served over a bed of steamed rice or noodles, making it a versatile meal option for lunch or dinner. Packed with nutrients and flavors, this recipe is sure to become a family favorite.
Preparing Teriyaki Chicken Stir-Fry at home allows you to control the ingredients, guaranteeing a healthier version compared to store-bought or restaurant options. With a few simple steps, you can have this delicious dish ready in no time, making it perfect for busy weeknights.
The combination of chicken, vegetables, and teriyaki sauce creates a balanced meal that will satisfy even the pickiest eaters.
Ingredients (Serves 4-6):
- 1 1/2 pounds boneless, skinless chicken breast, cut into bite-sized pieces
- 2 tablespoons vegetable oil
- 3 cups mixed vegetables (such as bell peppers, broccoli, and snap peas)
- 1 cup teriyaki sauce
- 2 tablespoons soy sauce
- 1 tablespoon honey
- 2 cloves garlic, minced
- 1 tablespoon grated fresh ginger
- 1/4 cup water
- 1 tablespoon cornstarch
- Cooked rice or noodles, for serving
- Sesame seeds and chopped green onions, for garnish
Cooking Instructions:
- Prepare the chicken and vegetables: Begin by cutting the chicken breasts into bite-sized pieces. Wash and chop the mixed vegetables into uniform sizes to guarantee even cooking.
- Make the sauce: In a small bowl, mix together the teriyaki sauce, soy sauce, honey, minced garlic, and grated ginger. In another small bowl, combine the water and cornstarch, stirring until the cornstarch is fully dissolved. Set both aside.
- Cook the chicken: Heat the vegetable oil in a large skillet or wok over medium-high heat. Add the chicken pieces in a single layer and cook for 5-7 minutes, stirring occasionally, until they’re browned and cooked through. Remove the chicken from the skillet and set it aside.
- Cook the vegetables: In the same skillet, add the mixed vegetables. Stir-fry for 3-5 minutes, or until the vegetables are just tender but still crisp.
- Combine chicken and sauce: Return the cooked chicken to the skillet with the vegetables. Pour in the teriyaki sauce mixture, stirring to coat the chicken and vegetables evenly.
- Thicken the sauce: Stir in the cornstarch mixture and continue to cook for another 2-3 minutes, or until the sauce has thickened to your desired consistency.
- Serve: Remove from heat and serve the teriyaki chicken stir-fry over a bed of cooked rice or noodles. Garnish with sesame seeds and chopped green onions before serving.
Extra Tips:
For extra flavor, marinate the chicken in a portion of the teriyaki sauce for 15-30 minutes before cooking. If you prefer a spicier dish, you can add a pinch of red pepper flakes to the sauce.
When cooking the vegetables, be sure not to overcook them to maintain their bright colors and crunchy texture. Feel free to switch up the vegetables based on what you have on hand or what your kids prefer.
This dish is quite versatile and can be adjusted to suit your family’s tastes.
Chicken Parmesan Sliders
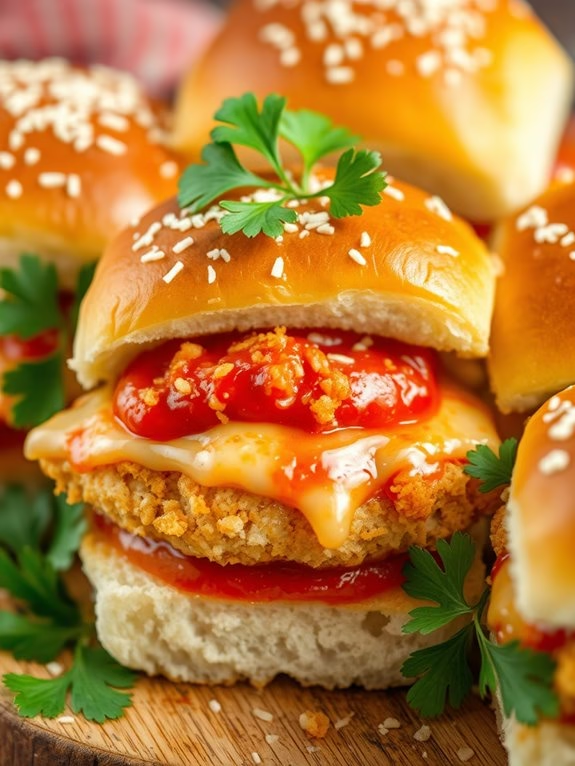
Chicken Parmesan Sliders are a delightful twist on the classic Italian-American dish, perfectly sized for little hands and appetites.
These sliders bring together tender chicken, rich marinara sauce, gooey mozzarella cheese, and a crispy breadcrumb coating, all nestled between soft slider buns. This recipe isn’t only easy to prepare but also a fun and interactive way to engage kids in the kitchen, making it a perfect choice for family dinners or casual gatherings.
The sliders are a hit with children due to their manageable size and the familiar, comforting flavors they offer. Assembling the sliders can be a creative activity, allowing kids to help with layering the ingredients and adding their personal touch.
The recipe yields approximately 12 sliders, ideal for serving 4-6 people, guaranteeing everyone gets their fill of this savory, cheesy delight.
Ingredients
- 2 boneless, skinless chicken breasts
- 1 cup all-purpose flour
- 2 large eggs
- 1 cup breadcrumbs
- 1 teaspoon Italian seasoning
- 1/2 teaspoon garlic powder
- Salt and pepper to taste
- 1 cup marinara sauce
- 1 1/2 cups shredded mozzarella cheese
- 12 slider buns
- 1/4 cup grated Parmesan cheese
- 2 tablespoons butter, melted
- 1 tablespoon chopped fresh parsley (optional)
Cooking Instructions
- Preheat Oven and Prepare Ingredients: Preheat your oven to 375°F (190°C). Slice the chicken breasts into 12 even pieces to fit the slider buns.
- Bread the Chicken: Set up a breading station with three shallow dishes—one with flour, one with beaten eggs, and one with a mixture of breadcrumbs, Italian seasoning, garlic powder, salt, and pepper. Dredge each chicken piece first in flour, then dip in egg, and finally coat with the seasoned breadcrumbs.
- Bake the Chicken: Place the breaded chicken pieces on a baking sheet lined with parchment paper. Bake in the preheated oven for 15-20 minutes, or until golden brown and cooked through.
- Assemble the Sliders: Lay the bottom halves of the slider buns in a baking dish. Place a piece of baked chicken on each bun, followed by a spoonful of marinara sauce and a generous sprinkle of mozzarella cheese. Place the top halves of the buns over the cheese.
- Melt the Cheese: Brush the tops of the buns with melted butter and sprinkle with Parmesan cheese. Bake in the oven for an additional 5-7 minutes, or until the cheese is melted and the tops are golden brown.
- Garnish and Serve: Remove from the oven, garnish with fresh parsley if desired, and serve warm.
Extra Tips
For an extra crispy texture, consider using panko breadcrumbs instead of regular breadcrumbs.
If you prefer a lighter option, you can grill the chicken pieces instead of baking them.
When assembling the sliders, verify the marinara sauce isn’t too runny to prevent the buns from getting soggy.
You can prepare the chicken ahead of time and refrigerate it, assembling and baking the sliders just before serving for ultimate freshness.
Buffalo Chicken Wraps
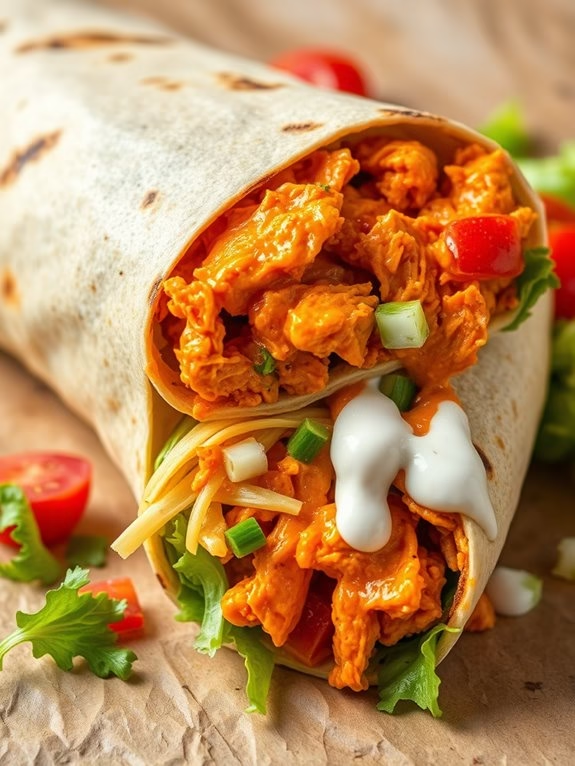
Buffalo Chicken Wraps are a delightful and easy-to-make dish that’s perfect for kids and adults alike. This recipe combines the spicy and tangy flavors of buffalo sauce with tender chicken, crunchy lettuce, and creamy ranch dressing, all wrapped up in a soft tortilla. It’s a versatile meal that can be served for lunch, dinner, or even a snack. The wraps aren’t only delicious but also fun to assemble, making them an excellent choice for involving kids in the kitchen.
This recipe is designed for a serving size of 4-6 people, making it perfect for a family meal or a small gathering. The ingredients are easily customizable, allowing you to adjust the level of spiciness or add extra toppings based on your family’s preferences. In addition to being flavorful, these wraps are also a healthier alternative to traditional fried buffalo wings, as they use grilled or baked chicken instead.
Ingredients:
- 1 1/2 pounds of boneless, skinless chicken breasts
- 1/2 cup buffalo sauce
- 1 tablespoon olive oil
- 6 large flour tortillas
- 1 cup shredded lettuce
- 1 cup shredded cheddar cheese
- 1/2 cup diced tomatoes
- 1/4 cup chopped green onions
- 1/2 cup ranch dressing
- Salt and pepper to taste
Cooking Instructions:
- Prepare the Chicken: Preheat your oven to 375°F (190°C). Rub the chicken breasts with olive oil, salt, and pepper. Place them on a baking sheet and bake for 25-30 minutes, or until the internal temperature reaches 165°F (74°C).
- Shred the Chicken: Once the chicken is cooked, let it cool for a few minutes. Then, using two forks, shred the chicken into bite-sized pieces.
- Mix with Buffalo Sauce: In a large mixing bowl, combine the shredded chicken with the buffalo sauce. Stir until the chicken is evenly coated.
- Warm the Tortillas: Heat the tortillas in a dry skillet over medium heat for about 30 seconds on each side, or until they’re warm and pliable.
- Assemble the Wraps: Lay a warm tortilla flat on a clean surface. In the center of the tortilla, layer shredded lettuce, buffalo chicken, shredded cheddar cheese, diced tomatoes, and chopped green onions.
- Add Dressing and Roll: Drizzle ranch dressing over the top of the fillings. Fold the sides of the tortilla over the fillings, then roll it up tightly from the bottom to form a wrap.
- Serve: Slice the wraps in half diagonally and serve immediately. Enjoy your buffalo chicken wraps with extra ranch dressing on the side, if desired.
Extra Tips:
To make the wraps more kid-friendly, you can reduce the amount of buffalo sauce or use a milder sauce to decrease the heat level. For added crunch, consider adding sliced cucumbers or bell peppers to the wraps.
If you’re short on time, you can use rotisserie chicken as a quick substitute for the baked chicken breasts. To keep the tortillas from becoming soggy, assemble the wraps just before serving.
Chicken and Veggie Kebabs
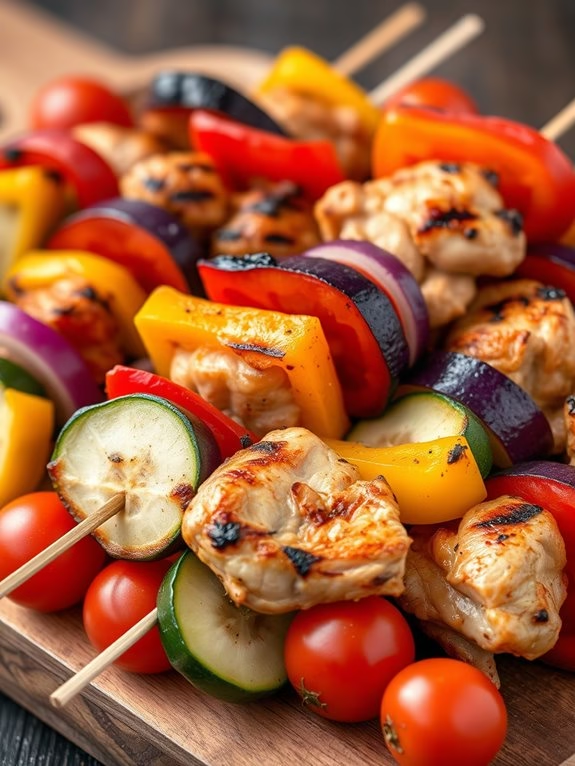
Chicken and Veggie Kebabs are a delightful and colorful way to get kids excited about eating their dinner. Not only do they enjoy the fun of eating food off a stick, but they also receive a healthy dose of vegetables and lean protein. This dish is perfect for a family meal or a backyard barbecue, as it’s simple to prepare and offers a variety of flavors that appeal to both kids and adults alike.
With a quick marinade and a bit of prep work, these kebabs can be on the table in no time, making them an excellent choice for busy weeknights. The versatility of this recipe allows you to incorporate any seasonal vegetables you have on hand, making it a great way to use up leftovers or get creative with new veggies.
Kids will love helping to assemble the skewers, making them feel involved in the cooking process. Plus, the vibrant colors of the veggies make the dish visually appealing, which is always a bonus when encouraging children to try new foods. Serve these kebabs with a side of rice or a fresh salad for a complete meal that satisfies the whole family.
Ingredients (Serves 4-6):
- 1.5 lbs boneless, skinless chicken breast, cut into 1-inch cubes
- 1 red bell pepper, cut into 1-inch pieces
- 1 yellow bell pepper, cut into 1-inch pieces
- 1 zucchini, sliced into thick rounds
- 1 red onion, cut into wedges
- 1 cup cherry tomatoes
- 3 tablespoons olive oil
- 2 tablespoons lemon juice
- 2 garlic cloves, minced
- 1 teaspoon dried oregano
- Salt and pepper to taste
- Wooden or metal skewers
Cooking Instructions:
- Prepare the Marinade: In a large bowl, combine olive oil, lemon juice, minced garlic, dried oregano, salt, and pepper. Mix well to guarantee all ingredients are combined.
- Marinate the Chicken: Add the chicken cubes to the bowl with the marinade. Stir to coat the chicken evenly, cover the bowl, and refrigerate for at least 30 minutes, allowing the flavors to infuse.
- Prepare the Vegetables: While the chicken is marinating, wash and cut the vegetables as described in the ingredients list.
- Assemble the Kebabs: If using wooden skewers, soak them in water for about 20 minutes to prevent burning. Thread the marinated chicken, bell peppers, zucchini, cherry tomatoes, and red onion onto the skewers, alternating between meat and vegetables for a colorful presentation.
- Preheat the Grill: Heat your grill to medium-high heat. If you don’t have a grill, you can use a grill pan on the stovetop.
- Grill the Kebabs: Place the kebabs on the grill and cook for about 12-15 minutes, turning occasionally, until the chicken is cooked through and has a nice char on the outside. Confirm that the internal temperature of the chicken reaches 165°F (75°C).
- Serve and Enjoy: Once cooked, remove the kebabs from the grill and let them rest for a couple of minutes. Serve them warm with your choice of sides.
Extra Tips:
To make the Chicken and Veggie Kebabs even more flavorful, consider adding a dash of smoked paprika or cumin to the marinade for an extra layer of taste. Encourage your kids to choose their favorite vegetables to include on the skewers, making it a more personalized experience for them.
If you’re in a hurry, you can marinate the chicken overnight to save time on the day of cooking. Remember, if you’re using metal skewers, they’ll get hot, so use tongs to handle them safely.
Chicken Salad Sandwiches
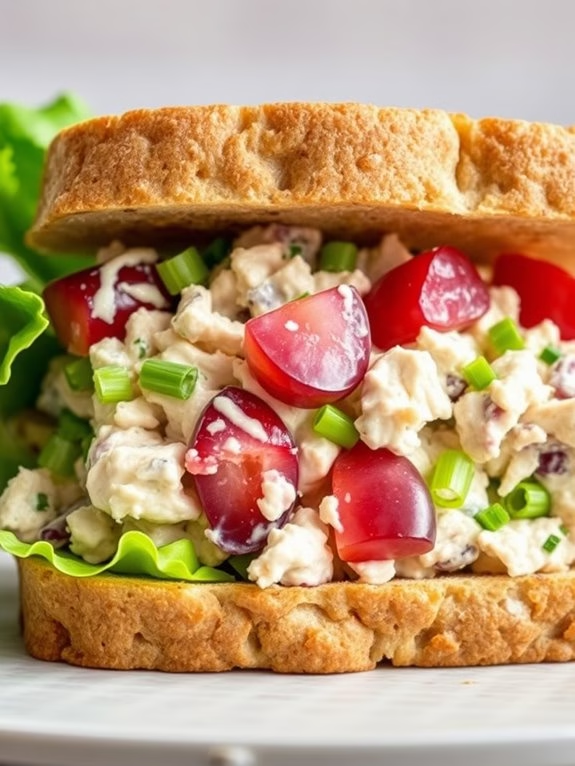
Chicken Salad Sandwiches are a delightful and easy-to-make meal that kids absolutely love. This recipe combines tender, juicy chicken with creamy mayonnaise, crisp celery, and a touch of sweetness from grapes, all sandwiched between slices of soft bread.
It’s a perfect combination of flavors and textures that’s sure to be a hit at lunch or as a light dinner. Not only is it delicious, but it’s also nutritious, providing essential proteins and vitamins that will keep the little ones energized throughout the day.
Preparing Chicken Salad Sandwiches is a fun and engaging activity that you can enjoy with your kids. They can help with mixing the ingredients, spreading the salad over the bread, and even assembling the sandwiches.
This recipe is versatile, allowing you to add or substitute ingredients based on your family’s preferences. It’s a great way to introduce children to the joys of cooking and to encourage them to explore different flavors and textures in their meals.
Ingredients (Serves 4-6)
- 3 cups cooked and shredded chicken breast
- 1/2 cup mayonnaise
- 1 tablespoon Dijon mustard
- 1 cup red grapes, halved
- 1/2 cup celery, finely chopped
- 1/4 cup green onions, chopped
- Salt and pepper, to taste
- 8-12 slices of whole grain bread
- Lettuce leaves (optional)
Instructions
- Prepare the Chicken: Begin by cooking the chicken breast if not already done. You can boil, bake, or grill the chicken until it’s fully cooked and then shred it using two forks.
- Mix the Salad: In a large mixing bowl, combine the shredded chicken, mayonnaise, and Dijon mustard. Stir until the chicken is evenly coated.
- Add the Ingredients: Add the halved grapes, chopped celery, and green onions into the bowl. Gently fold the ingredients together until well combined. Season with salt and pepper according to your taste preferences.
- Assemble the Sandwiches: Lay out the slices of whole grain bread. You can lightly toast them if desired for extra texture. Spread a generous amount of chicken salad onto one slice of bread. Add a lettuce leaf if using, then top with another slice of bread to form a sandwich.
- Serve: Cut each sandwich in half or quarters for easy handling, especially for little hands. Serve immediately and enjoy!
Extra Tips
For a healthier version, you can substitute Greek yogurt for mayonnaise or use a combination of both for a tangy flavor. If you want to add a little crunch to your chicken salad, try incorporating some chopped walnuts or almonds.
For an extra burst of flavor, consider adding a teaspoon of lemon juice or a pinch of paprika. Remember, this recipe is highly adaptable, so feel free to experiment with different herbs and spices to find the perfect taste for your family.

