
When I discovered just how versatile rotisserie chicken could be, I was absolutely thrilled.
These 14 creative recipes will definitely shake up your mealtime routine.
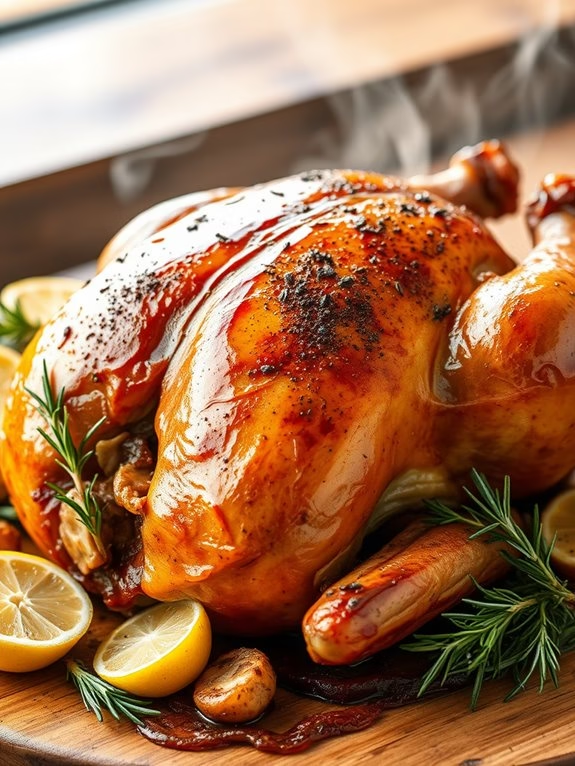
Picture the warm, comforting aroma of Classic Chicken Noodle Soup bubbling away on your stove.
Or the colorful, fresh Mediterranean Chicken Salad that brings a pop of brightness to your table.
From quick Chicken Enchilada Casserole to zesty Rotisserie Chicken Tacos, these dishes are sure to impress your family and friends!
Classic Chicken Noodle Soup

There’s nothing quite as comforting as a bowl of homemade chicken noodle soup, and using rotisserie chicken not only saves time but also adds incredible depth of flavor to this classic dish. This recipe is perfect for utilizing leftover chicken and provides a hearty, nourishing meal for the whole family.
The combination of tender chicken, fresh vegetables, and soft noodles in a savory broth makes for a timeless soup that warms both body and soul. This recipe for Classic Chicken Noodle Soup serves 4-6 people and is ideal for a cozy family dinner or for warming up during chilly days.
With simple ingredients and straightforward preparation, this soup isn’t only easy to make but also a delightful way to enjoy a comforting meal. The aroma of simmering vegetables and herbs fills the kitchen, promising a wholesome and satisfying dish.
Ingredients:
- 1 rotisserie chicken, shredded (about 3 cups of meat)
- 1 tablespoon olive oil
- 1 medium onion, diced
- 3 carrots, sliced
- 3 celery stalks, sliced
- 3 cloves garlic, minced
- 8 cups chicken broth
- 1 teaspoon dried thyme
- 1 teaspoon dried parsley
- 2 cups egg noodles
- Salt and pepper to taste
- Fresh parsley for garnish (optional)
Cooking Instructions:
- Prepare the Chicken: Begin by removing the skin and bones from the rotisserie chicken. Shred the meat into bite-sized pieces, ensuring you have about 3 cups. Set aside.
- Sauté the Vegetables: In a large pot, heat the olive oil over medium heat. Add the diced onion, sliced carrots, and celery. Cook, stirring frequently, until the vegetables begin to soften and the onion becomes translucent, about 5 minutes.
- Add Garlic and Herbs: Stir in the minced garlic, dried thyme, and dried parsley. Cook for another minute until the garlic is fragrant.
- Simmer the Broth: Pour the chicken broth into the pot and bring it to a boil. Once boiling, reduce the heat to a simmer and allow the flavors to meld together for about 10 minutes.
- Cook the Noodles: Add the egg noodles to the simmering broth. Let them cook for about 8-10 minutes, or until they’re tender.
- Incorporate the Chicken: Add the shredded rotisserie chicken to the pot. Stir well and let it heat through for about 5 minutes. Season the soup with salt and pepper to taste.
- Serve: Ladle the soup into bowls and garnish with fresh parsley if desired. Serve hot and enjoy!
Extra Tips:
When making this Classic Chicken Noodle Soup, feel free to customize the vegetables based on what you have on hand or your family’s preferences.
Adding a bay leaf during the simmering process can enhance the flavor of the broth, just remember to remove it before serving. If you prefer a thicker soup, you can reduce the amount of broth slightly or add a touch of cornstarch slurry.
Finally, for a richer taste, consider using homemade chicken broth if available. This will enhance the depth of flavor and make your soup even more delicious.
Creamy Chicken Alfredo Pasta
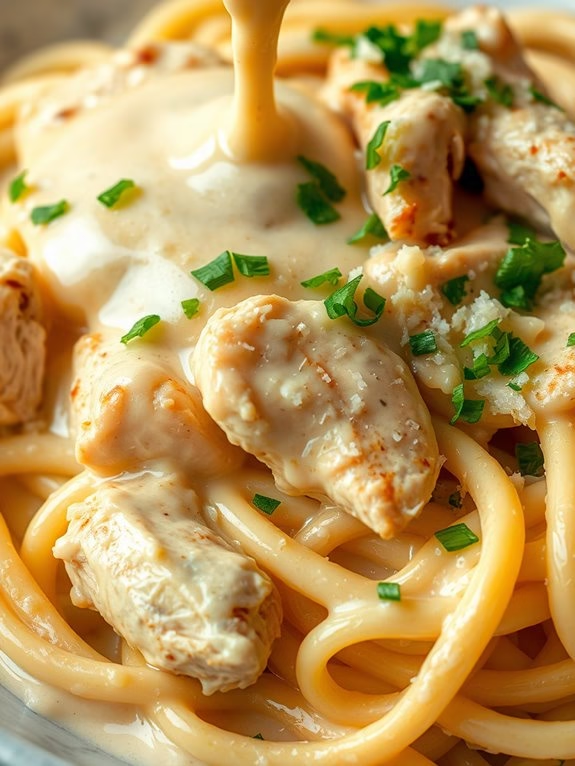
Creamy Chicken Alfredo Pasta is a delightful dish that combines rich, velvety Alfredo sauce with tender rotisserie chicken and perfectly cooked pasta. This classic Italian-inspired recipe is a favorite comfort food for many, offering a balance of creamy textures and savory flavors.
Whether you’re planning a family dinner or a cozy night in, this dish is both simple to prepare and utterly satisfying.
Using rotisserie chicken notably cuts down on prep time, allowing you to focus on creating a luscious Alfredo sauce that will envelop each pasta strand. The combination of freshly grated Parmesan cheese, heavy cream, and garlic creates a luxurious base that complements the juicy chicken pieces.
This recipe serves 4-6 people, making it ideal for gatherings or meal prep for the week.
Ingredients:
- 1 rotisserie chicken, shredded
- 1 pound fettuccine pasta
- 2 tablespoons olive oil
- 4 cloves garlic, minced
- 2 cups heavy cream
- 1 cup freshly grated Parmesan cheese
- Salt and pepper to taste
- 1 tablespoon chopped fresh parsley (optional)
Cooking Instructions:
- Prepare the Pasta: In a large pot, bring salted water to a boil. Add the fettuccine pasta and cook according to the package instructions until al dente. Drain the pasta, reserving about 1 cup of pasta water, and set aside.
- Shred the Chicken: While the pasta is cooking, remove the skin from the rotisserie chicken and shred the meat into bite-sized pieces. Discard any bones and set the shredded chicken aside.
- Make the Alfredo Sauce: In a large skillet over medium heat, add olive oil and sauté the minced garlic for about 1 minute, until fragrant. Pour in the heavy cream and bring it to a gentle simmer, stirring occasionally.
- Incorporate Cheese: Gradually add the Parmesan cheese to the simmering cream, stirring continuously until the cheese is melted and the sauce is smooth. Season with salt and pepper to taste.
- Combine Ingredients: Add the shredded rotisserie chicken to the sauce, stirring to coat the chicken evenly. Then, add the cooked fettuccine to the skillet, tossing everything together. If the sauce is too thick, add reserved pasta water a little at a time until the desired consistency is reached.
- Serve: Once the pasta is well coated with the sauce and heated through, remove from heat. Garnish with chopped fresh parsley, if using, and serve immediately.
Extra Tips:
For a richer flavor, consider adding a pinch of nutmeg to the Alfredo sauce. This subtle addition enhances the creaminess without overpowering the dish.
If you prefer a lighter version, you can substitute half-and-half for the heavy cream, though the sauce will be slightly less thick.
Be sure to use freshly grated Parmesan cheese, as pre-grated cheese may not melt as smoothly and could affect the texture of the sauce.
Enjoy your Creamy Chicken Alfredo Pasta with a side salad or garlic bread for a complete meal.
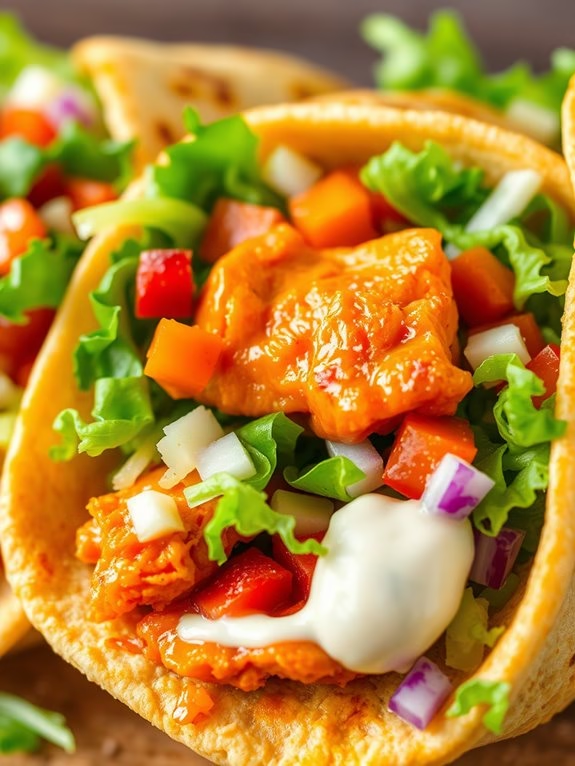
Rotisserie Chicken Tacos
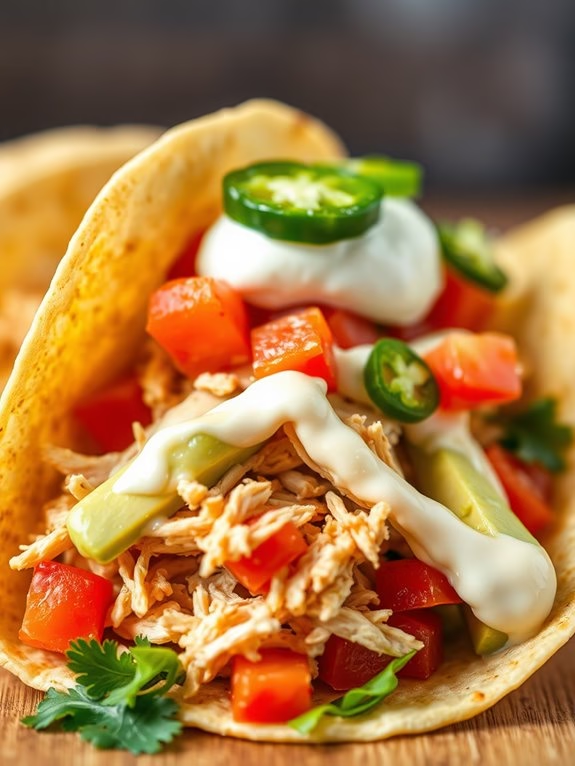
Rotisserie chicken tacos are a quick and delicious way to bring a vibrant meal to your table with minimal effort. Using a store-bought rotisserie chicken not only saves time but also adds a depth of flavor that only slow-roasted meat can provide. These tacos are perfect for a weeknight dinner or a festive gathering, offering a satisfying combination of tender chicken, fresh toppings, and zesty sauces.
The versatility of tacos allows you to tailor the toppings to your liking, making it a customizable meal that can suit various tastes and dietary preferences.
Start by shredding the rotisserie chicken, which will serve as the flavorful base for your tacos. Complement the chicken with a mix of fresh ingredients like crisp lettuce, juicy tomatoes, creamy avocados, and tangy cheese. To add a touch of spice, consider including sliced jalapeños or a dash of hot sauce. Serve everything in warm, soft tortillas to create an ideal vessel for the flavorful fillings. The result is a delightful mix of textures and flavors that’s sure to please both family and friends.
Ingredients (serving size: 4-6 people):
- 1 rotisserie chicken, shredded
- 12 small corn or flour tortillas
- 1 cup shredded lettuce
- 1 cup diced tomatoes
- 1 cup shredded cheese (cheddar, Monterey Jack, or a blend)
- 1 avocado, sliced
- 1/2 cup sour cream
- 1/4 cup chopped fresh cilantro
- 1 lime, cut into wedges
- 1 jalapeño, sliced (optional)
- Salt and pepper to taste
Cooking Instructions:
- Prep the Chicken: Remove the skin from the rotisserie chicken and shred the meat using your hands or two forks. Place the shredded chicken in a bowl and set aside.
- Warm the Tortillas: Heat a non-stick skillet over medium heat and warm the tortillas one by one, flipping them occasionally until they’re soft and pliable. Alternatively, wrap them in a damp paper towel and microwave for about 30 seconds.
- Prepare Toppings: While the tortillas are warming, prep your toppings. Dice the tomatoes, shred the lettuce, slice the avocado, and chop the cilantro. Arrange them in separate bowls for easy access.
- Assemble the Tacos: Lay a tortilla flat on a plate. Add a generous amount of shredded chicken as the base. Top with lettuce, tomatoes, cheese, avocado slices, and any other desired toppings like jalapeños or cilantro.
- Add Sauces: Drizzle sour cream over the top of your assembled taco. Squeeze a lime wedge over the ingredients for a burst of citrus flavor.
- Serve: Repeat the assembly process with the remaining tortillas and ingredients. Serve the tacos immediately with extra lime wedges on the side.
Extra Tips:
For an added layer of flavor, consider toasting the tortillas slightly on an open flame for a charred taste. If you prefer a spicier kick, mix a bit of hot sauce into the shredded chicken before serving.
You can also experiment with different cheeses or add a dollop of guacamole instead of sliced avocado. If you have leftovers, store the components separately to maintain freshness, and assemble tacos as needed. Enjoy your rotisserie chicken tacos with your favorite salsa or a side of rice and beans for a complete meal.
Chicken Caesar Salad
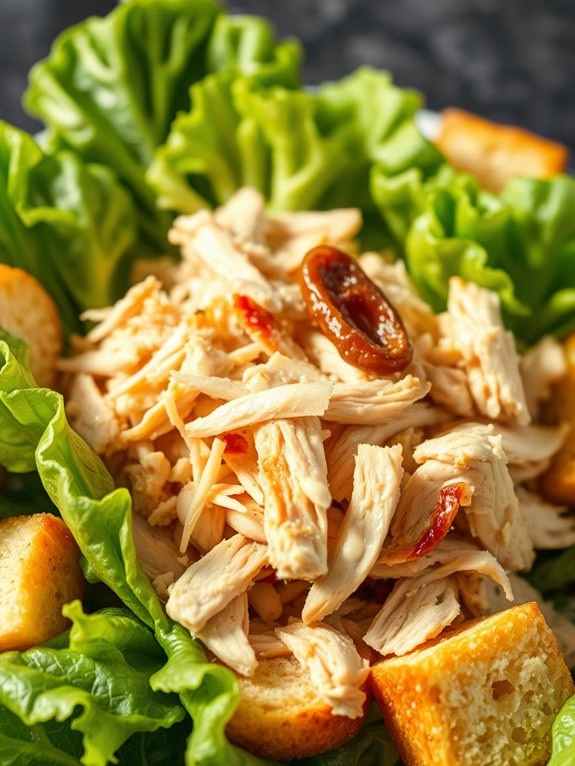
Chicken Caesar Salad is a classic and beloved dish that combines the savory flavors of rotisserie chicken with crisp romaine lettuce, creamy Caesar dressing, and crunchy croutons. This dish is perfect for a quick and easy meal that doesn’t sacrifice taste. Utilizing rotisserie chicken not only adds depth of flavor but also cuts down on prep time, making it an excellent choice for a busy weeknight dinner or a light lunch.
This recipe is designed to serve 4-6 people and is perfect for sharing with family or friends. By using rotisserie chicken, you bring a delightful smokiness to the salad that pairs beautifully with the tangy Caesar dressing and parmesan cheese. Fresh, vibrant ingredients come together in this dish to create a satisfying salad that’s both nutritious and delicious.
Ingredients:
- 1 rotisserie chicken, shredded
- 3 heads of romaine lettuce, chopped
- 1 cup Caesar dressing
- 1 cup grated parmesan cheese
- 1 cup croutons
- 2 tbsp olive oil
- 1 clove garlic, minced
- Juice of 1 lemon
- Salt and pepper to taste
- Optional: Anchovies, sliced for garnish
Instructions:
- Prepare the Chicken: Remove the skin from the rotisserie chicken and shred the meat into bite-sized pieces. Set aside in a large bowl.
- Make the Dressing: In a small bowl, combine the Caesar dressing with the minced garlic, olive oil, lemon juice, salt, and pepper. Whisk until well combined and set aside. If you prefer a more garlicky flavor, you can let the mixture sit for a few minutes to allow the garlic to infuse.
- Assemble the Salad: In a large salad bowl, add the chopped romaine lettuce. Arrange the shredded rotisserie chicken on top of the lettuce.
- Add the Dressing: Pour the prepared dressing over the lettuce and chicken. Toss the salad gently to guarantee even distribution of the dressing.
- Finish with Toppings: Sprinkle the grated parmesan cheese and croutons over the salad. If using, add the optional sliced anchovies on top for an extra burst of umami flavor.
- Serve: Divide the salad onto individual plates or serve in the large salad bowl family-style. Enjoy immediately for the best texture and flavor.
Extra Tips:
When preparing Chicken Caesar Salad, freshness is key. Use crisp, fresh romaine lettuce for the best crunch.
If you have time, consider making your own croutons by toasting cubed bread with olive oil, garlic powder, and Italian herbs for an extra layer of flavor.
Additionally, for those who enjoy a bit of heat, a sprinkle of red pepper flakes can add a delightful kick to the salad.
BBQ Chicken Pizza

BBQ Chicken Pizza is a delicious and easy-to-make dish that combines the smoky flavors of barbecue with the savory goodness of pizza. Perfect for family dinners or casual get-togethers, this recipe uses rotisserie chicken to save time and add a depth of flavor.
The pizza crust is topped with tangy BBQ sauce, tender chicken, red onions, and a blend of cheeses, creating a mouth-watering experience with every bite. This recipe serves 4-6 people and can be customized with your favorite toppings or extra cheese.
The key to a great BBQ chicken pizza is balancing the flavors and guaranteeing the crust is perfectly crisp. With just a few ingredients and simple steps, you can have a restaurant-quality pizza at home in no time.
Ingredients:
- 1 pre-made pizza crust (12-14 inches)
- 1 cup BBQ sauce
- 2 cups shredded rotisserie chicken
- 1 red onion, thinly sliced
- 1 cup shredded mozzarella cheese
- 1 cup shredded cheddar cheese
- 1/4 cup chopped fresh cilantro (optional)
- Olive oil for brushing
Instructions:
- Preheat the Oven: Preheat your oven to 450°F (232°C). If you have a pizza stone, place it in the oven to preheat as well; this will help achieve a crispy crust.
- Prepare the Crust: Place the pizza crust on a baking sheet or a pizza peel dusted with flour or cornmeal. Lightly brush the edges of the crust with olive oil to help it brown nicely in the oven.
- Add the Sauce: Spread the BBQ sauce evenly over the pizza crust, leaving about a 1-inch border around the edges for the crust.
- Top with Chicken and Onions: Evenly distribute the shredded rotisserie chicken over the BBQ sauce. Scatter the thinly sliced red onions on top of the chicken.
- Cheese Layer: Sprinkle the mozzarella and cheddar cheeses evenly over the entire pizza, guaranteeing that the chicken and onions are well covered.
- Bake the Pizza: Carefully transfer the pizza to the preheated oven (or onto the pizza stone) and bake for 12-15 minutes, or until the cheese is melted and bubbly and the crust is golden brown.
- Garnish and Serve: Once the pizza is done, remove it from the oven and allow it to cool for a couple of minutes. Sprinkle the chopped cilantro over the top if using, then slice and serve warm.
Extra Tips:
For an even more flavorful BBQ Chicken Pizza, consider using a smoked or spicy BBQ sauce for an added kick. You can also add toppings like sliced jalapeños for heat or pineapple chunks for a sweet contrast.
If you prefer a thinner crust, roll out the dough to your desired thickness, but remember to adjust the cooking time accordingly. For a gluten-free option, use a gluten-free pizza crust.
Always guarantee your oven is fully preheated before baking to ensure a perfectly crispy base.
Chicken Enchilada Casserole
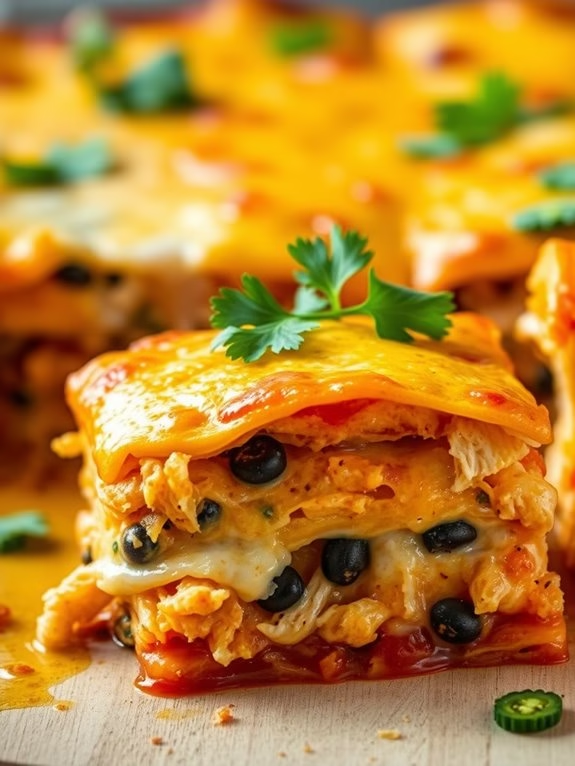
Chicken Enchilada Casserole is a delicious and hearty dish that combines the rich flavors of enchiladas with the simplicity of a casserole. Perfect for a family dinner or a gathering with friends, this recipe is designed to make the most of a rotisserie chicken, providing a quick yet satisfying meal.
The creamy sauce, gooey cheese, and perfectly seasoned chicken make this casserole an irresistible comfort food that everyone will love. This versatile dish can be customized to suit your taste preferences, whether you prefer it spicy or mild.
It’s also an excellent way to utilize leftovers, as the rotisserie chicken adds depth and flavor without the need for additional cooking. By layering tortillas, chicken, cheese, and sauce, you create a mouthwatering meal that can be enjoyed on its own or paired with a simple side salad or rice.
Ingredients (Serves 4-6)
- 1 rotisserie chicken, shredded
- 10 corn tortillas, cut into quarters
- 2 cups enchilada sauce
- 1 can (15 oz) black beans, drained and rinsed
- 1 can (4 oz) green chilies
- 2 cups shredded cheddar cheese
- 1 cup shredded Monterey Jack cheese
- 1 cup sour cream
- 1 teaspoon ground cumin
- 1 teaspoon garlic powder
- 1 teaspoon onion powder
- 1/2 teaspoon salt
- 1/2 teaspoon black pepper
- 1/4 cup chopped fresh cilantro (optional)
Cooking Instructions
1. Preheat the Oven: Start by preheating your oven to 375°F (190°C) to guarantee even cooking of the casserole.
2. Prepare the Chicken: Shred the rotisserie chicken, removing any skin and bones. Place the shredded chicken in a large bowl and mix in the cumin, garlic powder, onion powder, salt, and black pepper to evenly distribute the spices.
3. Mix the Filling: In another bowl, combine the enchilada sauce, black beans, green chilies, and sour cream. Stir until all ingredients are well combined into a creamy sauce.
4. Layer the Casserole: In a 9×13 inch baking dish, spread a thin layer of the enchilada sauce mixture on the bottom. Add a layer of tortilla pieces, followed by a layer of the seasoned chicken, a sprinkle of cheddar cheese, and a portion of the sauce.
Repeat these layers until all ingredients are used, finishing with a layer of tortillas and a generous topping of cheese.
5. Bake the Casserole: Cover the baking dish with aluminum foil and bake in the preheated oven for 25 minutes. Remove the foil and bake for an additional 10-15 minutes or until the cheese is bubbly and golden brown.
6. Garnish and Serve: Once baked, remove the casserole from the oven and let it cool for a few minutes. Top with fresh cilantro if desired before serving.
Extra Tips
For a spicier version, consider adding diced jalapeños or using a spicier enchilada sauce. If you prefer a milder taste, opt for mild green chilies and adjust the spices accordingly.
This casserole can also be made ahead of time and refrigerated; simply bake it when you’re ready to serve. Additionally, try using different types of cheese for varied flavors, such as pepper jack or queso fresco.
Thai Chicken Curry
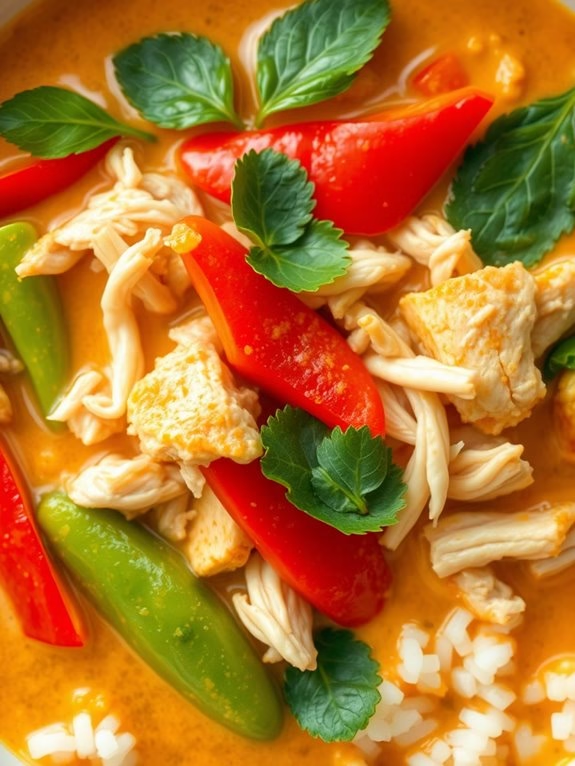
Thai Chicken Curry is a delightful and flavorful dish that brings the vibrant tastes of Thailand into your kitchen. Using rotisserie chicken in this recipe not only saves time but also infuses additional layers of flavor into the curry. The creamy coconut milk blends perfectly with the aromatic spices and herbs, creating a rich and satisfying meal. Ideal for a weeknight dinner or a cozy weekend meal, this dish is sure to impress both family and friends.
The beauty of Thai Chicken Curry lies in its simplicity and versatility. You can customize the vegetables based on what you have on hand or what’s in season. The rotisserie chicken is a convenient shortcut that allows you to focus on building the layers of flavor with the curry paste, lime juice, and fresh herbs. This recipe serves 4-6 people, making it perfect for a small gathering or for leftovers that taste even better the next day.
Ingredients (serving size: 4-6):
- 1 rotisserie chicken, shredded
- 2 tablespoons vegetable oil
- 1 onion, sliced
- 2 cloves garlic, minced
- 1 tablespoon ginger, grated
- 3 tablespoons Thai red curry paste
- 1 can (14 oz) coconut milk
- 1 cup chicken broth
- 1 tablespoon fish sauce
- 1 tablespoon brown sugar
- 1 red bell pepper, sliced
- 1 cup snap peas
- 1 cup bamboo shoots, drained
- Juice of 1 lime
- Fresh basil leaves for garnish
- Fresh cilantro leaves for garnish
- Cooked jasmine rice, for serving
Instructions:
- Prepare the Ingredients: Begin by shredding the meat from the rotisserie chicken and set aside. Slice the onion and bell pepper, mince the garlic, and grate the ginger.
- Sauté Aromatics: In a large pot or Dutch oven, heat the vegetable oil over medium heat. Add the sliced onion and sauté until translucent, about 3-4 minutes. Add the minced garlic and grated ginger, cooking for an additional minute until fragrant.
- Cook the Curry Paste: Stir in the Thai red curry paste and cook for 1-2 minutes, allowing the spices to bloom and become aromatic.
- Add Liquid Ingredients: Pour in the coconut milk and chicken broth, stirring to combine. Bring the mixture to a gentle simmer.
- Season the Curry: Add the fish sauce and brown sugar, stirring until the sugar dissolves. Taste and adjust seasoning as needed.
- Cook the Vegetables: Add the sliced red bell pepper, snap peas, and bamboo shoots to the pot. Simmer for 5-7 minutes until the vegetables are tender-crisp.
- Add Chicken and Lime Juice: Stir in the shredded rotisserie chicken and lime juice. Simmer for another 2-3 minutes until the chicken is heated through.
- Serve: Remove from heat and garnish with fresh basil and cilantro leaves. Serve hot over a bed of jasmine rice.
Extra Tips:
For a spicier curry, you can increase the amount of Thai red curry paste or add sliced fresh chili peppers. If you prefer a thicker curry, let it simmer longer to reduce the liquid to your desired consistency.
Fresh herbs are key to brightening the dish, so don’t skip the basil and cilantro garnish. For a more nutritious version, consider adding more vegetables like spinach or zucchini.
Store leftovers in an airtight container for up to 3 days, and reheat gently on the stove or in the microwave.
Chicken and Rice Skillet

This Chicken and Rice Skillet is a comforting and satisfying one-pan dish that combines the flavors of juicy rotisserie chicken with fluffy, seasoned rice. Perfect for a quick weeknight dinner, it’s a meal that comes together in under 30 minutes, using ingredients that you likely already have on hand. The rotisserie chicken adds depth and flavor, while the rice absorbs the savory spices, creating a deliciously cohesive dish that will have everyone asking for seconds.
The beauty of this recipe lies in its simplicity and versatility. You can easily adapt it to suit your taste preferences by adding vegetables or adjusting the seasonings. Whether you’re feeding a hungry family or preparing a meal for a small gathering, this Chicken and Rice Skillet serves 4-6 people and is sure to become a staple in your recipe collection.
Ingredients (Serves 4-6):
- 2 cups rotisserie chicken, shredded
- 1 1/2 cups long-grain white rice
- 3 cups chicken broth
- 1 medium onion, diced
- 2 cloves garlic, minced
- 1 teaspoon paprika
- 1 teaspoon dried thyme
- 1/2 teaspoon salt
- 1/4 teaspoon black pepper
- 1 cup frozen peas
- 2 tablespoons olive oil
- 1/4 cup grated Parmesan cheese
- 2 tablespoons fresh parsley, chopped
Cooking Instructions:
- Prepare the Ingredients: Begin by shredding the rotisserie chicken into bite-sized pieces. Dice the onion and mince the garlic for easy incorporation into the dish.
- Sauté Aromatics: In a large skillet, heat olive oil over medium heat. Add the diced onion and sauté for about 3-4 minutes until it becomes translucent. Stir in the minced garlic and cook for an additional minute until fragrant.
- Toast the Rice: Add the long-grain white rice to the skillet and stir well to coat each grain with the oil, onion, and garlic mixture. Cook for about 2 minutes, stirring frequently, until the rice is lightly toasted.
- Add Broth and Seasonings: Pour in the chicken broth and add the paprika, dried thyme, salt, and black pepper. Stir to combine the ingredients thoroughly, making certain the spices are evenly distributed.
- Simmer the Rice: Bring the mixture to a gentle boil, then reduce the heat to low. Cover the skillet with a tight-fitting lid and let it simmer for about 15-18 minutes, or until the rice is tender and the liquid is absorbed.
- Incorporate Chicken and Peas: Once the rice is cooked, gently fold in the shredded rotisserie chicken and frozen peas. Cover the skillet again and cook for an additional 5 minutes, or until the chicken is heated through and the peas are tender.
- Finish and Serve: Remove the skillet from heat. Stir in the grated Parmesan cheese and sprinkle with fresh parsley. Serve the Chicken and Rice Skillet hot and enjoy.
Extra Tips:
For a more vibrant dish, consider adding other vegetables such as bell peppers or carrots along with the peas. If you prefer a bit of heat, a pinch of cayenne pepper or red pepper flakes can be added during the cooking process.
Confirm the rice is cooked to your desired tenderness by checking it a few minutes before the suggested cooking time ends, as stove temperatures may vary. Leftovers can be stored in an airtight container in the refrigerator for up to 3 days, making it an excellent option for meal prep.
Buffalo Chicken Wraps
Buffalo Chicken Wraps are a delicious and easy-to-make dish that combines the classic flavors of buffalo chicken with the convenience of a handheld wrap. Perfect for a quick lunch or a casual dinner, these wraps offer a burst of spicy flavor balanced by creamy dressings and fresh vegetables. Using rotisserie chicken simplifies the preparation process, allowing you to focus on assembling the perfect wrap.
This recipe is ideal for serving 4-6 people and can easily be adjusted to suit personal taste preferences. The key to a great Buffalo Chicken Wrap is using quality ingredients and guaranteeing that the chicken is evenly coated with the buffalo sauce. Whether you’re a fan of fiery flavors or prefer a milder taste, these wraps can be customized to your liking.
Ingredients (Serves 4-6):
- 1 rotisserie chicken, shredded
- 1/2 cup buffalo sauce
- 6 large flour tortillas
- 1 cup shredded lettuce
- 1/2 cup diced tomatoes
- 1/2 cup shredded cheddar cheese
- 1/4 cup blue cheese or ranch dressing
- 1/4 cup diced red onion
- 2 tablespoons chopped fresh parsley (optional)
Cooking Instructions:
- Prepare the Chicken: Start by removing the skin from the rotisserie chicken and shredding the meat into bite-sized pieces. Place the shredded chicken in a large mixing bowl.
- Mix with Buffalo Sauce: Pour the buffalo sauce over the shredded chicken and toss thoroughly to guarantee every piece is coated evenly. Adjust the amount of sauce based on your heat preference.
- Warm the Tortillas: In a dry skillet over medium heat, warm each tortilla for about 30 seconds on each side. This makes them more pliable and easier to roll without tearing.
- Assemble the Wraps: Lay a warm tortilla flat on a clean surface. Spread a small amount of blue cheese or ranch dressing down the center of the tortilla.
- Add the Fillings: On top of the dressing, layer a handful of shredded lettuce, a sprinkle of diced tomatoes, some shredded cheddar cheese, and a small amount of diced red onion.
- Add the Chicken: Place a generous portion of the buffalo chicken mixture on top of the vegetables and cheese.
- Wrap it Up: Fold in the sides of the tortilla and then roll it up tightly from the bottom. Repeat with the remaining tortillas and fillings.
- Serve: Cut each wrap in half on a diagonal for easy handling and serve immediately. Garnish with chopped fresh parsley if desired.
Extra Tips:
For an extra crunchy texture, consider adding some crispy fried onions or crumbled bacon to the wraps.
If you prefer a milder flavor, mix some additional ranch or blue cheese dressing into the buffalo sauce before coating the chicken.
To make the dish more nutritious, whole wheat tortillas can be used in place of regular flour tortillas.
Additionally, these wraps can be stored wrapped in foil in the refrigerator for up to a day, making them a convenient option for meal prep.
Mediterranean Chicken Salad
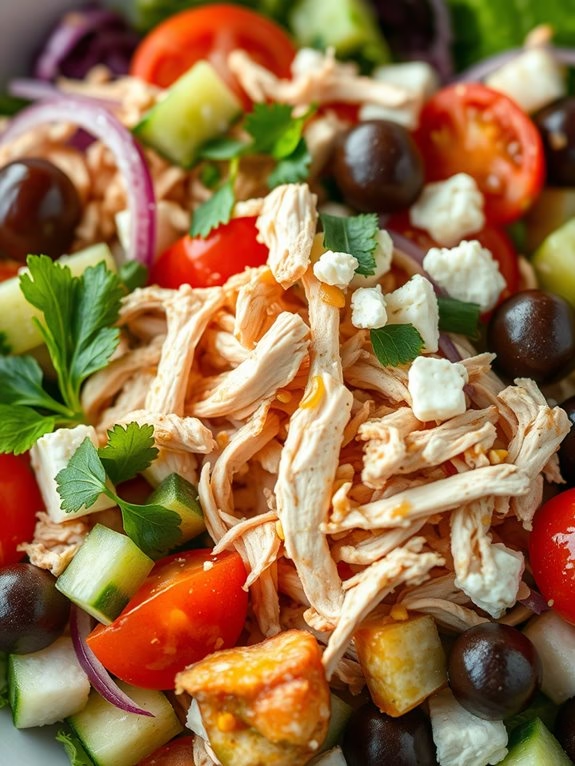
Mediterranean Chicken Salad is a vibrant and healthy dish that combines the flavors of the Mediterranean with the convenience of rotisserie chicken. This salad is perfect for a light lunch or a revitalizing dinner, offering a delightful mix of textures and tastes. The juicy rotisserie chicken is paired with crunchy cucumbers, sweet cherry tomatoes, and briny olives, all tossed in a zesty lemon dressing that ties the flavors together beautifully.
This salad isn’t only delicious but also quick and easy to prepare, making it an ideal choice for busy weeknights or a last-minute potluck dish. With a few fresh ingredients and a pre-cooked rotisserie chicken, you can have this Mediterranean-inspired meal ready in no time. With its vibrant colors and flavors, it’s sure to be a hit for any occasion.
Ingredients (serving size: 4-6 people):
- 1 rotisserie chicken, shredded
- 1 cup cherry tomatoes, halved
- 1 cucumber, diced
- 1/2 red onion, thinly sliced
- 1/2 cup Kalamata olives, pitted and sliced
- 1/4 cup crumbled feta cheese
- 1/4 cup chopped fresh parsley
- 1/4 cup olive oil
- 2 tablespoons fresh lemon juice
- 1 teaspoon dried oregano
- Salt and black pepper to taste
Instructions:
- Prepare the Rotisserie Chicken: Start by removing the skin from the rotisserie chicken. Shred the chicken meat using your fingers or two forks. Make sure to discard any bones and set the shredded chicken aside in a large mixing bowl.
- Chop the Vegetables: Halve the cherry tomatoes, dice the cucumber, and thinly slice the red onion. Add these ingredients to the bowl with the shredded chicken. This will create a colorful and fresh base for your salad.
- Add the Olives and Cheese: Slice the Kalamata olives and add them to the bowl. Crumble the feta cheese over the salad ingredients. These ingredients will add a salty, briny flavor that complements the rest of the dish.
- Make the Dressing: In a small bowl, whisk together the olive oil, fresh lemon juice, dried oregano, salt, and black pepper. Make sure the dressing is well-blended before adding it to the salad.
- Combine and Toss: Pour the dressing over the salad ingredients in the large bowl. Use salad tongs or two large spoons to gently toss the salad until all ingredients are coated evenly with the dressing.
- Garnish and Serve: Sprinkle the chopped fresh parsley over the salad for a burst of color and fresh flavor. Serve immediately, or refrigerate for up to an hour if you prefer a chilled salad.
Extra Tips:
For an added crunch, you can include a handful of toasted pine nuts or slivered almonds to the salad. If you prefer a creamier dressing, consider adding a tablespoon of Greek yogurt to the lemon dressing mixture.
To make this dish even more filling, serve it with warm pita bread or on a bed of mixed greens. Remember, the key to this salad is using fresh, high-quality ingredients to enhance the natural flavors.
Enjoy your Mediterranean Chicken Salad as a standalone meal or as a side dish with grilled meats or seafood.
Chicken Pot Pie
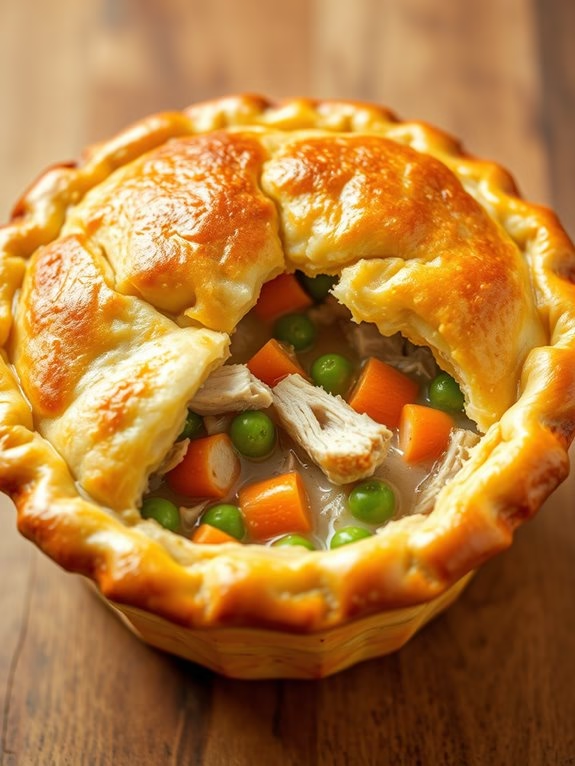
Rotisserie Chicken Pot Pie is a comforting and classic dish that combines the convenience of store-bought rotisserie chicken with the rich, savory flavors of a homemade pie. This recipe is perfect for a family dinner, serving 4-6 people, and makes use of flaky pie crusts, tender vegetables, and a creamy sauce to envelop the succulent chicken.
Whether you’re using leftover chicken or purchasing fresh from the store, this pot pie is bound to bring warmth and satisfaction to your table. By using rotisserie chicken, you not only save time but also enhance the depth of flavor in the dish, as the pre-cooked chicken is already seasoned and juicy.
Pairing it with a medley of vegetables and a luscious sauce, all encased in a golden-brown crust, this pot pie can be prepared with minimal effort and maximum taste. Follow the recipe below to create a comforting meal that’s sure to please everyone around your dining table.
Ingredients (Serves 4-6):
- 1 store-bought rotisserie chicken, shredded (about 3 cups of meat)
- 1/4 cup unsalted butter
- 1 medium onion, diced
- 2 cloves garlic, minced
- 1 cup carrots, diced
- 1 cup peas (fresh or frozen)
- 1/2 cup celery, diced
- 1/3 cup all-purpose flour
- 2 cups chicken broth
- 1 cup whole milk or heavy cream
- 1 teaspoon salt
- 1/2 teaspoon black pepper
- 1 teaspoon dried thyme
- 2 pre-made pie crusts (store-bought or homemade)
- 1 egg, beaten (for egg wash)
Cooking Instructions:
- Preheat the Oven: Preheat your oven to 400°F (200°C) to guarantee it’s ready for baking the assembled pie.
- Prepare the Filling: In a large skillet over medium heat, melt the butter. Add the diced onion and cook until translucent, about 3-4 minutes. Stir in the garlic, carrots, peas, and celery, cooking until the vegetables are tender, approximately 5-7 minutes.
- Make the Sauce: Sprinkle the flour over the vegetables and stir continuously for about 1 minute to cook out the raw flour taste. Gradually add the chicken broth and milk, stirring constantly until the mixture begins to thicken, around 3-5 minutes.
- Season with salt, pepper, and thyme.
- Add the Chicken: Stir in the shredded rotisserie chicken, making sure it’s evenly distributed in the sauce. Allow the mixture to simmer for a few minutes to meld the flavors together. Remove from heat.
- Assemble the Pie: Roll out one pie crust and place it into a 9-inch pie dish, pressing it against the sides. Pour the chicken and vegetable mixture into the crust, spreading it evenly. Cover with the second pie crust, sealing the edges by pinching them together or crimping with a fork.
- Apply the Egg Wash: Brush the top crust with the beaten egg to achieve a golden-brown finish as it bakes. Cut a few slits into the top crust to allow steam to escape.
- Bake the Pie: Place the pie in the preheated oven and bake for 30-35 minutes, or until the crust is golden brown and the filling is bubbling. Allow the pie to cool for 10 minutes before serving.
Extra Tips:
For a more flavorful pie, consider adding a splash of white wine to the sauce for a subtle depth of flavor. If you’re short on time, frozen mixed vegetables can be used in place of fresh ones.
Make sure to let the pie rest before serving to allow the filling to set and cool slightly, guaranteeing clean slices when cut. You can also customize the herbs and spices to your taste, adding rosemary or sage for an autumnal twist.
Greek Chicken Gyros

Greek Chicken Gyros are a delicious and easy way to enjoy the vibrant flavors of the Mediterranean. This dish combines tender rotisserie chicken with a tangy homemade tzatziki sauce, fresh vegetables, and warm pita bread. Perfect for a weeknight dinner or a casual weekend meal, these gyros are sure to impress family and friends with their savory taste and delightful texture. The use of rotisserie chicken not only saves cooking time but also guarantees that the chicken is juicy and flavorful.
Traditionally, gyros are made with marinated meat cooked on a vertical rotisserie, but this recipe simplifies the process by using already-cooked rotisserie chicken. The key is to pair the chicken with the right blend of spices and fresh ingredients to capture the authentic taste of Greek cuisine. By assembling the gyros with a variety of toppings, you can customize each serving to suit individual preferences, making this dish both versatile and crowd-pleasing.
Ingredients for 4-6 servings:
- 1 rotisserie chicken, shredded
- 6 large pita bread rounds
- 1 cucumber, diced
- 2 tomatoes, diced
- 1 red onion, thinly sliced
- 1 cup plain Greek yogurt
- 2 cloves garlic, minced
- 2 tablespoons olive oil
- 1 tablespoon lemon juice
- 1 teaspoon dried oregano
- 1 teaspoon ground cumin
- Salt and pepper to taste
- 1/4 cup fresh dill, chopped
- 1/4 cup fresh parsley, chopped
Cooking Instructions:
- Prepare the Tzatziki Sauce: In a medium bowl, combine the Greek yogurt, minced garlic, olive oil, lemon juice, dill, salt, and pepper. Stir well until all ingredients are combined. Cover and refrigerate for at least 30 minutes to allow the flavors to meld.
- Season the Chicken: In a small bowl, mix together the dried oregano, ground cumin, salt, and pepper. Sprinkle this spice mixture over the shredded rotisserie chicken, tossing to coat evenly.
- Warm the Pita Bread: Preheat a skillet over medium heat. Lightly brush each pita bread with a bit of olive oil and warm in the skillet for about 1-2 minutes on each side until soft and pliable. Alternatively, you can warm the pita bread in the oven at 350°F (175°C) for about 5 minutes.
- Assemble the Gyros: Lay each warmed pita flat and spread a generous spoonful of tzatziki sauce over the surface. Add a portion of the seasoned chicken, followed by diced cucumber, tomatoes, and thinly sliced red onions.
- Garnish and Serve: Sprinkle each gyro with fresh parsley and add more tzatziki sauce if desired. Fold the pita around the fillings to form a wrap. Serve immediately while the pita is warm.
Extra Tips:
For a more traditional gyro experience, consider grilling the seasoned rotisserie chicken briefly on a hot grill or pan to add a slightly charred flavor.
If you prefer a spicier kick, add a pinch of cayenne pepper or paprika to the chicken seasoning mix.
To keep the pita bread from tearing, avoid overfilling with ingredients.
Finally, for added freshness, serve with lemon wedges on the side for squeezing over the gyros before eating.
Chicken and Broccoli Stir Fry
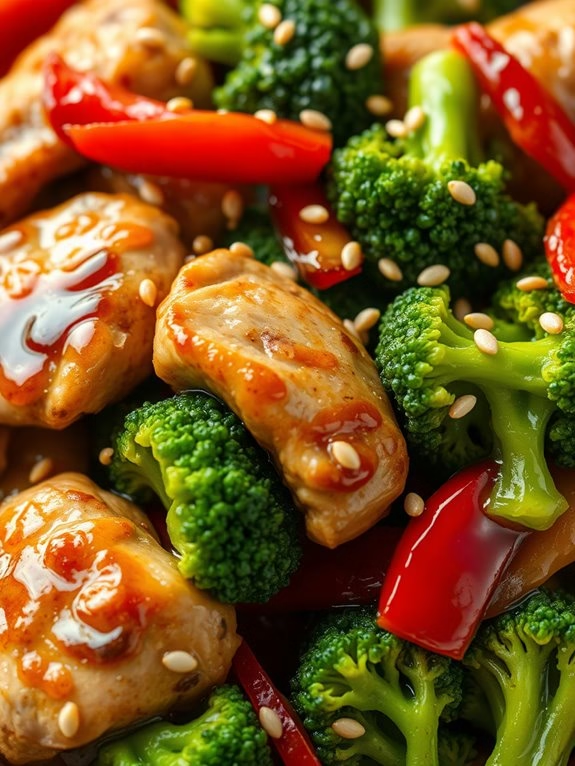
If you’re seeking a quick and delicious meal that combines the succulent flavors of rotisserie chicken with the vibrant crunch of broccoli, search no more than this Chicken and Broccoli Stir Fry. Perfect for a weeknight dinner, this dish is both nutritious and satisfying, offering a delightful mix of textures and flavors.
Utilizing pre-cooked rotisserie chicken reduces preparation time, making it an ideal choice for busy evenings. The soy sauce-based stir fry sauce provides a savory backdrop that complements the juicy chicken and crisp-tender broccoli perfectly.
This dish is designed to serve 4-6 people, making it a great option for family dinners or small gatherings. The use of fresh ingredients guarantees a wholesome meal, while the ease of preparation allows you to enjoy the cooking process. In just a few simple steps, you can transform basic ingredients into a restaurant-quality stir fry that’s sure to impress.
Ingredients:
- 2 cups rotisserie chicken, shredded
- 4 cups broccoli florets
- 1 red bell pepper, sliced
- 1 onion, sliced
- 3 cloves garlic, minced
- 1 tablespoon ginger, minced
- 3 tablespoons soy sauce
- 1 tablespoon oyster sauce
- 1 tablespoon sesame oil
- 1 tablespoon vegetable oil
- 1 teaspoon cornstarch
- 1/4 cup chicken broth
- 1 tablespoon sesame seeds (optional)
- Salt and pepper to taste
Cooking Instructions:
- Prepare the Sauce: In a small bowl, mix together the soy sauce, oyster sauce, sesame oil, cornstarch, and chicken broth. Stir until the cornstarch is fully dissolved and set aside.
- Heat the Oil: In a large skillet or wok, heat the vegetable oil over medium-high heat until hot but not smoking.
- Sauté Aromatics: Add the minced garlic and ginger to the hot oil, stirring constantly for about 30 seconds, until fragrant.
- Cook Vegetables: Add the sliced onion, red bell pepper, and broccoli florets to the skillet. Stir fry for about 4-5 minutes until the vegetables are tender but still crisp.
- Add Chicken: Add the shredded rotisserie chicken to the skillet, stirring to combine with the vegetables.
- Incorporate Sauce: Pour the prepared sauce over the chicken and vegetables. Stir well to coat everything evenly. Cook for another 2-3 minutes, allowing the sauce to thicken slightly.
- Season and Serve: Taste and season with salt and pepper as needed. If using, sprinkle sesame seeds on top before serving. Serve hot over rice or noodles for a complete meal.
Extra Tips:
When making Chicken and Broccoli Stir Fry, it’s important to have all your ingredients prepped and ready before you start cooking. Stir frying happens quickly, so having everything at hand will guarantee a smooth cooking process.
If you prefer a spicier dish, consider adding a pinch of red pepper flakes or a splash of sriracha for some heat. Additionally, to maintain the vibrant color and crispness of the broccoli, avoid overcooking; it should be tender yet firm to the bite.
Chicken Quesadillas
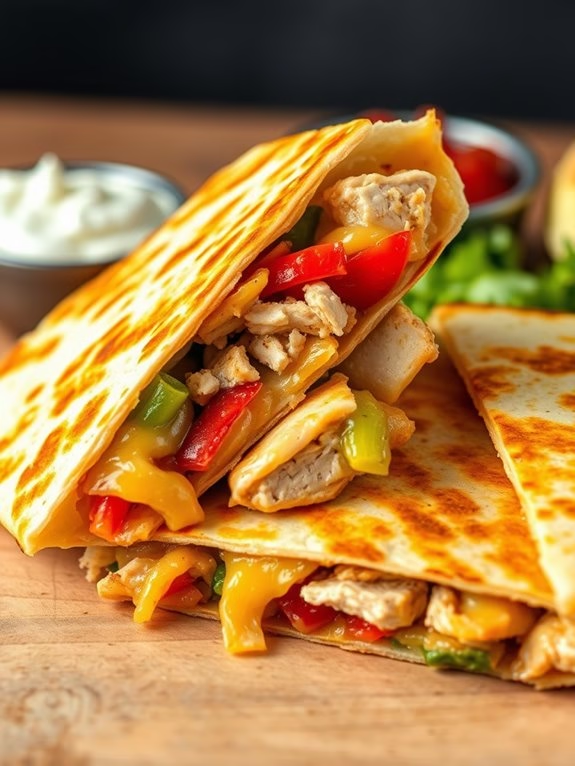
Chicken quesadillas are a delicious and quick meal that can be made using rotisserie chicken. This versatile dish is perfect for family dinners or casual gatherings, offering a delightful combination of flavors and textures with minimal preparation time. The ease of using rotisserie chicken not only cuts down on cooking time, but also guarantees that the chicken is tender and flavorful.
By incorporating shredded cheese, vegetables, and spices, you can elevate your quesadillas to a new level of enjoyment. The crispy tortilla exterior complements the gooey, savory filling, making it a crowd-pleaser. This recipe serves 4-6 people, making it ideal for sharing with friends and family.
Ingredients:
- 2 cups shredded rotisserie chicken
- 2 cups shredded cheese (cheddar, Monterey Jack, or a mix)
- 1 onion, finely chopped
- 1 red bell pepper, diced
- 1 green bell pepper, diced
- 2 tablespoons olive oil
- 1 teaspoon ground cumin
- 1 teaspoon chili powder
- Salt and pepper to taste
- 8 flour tortillas
- Cooking spray or extra olive oil for the pan
- Optional toppings: sour cream, salsa, guacamole, fresh cilantro
Cooking Instructions:
- Prep the Ingredients:
- Shred the rotisserie chicken into bite-sized pieces and set aside.
- Chop the onion and dice the red and green bell peppers.
- Cook the Vegetables:
- Heat 2 tablespoons of olive oil in a skillet over medium heat.
- Add the chopped onion and bell peppers. Sauté until they’re tender, about 5 minutes.
- Season the Chicken:
- Add the shredded chicken to the skillet with the vegetables.
- Sprinkle the cumin, chili powder, salt, and pepper over the mixture.
- Stir well to combine and heat for another 3-4 minutes until the chicken is warmed through.
- Assemble the Quesadillas:
- Lay a tortilla on a flat surface. Place a portion of the chicken and vegetable mixture on one half of the tortilla.
- Sprinkle a generous amount of shredded cheese over the chicken mixture.
- Fold the other half of the tortilla over the filling to create a half-moon shape.
- Cook the Quesadillas:
- Heat a large skillet or griddle over medium heat. Lightly grease with cooking spray or olive oil.
- Place the quesadilla in the skillet and cook for 3-4 minutes on each side, or until the tortilla is golden brown and the cheese has melted.
- Serve:
- Remove from the skillet and let cool slightly.
- Cut each quesadilla into wedges and serve with optional toppings like sour cream, salsa, guacamole, and fresh cilantro.
Extra Tips:
When cooking quesadillas, make certain that the heat isn’t too high to prevent burning the tortillas before the cheese melts.
For a spicier kick, consider adding sliced jalapeños or a dash of hot sauce to the chicken mixture.
If you’re short on time, you can also use pre-shredded cheese and prepared salsa to speed up the process.
Experiment with different cheese blends and vegetables to personalize your quesadillas to your taste.