
Who doesn’t adore a delightful appetizer, especially when it’s quick, easy, and features chicken?
Picture a vibrant platter filled with juicy Chicken Skewers Delight, adorable Mini Chicken Pot Pies, and crispy Chicken Spring Rolls.
Your guests will be raving as they enjoy warm Spicy Buffalo Chicken Dip with crunchy chips or savoring BBQ Chicken Sliders.
I’ve gathered 14 irresistible chicken appetizers that are perfect for your next gathering.
Let’s explore these tasty, crowd-pleasing bites that will surely impress!
Chicken Skewers Delight
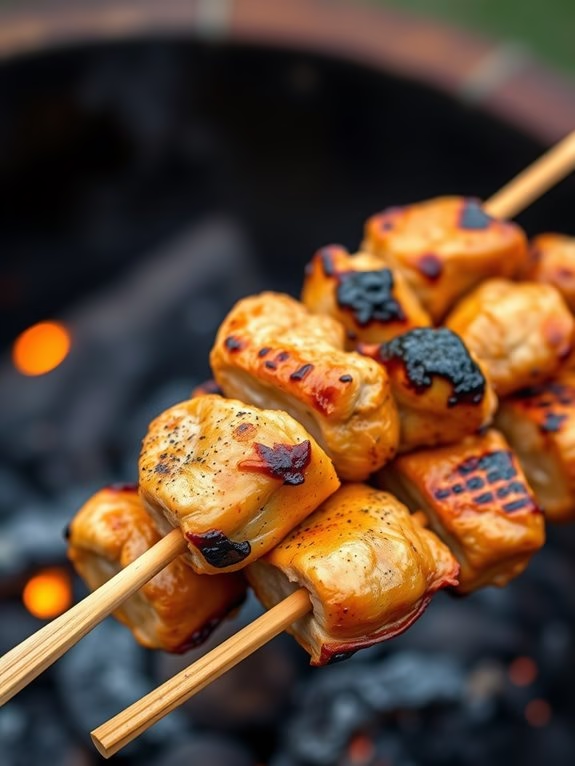
There’s nothing more tantalizing than the sight of golden-brown chicken skewers sizzling on the grill. The aroma of the marinade, the sizzle of the hot coals, and the anticipation of a flavorsome bite can pull anyone towards them.
Our ‘Chicken Skewers Delight’ is a quick and easy chicken appetizer that’s certain to become a crowd favorite at your next party.
Chicken Skewers Delight is a delicious combination of tender chicken pieces marinated in a mix of spices and skewered to perfection. The marinade is the star of this dish, lending the chicken its unique flavor. The skewers are then grilled, adding a smoky depth to the already appetizing dish. Serve it hot off the grill for a delectable starter that will have your guests coming back for more.
Ingredients:
- 500 grams of boneless chicken, cut into 1-inch cubes
- 2 tablespoons of olive oil
- 1 tablespoon of lemon juice
- 2 teaspoons of garlic powder
- 2 teaspoons of onion powder
- 1 teaspoon of paprika
- 1 teaspoon of dried oregano
- 1 teaspoon of dried thyme
- Salt and Pepper to taste
- Wooden skewers, soaked in water
Cooking Instructions:
- Start by preparing the marinade. In a bowl, combine olive oil, lemon juice, garlic powder, onion powder, paprika, dried oregano, dried thyme, salt, and pepper. Mix it well to ascertain that all the spices are evenly distributed.
- Add the chicken pieces to the bowl and ascertain that they’re fully coated with the marinade. Leave the chicken to marinate for at least 30 minutes. If you have more time, you can marinate it for up to 2 hours for more flavor.
- While the chicken is marinating, soak the wooden skewers in water. This will prevent them from burning when you grill the skewers.
- Once the chicken is well-marinated, thread the chicken pieces onto the skewers.
- Preheat your grill on medium heat. Once it’s hot, place the skewers on the grill.
- Grill the skewers for about 5-7 minutes on each side, or until the chicken is fully cooked and has a nice golden-brown color.
- Remove the skewers from the grill and serve immediately.
Extra Tips:
When grilling the skewers, make sure to turn them regularly to ascertain even cooking. If you don’t have a grill, you can also cook these skewers in the oven at 200°C for about 20 minutes, turning halfway through.
The key to juicy and tender skewers isn’t to overcook the chicken, so make sure to keep an eye on them while they’re on the grill or in the oven. Enjoy these delightful chicken skewers with a dipping sauce of your choice.
Mini Chicken Pot Pies
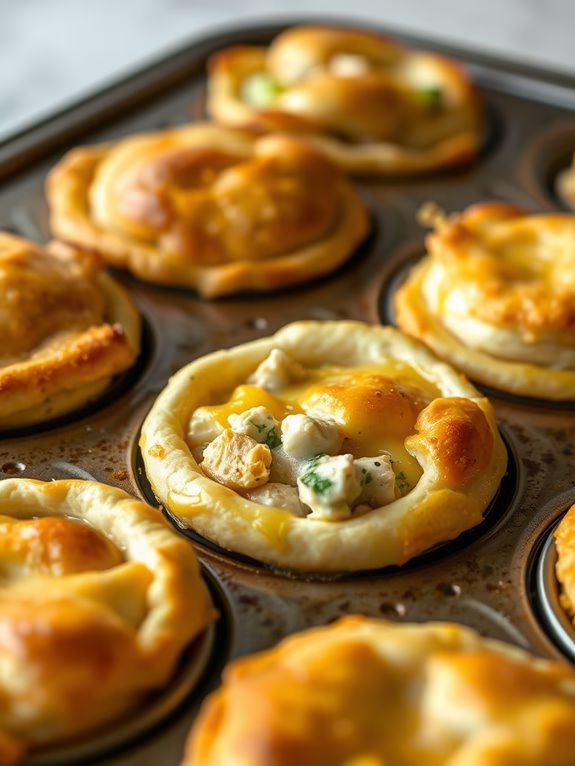
When it comes to bite-sized appetizers that are a hit at every party, few can beat the classic appeal of Mini Chicken Pot Pies. These delectable delights combine the comforting flavors of a traditional chicken pot pie into a fun, single-serving size that’s perfect for parties, potlucks, or simply a fun family dinner.
With their flaky crust, creamy filling, and savory chicken, these mini pot pies are sure to impress your guests and leave them reaching for more.
The best part about these Mini Chicken Pot Pies is how easy they’re to make. Using pre-made pie crust and a simple combination of ingredients, you can whip up these appetizers in less than an hour. Plus, they’re versatile—you can easily adjust the recipe to suit your tastes or accommodate dietary restrictions.
Now, let’s plunge into the recipe for these delicious, crowd-pleasing Mini Chicken Pot Pies.
Ingredients:
- 2 pre-made pie crusts
- 1 cup cooked chicken, diced
- 1 cup frozen mixed vegetables
- 1 cup shredded cheddar cheese
- 1 can (10.5 oz) cream of chicken soup
- Salt and pepper to taste
- 1 egg (for egg wash)
Cooking Instructions:
- Preheat your oven to 375 degrees F (190 degrees C).
- Roll out your pre-made pie crusts and cut out circles using a round cookie cutter or the rim of a glass. You should get about 12-16 circles from each pie crust.
- Press each circle into the wells of a muffin tin, making sure the dough comes up the sides to form a mini pie shell.
- In a bowl, combine the diced chicken, mixed vegetables, cheddar cheese, and cream of chicken soup. Season with salt and pepper to taste.
- Spoon the chicken mixture into each mini pie shell, filling them to the top.
- If desired, cut out additional pie crust circles to place on top of each filled pie shell, sealing the edges with a fork.
- Beat the egg in a small bowl and brush over the top of each pie to give them a golden color when baked.
- Bake in the preheated oven for 25-30 minutes, or until the crust is golden and the filling is bubbly.
When making these Mini Chicken Pot Pies, remember to not overfill the mini pie shells to prevent the filling from spilling over while baking.
Also, when using the egg wash, verify to cover the entire surface of the pie crust for an even, golden finish.
Finally, if you want to make these pot pies ahead of time, simply prepare them up until the baking step, then freeze. When ready to serve, bake straight from the freezer, adding a few extra minutes to the cooking time.
Crispy Chicken Spring Rolls

Crispy Chicken Spring Rolls are a savory treat that will delight your guests at any gathering. They’re quick and easy to prepare, making them a perfect choice for an appetizer. These spring rolls have a crispy and golden exterior, filled with a flavorful filling of chicken, vegetables, and aromatic spices. Every bite of these rolls is an explosion of taste, taking your taste buds on a delightful journey.
Don’t be intimidated by the thought of making spring rolls at home. It’s a simple process, and the result is worth every minute spent in the kitchen. Once you’ve tasted these homemade Crispy Chicken Spring Rolls, you’ll never want to go back to the store-bought ones. This recipe is designed to serve 4-6 people, so adjust the proportions if you’re expecting a larger crowd.
Ingredients:
- 2 boneless, skinless chicken breasts
- 1 tablespoon vegetable oil
- 2 cloves garlic, minced
- 1 small onion, finely chopped
- 1 carrot, finely shredded
- 1 cup shredded cabbage
- 2 green onions, finely chopped
- 1 teaspoon soy sauce
- 1 teaspoon sesame oil
- Salt and pepper to taste
- 12 spring roll wrappers
- 1 egg, beaten
- Vegetable oil for deep frying
Instructions:
- Start by cooking the chicken. Cut the chicken breasts into small pieces and cook them in a pan with a tablespoon of vegetable oil over medium heat until they’re no longer pink. Remove from the pan and set aside.
- In the same pan, add the minced garlic and chopped onion. Sauté until the onion becomes translucent.
- Add the shredded carrot and cabbage to the pan. Cook until the vegetables are tender.
- Return the cooked chicken to the pan. Add the chopped green onions, soy sauce, and sesame oil. Season with salt and pepper to taste. Stir well to combine all the ingredients. Remove from the heat and let it cool.
- Lay a spring roll wrapper on a flat surface. Place a spoonful of the chicken and vegetable mixture on the lower third of the wrapper. Fold the bottom edge over the filling, then fold in the sides and roll up tightly. Seal the edge with a bit of the beaten egg.
- Repeat with the remaining wrappers and filling.
- Heat the vegetable oil in a deep fryer or deep pan over medium-high heat. Fry the spring rolls until they’re golden brown and crispy. This should take about 2-3 minutes per side.
- Drain the spring rolls on paper towels to remove excess oil.
- Serve hot with your favorite dipping sauce.
When making these Crispy Chicken Spring Rolls, be certain to roll them tightly to prevent the filling from spilling out during the frying process.
Also, don’t overcrowd the pan when frying, as this can lower the oil temperature and result in soggy spring rolls.
Remember to let the filling cool before you start rolling so the heat doesn’t make the wrappers soggy. Enjoy this simple yet delicious appetizer!
Spicy Buffalo Chicken Dip
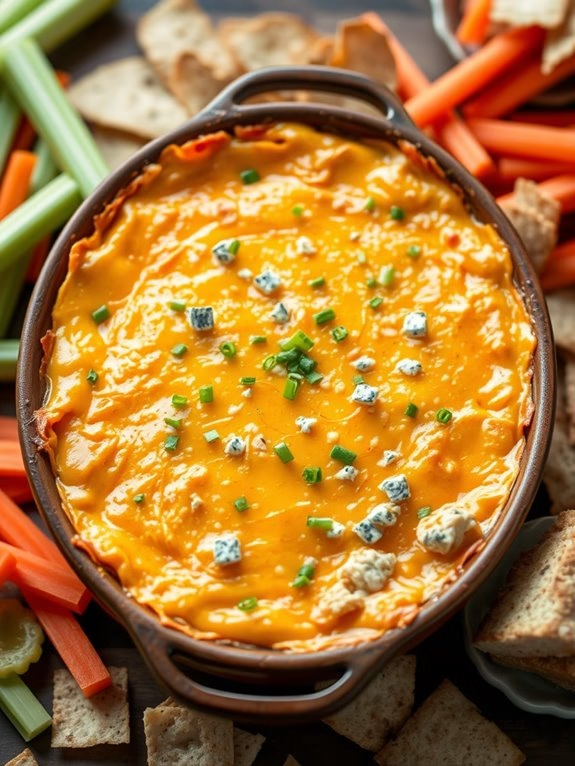
Are you looking to add a flavorful and easy chicken appetizer to your next party menu? Search no more than the Spicy Buffalo Chicken Dip. This appetizer is a crowd-pleaser that combines the bold flavors of buffalo sauce, tender chicken, and creamy cheeses.
It’s the perfect dish for any gathering, from game day parties to family reunions, and it’s easy enough for even novice cooks to pull off.
The Spicy Buffalo Chicken Dip is a versatile appetizer that can be served with a variety of sides. It pairs perfectly with crunchy celery sticks, carrot sticks, tortilla chips, or even pita bread.
This recipe serves 4-6 people, but it can easily be doubled or even tripled for larger groups.
Ingredients:
- 2 cups shredded cooked chicken
- 1 (8 oz) package cream cheese, softened
- 1 cup ranch dressing
- 3/4 cup hot buffalo sauce
- 1 1/2 cups shredded cheddar cheese
- 1/2 cup crumbled blue cheese
- 1/2 cup chopped green onions for garnish
Instructions:
- Preheat your oven to 350 degrees F (175 degrees C).
- In a medium-sized bowl, combine the shredded chicken, cream cheese, ranch dressing, and hot buffalo sauce. Mix until all ingredients are well combined.
- Transfer the chicken mixture into a baking dish, spreading it out evenly.
- Top the mixture with the shredded cheddar cheese, ensuring that it’s evenly distributed.
- Bake in the preheated oven for 20-25 minutes, or until the cheese is bubbly and slightly golden.
- Once done, remove from the oven and let it cool for about 5 minutes.
- Sprinkle the crumbled blue cheese and chopped green onions on top for garnish before serving.
When making the Spicy Buffalo Chicken Dip, it’s important to use high-quality ingredients for the best results. For the chicken, you can use a rotisserie chicken from your local grocery store or cook your own chicken breast.
If you prefer a spicier dip, feel free to add more buffalo sauce. Remember, this dip is best served warm, so plan your cooking time accordingly. Enjoy!
Chicken Quesadilla Bites
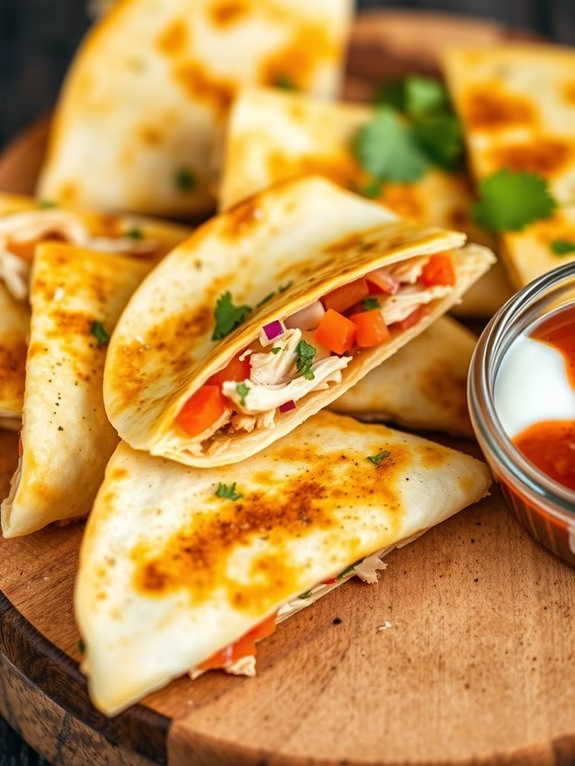
Chicken Quesadilla Bites are a delightful and easy-to-make appetizer perfect for any occasion. These bite-sized treats are filled with mouth-watering flavors of chicken, cheese, and a blend of spices, all packed within a crisp tortilla. They’re perfect for parties and gatherings, or even just a mid-day snack, and are sure to impress your guests with their delightful flavor and appearance.
Preparing Chicken Quesadilla Bites is an effortless task. The ingredients are simple and readily available in most kitchens. The cooking process is also quick, with a total time of about 20 minutes. You can also customize the fillings according to your liking, making it a versatile recipe that everyone can enjoy.
Ingredients:
- 2 boneless skinless chicken breasts
- 1 tablespoon olive oil
- 1/2 teaspoon salt
- 1/2 teaspoon black pepper
- 8 small flour tortillas
- 2 cups shredded Mexican cheese blend
- 1/2 cup diced red onion
- 1/2 cup chopped cilantro
- 1/2 cup diced tomatoes
- Sour cream and salsa for serving
Instructions:
- Start by seasoning the chicken breasts with salt and pepper.
- Heat the olive oil in a pan over medium heat. Once the oil is hot, add the chicken breasts and cook until they’re no longer pink in the middle. This should take about 5-7 minutes on each side.
- Once the chicken is cooked, remove it from the pan and let it cool. After it has cooled, shred the chicken using two forks.
- Lay out the flour tortillas and evenly distribute the shredded chicken, cheese, red onion, cilantro, and diced tomatoes among them.
- Fold each tortilla in half over the fillings, pressing down gently to secure them.
- Heat a clean pan over medium heat. Cook each quesadilla for about 2-3 minutes on each side, or until they’re golden brown and the cheese has melted.
- Once cooked, let the quesadillas cool for a few minutes before cutting them into bite-sized pieces.
- Serve the Chicken Quesadilla Bites with sour cream and salsa on the side.
When preparing the Chicken Quesadilla Bites, be careful not to overfill the tortillas. If they’re too full, the fillings might spill out when you’re cooking them.
Also, make sure to cook them on medium heat to prevent them from burning. You can also add more spices like cumin or chili powder to the chicken for an extra kick.
Baked Chicken Meatballs
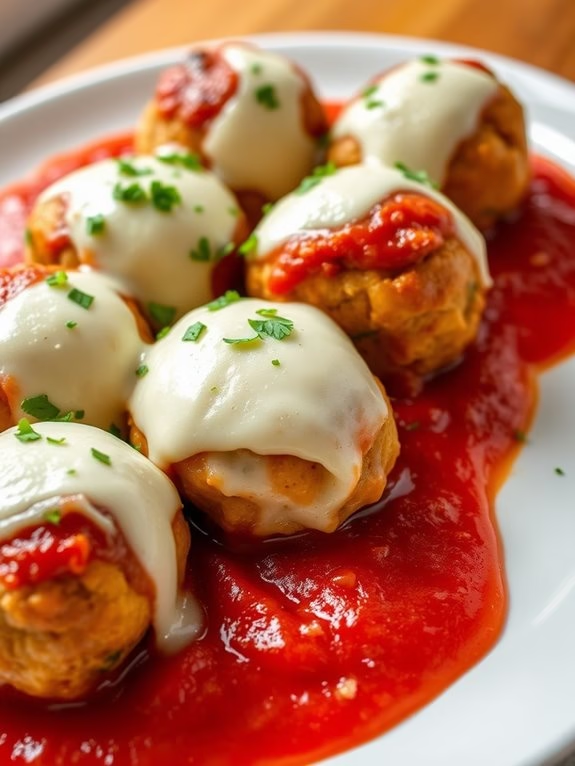
Baked Chicken Meatballs are a quick and easy appetizer that’s sure to please everyone at your next gathering. These bite-sized treats are packed with flavor and can be made in less than 30 minutes. Whether you’re entertaining guests or just looking for a tasty snack, these meatballs are the perfect option.
The key to these meatballs is using ground chicken, which keeps them light and juicy. Paired with a blend of Italian spices, breadcrumbs, and a tangy marinara sauce, these meatballs are deliciously satisfying. Best of all, they’re baked, not fried, so they’re healthier than traditional meatball appetizers.
Ingredients:
- 1 lb ground chicken
- 1 cup breadcrumbs
- 1/4 cup grated Parmesan cheese
- 1/4 cup chopped fresh parsley
- 2 cloves garlic, minced
- 1 large egg
- 1/2 teaspoon salt
- 1/4 teaspoon black pepper
- 1 cup marinara sauce
- Mozzarella cheese for topping
Cooking Instructions:
- Preheat your oven to 375 degrees F. Line a baking sheet with parchment paper for easy cleanup.
- In a large bowl, combine the ground chicken, breadcrumbs, Parmesan cheese, parsley, garlic, egg, salt, and pepper. Mix until all ingredients are well incorporated.
- Using your hands, shape the mixture into small meatballs, about 1 inch in diameter. Place the meatballs on the prepared baking sheet.
- Bake the meatballs for 15 minutes, or until they’re cooked through and browned on the outside.
- Remove the meatballs from the oven and spoon marinara sauce over each one. Top with a sprinkle of mozzarella cheese.
- Return the meatballs to the oven and bake for an additional 5 minutes, or until the cheese is melted and bubbly.
- Allow the meatballs to cool slightly before serving.
Extra Tips:
When making the meatballs, be careful not to overmix the ingredients as this can make them tough.
Also, using a small ice cream scoop can help guarantee your meatballs are uniform in size, which helps them cook evenly.
Finally, these meatballs can be prepared ahead of time and frozen, making them a convenient option for last-minute entertaining. Simply bake from frozen, adding a few extra minutes to the cooking time.
Chicken and Cheese Empanadas
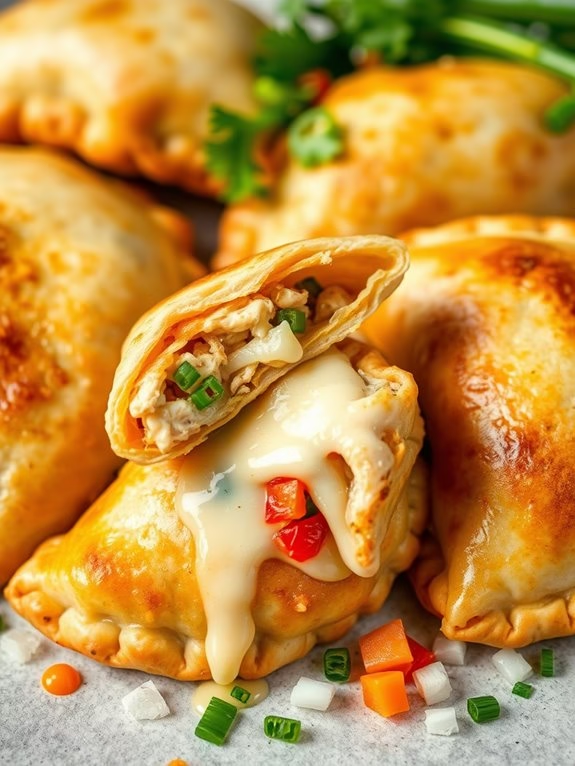
Chicken and Cheese Empanadas are the perfect quick and easy appetizer for your next gathering. This Latin American classic is a pastry turnover filled with flavorful chicken and oozy, melty cheese. The crust is crispy and golden, while the filling is savory and satisfying. Not only are these empanadas delicious, but they can also be made ahead of time and fried or baked at the last minute, making them the ideal party food.
The ingredients for Chicken and Cheese Empanadas are simple and easy to find. The filling is made from chicken breast, onion, garlic, bell peppers, and a combination of spices that give it a delectable flavor. The pastry dough is made from flour, shortening, and a little bit of salt. Finally, they’re filled with a generous portion of cheese, which melts to perfection when cooked.
Ingredients:
- 2 boneless, skinless chicken breasts
- 1 onion, chopped
- 2 cloves garlic, minced
- 1 red bell pepper, chopped
- 1 green bell pepper, chopped
- 1 teaspoon cumin
- 1 teaspoon paprika
- Salt and pepper to taste
- 2 cups all-purpose flour
- 1/2 cup shortening
- 1/2 teaspoon salt
- 1/2 cup cold water
- 1 cup shredded cheddar cheese
- Oil for frying
Cooking instructions:
- Start by cooking the chicken. Place the chicken breasts in a saucepan, cover with water, bring to a boil, and then simmer for about 15 minutes until the chicken is cooked through. Once cooked, shred the chicken and set it aside.
- In a large skillet, sauté the onion, garlic, and bell peppers until they’re soft. Add the shredded chicken, cumin, paprika, salt, and pepper to the skillet and stir well to combine. Remove from heat and set aside.
- In a large bowl, combine the flour, shortening, and salt. Using your hands, mix the ingredients together until the mixture resembles coarse crumbs. Slowly add the cold water and mix until a dough forms.
- Divide the dough into 12 equal pieces and roll each piece into a ball. On a floured surface, roll out each ball into a 6-inch circle.
- Place a spoonful of the chicken mixture onto one half of each circle, top with some shredded cheese, and then fold the other half of the dough over the filling to form a half-moon shape. Press the edges together to seal the empanada.
- Heat the oil in a deep fryer or large saucepan to 375°F. Fry the empanadas, a few at a time, until they’re golden brown on both sides. Drain on paper towels.
Extra tips:
When sealing the empanadas, it’s important to make sure they’re well sealed to prevent the filling from spilling out during cooking. You can use a fork to crimp the edges for extra security.
Additionally, if you prefer a healthier version, these empanadas can be baked in a preheated oven at 400°F for about 20 minutes or until golden brown.
BBQ Chicken Sliders
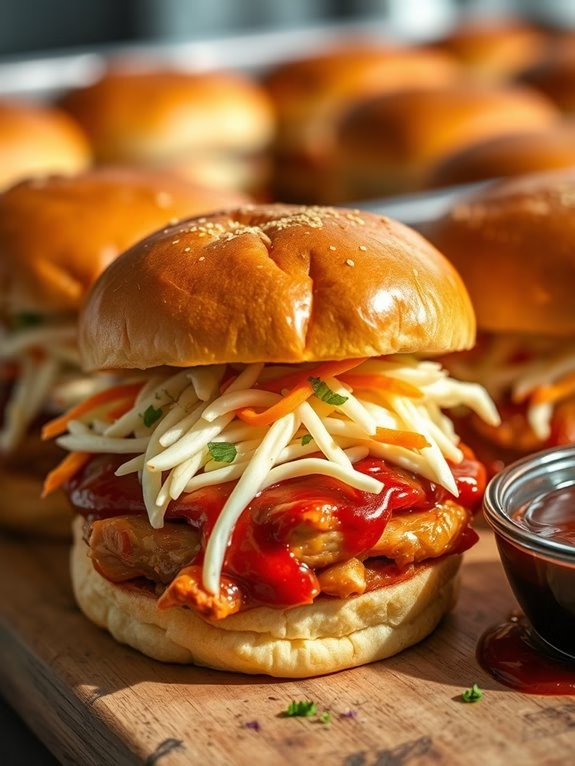
BBQ Chicken Sliders are a crowd-pleaser, perfect for any gathering or a simple family dinner. These mini sandwiches are packed with flavor, featuring succulent BBQ chicken, tangy coleslaw, and soft, fluffy buns. Easy to prepare and immensely satisfying, they’re sure to become a favorite in your home.
The secret to these sliders is a mouthwatering BBQ sauce that perfectly complements the tender chicken. A fresh, crunchy coleslaw adds a delightful contrast of textures, while the sliders’ size makes them perfect for a quick snack or a light meal. This recipe serves 4-6 people, making it ideal for small gatherings or family dinners.
Ingredients:
- 2 boneless, skinless chicken breasts
- 1 cup BBQ sauce
- 1 cup coleslaw mix
- 1/2 cup mayonnaise
- 1 tbsp apple cider vinegar
- 1 tsp sugar
- Salt and pepper to taste
- 12 slider buns
- 1/2 cup melted butter
- 1 tsp garlic powder
Cooking Instructions:
- Start by cooking the chicken. Place the chicken breasts in a slow cooker and pour the BBQ sauce over them. Cook on low for 6-8 hours or on high for 3-4 hours, until the chicken is tender and fully cooked.
- Once the chicken is done, shred it with two forks directly in the slow cooker. Stir it around to evenly coat it in the BBQ sauce.
- While the chicken is cooking, prepare the coleslaw. In a bowl, combine the coleslaw mix, mayonnaise, apple cider vinegar, sugar, salt, and pepper. Stir until all the ingredients are well mixed. Refrigerate until ready to use.
- Preheat your oven to 350°F (175°C). Slice the slider buns in half and place the bottom halves in a baking dish.
- Spread the shredded BBQ chicken evenly over the bottom halves of the buns. Top with the coleslaw, then place the top halves of the buns on top.
- In a small bowl, mix together the melted butter and garlic powder. Brush this mixture over the tops of the buns.
- Bake in the preheated oven for about 15 minutes, until the buns are golden and the sliders are heated through.
While this BBQ Chicken Sliders recipe is fairly straightforward, there are a few extra tips to make your cooking experience even smoother. If you’re short on time, you can use pre-cooked rotisserie chicken instead of slow-cooking your own. Just shred it and mix it with the BBQ sauce.
Also, consider toasting the buns before assembling the sliders; this will help prevent them from getting soggy from the BBQ sauce and coleslaw. Finally, feel free to customize the sliders with your favorite toppings, like pickles or melted cheese.
Chicken Lettuce Wraps
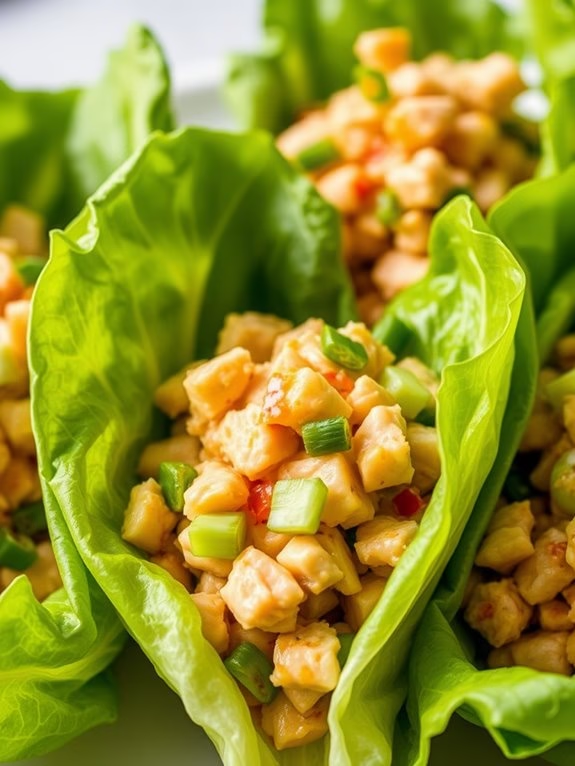
Chicken Lettuce Wraps are a light and flavorful appetizer that can be prepared in a short span of time. This Asian-inspired dish is versatile, allowing you to customize it with various additions based on your preference. The succulent chicken and crunchy water chestnuts, all enveloped in a crisp lettuce leaf, make for a delightful contrast of textures. The tangy-sweet sauce adds a delectable touch to the dish, leaving your taste buds craving for more.
These Chicken Lettuce Wraps are a great choice for casual get-togethers or parties, offering a healthier alternative to traditional appetizers. Not only are they quick and easy to prepare, but they can also be made ahead of time, making them a convenient choice for busy hosts. These appetizers are sure to be a hit with both kids and adults alike.
Ingredients for 4-6 servings:
- 1 lb boneless, skinless chicken breast
- 1 tablespoon vegetable oil
- 1 onion, finely chopped
- 2 cloves garlic, minced
- 1 can (8 oz) water chestnuts, drained and finely chopped
- 1/4 cup hoisin sauce
- 2 tablespoons soy sauce
- 1 tablespoon rice vinegar
- 1 teaspoon sesame oil
- 1/4 teaspoon red pepper flakes (optional)
- 1/4 cup chopped green onions
- Salt and pepper to taste
- 1 head iceberg lettuce or butter lettuce
Cooking Instructions:
- Start by cutting the chicken into small pieces. You can also pulse it in a food processor until finely chopped.
- Heat the vegetable oil in a large skillet over medium heat. Add the chopped onion and cook until it becomes translucent.
- Add the minced garlic to the skillet and sauté for about 30 seconds until fragrant.
- Next, add the finely chopped chicken to the skillet. Cook until the chicken is no longer pink.
- Stir in the chopped water chestnuts, hoisin sauce, soy sauce, rice vinegar, sesame oil, and red pepper flakes. Season with salt and pepper to taste. Cook for about 2-3 minutes until everything is well combined and heated through.
- Remove the skillet from the heat and stir in the chopped green onions.
- To serve, spoon the chicken mixture onto the lettuce leaves. Fold the lettuce over the filling, similar to a taco, and serve immediately.
When making these Chicken Lettuce Wraps, it’s important to cut all your ingredients into similar-sized pieces to guarantee even cooking. If you prefer a vegetarian version, you can replace the chicken with tofu. Also, you can add more veggies like bell pepper or mushroom for extra crunch.
Remember to wash the lettuce thoroughly and pat dry before using it. Enjoy this light, invigorating, and satisfying appetizer that’s perfect for any occasion.
Chicken Caesar Salad Cups
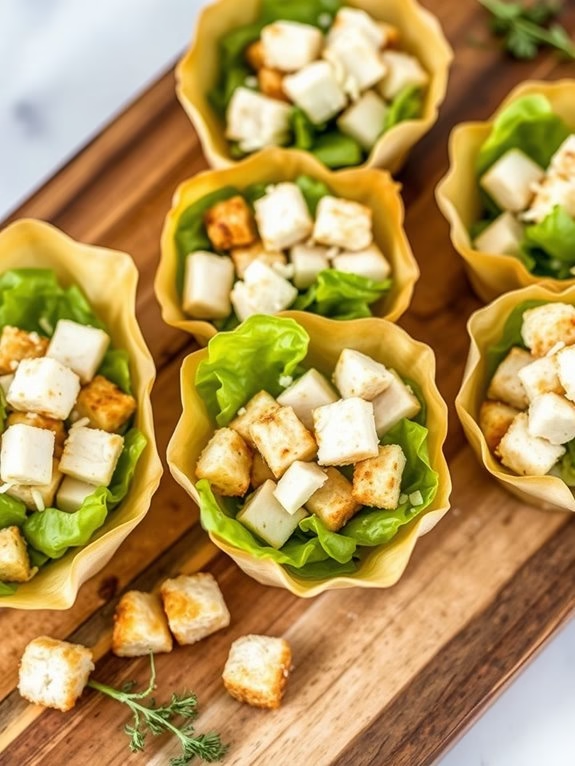
Chicken Caesar Salad Cups are the perfect appetizer for any occasion. They’re light, fresh, and packed with flavor. This bite-sized version of the classic Caesar salad offers a unique twist that’s certain to impress your guests. The crunchy lettuce combined with the tender chicken, tangy dressing, and crispy croutons, all served in a deliciously edible cup, makes this appetizer an absolute crowd-pleaser.
Preparing Chicken Caesar Salad Cups is quick and easy, and the best part is that you can make them ahead of time. This recipe serves 4 to 6 people, making it ideal for small gatherings or family dinners. The ingredients are simple and readily available, and the cooking process is straightforward, allowing even beginner cooks to create this elegant appetizer.
Ingredients:
- 2 boneless, skinless chicken breasts
- 1 tablespoon of olive oil
- Salt and pepper to taste
- 24 mini filo cups
- 6 cups of Romaine lettuce, chopped
- 1 cup of Caesar dressing
- 1/2 cup of shredded Parmesan cheese
- 1 cup of croutons
Cooking Instructions:
- Preheat your oven to 350 degrees Fahrenheit and arrange the mini filo cups on a baking sheet.
- Season the chicken breasts with salt and pepper. Heat a skillet over medium heat, add the olive oil, then cook the chicken breasts until they’re no longer pink in the middle, approximately 7 minutes per side.
- Once the chicken is cooked, let it cool before cutting it into bite-sized pieces.
- Toss the chopped Romaine lettuce with Caesar dressing until it’s well coated. Add the shredded Parmesan cheese and toss again until well mixed.
- Fill each mini filo cup with the Caesar salad mixture, then top with a piece of cooked chicken and a crouton.
- Bake the filled cups in the preheated oven for about 5-7 minutes, until they’re heated through and the filo cups are crispy.
- Let them cool slightly before serving.
Extra Tips:
When preparing the Chicken Caesar Salad Cups, make certain the lettuce is well-dried before adding the dressing to avoid making the filo cups soggy.
Also, while store-bought Caesar dressing works fine, making your own homemade dressing can elevate the flavor of this dish.
Finally, feel free to add more or less of any ingredient to suit your preference. You can also add other ingredients like bacon or cherry tomatoes for a variation of flavor.
Sweet Chicken Pinwheels
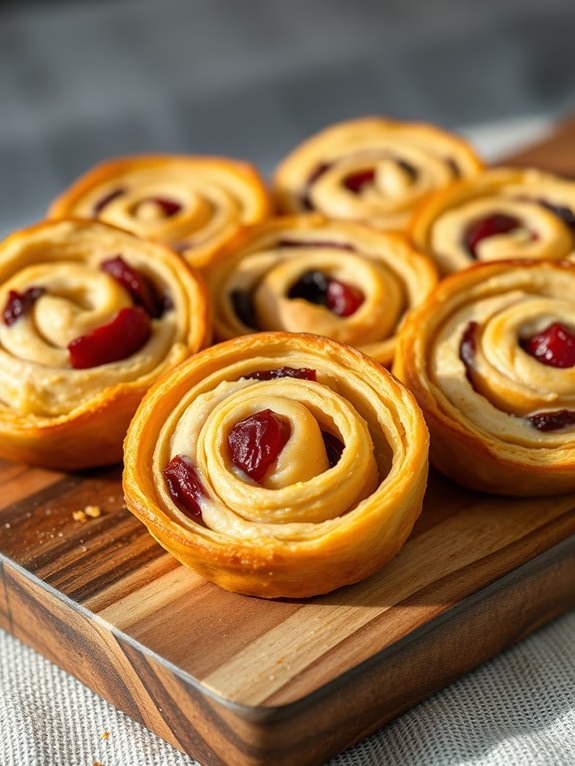
Sweet Chicken Pinwheels are a delightful appetizer that your guests will love. They’re small, bite-sized treats that combine the sweetness of cranberry sauce with the savory taste of chicken and cream cheese. Wrapped inside puff pastry and baked until golden brown, these pinwheels are as pleasing to the eye as they’re to the palate. Easy to make and even easier to eat, they’re perfect for any occasion.
The Sweet Chicken Pinwheels recipe provided here serves 4-6 people. It’s an easy appetizer recipe that doesn’t require much time or effort. This recipe takes a simple chicken filling and transforms it into a vibrant, flavorful bite that’s perfect for parties, family dinners, or even just a fun cooking experiment on a weekend.
Ingredients:
- 2 boneless, skinless chicken breasts
- 1 cup of cream cheese
- 1/2 cup of cranberry sauce
- 1 puff pastry sheet
- 1 egg (for egg wash)
- Salt and pepper to taste
Cooking Instructions:
- Preheat the oven to 375 degrees Fahrenheit.
- Season the chicken breasts with salt and pepper. Bake the chicken in the preheated oven for 20-25 minutes, or until cooked through. Allow it to cool completely.
- Once cooled, shred the chicken breasts using a fork or your hands.
- In a mixing bowl, combine the shredded chicken, cream cheese, and cranberry sauce. Stir until well combined.
- Roll out the puff pastry sheet on a floured surface. Spread the chicken mixture evenly over the pastry, leaving a small border around the edges.
- Roll the puff pastry into a log shape, starting at one end and working your way to the other.
- Slice the log into 1-inch thick pinwheels. Place each pinwheel on a baking sheet lined with parchment paper.
- Beat the egg in a small bowl and brush it over the tops of the pinwheels. This will give them a beautiful golden color when baked.
- Bake the pinwheels in the preheated oven for 15-20 minutes, or until golden brown and puffy.
When it comes to making these Sweet Chicken Pinwheels, it’s important to let the chicken cool before shredding it. This makes the shredding process easier and prevents the cream cheese from melting before the pinwheels are baked.
Also, be sure not to over-stuff the puff pastry, as this can make it difficult to roll and could cause the filling to spill out during baking. Finally, remember to keep an eye on the pinwheels in the oven. They bake quickly and can easily burn if not monitored. Enjoy your cooking!
Chicken and Bacon Ranch Bites

Chicken and Bacon Ranch Bites are the perfect appetizer for any party or family gathering. These bite-sized delights combine juicy chicken, crispy bacon, and creamy ranch dressing to create a mouthwatering flavor explosion that’ll have your guests coming back for seconds, and even thirds.
The best part? They’re quick and easy to make, so you won’t have to spend hours in the kitchen to impress your friends and family.
The key to making these appetizers is to guarantee that the chicken is cooked to perfection, and the bacon is crispy but not overcooked. You also want to make certain that the ranch dressing is distributed evenly throughout the chicken and bacon mixture, so every bite is as flavorsome as the last.
Now, let’s get to the recipe so you can start cooking!
Ingredients:
- 2 chicken breasts, boneless and skinless
- 8 slices of bacon
- 1 cup of ranch dressing
- 1 cup of shredded cheddar cheese
- 1/2 cup of chopped green onions
- Salt and pepper to taste
Cooking Instructions:
- Preheat your oven to 400 degrees Fahrenheit.
- Cut the chicken breasts into bite-sized pieces, and season them with salt and pepper.
- Cook the bacon in a skillet over medium heat until it’s crispy. Once it’s done, remove it from the skillet and place it on a paper towel to drain the excess grease.
- In the same skillet, add the chicken and cook it until it’s no longer pink in the middle. This should take about 5-7 minutes.
- While the chicken is cooking, chop the cooked bacon into small pieces.
- Once the chicken is cooked, remove it from the skillet and place it in a large mixing bowl.
- Add the chopped bacon, ranch dressing, shredded cheddar cheese, and chopped green onions to the bowl with the chicken.
- Mix everything together until the chicken and bacon are evenly coated with the ranch dressing and cheese.
- Spoon the chicken and bacon mixture onto a baking sheet, forming small bite-sized mounds.
- Bake in the preheated oven for about 10 minutes, or until the cheese is melted and bubbly.
- Remove from the oven and let them cool for a few minutes before serving.
When making these Chicken and Bacon Ranch Bites, it’s important to remember to not overcook the chicken as it will continue to cook in the oven.
Also, consider using thick-cut bacon for a richer flavor. And if you really want to impress your guests, you could even make your own homemade ranch dressing. Enjoy your cooking!
Creamy Chicken Stuffed Mushrooms

Creamy Chicken Stuffed Mushrooms are the perfect appetizer for any occasion. They’re a delightful blend of tender chicken, rich cream cheese, and fresh mushrooms, all baked to perfection.
These bite-sized treats are sure to impress your guests with their savory flavor and gourmet presentation. The trick to perfecting this recipe lies in the balance of flavors. The mushrooms should be fresh and firm, the chicken should be cooked just right, and the cream cheese filling should be rich and creamy.
The end result is an appetizer that’s not only delicious, but also incredibly satisfying.
Ingredients:
- 24 medium-sized mushrooms
- 2 cups of cooked chicken, finely chopped
- 1 cup of cream cheese, softened
- 1/4 cup of grated Parmesan cheese
- 1/4 cup of green onions, finely chopped
- 2 cloves of garlic, minced
- 1/2 teaspoon of black pepper
- 1/2 teaspoon of salt
- 1/4 teaspoon of paprika
- 2 tablespoons of olive oil
Cooking Instructions:
- Preheat your oven to 375°F and line a baking sheet with parchment paper.
- Clean the mushrooms thoroughly and remove the stems. Set the caps aside and finely chop the stems.
- Heat the olive oil in a pan over medium heat. Add the chopped mushroom stems and garlic, and sauté until they’re tender.
- In a bowl, combine the sautéed mushroom stems and garlic with the cooked chicken, cream cheese, Parmesan cheese, green onions, salt, pepper, and paprika. Mix until the ingredients are well-incorporated.
- Spoon the chicken and cream cheese mixture into each mushroom cap, making certain they’re generously filled.
- Place the stuffed mushrooms on the prepared baking sheet and bake for about 20 minutes, or until the mushrooms are tender and the tops are golden.
- Let the mushrooms cool for a few minutes before serving.
Extra tips:
When choosing mushrooms, opt for those that are firm with a smooth surface. They should feel heavy for their size and have a fresh, earthy smell.
Also, consider using a small spoon or a piping bag to fill the mushroom caps. This will guarantee a clean and even distribution of the filling. Finally, don’t be afraid to get creative with the filling. You can add some chopped spinach, bell peppers, or even some bacon for an extra layer of flavor. Enjoy your cooking!
Chicken Teriyaki Rice Balls

Chicken Teriyaki Rice Balls are a delightful Asian-inspired appetizer that’s sure to impress your guests. These bite-sized treats are packed full of flavor, combining the savory taste of chicken teriyaki with the comforting texture of sticky rice. They’re easy to make and can be prepared in advance, making them perfect for entertaining. The subtle sweetness of teriyaki sauce combined with the tender chicken and the texture of the rice make these appetizers a hit at any gathering.
These appetizers are versatile and can be served at any occasion- be it a casual get-together or a formal party. They’re also a healthier alternative to many other appetizers, as they’re baked and not fried. The recipe below serves 4-6 people, but you can easily double or triple it if you’re expecting a larger crowd.
Ingredients:
- 2 cups of sushi rice
- 3 cups of water
- 2 boneless chicken breasts
- 1/2 cup of teriyaki sauce
- 2 green onions, finely chopped
- 1 tablespoon of sesame seeds
- 1 tablespoon of vegetable oil
- Salt to taste
Cooking Instructions:
- Preheat your oven to 350 degrees Fahrenheit.
- Rinely rinse the sushi rice under cold water until the water runs clear. This will remove any excess starch and help the rice stick together better.
- In a medium-sized saucepan, add the rice and water. Bring it to a boil, then reduce the heat to low, cover, and let it simmer for about 20 minutes, or until the water is absorbed and the rice is tender.
- While the rice is cooking, cut the chicken breasts into small, bite-sized pieces.
- Heat the vegetable oil in a pan over medium heat. Add the chicken pieces and cook until they’re no longer pink in the middle.
- Pour the teriyaki sauce over the cooked chicken, stirring to coat all the pieces. Let it simmer for a few minutes until the sauce thickens.
- Once the rice and chicken are ready, let them cool for a bit, then mix them together in a large bowl.
- Add the chopped green onions and sesame seeds to the bowl, mixing well to distribute them throughout the rice and chicken.
- Using your hands, form the mixture into small balls, about the size of a golf ball, and place them on a baking sheet.
- Bake the rice balls in the preheated oven for about 20-25 minutes, or until they’re golden brown and crispy.
When making these Chicken Teriyaki Rice Balls, it’s important to let the rice and chicken mixture cool completely before forming the balls. This will help them hold their shape better.
Also, be sure to keep your hands slightly wet when forming the balls to prevent the rice from sticking to your hands. For a bit of extra flavor, you can also sprinkle a few more sesame seeds on top of the balls before baking them. Enjoy these delicious appetizers with your favorite dipping sauce.