
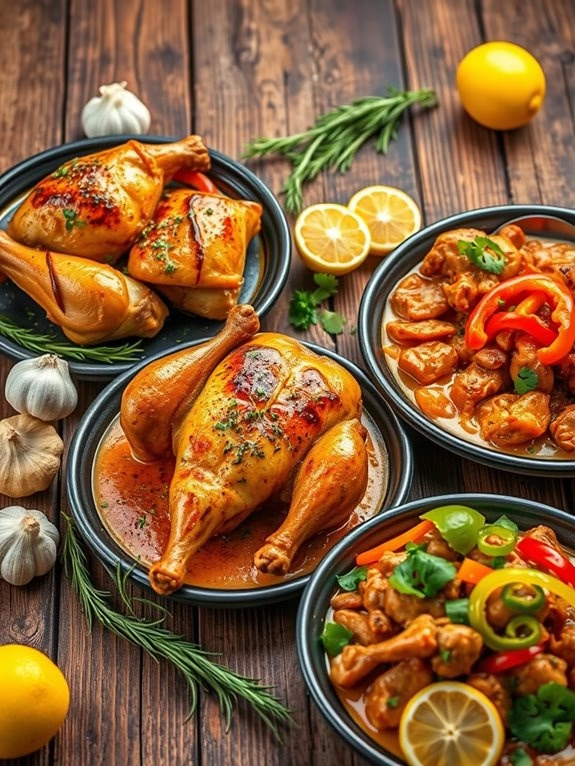
When I first discovered the magic of the Instapot, chicken quickly became my go-to ingredient.
There’s something so comforting about coming home to the warm aroma of Classic Chicken Soup.
Or whipping up a creamy Tuscan Chicken that feels like a warm hug on a plate in just minutes.
From zesty Lemon Herb Chicken to the bold flavors of Chicken Tikka Masala, each recipe is designed to make your life easier and your dinners more delightful.
Let’s transform your dinner routine with these mouthwatering Instapot chicken recipes!
Classic Chicken Soup
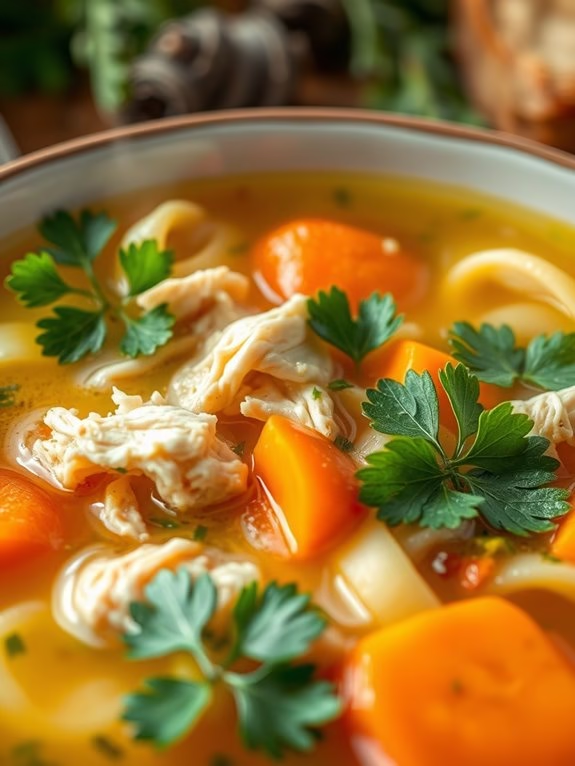
Classic Chicken Soup is the ultimate comfort food, perfect for warming up on a chilly day or soothing a cold. When made in an Instapot, this beloved dish comes together quickly without sacrificing any of its traditional flavors. The Instapot locks in the flavors and tenderizes the chicken, creating a rich and savory broth that’s brimming with tender chicken pieces, wholesome vegetables, and aromatic herbs.
This recipe serves as a satisfying meal for 4-6 people, ideal for a family dinner or for meal-prepping lunches for the week. The convenience of an Instapot not only reduces the cooking time considerably but also enhances the depth of flavors in the soup. Whether you’re a seasoned cook or a beginner, this recipe will guide you to create a delicious and wholesome chicken soup with minimal effort.
Ingredients:
- 1 tablespoon olive oil
- 1 medium onion, chopped
- 3 carrots, peeled and sliced
- 3 celery stalks, sliced
- 3 cloves garlic, minced
- 1 teaspoon salt
- 1/2 teaspoon black pepper
- 1 teaspoon dried thyme
- 1 teaspoon dried parsley
- 1 bay leaf
- 4 cups chicken broth
- 1 cup water
- 1.5 pounds boneless, skinless chicken breasts
- 1 cup egg noodles
- 2 tablespoons fresh parsley, chopped (optional)
- Lemon wedges for serving (optional)
Cooking Instructions:
- Prepare the Instapot: Turn the Instapot to the sauté setting and add the olive oil. Once the oil is hot, add the chopped onion, carrots, and celery. Sauté for about 3-4 minutes until the vegetables begin to soften.
- Add Garlic and Seasonings: Add the minced garlic to the sautéed vegetables and cook for an additional 1 minute until fragrant. Stir in the salt, black pepper, dried thyme, dried parsley, and the bay leaf.
- Add Liquids and Chicken: Pour in the chicken broth and water, then give the mixture a good stir to combine. Place the chicken breasts into the liquid, making sure they’re fully submerged.
- Pressure Cook the Soup: Secure the lid on the Instapot and set it to high pressure for 10 minutes. Once the cooking time is complete, allow the pressure to release naturally for about 10 minutes before manually releasing any remaining pressure.
- Shred the Chicken: Carefully remove the chicken breasts from the Instapot and shred them using two forks. Return the shredded chicken to the pot.
- Cook the Noodles: Set the Instapot back to the sauté setting and add the egg noodles to the soup. Let them cook for about 5-7 minutes until they’re tender to the bite.
- Finish and Serve: Turn off the Instapot, remove the bay leaf, and taste the soup to adjust seasoning if necessary. Garnish with fresh parsley if desired, and serve hot with lemon wedges on the side for a zesty finish.
Extra Tips:
For a more robust flavor, consider adding a splash of white wine or a squeeze of lemon juice before serving. If you prefer a thicker soup, you can mash some of the cooked vegetables or add a tablespoon of cornstarch mixed with cold water to the broth.
To save time, you can also use pre-chopped vegetables available in grocery stores. Always make sure the Instapot lid is securely locked before starting the pressure cooking process, and handle the release of steam with caution to prevent burns.
Creamy Tuscan Chicken
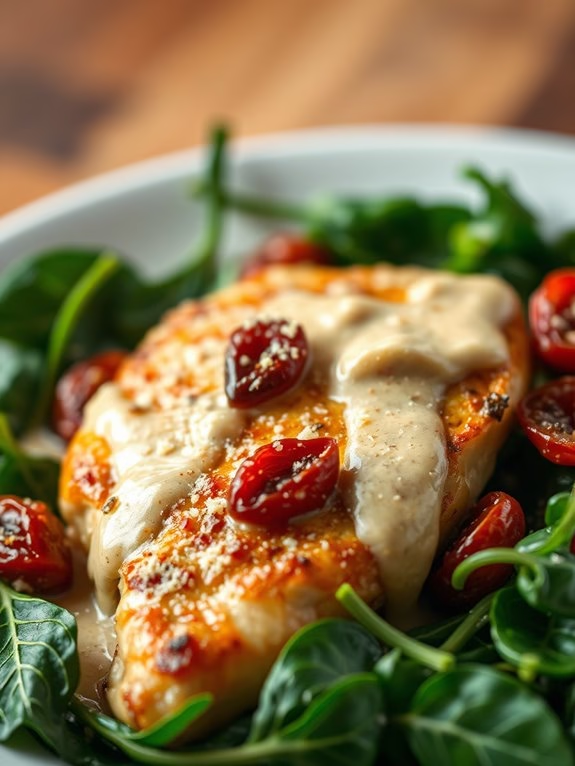
Creamy Tuscan Chicken is a delectable dish that brings the rich flavors of Italy right to your kitchen table. This dish combines tender chicken breasts with a creamy, garlicky sauce, sun-dried tomatoes, and fresh spinach, creating a comforting meal that feels both indulgent and simple. The use of the Instapot makes this recipe not only quick and easy but also guarantees that the chicken stays moist and flavorful. Perfect for a family dinner or a special occasion, this dish is sure to impress anyone who tries it.
The beauty of this Creamy Tuscan Chicken lies in its ability to blend rustic ingredients with a touch of elegance. The sun-dried tomatoes provide a tangy sweetness that complements the creamy sauce, while the spinach adds a freshness that balances the richness of the dish. By using the Instapot, you’ll save time without sacrificing any of the depth of flavor. Whether you’re a seasoned cook or just starting out, this recipe offers straightforward instructions to help you achieve a restaurant-quality meal at home.
Ingredients (Serving Size: 4-6 people):
- 4 boneless, skinless chicken breasts
- 2 tablespoons olive oil
- 1 teaspoon salt
- 1/2 teaspoon black pepper
- 1 teaspoon Italian seasoning
- 1/2 cup chicken broth
- 1 cup heavy cream
- 1/2 cup grated Parmesan cheese
- 1 cup sun-dried tomatoes, chopped
- 3 cups fresh spinach
- 4 cloves garlic, minced
- 1 tablespoon cornstarch
- 2 tablespoons water
Cooking Instructions:
- Prepare the Chicken: Start by seasoning the chicken breasts with salt, pepper, and Italian seasoning on both sides. This step is essential for infusing the chicken with flavor before it cooks.
- Sauté the Chicken: Set the Instapot to ‘Sauté’ mode and add the olive oil. Once hot, add the seasoned chicken breasts, searing each side for about 3 minutes until lightly browned. Remove the chicken and set aside.
- Sauté Garlic: In the same pot, add the minced garlic and sauté for about 1 minute until fragrant. Be careful not to burn the garlic, as it can become bitter.
- Deglaze the Pot: Pour in the chicken broth to deglaze the pot, scraping up any browned bits from the bottom. This adds depth to the sauce.
- Cook the Chicken: Return the chicken breasts to the Instapot. Secure the lid and set the Instapot to ‘Pressure Cook’ on high for 10 minutes. Once done, allow a natural release for 5 minutes, then carefully perform a manual release.
- Make the Creamy Sauce: Remove the chicken breasts again and switch the Instapot back to ‘Sauté’ mode. Stir in the heavy cream, Parmesan cheese, and sun-dried tomatoes. Allow the sauce to simmer for 2-3 minutes.
- Thicken the Sauce: In a small bowl, mix the cornstarch with water to create a slurry. Slowly whisk this into the sauce, stirring constantly until the sauce thickens to your desired consistency.
- Add Spinach: Stir in the fresh spinach and cook until wilted, which should take about 1-2 minutes.
- Combine and Serve: Return the chicken breasts to the pot, spoon the sauce over them, and let them heat through for another minute. Serve hot, garnished with additional Parmesan if desired.
Extra Tips:
For an extra burst of flavor, consider adding a splash of white wine during the deglazing process. If you prefer a thicker sauce, adjust the amount of cornstarch slurry accordingly, but do so gradually to avoid over-thickening.
Using fresh spinach is recommended for the best texture, but if unavailable, frozen spinach can be a substitute—just be sure to thaw and drain it thoroughly. Finally, always verify the chicken is cooked to an internal temperature of 165°F for safety.
Honey Garlic Chicken
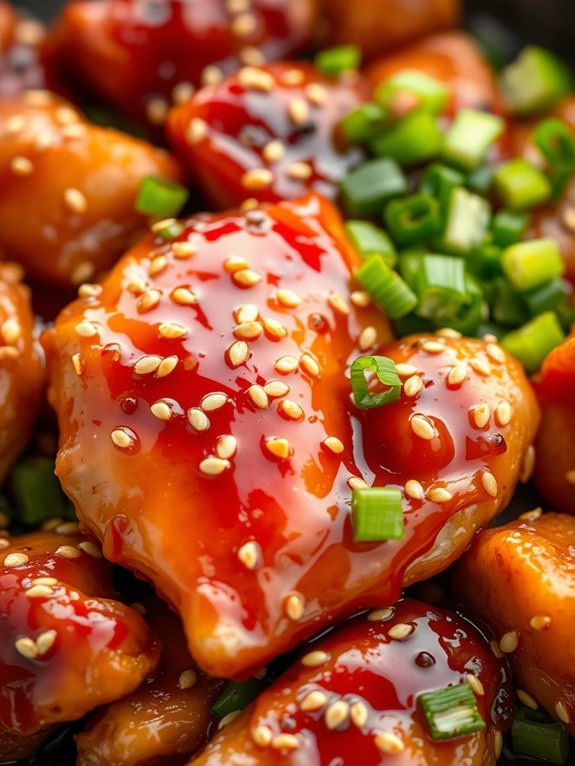
Honey Garlic Chicken is a delightful dish that combines the sweetness of honey with the savory flavors of garlic and soy sauce. This dish is perfect for those busy weeknights when you need a quick and easy meal but still want something delicious and satisfying.
Using an Instapot allows you to infuse the chicken with flavors in a fraction of the time, retaining moisture and tenderness that makes each bite memorable.
This recipe is designed to serve 4-6 people, making it a great option for family dinners or small gatherings. The combination of ingredients creates a sticky, flavorful glaze that coats the chicken beautifully. You’ll find that this dish pairs well with steamed rice or your favorite vegetables, providing a wholesome and balanced meal.
Ingredients:
- 2 pounds of boneless, skinless chicken thighs
- 1/3 cup honey
- 1/3 cup soy sauce
- 1/4 cup ketchup
- 5 cloves garlic, minced
- 1 tablespoon olive oil
- 1/2 teaspoon ground black pepper
- 1 tablespoon cornstarch
- 2 tablespoons water
- 1 tablespoon sesame seeds (optional, for garnish)
- 2 green onions, chopped (optional, for garnish)
Cooking Instructions:
- Prepare the Instapot: Set your Instapot to the sauté setting and add the olive oil. Allow it to heat up for a minute or until it shimmers.
- Sauté the Garlic: Add the minced garlic to the Instapot and sauté for about 1-2 minutes until it becomes fragrant, being careful not to let it burn.
- Add Chicken and Sauce Ingredients: Place the chicken thighs into the pot. In a separate bowl, mix the honey, soy sauce, ketchup, and ground black pepper. Pour this mixture over the chicken in the Instapot.
- Cook the Chicken: Close and lock the Instapot lid. Set it to pressure cook on high for 10 minutes. Once the cooking time is up, allow the pressure to release naturally for about 5 minutes before performing a quick release.
- Thicken the Sauce: Open the Instapot and set it back to the sauté setting. In a small bowl, mix the cornstarch and water to create a slurry. Add this to the pot and stir well. Allow the sauce to simmer for about 2-3 minutes until it thickens to your desired consistency.
- Finish and Serve: Once the sauce has thickened, turn off the Instapot. Serve the chicken hot, garnished with sesame seeds and chopped green onions if desired, alongside steamed rice or vegetables.
Extra Tips:
When preparing Honey Garlic Chicken in an Instapot, remember to cut your chicken thighs into uniform pieces to guarantee even cooking.
If you prefer a more intense garlic flavor, feel free to add extra cloves or use garlic powder in addition to fresh garlic. For a spicier version, you can include a pinch of red pepper flakes in the sauce.
If you find the sauce too sweet, adjust the honey to your taste preference. Always verify your Instapot lid is properly sealed before starting the pressure cooking process to avoid any mishaps.
Lemon Herb Chicken
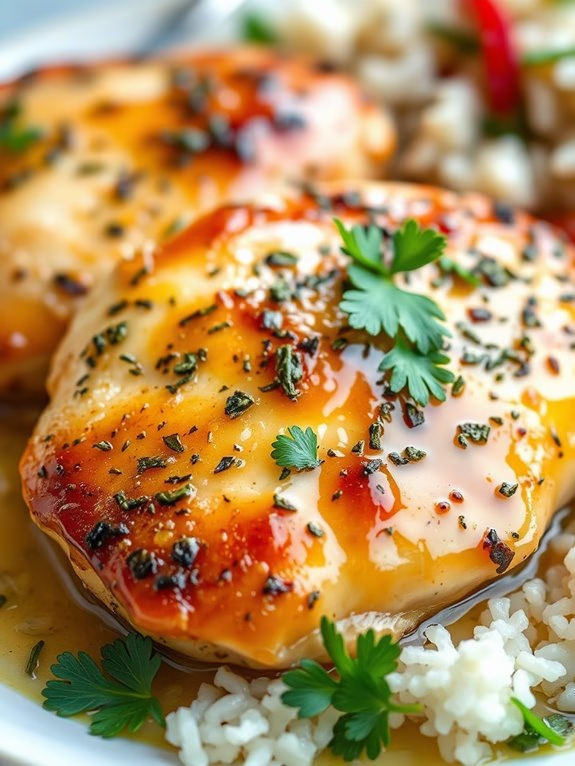
Lemon Herb Chicken is a delightful and flavorful dish that brings together the zestiness of lemon with aromatic herbs to create a mouthwatering meal. Cooking this dish in an Instapot not only saves time but also guarantees that the chicken is tender, juicy, and infused with all the rich flavors.
Perfect for a family dinner or a small gathering, this recipe serves 4-6 people and is sure to impress even the pickiest eaters with its vibrant taste and aromatic appeal. The simplicity of this recipe makes it an excellent choice for both weeknight dinners and special occasions.
With the Instapot, you can achieve a perfectly cooked chicken in a fraction of the time it would take using traditional methods, without compromising on taste or texture. The lemon herb marinade acts as the perfect seasoning, enhancing the natural flavors of the chicken and making each bite a burst of deliciousness.
Follow this recipe to create a meal that’s as easy to prepare as it’s delightful to eat.
Ingredients:
- 4-6 boneless, skinless chicken breasts
- 2 tablespoons olive oil
- 1 lemon, juiced and zested
- 4 cloves garlic, minced
- 1 teaspoon dried thyme
- 1 teaspoon dried rosemary
- 1 teaspoon dried oregano
- 1 teaspoon salt
- ½ teaspoon black pepper
- 1 cup chicken broth
- Fresh parsley for garnish (optional)
Instructions:
- Prepare the Chicken: Rinse the chicken breasts under cold water and pat them dry with a paper towel. This step guarantees that the seasoning adheres better to the chicken.
- Make the Marinade: In a small mixing bowl, combine olive oil, lemon juice, lemon zest, minced garlic, dried thyme, rosemary, oregano, salt, and black pepper. Mix well until all ingredients are fully incorporated.
- Marinate the Chicken: Rub the marinade all over the chicken breasts, guaranteeing they’re well coated. For best results, let the chicken marinate in the refrigerator for at least 30 minutes, or up to 2 hours if time permits. This allows the flavors to penetrate the meat thoroughly.
- Sauté in the Instapot: Turn on the Instapot and select the “Sauté” function. Once hot, add a tablespoon of olive oil and sear the marinated chicken breasts on each side for about 2-3 minutes until golden brown. This step helps to lock in the flavors and gives the chicken a nice color.
- Pressure Cook: Add the chicken broth to the Instapot and gently scrape the bottom to deglaze any browned bits. This will enhance the sauce’s flavor. Cancel the “Sauté” function, then secure the lid on the Instapot. Set it to “Pressure Cook” on high for 8 minutes.
- Release Pressure: Once the cooking time is complete, allow the pressure to naturally release for about 5 minutes, then do a quick release for any remaining pressure. Carefully remove the lid once the pressure is fully released.
- Serve: Transfer the chicken to a serving platter and garnish with fresh parsley if desired. Serve with a side of your choice, such as rice, potatoes, or steamed vegetables, and spoon some of the flavorful broth over the chicken before serving.
Extra Tips:
For an even deeper flavor, consider marinating the chicken overnight. When searing the chicken, guarantee the Instapot is hot enough to create a good sear, which adds depth to the flavor profile.
If you prefer a thicker sauce, you can whisk in a cornstarch slurry (1 tablespoon cornstarch mixed with 1 tablespoon water) after pressure cooking and bring the broth to a simmer using the “Sauté” function. This will thicken the broth into a luscious sauce perfect for drizzling over the chicken and sides.
Buffalo Chicken Wings

Buffalo chicken wings are a classic American appetizer that have become a favorite at gatherings and sports events. Using an Instapot to make these wings guarantees they’re cooked quickly and evenly, while maintaining their juicy tenderness. The pressure cooker function of the Instapot infuses the spicy buffalo sauce deep into the chicken, making each bite a savory delight.
By finishing the wings under the broiler, you’ll achieve a crispy skin that perfectly complements the rich flavors of the sauce. This recipe serves 4-6 people and is perfect for a casual get-together or a family dinner. Pair these wings with celery sticks and a side of blue cheese or ranch dressing for a complete experience.
The preparation is straightforward and requires minimal ingredients, making it an ideal dish for both novice and experienced cooks who want to enjoy a flavorful, homemade version of buffalo chicken wings.
Ingredients:
- 3 pounds chicken wings
- 1 cup buffalo wing sauce
- 1 cup water
- 1 tablespoon apple cider vinegar
- 2 tablespoons unsalted butter
- 1 teaspoon garlic powder
- 1 teaspoon onion powder
- Salt and pepper to taste
- Celery sticks (optional)
- Blue cheese or ranch dressing (optional)
Cooking Instructions:
- Prepare the Wings: Rinse the chicken wings under cold water and pat them dry with paper towels. Make sure they’re completely dry to guarantee the skin crisps up later. Season the wings with salt, pepper, garlic powder, and onion powder, tossing them to guarantee an even coating.
- Set Up the Instapot: Pour 1 cup of water and the apple cider vinegar into the Instapot. Place the trivet inside the pot and arrange the seasoned wings on the trivet in a single layer, or stacked loosely if necessary.
- Pressure Cook the Wings: Secure the lid on the Instapot and set the valve to the sealing position. Select the ‘Pressure Cook’ or ‘Manual’ setting and adjust the timer to 10 minutes on high pressure. Once the cooking cycle is complete, allow the pressure to release naturally for 5 minutes, then perform a quick release by carefully turning the valve to the venting position.
- Prepare the Buffalo Sauce: While the wings are cooking, melt the butter in a small saucepan over low heat. Stir in the buffalo wing sauce until the mixture is smooth and heated through. Keep the sauce warm until the wings are ready.
- Coat the Wings: Once the pressure has been fully released, open the Instapot and remove the wings. Preheat your oven’s broiler to high. Transfer the wings into a large mixing bowl and pour the warm buffalo sauce over them. Toss the wings until they’re evenly coated with the sauce.
- Broil the Wings: Arrange the sauced wings on a baking sheet lined with aluminum foil or parchment paper. Place the baking sheet under the broiler for about 5-7 minutes, or until the wings are crispy and lightly charred. Keep a close eye to prevent burning.
- Serve: Remove the wings from the oven and let them rest for a couple of minutes. Serve them hot with celery sticks and your choice of blue cheese or ranch dressing on the side.
Extra Tips:
For an even crispier texture, consider patting the wings dry again after pressure cooking to remove excess moisture before broiling. If you like your wings extra spicy, add a few more tablespoons of hot sauce to the buffalo mix.
Adjust the cooking time slightly if you prefer your wings more tender or crispier. Experiment with different brands of buffalo sauce to find your preferred level of heat and flavor.
Chicken Alfredo Pasta
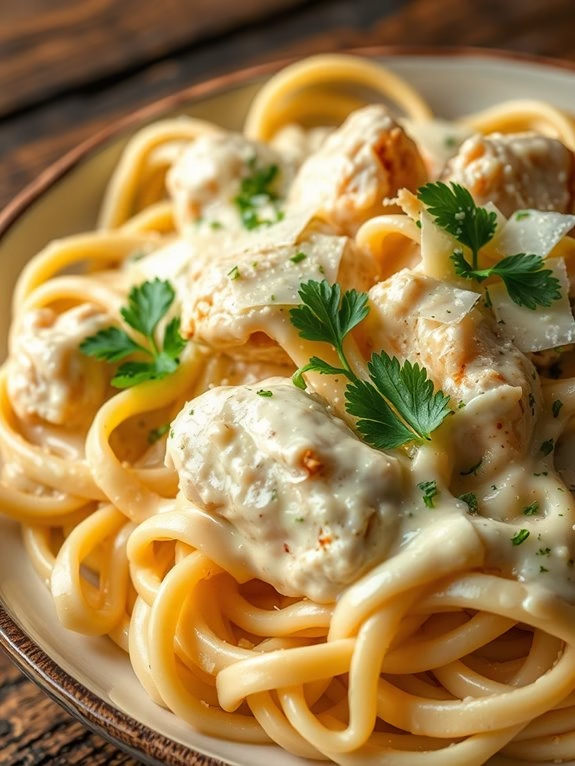
Indulge in the creamy, cheesy delight of Chicken Alfredo Pasta made effortlessly in an Instant Pot. This comforting dish combines tender pieces of chicken with a rich, savory Alfredo sauce and perfectly cooked pasta, offering a restaurant-quality meal right at home.
With the convenience of the Instant Pot, you can have this delicious dish ready in no time, making it perfect for busy weeknights or a cozy family dinner. The beauty of using an Instant Pot for this recipe lies in its ability to infuse flavors quickly while keeping the chicken juicy and the pasta perfectly al dente.
Whether you’re a seasoned chef or a beginner in the kitchen, this Chicken Alfredo Pasta recipe is simple to follow and delivers consistently delicious results every time.
Ingredients for 4-6 servings:
- 1 pound boneless, skinless chicken breasts, cut into bite-sized pieces
- 1 tablespoon olive oil
- 4 cloves garlic, minced
- 4 cups chicken broth
- 12 ounces fettuccine pasta, broken in half
- 1 cup heavy cream
- 1 cup grated Parmesan cheese
- Salt and pepper to taste
- 2 tablespoons chopped fresh parsley (optional)
Cooking Instructions:
- Sauté the Chicken: Set the Instant Pot to the sauté setting and add olive oil. Once the oil is hot, add the chicken pieces. Season with salt and pepper, and cook until the chicken is browned on all sides, about 5 minutes. Remove the chicken and set aside.
- Add Garlic: To the remaining oil in the pot, add the minced garlic and sauté for about 1 minute until fragrant. Be careful not to burn the garlic.
- Deglaze the Pot: Pour in the chicken broth and use a wooden spoon to scrape up any brown bits from the bottom of the pot. This step will help enhance the flavor of the dish and prevent sticking.
- Cook the Pasta: Add the broken pasta to the pot, making sure it’s evenly distributed and submerged in the broth. Place the browned chicken on top of the pasta. Secure the lid and set the Instant Pot to pressure cook on high for 6 minutes.
- Quick Release Pressure: Once the cooking time is complete, perform a quick release of the pressure. Carefully remove the lid once the pressure has fully released.
- Add Cream and Cheese: Stir in the heavy cream and Parmesan cheese, mixing well until the cheese has melted and the sauce is creamy. If the sauce is too thick, you can add a bit more cream or broth to reach your desired consistency.
- Season and Serve: Taste and adjust the seasoning with more salt and pepper if needed. Garnish with fresh parsley if desired, and serve immediately.
Extra Tips:
For an even richer flavor, consider adding a pinch of nutmeg to the sauce or a handful of spinach right before serving for added nutrition.
If you prefer a thicker sauce, let the pasta sit in the pot on the sauté setting while stirring gently until it reaches your preferred consistency.
To avoid clumping, make sure to break the pasta and arrange it in a crisscross pattern when adding it to the pot. Enjoy your meal with a side of garlic bread or a fresh salad for a complete dining experience.
Teriyaki Chicken
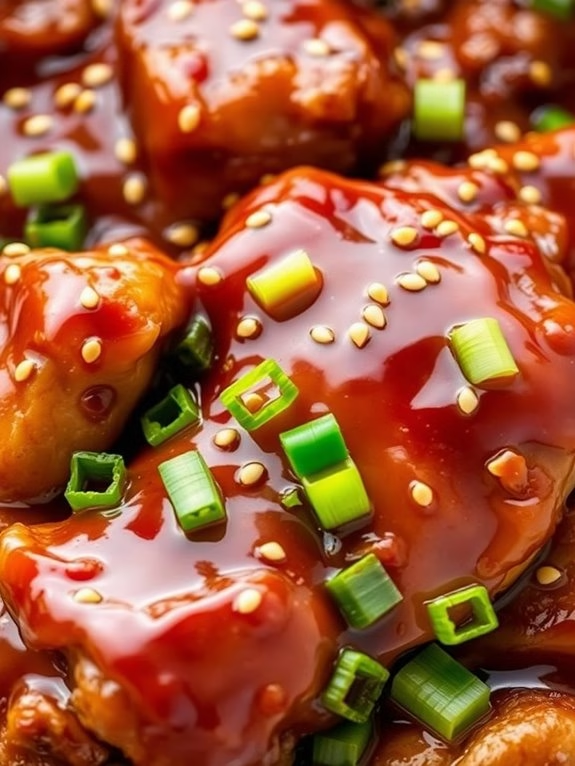
Teriyaki chicken is a beloved classic that combines the savory flavors of soy sauce with the sweetness of brown sugar, creating a deliciously glazed dish that pairs perfectly with rice or vegetables. Using an Instapot makes this dish even easier to prepare, as it allows the chicken to soak up all the flavors while guaranteeing that it remains tender and juicy.
This recipe is perfect for those busy weeknights when you want a no-fuss meal that doesn’t skimp on flavor. With this Instapot Teriyaki Chicken recipe, you’ll have a delightful meal ready for your family or guests in no time. The quick cooking time and the ability to set and forget make it an ideal choice for both beginners and experienced cooks.
You’ll be able to enjoy succulent chicken with mouthwatering teriyaki sauce in less than an hour. Whether you serve it over steamed rice or alongside stir-fried vegetables, this dish is sure to become a staple in your weekly dinner rotation.
Ingredients (Serving Size: 4-6 people):
- 2 pounds of boneless, skinless chicken thighs
- 1 cup soy sauce
- 1 cup water
- 1/2 cup brown sugar
- 2 tablespoons honey
- 1 tablespoon rice vinegar
- 1 tablespoon minced garlic
- 1 tablespoon grated ginger
- 1 tablespoon cornstarch
- 2 tablespoons water (for cornstarch slurry)
- 2 tablespoons sesame seeds (optional, for garnish)
- Chopped green onions (optional, for garnish)
Cooking Instructions:
- Prepare the Chicken: Start by trimming any excess fat from the chicken thighs. This will guarantee that your dish isn’t overly greasy once cooked.
- Mix the Sauce: In a medium bowl, combine soy sauce, water, brown sugar, honey, rice vinegar, garlic, and ginger. Stir until the brown sugar is dissolved and the ingredients are well combined.
- Set Up the Instapot: Place the chicken thighs in the Instapot and pour the teriyaki sauce mixture over the chicken. Guarantee that all pieces are well-coated with the sauce.
- Pressure Cook: Secure the lid on the Instapot and make sure the valve is set to the “sealing” position. Select the “Pressure Cook” or “Manual” setting and set the timer for 10 minutes on high pressure.
- Natural Release: Once the cooking time is up, allow the Instapot to naturally release pressure for about 10 minutes, then carefully switch the valve to the “venting” position to release any remaining pressure.
- Thicken the Sauce: Remove the chicken from the Instapot and set aside. Set the Instapot to “Sauté” mode. In a small bowl, mix the cornstarch with 2 tablespoons of water to create a slurry. Stir this slurry into the sauce in the Instapot, and cook for a few minutes until the sauce thickens.
- Serve: Return the chicken to the pot, guaranteeing it’s well coated with the thickened sauce. Serve hot, garnished with sesame seeds and chopped green onions if desired.
Extra Tips:
For an even richer flavor, consider marinating the chicken in the teriyaki sauce for a few hours before cooking. This allows the flavors to penetrate deeper into the meat.
If you prefer a spicier kick, add a pinch of red pepper flakes to the sauce mixture. Additionally, if you find the sauce too salty, you can dilute it with a bit more water or adjust the sugar to balance the taste to your liking.
Chicken Tikka Masala
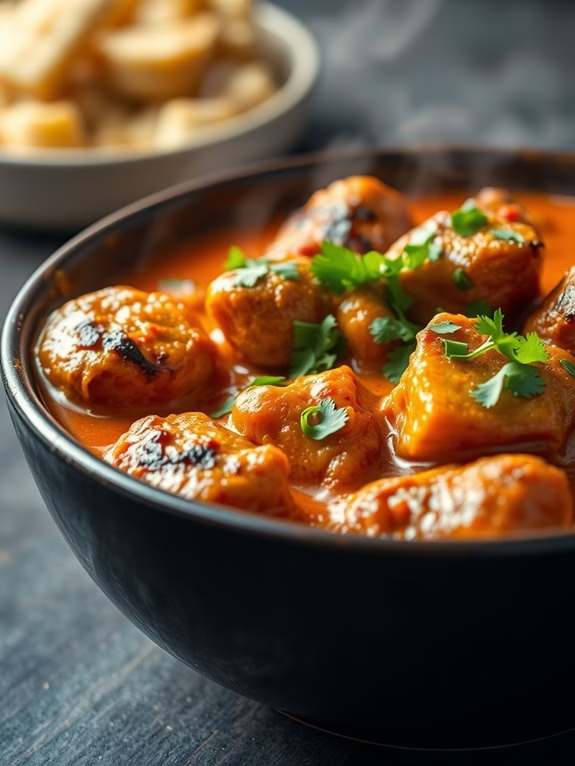
Chicken Tikka Masala is a beloved Indian dish known for its rich and creamy tomato-based sauce combined with succulent pieces of marinated chicken. Traditionally, this dish involves several cooking steps, including marinating the chicken with yogurt and spices, grilling or broiling it, and then simmering it in a luscious sauce.
However, with the advent of the Instapot, you can now create this delightful dish with much less effort and time, making it perfect for weeknight dinners or when you’re craving something comforting and flavorful without spending hours in the kitchen.
This recipe is designed to serve 4-6 people and takes advantage of the Instapot’s ability to pressure cook, sauté, and simmer, all in one appliance. The result is a Chicken Tikka Masala with tender, juicy chicken pieces and a sauce that’s bursting with spices and flavor. Not only does the Instapot cut down on cooking time, but it also enhances the melding of spices, making every bite a taste sensation.
Let’s plunge into the ingredients and steps needed to prepare this delectable dish.
Ingredients (serving size: 4-6 people):
- 1 ½ pounds boneless, skinless chicken thighs, cut into 1-inch pieces
- 1 cup plain yogurt
- 2 tablespoons lemon juice
- 3 teaspoons ground cumin
- 2 teaspoons ground coriander
- 2 teaspoons paprika
- 1 teaspoon ground turmeric
- 1 teaspoon ground cayenne pepper
- 2 teaspoons garam masala
- 2 teaspoons salt
- 2 tablespoons vegetable oil
- 1 large onion, finely chopped
- 4 cloves garlic, minced
- 1 tablespoon fresh ginger, minced
- 1 (14-ounce) can crushed tomatoes
- 1 cup heavy cream
- 1 tablespoon tomato paste
- Fresh cilantro, chopped (for garnish)
Cooking Instructions:
- Marinate the Chicken: In a large bowl, combine the chicken pieces, yogurt, lemon juice, 2 teaspoons of cumin, 1 teaspoon of coriander, paprika, turmeric, cayenne pepper, and salt. Mix well until the chicken is thoroughly coated. Cover and let it marinate in the refrigerator for at least 30 minutes, or overnight for best results.
- Sauté in Instapot: Set your Instapot to the ‘Sauté’ mode and add the vegetable oil. Once hot, add the chopped onions and sauté for about 5 minutes until they become translucent. Stir in the garlic and ginger, cooking for another 2 minutes until fragrant.
- Cook the Chicken: Add the marinated chicken to the pot, and cook for about 5 minutes, stirring occasionally, until the chicken begins to brown. Add the remaining cumin, coriander, and the garam masala, stirring to coat the chicken with spices.
- Pressure Cook: Stir in the crushed tomatoes and tomato paste. Close the Instapot lid and set it to ‘Pressure Cook’ on high for 10 minutes. Once the cooking time is up, allow the pressure to release naturally for 10 minutes before manually releasing any remaining pressure.
- Finish the Sauce: Open the lid and set the Instapot back to ‘Sauté’ mode. Stir in the heavy cream and allow the sauce to simmer for another 5-10 minutes until it thickens slightly. Taste and adjust seasoning if necessary.
- Garnish and Serve: Turn off the Instapot and let the Chicken Tikka Masala rest for a few minutes. Garnish with chopped fresh cilantro before serving. Enjoy with steamed basmati rice or warm naan bread.
Extra Tips:
When cooking Chicken Tikka Masala in an Instapot, it’s important to not skip the marination step, as this helps tenderize the chicken and infuse it with flavor.
If you prefer a spicier dish, increase the amount of cayenne pepper or add red chili powder. For a dairy-free version, substitute the yogurt with a non-dairy yogurt and the heavy cream with coconut milk or cream.
Finally, always taste the dish before serving and adjust the seasoning to your preference.
BBQ Pulled Chicken
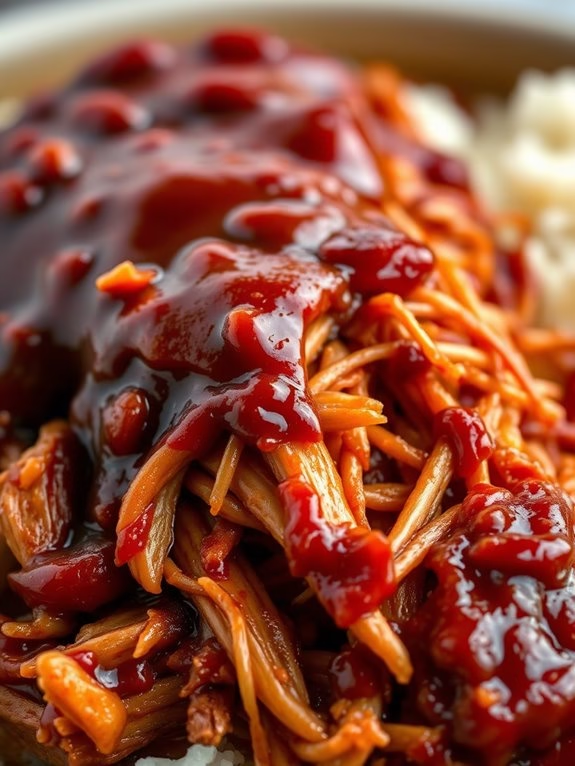
BBQ Pulled Chicken is a savory and tangy dish that’s perfect for any get-together or family dinner. With the help of an Instapot, you can achieve tender, juicy chicken in a fraction of the time it would take using traditional methods. This recipe combines the rich flavors of barbecue sauce with succulent chicken breasts, resulting in a mouthwatering meal that’s sure to please everyone at the table.
Whether served on buns, over rice, or alongside a fresh salad, BBQ Pulled Chicken is versatile and satisfying. Preparing this dish in an Instapot not only saves time but also enhances the flavor by locking in moisture and guaranteeing the chicken is cooked to perfection. The pressure cooker feature of the Instapot allows the chicken to absorb the deep, smoky flavors of the barbecue sauce, creating a dish that’s both simple and delicious.
Follow this recipe to enjoy a serving size of 4-6 people, perfect for a small gathering or a few days of leftovers.
Ingredients:
- 2 lbs boneless, skinless chicken breasts
- 1 cup barbecue sauce
- 1/2 cup chicken broth
- 1 tablespoon apple cider vinegar
- 1 tablespoon Worcestershire sauce
- 1 teaspoon smoked paprika
- 1 teaspoon garlic powder
- 1/2 teaspoon onion powder
- Salt and pepper to taste
- Buns or preferred serving option
Cooking Instructions:
- Prepare the Instapot: Start by guaranteeing your Instapot is clean and ready. Place the trivet inside the pot to keep the chicken off the bottom.
- Season the Chicken: Season the chicken breasts with smoked paprika, garlic powder, onion powder, salt, and pepper. Ensure the chicken is evenly coated with the spices.
- Add Ingredients to the Pot: Place the seasoned chicken breasts on the trivet in the Instapot. Pour the chicken broth, barbecue sauce, apple cider vinegar, and Worcestershire sauce over the chicken.
- Pressure Cook: Secure the lid on the Instapot and set the valve to the sealing position. Select the “Pressure Cook” or “Manual” setting and set the timer for 15 minutes on high pressure.
- Natural Release: Once the cooking time is complete, allow the pressure to release naturally for about 10 minutes, then carefully use the quick release to release any remaining pressure.
- Shred the Chicken: Open the Instapot and carefully remove the chicken breasts. Shred the chicken using two forks and return it to the pot to soak up the sauce for a few more minutes.
- Serve: Serve the BBQ Pulled Chicken on buns, over rice, or as desired. Enjoy the flavorful dish with your favorite sides.
Extra Tips:
For a smokier flavor, consider adding a few drops of liquid smoke to the sauce mixture. If you prefer a spicier version, add a pinch of cayenne pepper or a few dashes of hot sauce to the mix.
You can also customize the barbecue sauce by mixing in honey or brown sugar for a sweeter taste. When shredding the chicken, ensure it’s well-coated in the sauce to maintain moisture and flavor. For a crispier texture on buns, lightly toast them before serving.
Thai Green Curry
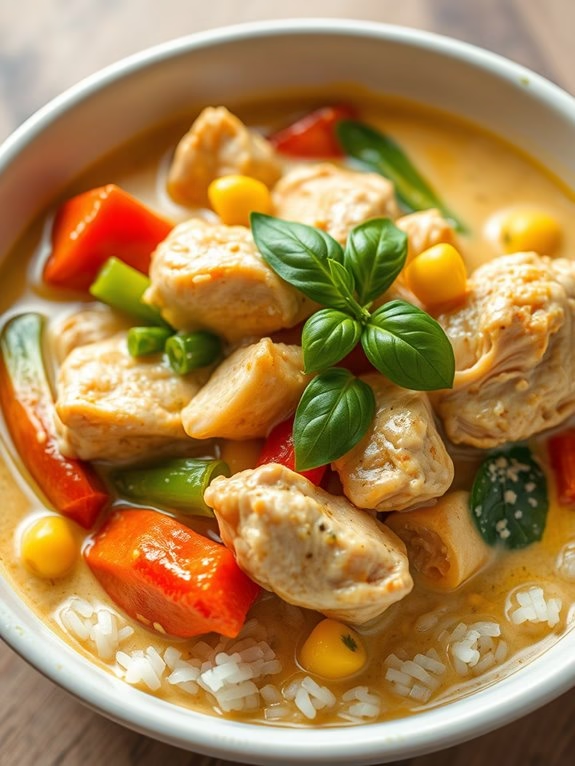
Thai Green Curry is a flavorful and aromatic dish that brings together the vibrant tastes of Thai cuisine. This recipe combines tender chicken pieces with a fragrant green curry paste, coconut milk, and fresh vegetables, creating a creamy and spicy dish that will delight your taste buds.
Using an Instapot makes this recipe incredibly easy and quick, allowing you to enjoy authentic Thai flavors with minimal effort. Perfect for busy weeknights or when you want to impress guests with a delicious homemade meal.
The beauty of this dish lies in its simplicity and the balance of flavors. The Instapot not only speeds up the cooking process but also helps to infuse the chicken and vegetables with the rich and aromatic spices of the green curry paste.
This recipe is adaptable, allowing you to adjust the level of spiciness and the types of vegetables based on your personal preferences. Serve it over steamed jasmine rice or with warm naan bread for a complete meal that’s sure to satisfy.
Ingredients (Serves 4-6):
- 1 ½ pounds boneless, skinless chicken thighs, cut into bite-sized pieces
- 2 tablespoons vegetable oil
- 3 tablespoons green curry paste
- 1 can (13.5 oz) coconut milk
- 1 cup chicken broth
- 1 tablespoon fish sauce
- 1 tablespoon brown sugar
- 1 red bell pepper, sliced
- 1 cup sugar snap peas
- 1 cup baby corn, drained
- 1 cup bamboo shoots, drained
- 1 tablespoon lime juice
- Fresh basil leaves, for garnish
- Cooked jasmine rice, for serving
Cooking Instructions:
- Prepare the Instapot: Set your Instapot to the sauté mode and heat the vegetable oil. Add the green curry paste and sauté for about 1-2 minutes until fragrant, verifying it doesn’t burn.
- Cook the Chicken: Add the chicken pieces to the pot, stirring to coat them with the curry paste. Cook for about 3-4 minutes until the chicken is no longer pink on the outside.
- Add Liquids and Seasoning: Pour in the coconut milk, chicken broth, fish sauce, and brown sugar. Stir well to combine all ingredients, verifying the chicken is submerged in the liquid.
- Pressure Cook: Secure the lid on the Instapot and set it to pressure cook on high for 10 minutes. Once the cooking time is complete, allow the pressure to release naturally for about 5 minutes before quick releasing any remaining pressure.
- Add Vegetables: Open the Instapot and add the red bell pepper, sugar snap peas, baby corn, and bamboo shoots. Stir to distribute the vegetables evenly in the curry.
- Simmer to Finish: Switch the Instapot back to sauté mode and let the curry simmer for an additional 5 minutes to cook the vegetables and thicken the sauce slightly.
- Final Touches: Stir in the lime juice and adjust the seasoning with additional fish sauce or sugar if needed. Garnish with fresh basil leaves before serving.
- Serve: Serve the Thai Green Curry Chicken over a bed of steamed jasmine rice, verifying each serving has a generous amount of both chicken and vegetables.
Extra Tips:
For a creamier curry, you can use full-fat coconut milk. If you prefer a milder curry, start with 2 tablespoons of green curry paste and adjust to taste.
Feel free to substitute vegetables based on what you have available; zucchini and carrots work well. Verify your Instapot is properly sealed to avoid any steam leakage, and remember that the natural release helps to keep the chicken tender and juicy.
Adjusting the spice level and sweetness can help balance the dish to your liking, so taste and tweak as needed.
Chicken Fajitas
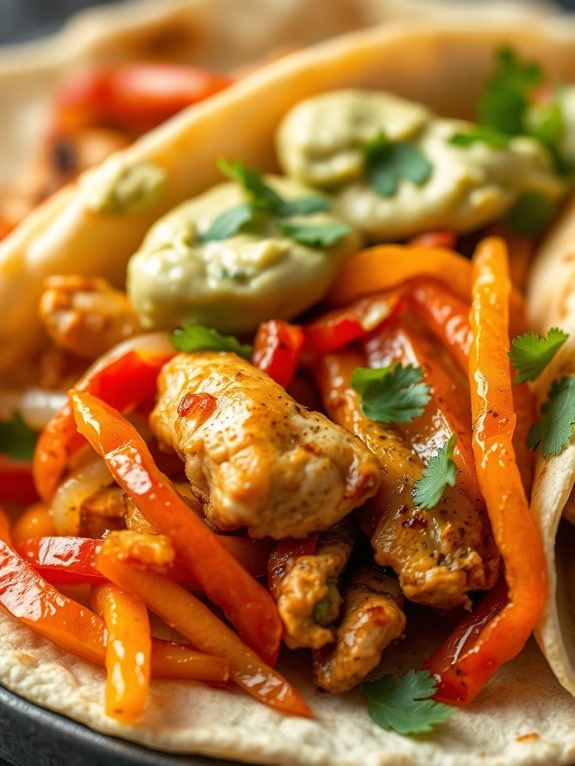
Transform your dinner routine with these easy and delicious Instapot Chicken Fajitas. This recipe brings together the vibrant flavors of Mexican cuisine, delivering tender, juicy chicken infused with the zesty taste of lime, garlic, and spices, all cooked effortlessly in your Instapot. Perfect for a quick family meal or a gathering with friends, these fajitas aren’t only simple to prepare but also incredibly satisfying.
The combination of colorful bell peppers, onions, and seasoned chicken strips wrapped in warm tortillas will make this dish a favorite on your meal rotation. Cooking chicken fajitas in an Instapot not only saves time but also enhances the flavors by evenly cooking the ingredients under pressure, resulting in perfectly tenderized meat and vegetables.
Whether you’re a seasoned cook looking to streamline your kitchen efforts or a beginner enthusiastic to impress, this recipe provides a fail-proof method to achieve restaurant-quality fajitas at home. Serve these fajitas with your choice of toppings like sour cream, guacamole, and salsa for a meal that’s customizable and full of flavor.
Ingredients (Serves 4-6):
- 2 pounds boneless, skinless chicken breasts
- 1 tablespoon olive oil
- 1 tablespoon chili powder
- 1 teaspoon ground cumin
- 1 teaspoon smoked paprika
- 1 teaspoon garlic powder
- 1 teaspoon onion powder
- 1 teaspoon salt
- 1/2 teaspoon black pepper
- 1/4 teaspoon cayenne pepper (optional)
- 2 bell peppers (red, yellow, or green), sliced
- 1 large onion, sliced
- 1/4 cup chicken broth or water
- Juice of 1 lime
- 8-10 flour tortillas
- Optional toppings: sour cream, guacamole, salsa, shredded cheese, chopped cilantro
Cooking Instructions:
- Prepare the Chicken and Vegetables: Slice the chicken breasts into thin strips. Set aside. Slice the bell peppers and onion.
- Season the Chicken: In a small bowl, combine chili powder, cumin, smoked paprika, garlic powder, onion powder, salt, black pepper, and cayenne pepper. Sprinkle the spice mixture over the chicken strips, ensuring they’re well-coated.
- Sauté in the Instapot: Set your Instapot to ‘Sauté’ mode. Add olive oil and allow it to heat. Add the seasoned chicken strips and sauté for about 3-4 minutes, until slightly browned. Remove the chicken and set aside.
- Cook the Vegetables: In the same pot, add the sliced bell peppers and onion. Sauté for 2-3 minutes until they begin to soften.
- Pressure Cook: Return the chicken to the pot. Add the chicken broth or water and lime juice to the pot. Stir well. Secure the lid on the Instapot, ensuring the pressure valve is set to sealing. Select the ‘Pressure Cook’ or ‘Manual’ setting and set the timer for 8 minutes.
- Release Pressure and Serve: Once the cooking time is complete, perform a quick release by turning the pressure valve to venting. Carefully remove the lid and stir the fajita mixture. Serve the chicken and vegetables in warm tortillas with your choice of toppings.
Extra Tips:
For an added burst of flavor, marinate the chicken in the spice mixture for 30 minutes to an hour before cooking. If you prefer your vegetables with a bit more crunch, you can remove them before pressure cooking and add them back afterward.
To warm the tortillas, wrap them in foil and place them in the oven at 350°F for about 10 minutes, or heat them individually in a dry skillet over medium heat for a few seconds on each side. These Instapot Chicken Fajitas can be paired with a side of Mexican rice or a simple salad for a complete meal.
Moroccan Chicken Stew
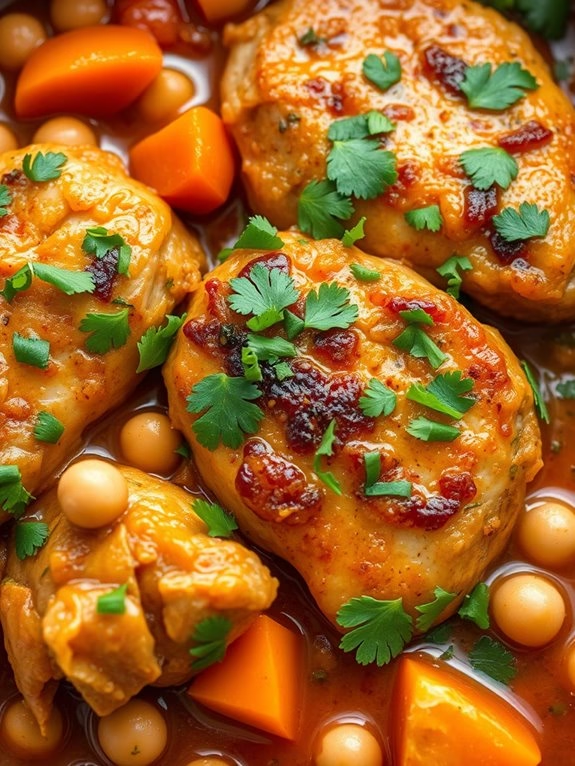
Moroccan Chicken Stew is a delightful and aromatic dish that combines tender chicken with a variety of spices, vegetables, and broth, creating a comforting meal that’s both nutritious and full of flavor. This dish is perfect for those who enjoy the rich and exotic flavors of Moroccan cuisine but want a convenient and quick way to prepare it using an Instapot.
With its blend of spices like cumin, coriander, and cinnamon, Moroccan Chicken Stew offers a unique taste experience that will transport your taste buds to the bustling markets of Marrakesh.
Preparing Moroccan Chicken Stew in an Instapot not only saves time but also enhances the depth of flavors as the pressure cooking process allows the spices and ingredients to meld beautifully. This recipe is ideal for a family meal, serving between 4-6 people, and can be easily adjusted to suit your taste preferences.
Whether you enjoy it as a standalone dish or paired with couscous or crusty bread, this stew is sure to become a favorite in your household.
Ingredients (serving size: 4-6 people):
- 2 pounds chicken thighs, boneless and skinless
- 2 tablespoons olive oil
- 1 large onion, finely chopped
- 3 cloves garlic, minced
- 2 teaspoons ground cumin
- 2 teaspoons ground coriander
- 1 teaspoon ground cinnamon
- 1 teaspoon ground ginger
- 1 teaspoon paprika
- 1/2 teaspoon cayenne pepper (optional)
- 1 can (14 oz) diced tomatoes
- 1 cup chicken broth
- 1 can (15 oz) chickpeas, drained and rinsed
- 1 cup carrots, sliced
- 1/2 cup dried apricots, chopped
- Salt and pepper to taste
- Fresh cilantro, chopped (for garnish)
Cooking Instructions:
- Prepare the Instapot: Turn on the Instapot and select the “Sauté” function. Add olive oil to the pot and let it heat up.
- Sauté the Aromatics: Add the chopped onion and garlic to the pot. Sauté until the onion becomes translucent and fragrant, about 3-4 minutes.
- Add Spices: Stir in the cumin, coriander, cinnamon, ginger, paprika, and cayenne pepper (if using). Cook for an additional 1-2 minutes, allowing the spices to toast and release their aroma.
- Brown the Chicken: Add the chicken thighs to the pot, searing them for about 3-4 minutes on each side until they’re lightly browned.
- Deglaze the Pot: Pour in the canned tomatoes and chicken broth. Use a wooden spoon to scrape any browned bits from the bottom of the pot to enhance the flavor of the stew.
- Add Remaining Ingredients: Stir in the chickpeas, carrots, and dried apricots. Season with salt and pepper to taste.
- Pressure Cook: Secure the lid on the Instapot, ensuring the valve is set to “Sealing.” Select the “Pressure Cook” or “Manual” function and set the cooking time to 15 minutes on high pressure.
- Release Pressure: Once the cooking time is complete, allow the pressure to naturally release for 10 minutes before carefully using the quick release method to release any remaining pressure.
- Serve: Open the lid and give the stew a good stir. Taste and adjust seasoning if necessary. Serve hot, garnished with fresh cilantro.
Extra Tips:
For a richer flavor, consider marinating the chicken thighs in the spice mixture for a few hours before cooking. If you prefer a thicker stew, use an immersion blender to blend a portion of the stew before serving.
This dish pairs wonderfully with couscous or rice, which can be cooked simultaneously in a separate pot while the stew is in the Instapot. Adjust the spice levels according to your preference, and feel free to add other vegetables like bell peppers or zucchini for added texture and flavor.
Chicken and Dumplings
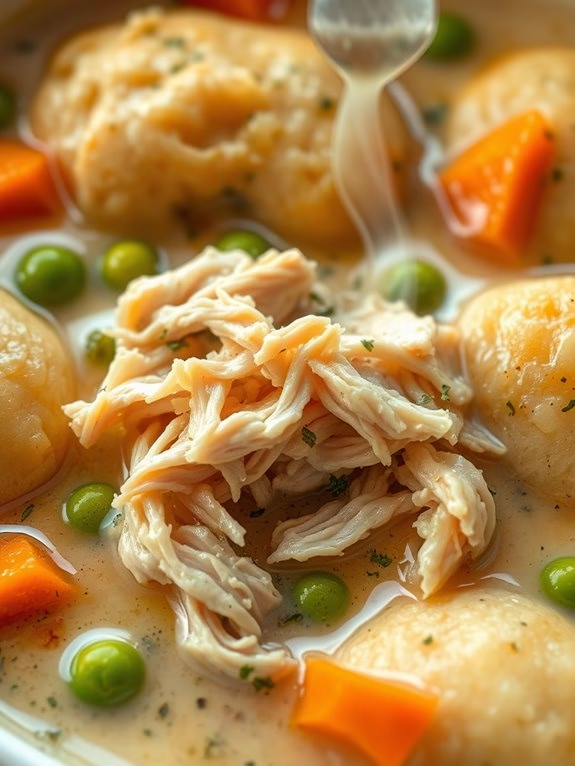
There’s nothing quite like a warm, comforting bowl of chicken and dumplings to soothe the soul and satisfy your hunger. This Instant Pot version takes a beloved classic and adapts it for modern kitchens, making it easier and faster without losing any of the traditional flavors. The tender chicken, fluffy dumplings, and rich, savory broth come together in harmony, providing a hearty meal perfect for any day of the week.
By using the Instant Pot, you can notably cut down on the cooking time without compromising the taste. This one-pot wonder is ideal for busy families or anyone looking for a convenient yet delicious home-cooked meal. With a few simple ingredients and minimal prep work, you can have this comforting dish ready to serve in under an hour.
Ingredients (Serves 4-6):
- 2 tablespoons olive oil
- 1 medium onion, diced
- 3 cloves garlic, minced
- 4 medium carrots, sliced
- 3 celery stalks, sliced
- 1 teaspoon dried thyme
- 1 teaspoon dried rosemary
- 1 teaspoon salt
- 1/2 teaspoon black pepper
- 4 boneless, skinless chicken breasts
- 4 cups chicken broth
- 1 cup frozen peas
- 1 cup heavy cream
- 2 cups all-purpose flour
- 1 tablespoon baking powder
- 1 teaspoon salt (for dumplings)
- 1 cup whole milk
- 4 tablespoons unsalted butter, melted
Instructions:
- Sauté Vegetables: Set your Instant Pot to the sauté setting. Add olive oil and allow it to heat up. Add the diced onion, minced garlic, sliced carrots, and celery. Sauté for about 5 minutes until the vegetables are softened.
- Season and Add Chicken: Stir in the dried thyme, rosemary, salt, and black pepper. Place the chicken breasts on top of the sautéed vegetables.
- Add Broth and Cook: Pour in the chicken broth, making sure it covers the chicken. Secure the lid on the Instant Pot, set the valve to sealing, and select the pressure cook (manual) setting on high for 10 minutes.
- Prepare Dumplings: While the chicken is cooking, prepare the dumplings. In a large bowl, whisk together the all-purpose flour, baking powder, and salt. Add the milk and melted butter, stirring until just combined. Don’t over-mix, as this will make the dumplings tough.
- Release Pressure and Shred Chicken: Once the cooking time is complete, allow for a natural pressure release for 10 minutes before carefully turning the valve to venting. Remove the lid, take out the chicken breasts, and shred them using two forks.
- Add Peas and Cream: Stir in the frozen peas and heavy cream to the pot. Return the shredded chicken to the pot and mix well.
- Cook Dumplings: Drop spoonfuls of the dumpling dough into the pot, spacing them apart slightly. Close the lid, set the valve to sealing, and pressure cook on high for another 5 minutes.
- Final Release and Serve: After the second cooking cycle, perform a quick pressure release. Carefully remove the lid and check that the dumplings are puffed and cooked through. Serve the chicken and dumplings hot, garnished with additional fresh herbs if desired.
Extra Tips:
For a richer flavor, consider adding a splash of white wine to the sautéed vegetables before pressure cooking. If you prefer a thicker broth, mix a tablespoon of cornstarch with water and stir it into the pot after adding the peas and cream.
Always taste and adjust the seasoning before serving to guarantee the perfect balance of flavors. For an added touch, sprinkle some freshly chopped parsley over the dish just before serving.