Cooking is such a delightful adventure, and exploring high-protein chicken recipes is one of my absolute favorites.
There’s something so satisfying about starting the week with a zesty Grilled Lemon Herb Chicken that bursts with flavor.
Midweek cravings often call for something quick and delicious, like a Spicy Chicken Stir-Fry that’s perfect for busy days.
And have you ever paired Baked Garlic Parmesan Chicken with a creamy sauce that just elevates the whole dish?
Let’s embark on this tasty journey together and transform simple ingredients into protein-packed delights!
Grilled Lemon Herb Chicken
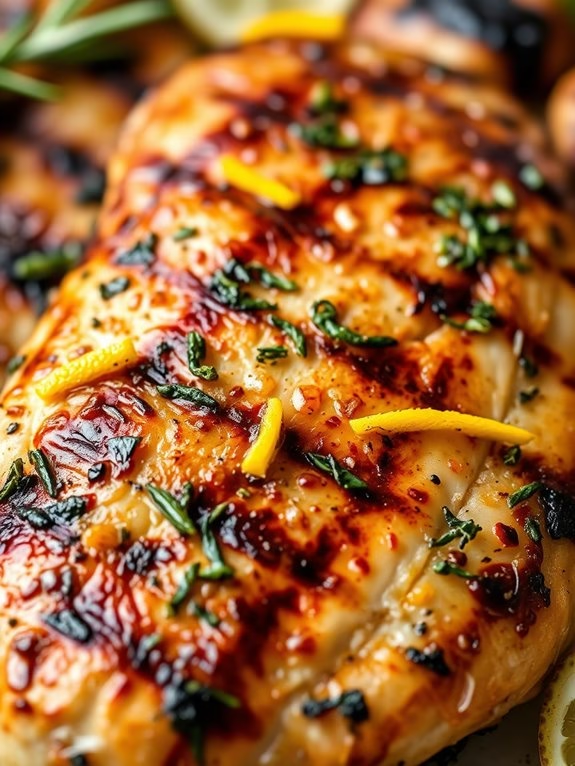
Grilled Lemon Herb Chicken is a delicious and healthy option for those looking to increase their protein intake while enjoying a flavorful meal. This dish combines the zesty freshness of lemon with a blend of aromatic herbs, creating a savory marinade that enhances the natural flavors of the chicken. Perfect for a summer barbecue or a casual family dinner, Grilled Lemon Herb Chicken is sure to become a favorite in your household.
The chicken is juicy and tender, with a delightful char from the grill that adds depth to the overall taste. This recipe isn’t only high in protein but also easy to prepare, making it ideal for busy weeknights or when you want to impress guests without spending hours in the kitchen.
The key to success with this dish is allowing the chicken to marinate long enough to soak up all the flavors, followed by grilling it to perfection. Whether served with a side of roasted vegetables, a fresh salad, or your favorite grains, this Grilled Lemon Herb Chicken will satisfy your culinary cravings.
Ingredients (Serving Size: 4-6 people):
- 6 boneless, skinless chicken breasts
- 1/3 cup olive oil
- Zest and juice of 2 lemons
- 4 cloves garlic, minced
- 2 tablespoons fresh rosemary, chopped
- 2 tablespoons fresh thyme, chopped
- 1 teaspoon salt
- 1/2 teaspoon black pepper
Cooking Instructions:
- Prepare the Marinade: In a large mixing bowl, combine olive oil, lemon zest, lemon juice, minced garlic, chopped rosemary, chopped thyme, salt, and black pepper. Whisk the ingredients together until they’re well incorporated.
- Marinate the Chicken: Place the chicken breasts in a large resealable plastic bag or a shallow dish. Pour the marinade over the chicken, ensuring each piece is well coated. Seal the bag or cover the dish, and refrigerate for at least 1 hour, or up to 8 hours for more intense flavor.
- Preheat the Grill: About 20 minutes before you’re ready to grill, preheat your grill to medium-high heat. Make sure the grates are clean and lightly oiled to prevent sticking.
- Grill the Chicken: Remove the chicken from the marinade, allowing any excess to drip off. Place the chicken onto the preheated grill. Cook for 6-7 minutes per side, or until the internal temperature reaches 165°F (75°C) and the chicken is nicely charred but not burnt.
- Rest and Serve: Once cooked, remove the chicken from the grill and let it rest on a clean plate for about 5 minutes. This helps the juices redistribute, ensuring each bite is tender and juicy. Serve hot with your choice of sides.
Extra Tips: For best results, use fresh herbs instead of dried ones, as they provide a more vibrant flavor. If fresh herbs aren’t available, dried herbs can be substituted, but use them sparingly since they’re more concentrated.
Additionally, consider using a meat thermometer to check the internal temperature of the chicken to avoid overcooking. If you don’t have a grill, this recipe can also be prepared using a grill pan or broiled in the oven.
Spicy Chicken Stir-Fry
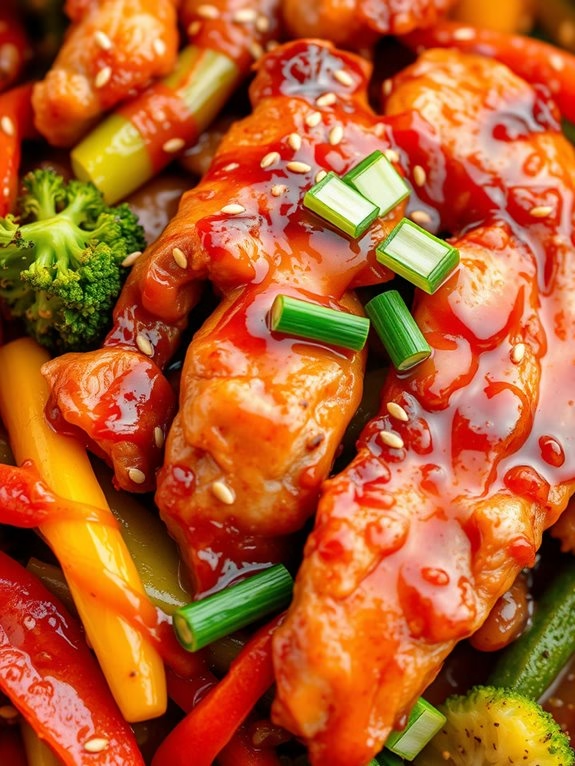
Spicy Chicken Stir-Fry is a delightful dish that combines the richness of chicken with a medley of colorful vegetables and a bold, spicy sauce. This high-protein recipe is perfect for those who enjoy a little heat in their meals, and it’s a great option for a quick and satisfying dinner.
With its vibrant flavors and contrasting textures, this stir-fry isn’t only nutritious but also visually appealing, making it a great choice for family dinners or casual gatherings with friends.
The key to a successful Spicy Chicken Stir-Fry is balancing the heat with the natural sweetness of the vegetables and the savory notes of the sauce. The dish can be easily customized to suit individual spice preferences by adjusting the amount of chili used.
This recipe serves 4-6 people and can be paired with steamed rice or noodles to make a complete meal. Enjoy the robust flavors and the nourishing benefits of this quick and easy dish!
Ingredients:
- 1 1/2 pounds boneless, skinless chicken breasts, sliced into thin strips
- 2 tablespoons vegetable oil
- 1 red bell pepper, sliced
- 1 yellow bell pepper, sliced
- 1 cup broccoli florets
- 1 cup snap peas
- 1 medium onion, sliced
- 3 cloves garlic, minced
- 1 tablespoon fresh ginger, minced
- 3 tablespoons soy sauce
- 2 tablespoons oyster sauce
- 1 tablespoon chili paste (or to taste)
- 1 tablespoon honey
- 1 tablespoon cornstarch
- 1/4 cup water
- Salt and pepper to taste
- 2 green onions, sliced (for garnish)
- Sesame seeds (for garnish)
Cooking Instructions:
- Prepare the Chicken: Begin by cutting the chicken breasts into thin strips. Season the chicken lightly with salt and pepper, establishing even coverage for better flavor.
- Mix the Sauce: In a small bowl, combine the soy sauce, oyster sauce, chili paste, honey, cornstarch, and water. Stir until the cornstarch is fully dissolved and the mixture is smooth. Set aside.
- Cook the Chicken: Heat a tablespoon of vegetable oil in a large skillet or wok over medium-high heat. Add the chicken strips, cooking them in batches if necessary, to avoid overcrowding. Sauté the chicken for about 5-7 minutes until fully cooked and slightly browned. Remove the chicken from the skillet and set aside.
- Stir-Fry the Vegetables: In the same skillet, add the remaining tablespoon of oil. Add the minced garlic and ginger, stirring for about 30 seconds until fragrant. Then, add the sliced onion, bell peppers, broccoli, and snap peas. Stir-fry the vegetables for approximately 4-5 minutes until they’re crisp-tender.
- Combine Chicken and Sauce: Return the cooked chicken to the skillet with the vegetables. Give the prepared sauce a good stir and pour it over the chicken and vegetables. Toss everything together to guarantee the sauce coats all ingredients evenly. Cook for an additional 2-3 minutes until the sauce thickens and everything is heated through.
- Garnish and Serve: Once the stir-fry is ready, transfer it to a serving platter. Garnish with sliced green onions and sesame seeds to add a fresh and nutty element. Serve hot with your choice of steamed rice or noodles.
Extra Tips:
For the best results, make sure to slice the chicken and vegetables uniformly to guarantee even cooking.
If you prefer a milder dish, reduce the amount of chili paste or omit it altogether. Alternatively, for those who love extra heat, consider adding sliced fresh chilies towards the end of cooking.
To add more depth of flavor, you can marinate the chicken in a bit of soy sauce and cornstarch for about 15 minutes before cooking. This will make the chicken tender and enhance the overall taste of the dish.
Baked Garlic Parmesan Chicken
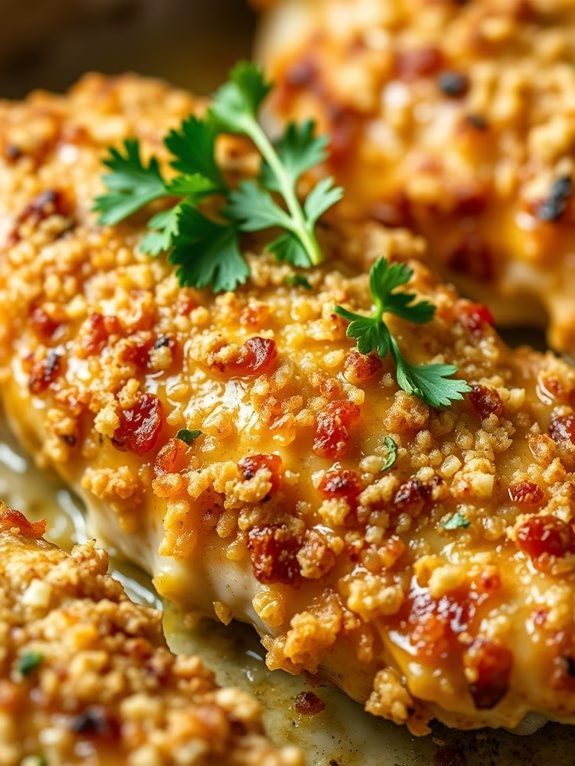
Baked Garlic Parmesan Chicken is a delightful dish that combines the savory flavors of garlic and Parmesan cheese with tender, juicy chicken. This high-protein meal is perfect for a family dinner or a special gathering, offering both taste and nutrition. The crispy, golden-brown crust that forms on the chicken as it bakes is sure to be a crowd-pleaser, while the rich aroma of garlic and herbs fills your kitchen with an inviting warmth.
This recipe isn’t only delicious but also simple to prepare, making it an excellent choice for both novice and experienced cooks. The combination of bread crumbs and Parmesan cheese creates a satisfying texture, while the garlic infuses every bite with a robust flavor. With a few simple ingredients, you can create a dish that’s both elegant and comforting, perfect for any occasion.
Ingredients for 4-6 servings:
- 4 boneless, skinless chicken breasts
- 1 cup grated Parmesan cheese
- 1 cup bread crumbs
- 4 cloves garlic, minced
- 1 teaspoon dried oregano
- 1 teaspoon dried basil
- 1 teaspoon salt
- 1/2 teaspoon black pepper
- 1/2 cup unsalted butter, melted
- 2 tablespoons chopped fresh parsley (optional for garnish)
Cooking Instructions:
- Preheat the Oven: Begin by preheating your oven to 375°F (190°C). This guarantees the oven is at the right temperature for even cooking.
- Prepare the Baking Dish: Grease a 9×13-inch baking dish with a small amount of butter or non-stick cooking spray. This will prevent the chicken from sticking to the dish during baking.
- Mix the Dry Ingredients: In a medium bowl, combine the Parmesan cheese, bread crumbs, oregano, basil, salt, and black pepper. Stir these ingredients together until they’re well mixed.
- Prepare the Chicken: Rinse the chicken breasts under cold water and pat them dry with paper towels. This step is vital for removing any excess moisture and making sure the coating sticks properly.
- Coat the Chicken: Dip each chicken breast into the melted butter, ensuring it’s fully coated. Then, press the chicken into the Parmesan and bread crumb mixture, coating it evenly on both sides. Place each coated chicken breast into the prepared baking dish.
- Add Garlic: Sprinkle the minced garlic evenly over the chicken breasts. This will add a more concentrated garlic flavor to the dish.
- Bake the Chicken: Place the baking dish in the preheated oven and bake for 25-30 minutes. The chicken should be cooked through, with a golden-brown crust forming on top. To verify the chicken is fully cooked, use a meat thermometer to check that the internal temperature has reached 165°F (74°C).
- Garnish and Serve: Remove the baking dish from the oven and let the chicken rest for a few minutes before serving. Garnish with chopped fresh parsley if desired. Serve the chicken hot, perhaps alongside a fresh salad or steamed vegetables.
Extra Tips: For an even more flavorful dish, consider marinating the chicken in the garlic, herbs, and a little olive oil for an hour before coating and baking. If you prefer a spicier kick, add a pinch of red pepper flakes to the bread crumb mixture. Additionally, try using panko breadcrumbs for a lighter, crispier coating. Remember to let the chicken rest after baking, as this allows the juices to redistribute, resulting in juicier, more flavorful chicken.
Honey Mustard Chicken Thighs
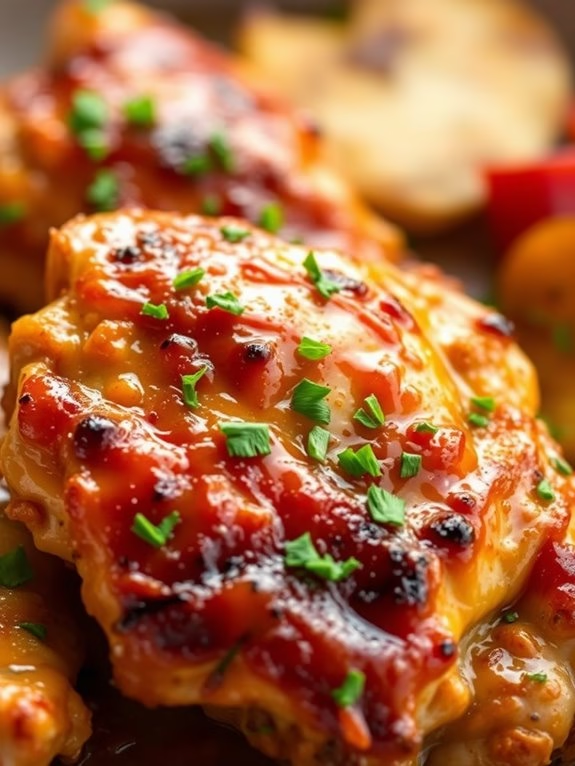
Honey Mustard Chicken Thighs are a delightful dish that combines the sweet and tangy flavors of honey and mustard with the savory richness of perfectly cooked chicken thighs. This recipe is perfect for a cozy family dinner or a casual gathering with friends. Not only is it high in protein, but it also offers a burst of flavor that will leave everyone asking for seconds.
The chicken thighs are marinated in a simple yet flavorful sauce, then seared to perfection and baked until juicy and tender. The key to this dish is the balance between the sweetness of honey and the sharpness of mustard. This delicious glaze not only imparts great flavor but also helps keep the chicken moist during cooking.
With a few simple ingredients and easy steps, you can create a memorable meal that fits perfectly into a high-protein diet. Whether served with a side of roasted vegetables or a simple salad, Honey Mustard Chicken Thighs are sure to be a hit.
Ingredients (Serves 4-6):
- 8 chicken thighs (bone-in, skin-on)
- 1/3 cup honey
- 1/3 cup Dijon mustard
- 2 tablespoons olive oil
- 2 tablespoons soy sauce
- 1 tablespoon apple cider vinegar
- 3 cloves garlic, minced
- Salt and pepper, to taste
- Fresh parsley, chopped (for garnish)
Cooking Instructions:
- Preheat the Oven: Begin by preheating your oven to 400°F (200°C). This will guarantee it’s hot enough to bake the chicken thoroughly after searing.
- Prepare the Marinade: In a medium-sized bowl, combine the honey, Dijon mustard, olive oil, soy sauce, apple cider vinegar, and minced garlic. Whisk these ingredients together until well blended.
- Marinate the Chicken: Place the chicken thighs in a large resealable plastic bag or a shallow dish. Pour the marinade over the chicken, guaranteeing each thigh is well coated. Seal the bag or cover the dish with plastic wrap, and let it marinate in the refrigerator for at least 30 minutes, or up to 2 hours for more intense flavor.
- Sear the Chicken: Heat a large oven-safe skillet over medium-high heat. Once hot, remove the chicken thighs from the marinade, allowing excess to drip off. Season both sides with salt and pepper. Place the thighs skin-side down in the skillet and sear for about 5 minutes until the skin is golden brown and crispy.
- Bake the Chicken: Flip the chicken thighs over so they’re skin-side up. Pour any remaining marinade over the chicken. Transfer the skillet to the preheated oven and bake for 25-30 minutes, or until the chicken reaches an internal temperature of 165°F (74°C) and is cooked through.
- Garnish and Serve: Once cooked, remove the chicken from the oven and let it rest for a few minutes. Garnish with freshly chopped parsley before serving. Enjoy your Honey Mustard Chicken Thighs with your choice of sides.
Extra Tips:
For the best results, try to use chicken thighs that are similar in size to guarantee even cooking. If you prefer a slightly less sweet version, reduce the amount of honey slightly.
Feel free to experiment with different types of mustard, like whole grain or spicy brown, to suit your personal taste. If you don’t have an oven-safe skillet, you can transfer the seared chicken to a baking dish before adding the marinade and baking.
Finally, this dish pairs beautifully with roasted potatoes or a green salad for a complete meal.
Chicken and Quinoa Salad
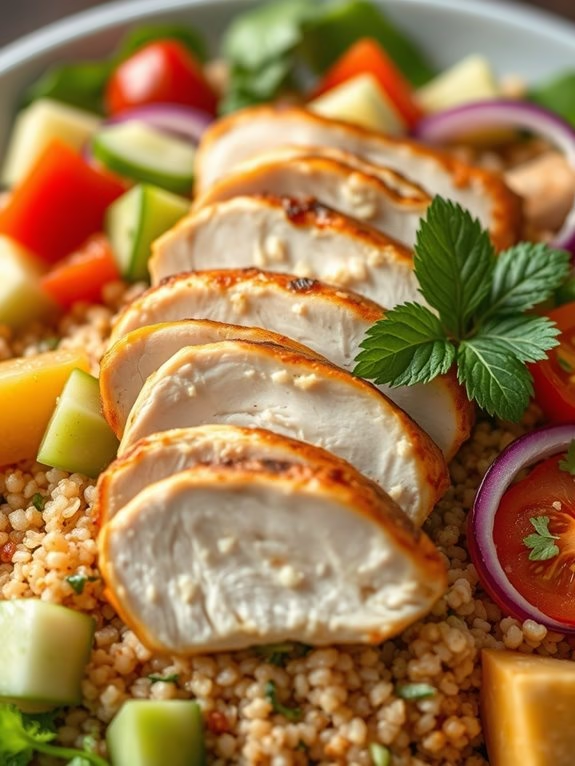
Chicken and Quinoa Salad is a nutritious and delicious dish that combines the lean protein of chicken with the wholesome goodness of quinoa. This salad isn’t only packed with protein, making it perfect for those looking to maintain a healthy lifestyle, but it’s also rich in flavor, thanks to the addition of fresh vegetables and a zesty dressing.
Perfect for lunch or a light dinner, this salad is easy to prepare and can be customized with your favorite ingredients. This high-protein salad is ideal for serving 4-6 people, making it perfect for a family meal or a small gathering. The combination of tender chicken, fluffy quinoa, and crisp vegetables creates a delightful texture, while the homemade dressing ties everything together beautifully.
Whether you’re looking to fuel your day with a healthy meal or impress your guests with a vibrant dish, this Chicken and Quinoa Salad is sure to be a hit.
Ingredients:
- 2 cups quinoa
- 4 cups water
- 4 boneless, skinless chicken breasts
- 2 tablespoons olive oil
- Salt and pepper, to taste
- 1 cucumber, diced
- 1 red bell pepper, diced
- 1 cup cherry tomatoes, halved
- 1/2 red onion, thinly sliced
- 1/4 cup fresh parsley, chopped
- 1/4 cup fresh mint, chopped
- 1/4 cup lemon juice
- 2 tablespoons honey
- 1 teaspoon Dijon mustard
Cooking Instructions:
1. Prepare the Quinoa: Rinse the quinoa under cold water using a fine-mesh sieve. In a large pot, bring 4 cups of water to a boil. Add the quinoa, reduce the heat to low, cover, and let it simmer for about 15 minutes, or until the quinoa is cooked and the water is absorbed.
Remove from the heat and let it sit, covered, for an additional 5 minutes. Fluff with a fork and set aside to cool.
2. Cook the Chicken: While the quinoa is cooking, season the chicken breasts with salt and pepper. Heat the olive oil in a large skillet over medium heat. Add the chicken breasts and cook for 6-7 minutes on each side, or until they’re golden brown and cooked through.
Remove from the skillet and let them rest for 5 minutes before slicing them into thin strips.
3. Prepare the Vegetables: In a large mixing bowl, combine the diced cucumber, red bell pepper, cherry tomatoes, and sliced red onion. Add the cooled quinoa to the bowl and mix until combined.
4. Make the Dressing: In a small bowl, whisk together the lemon juice, honey, and Dijon mustard. Season with salt and pepper to taste. Pour the dressing over the quinoa and vegetable mixture and toss to coat.
5. Assemble the Salad: Add the sliced chicken breasts to the quinoa and vegetable mixture. Sprinkle the chopped parsley and mint over the top and gently toss to combine all the ingredients.
6. Serve: Transfer the salad to a serving platter or individual plates. Serve immediately, or refrigerate for up to an hour to allow the flavors to meld together.
Extra Tips:
For best results, verify that the quinoa is completely cooled before adding it to the salad. This prevents it from becoming mushy and helps maintain the crisp texture of the vegetables.
Feel free to customize this salad by adding other ingredients such as avocado, feta cheese, or nuts for added flavor and texture. If you’re short on time, use pre-cooked or rotisserie chicken to speed up the preparation process.
Slow Cooker Chicken Chili
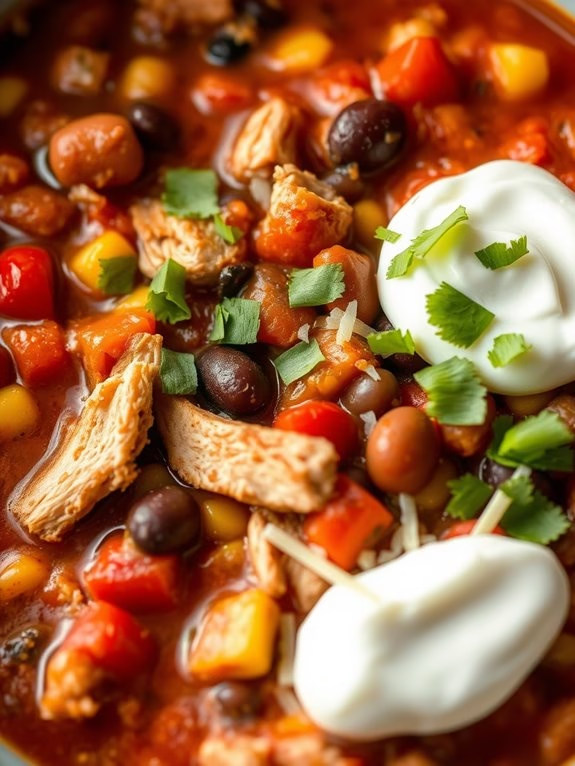
Warm and hearty, Slow Cooker Chicken Chili is a high-protein, easy-to-make dish that boasts rich flavors and comforting aromas. This recipe is perfect for busy weeknights or leisurely weekends, allowing you to prepare a wholesome meal with minimal effort.
Using a slow cooker not only enhances the depth of flavors but also guarantees that the chicken becomes tender and juicy, absorbing the delicious blend of spices and ingredients. Ideal for serving 4-6 people, this chili combines lean chicken breast with kidney beans, tomatoes, and a medley of spices to create a nourishing meal.
Perfect for pairing with a side of cornbread or a simple salad, this dish is bound to become a family favorite.
Ingredients:
- 1.5 lbs boneless, skinless chicken breasts
- 1 can (15 oz) kidney beans, drained and rinsed
- 1 can (15 oz) black beans, drained and rinsed
- 1 can (15 oz) corn, drained
- 1 can (15 oz) diced tomatoes
- 1 can (15 oz) tomato sauce
- 1 cup chicken broth
- 1 medium onion, diced
- 2 cloves garlic, minced
- 1 red bell pepper, diced
- 1 tbsp chili powder
- 1 tsp ground cumin
- 1 tsp paprika
- Salt and pepper to taste
- Optional toppings: shredded cheese, sour cream, chopped cilantro
Cooking Instructions:
- Prepare the Ingredients: Begin by gathering all the ingredients. Dice the onion and red bell pepper, and mince the garlic. This will guarantee everything is ready to add to the slow cooker seamlessly.
- Layer the Slow Cooker: Place the chicken breasts at the bottom of the slow cooker. This guarantees they cook evenly and absorb the maximum flavor from the other ingredients.
- Add Vegetables and Beans: Add the diced onion, minced garlic, and diced bell pepper over the chicken. Then, add the kidney beans, black beans, corn, and diced tomatoes.
- Incorporate Liquids and Spices: Pour in the tomato sauce and chicken broth. Sprinkle the chili powder, cumin, paprika, salt, and pepper over the top. Stir the mixture lightly to guarantee the spices are evenly distributed.
- Slow Cook the Chili: Cover the slow cooker with its lid and set it to cook on low for 6-8 hours or on high for 3-4 hours. This slow cooking process will allow the chicken to become tender and the flavors to meld beautifully.
- Shred the Chicken: About 30 minutes before serving, remove the chicken breasts from the slow cooker and shred them using two forks. Return the shredded chicken to the pot and stir well to combine.
- Serve and Garnish: Once cooked, taste and adjust seasoning if necessary. Serve the chili hot, topped with your choice of shredded cheese, sour cream, or chopped cilantro for added flavor and texture.
Extra Tips:
To enhance the flavor of your Slow Cooker Chicken Chili, consider using smoked paprika for a subtle smoky taste. If you prefer a spicier chili, add a pinch of cayenne pepper or a chopped jalapeño pepper.
For a creamier texture, stir in a dollop of cream cheese or Greek yogurt just before serving. Finally, this dish can be made ahead and stored in the refrigerator for up to 3 days or frozen for up to 3 months, making it a convenient option for meal prep.
Thai Peanut Chicken Skewers
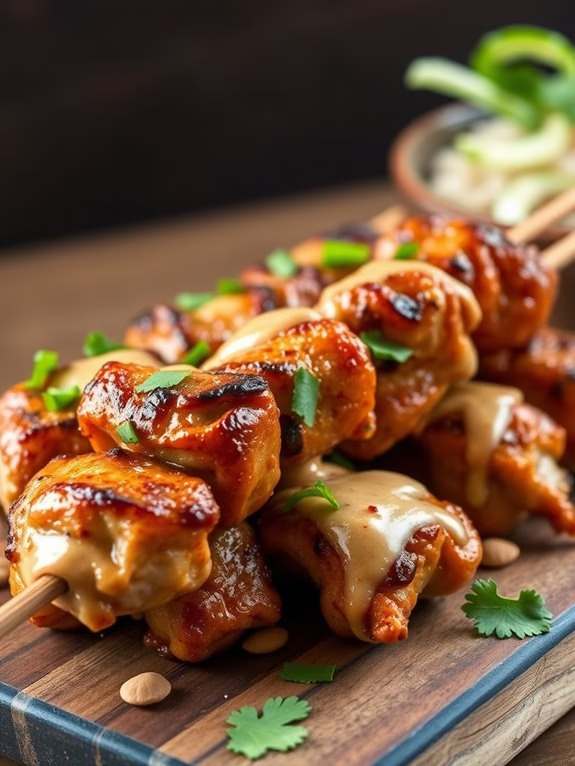
Thai Peanut Chicken Skewers are a delicious and flavorful dish that brings together the rich, nutty taste of peanuts with aromatic Thai spices. Perfect for a family dinner or a summer barbecue, these skewers combine succulent chunks of chicken with a creamy and spicy peanut sauce. The marinade infuses the chicken with flavors, while the grilling process adds a smoky touch, creating an irresistible and healthy high-protein meal.
This recipe serves 4-6 people and is perfect for those looking to enjoy a meal that’s both nutritious and packed with flavor. The skewers can be served as an appetizer or a main course, and they pair well with jasmine rice or a fresh cucumber salad. The peanut sauce, which also serves as a dipping sauce, elevates the dish with its balance of sweet, salty, and spicy flavors, making these skewers a crowd-pleaser.
Ingredients:
- 2 pounds boneless, skinless chicken breasts, cut into 1-inch cubes
- 1 cup coconut milk
- 1/4 cup soy sauce
- 1 tablespoon fish sauce
- 2 tablespoons brown sugar
- 3 cloves garlic, minced
- 1 tablespoon fresh ginger, grated
- 1 teaspoon ground coriander
- 1 teaspoon curry powder
- 1/2 teaspoon chili flakes (or to taste)
- 1 cup creamy peanut butter
- 2 tablespoons lime juice
- 1 tablespoon sesame oil
- 1/4 cup water
- Wooden or metal skewers
Cooking Instructions:
- Prepare the Marinade: In a large mixing bowl, combine coconut milk, soy sauce, fish sauce, brown sugar, minced garlic, grated ginger, ground coriander, curry powder, and chili flakes. Mix well until the sugar is dissolved and the spices are evenly distributed.
- Marinate the Chicken: Add the cubed chicken pieces to the marinade, guaranteeing each piece is fully coated. Cover the bowl with plastic wrap and refrigerate for at least 2 hours, or overnight for best results, allowing the flavors to fully penetrate the chicken.
- Prepare the Peanut Sauce: In a medium saucepan over low heat, combine peanut butter, lime juice, sesame oil, and water. Stir continuously until the mixture is smooth and creamy. If the sauce is too thick, add more water a tablespoon at a time until the desired consistency is reached. Set aside.
- Preheat the Grill: Preheat your grill to medium-high heat. If using wooden skewers, soak them in water for at least 30 minutes to prevent burning.
- Assemble the Skewers: Thread the marinated chicken pieces onto skewers, leaving a small space between each piece for even cooking.
- Grill the Skewers: Place the skewers on the preheated grill. Cook for about 12-15 minutes, turning occasionally until the chicken is cooked through and has a nice char on the outside.
- Serve: Remove the skewers from the grill and let them rest for a few minutes. Serve hot with the peanut sauce either drizzled over the top or on the side for dipping.
Extra Tips:
For extra flavor, you can garnish the skewers with chopped fresh cilantro and crushed peanuts before serving. If you prefer a spicier kick, add more chili flakes or a dash of sriracha to the peanut sauce.
To ascertain even cooking, make sure to cut the chicken pieces uniformly and avoid overcrowding the skewers. Also, keep a close eye on the grilling process to prevent the chicken from drying out. Enjoy your Thai Peanut Chicken Skewers with a side of lime wedges for an extra burst of freshness.
Crispy Air Fryer Chicken
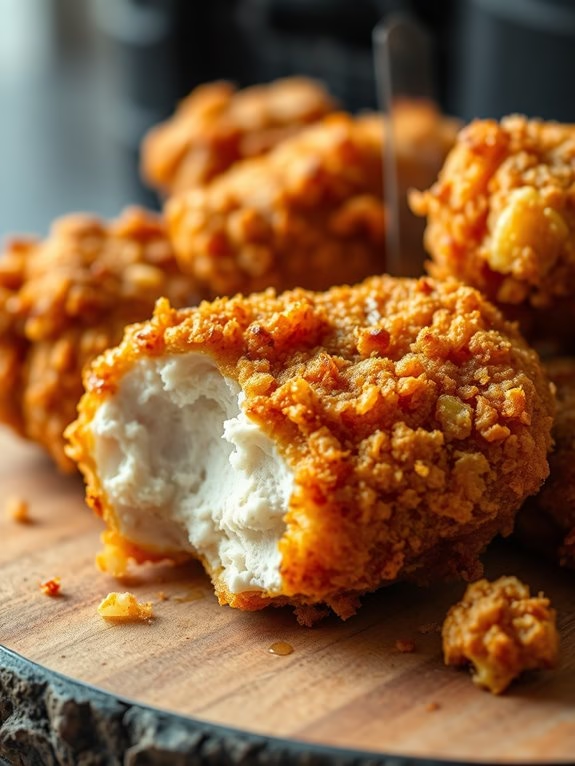
Crispy Air Fryer Chicken is a delicious and healthier alternative to traditional fried chicken. By using an air fryer, you can achieve the same golden-brown, crispy exterior without the need for excessive oil, making it a perfect high-protein dish. The chicken is seasoned with a mix of spices that infuse it with flavor, while the air fryer guarantees it remains juicy on the inside.
This recipe is ideal for anyone looking to enjoy the taste of fried chicken while sticking to a health-conscious diet. This recipe is perfect for serving 4-6 people, making it a great option for family dinners or small gatherings. The preparation is straightforward, and the cooking time is noticeably reduced compared to conventional methods, allowing you to enjoy your meal in no time.
Whether you’re a seasoned home cook or a beginner, this Crispy Air Fryer Chicken recipe will be a hit at your table.
Ingredients:
- 4-6 chicken thighs or drumsticks
- 1 cup all-purpose flour
- 1 teaspoon paprika
- 1 teaspoon garlic powder
- 1 teaspoon onion powder
- 1 teaspoon salt
- 1/2 teaspoon black pepper
- 1/2 teaspoon cayenne pepper (optional for heat)
- 2 large eggs
- Cooking spray or a small amount of oil
Instructions:
- Preheat the Air Fryer: Begin by preheating your air fryer to 400°F (200°C). This will guarantee the chicken starts cooking immediately and becomes crispy.
- Prepare the Breading: In a shallow dish, combine the flour, paprika, garlic powder, onion powder, salt, black pepper, and cayenne pepper. Mix well to guarantee the spices are evenly distributed.
- Beat the Eggs: In another shallow bowl, beat the eggs until well blended. This will act as the binding agent for the flour mixture.
- Coat the Chicken: Dip each piece of chicken into the egg mixture, guaranteeing it’s fully coated, then dredge it in the flour mixture, pressing gently to guarantee the flour adheres well.
- Prepare the Air Fryer Basket: Lightly spray the air fryer basket with cooking spray or brush it with a small amount of oil to prevent sticking.
- Arrange the Chicken: Place the coated chicken pieces in a single layer in the air fryer basket, guaranteeing they don’t overlap. You may need to cook in batches depending on the size of your air fryer.
- Cook the Chicken: Cook the chicken at 400°F (200°C) for 20-25 minutes, flipping halfway through the cooking time, until the chicken is golden brown and cooked through. The internal temperature should reach 165°F (75°C).
- Serve and Enjoy: Once cooked, remove the chicken from the air fryer and let it rest for a few minutes before serving. This allows the juices to redistribute, keeping the chicken moist.
Extra Tips:
For the crispiest results, make sure not to overcrowd the air fryer basket, as this can lead to uneven cooking. If you prefer a spicier kick, feel free to adjust the cayenne pepper to your liking.
Additionally, using a meat thermometer will help guarantee your chicken is perfectly cooked without being overdone. If you find the coating isn’t as crispy as desired, spray a little more oil on the chicken before cooking.
Enjoy your Crispy Air Fryer Chicken with your favorite dipping sauce or a side of vegetables for a complete meal.
Chicken and Vegetable Soup
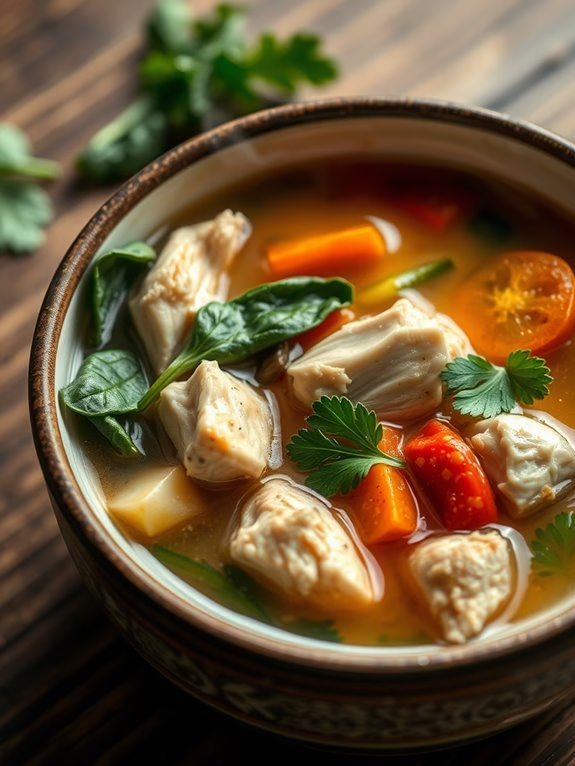
Chicken and vegetable soup is a comforting and nutritious dish that’s perfect for any season. This high-protein recipe isn’t only delicious but also incredibly easy to make, making it a great option for a quick and healthy meal. Packed with tender chicken pieces and a variety of fresh vegetables, this soup is both satisfying and nourishing. The broth is infused with aromatic herbs and seasonings that elevate the flavors, creating a warm and inviting dish that everyone will love.
Whether you’re looking to boost your protein intake or simply enjoy a hearty bowl of soup, this chicken and vegetable soup recipe is guaranteed to meet your needs. It’s ideal for a family dinner or a meal prep option for the week, as it can be refrigerated and reheated for later consumption. Plus, it’s a versatile recipe that allows you to use any vegetables you have on hand, reducing food waste and making it an economical choice.
Ingredients (Serves 4-6):
- 1 pound boneless, skinless chicken breasts or thighs
- 2 tablespoons olive oil
- 1 large onion, chopped
- 3 cloves garlic, minced
- 3 carrots, sliced
- 3 celery stalks, sliced
- 1 zucchini, sliced
- 1 red bell pepper, chopped
- 6 cups chicken broth
- 1 cup green beans, trimmed and halved
- 1 teaspoon dried thyme
- 1 teaspoon dried basil
- Salt and pepper to taste
- 1 cup fresh spinach
- 2 tablespoons fresh parsley, chopped
Cooking Instructions:
- Prepare the Chicken: Start by cutting the boneless, skinless chicken into bite-sized pieces. Season the chicken pieces with salt and pepper to taste.
- Cook the Chicken: In a large pot or Dutch oven, heat the olive oil over medium-high heat. Add the chicken pieces and cook until they’re browned on all sides, about 5-7 minutes. Remove the chicken from the pot and set it aside.
- Sauté the Aromatics: In the same pot, add the chopped onion and minced garlic. Sauté until the onion becomes translucent and the garlic is fragrant, about 2-3 minutes.
- Add Vegetables: Add the sliced carrots, celery, zucchini, and red bell pepper to the pot. Cook for 4-5 minutes, stirring occasionally, until the vegetables start to soften.
- Combine Ingredients: Return the browned chicken to the pot and pour in the chicken broth. Add the green beans, dried thyme, and dried basil. Stir well to combine all ingredients.
- Simmer the Soup: Bring the soup to a boil, then reduce the heat to low and let it simmer for 20-25 minutes. This allows the flavors to meld together and guarantees the chicken is cooked through.
- Finish with Spinach and Herbs: In the last 5 minutes of cooking, add the fresh spinach and stir until wilted. Sprinkle in the chopped fresh parsley.
- Season and Serve: Taste the soup and adjust the seasoning with additional salt and pepper if needed. Serve hot and enjoy!
Extra Tips:
For a richer flavor, consider using homemade chicken broth instead of store-bought. You can also add a splash of lemon juice before serving to brighten the flavors.
If you prefer a thicker soup, you can mash some of the vegetables with a fork or blend a portion of the soup before adding the spinach. Feel free to customize this recipe by incorporating other seasonal vegetables or herbs based on your preferences.
Teriyaki Chicken Bowls
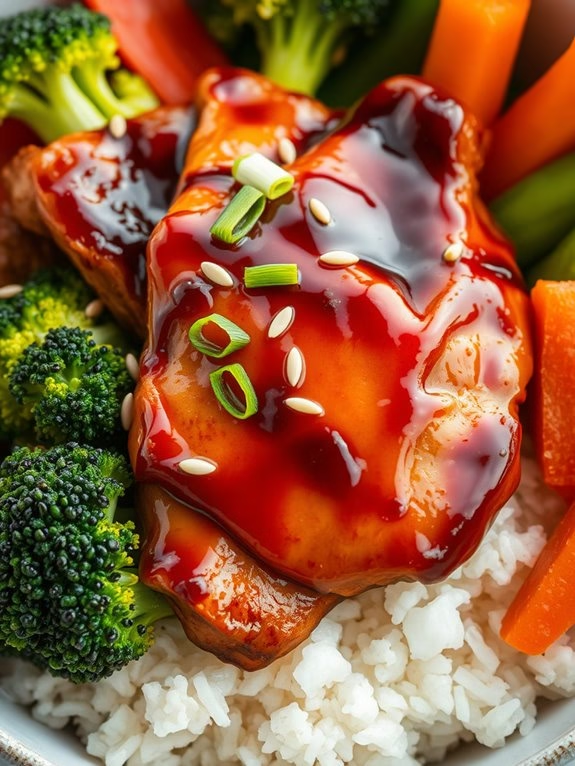
Teriyaki Chicken Bowls are a delightful and nutritious way to enjoy a high-protein meal that’s both satisfying and flavorful. This dish combines tender, juicy chicken with a rich and savory teriyaki sauce, served over a bed of fluffy rice and accompanied by fresh, crisp vegetables.
Whether you’re preparing dinner for the family or meal prepping for the week, these bowls offer a well-rounded meal option that’s sure to please everyone at the table. The key to this dish lies in the balance of flavors and textures, from the umami-rich teriyaki sauce to the crunch of the vegetables, and the softness of the rice.
With a few simple ingredients and some basic cooking techniques, you can create a delicious meal that’s both healthy and comforting. Perfect for 4-6 people, these Teriyaki Chicken Bowls are an easy way to incorporate more protein into your diet while enjoying a restaurant-quality meal at home.
Ingredients (for 4-6 servings):
- 2 pounds boneless, skinless chicken breasts, cut into bite-sized pieces
- 1 cup teriyaki sauce
- 3 tablespoons soy sauce
- 2 tablespoons honey
- 2 tablespoons rice vinegar
- 1 tablespoon cornstarch
- 1 tablespoon vegetable oil
- 4 cups cooked white or brown rice
- 1 cup broccoli florets
- 1 cup sliced bell peppers
- 1 cup sliced carrots
- 3 green onions, sliced
- Sesame seeds, for garnish
Cooking Instructions:
- Prepare the Sauce: In a medium bowl, combine the teriyaki sauce, soy sauce, honey, rice vinegar, and cornstarch. Whisk together until the cornstarch is completely dissolved. This mixture will serve as your marinade and sauce.
- Marinate the Chicken: Place the chicken pieces in a large resealable plastic bag or shallow dish. Pour half of the teriyaki mixture over the chicken, ensuring each piece is well-coated. Seal the bag or cover the dish and marinate in the refrigerator for at least 30 minutes to allow the flavors to infuse.
- Cook the Chicken: Heat the vegetable oil in a large skillet over medium-high heat. Remove the chicken from the marinade (discard the marinade) and add it to the skillet. Cook the chicken for 6-8 minutes, stirring occasionally, until it’s golden brown and cooked through.
- Cook the Vegetables: While the chicken is cooking, steam the broccoli, bell peppers, and carrots until they’re tender-crisp, about 4-5 minutes. You can use a steamer basket or microwave them with a little water in a covered dish.
- Combine and Serve: Once the chicken is cooked, add the remaining teriyaki mixture to the skillet. Bring it to a simmer and let it cook for an additional 2-3 minutes until the sauce thickens. Stir in the steamed vegetables until they’re well-coated with the sauce.
- Assemble the Bowls: Divide the cooked rice among bowls and top with the teriyaki chicken and vegetable mixture. Garnish with sliced green onions and sesame seeds for added flavor and presentation.
Extra Tips:
To enhance the flavor, you can marinate the chicken overnight in the refrigerator. If you prefer a spicier kick, add a dash of sriracha or red pepper flakes to the sauce.
For a lower-carb option, consider serving the chicken and vegetables over cauliflower rice instead of traditional rice. Additionally, feel free to substitute or add more vegetables based on your preference, such as snap peas or zucchini, to make the dish even more colorful and nutritious.
Creamy Tuscan Chicken
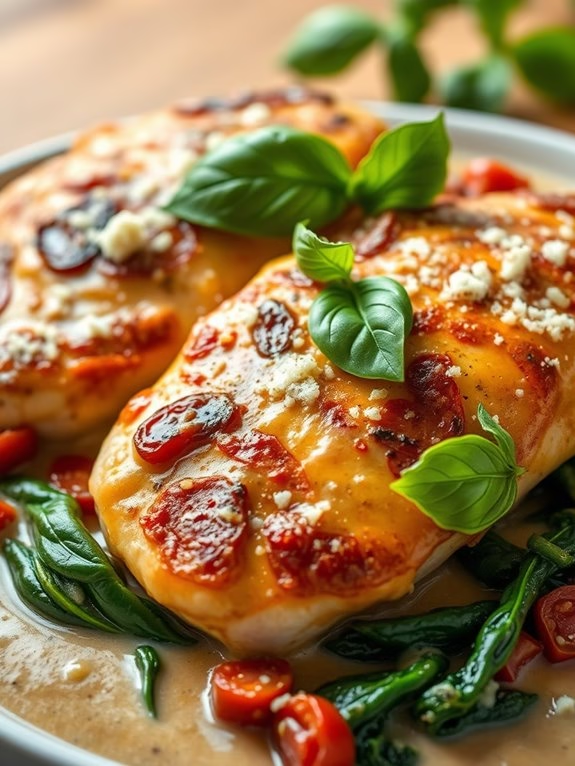
Creamy Tuscan Chicken is a delightful and savory dish that combines tender, juicy chicken breasts with a rich, creamy sauce infused with sun-dried tomatoes, garlic, and spinach. The Tuscan flavors in this dish bring a taste of Italy to your dinner table, making it a perfect choice for a family meal or a special occasion.
The creamy sauce is well-balanced with the tanginess of sun-dried tomatoes and the earthiness of spinach, creating a harmonious blend of flavors that will impress your guests. This high-protein dish isn’t only delicious but also quite simple to prepare.
With a cooking time of under an hour, you can have a restaurant-quality meal ready in no time. The recipe serves 4-6 people, making it ideal for a family dinner or a small gathering. Whether you’re a seasoned cook or a beginner in the kitchen, this recipe is easy to follow and yields impressive results.
Let’s explore the ingredients and instructions for making this delectable dish.
Ingredients (Serves 4-6):
- 4-6 boneless, skinless chicken breasts
- 2 tablespoons olive oil
- Salt and pepper, to taste
- 1 teaspoon Italian seasoning
- 2 tablespoons unsalted butter
- 3 cloves garlic, minced
- 1 cup heavy cream
- 1/2 cup chicken broth
- 3/4 cup grated Parmesan cheese
- 1 cup sun-dried tomatoes, chopped
- 2 cups fresh spinach leaves
- 1 tablespoon fresh basil, chopped
Cooking Instructions:
- Prepare the Chicken: Season the chicken breasts with salt, pepper, and Italian seasoning on both sides. This will enhance the flavor of the chicken and guarantee it’s well-seasoned throughout.
- Cook the Chicken: Heat olive oil in a large skillet over medium-high heat. Add the chicken breasts and cook for about 6-7 minutes on each side until they’re golden brown and cooked through. Remove the chicken from the skillet and set aside.
- Make the Sauce: In the same skillet, melt the butter over medium heat. Add the minced garlic and sauté for about 1 minute until fragrant. Be careful not to burn the garlic, as it can become bitter.
- Add Liquids and Cheese: Pour in the heavy cream and chicken broth, stirring to combine. Bring the mixture to a gentle simmer, then whisk in the Parmesan cheese until the sauce is smooth and creamy.
- Incorporate Vegetables: Stir in the sun-dried tomatoes and fresh spinach leaves. Cook for 2-3 minutes until the spinach is wilted and the tomatoes are heated through.
- Combine with Chicken: Return the chicken breasts to the skillet, nestling them into the creamy sauce. Spoon the sauce over the chicken to coat it fully. Allow the chicken to simmer in the sauce for an additional 5 minutes to absorb the flavors.
- Finish and Serve: Sprinkle the chopped fresh basil over the dish for a burst of fresh flavor. Serve the Creamy Tuscan Chicken hot, paired with pasta, rice, or crusty bread to soak up the delicious sauce.
Extra Tips:
To guarantee the chicken stays juicy, avoid overcooking it. Cooking time may vary depending on the thickness of the chicken breasts, so use a meat thermometer to check that the internal temperature reaches 165°F (74°C).
Feel free to adjust the creaminess of the sauce by adding more or less heavy cream based on your preference. For added flavor, you can also incorporate a splash of white wine when making the sauce. Enjoy your Creamy Tuscan Chicken with a side salad for a complete meal!
BBQ Chicken Pizza
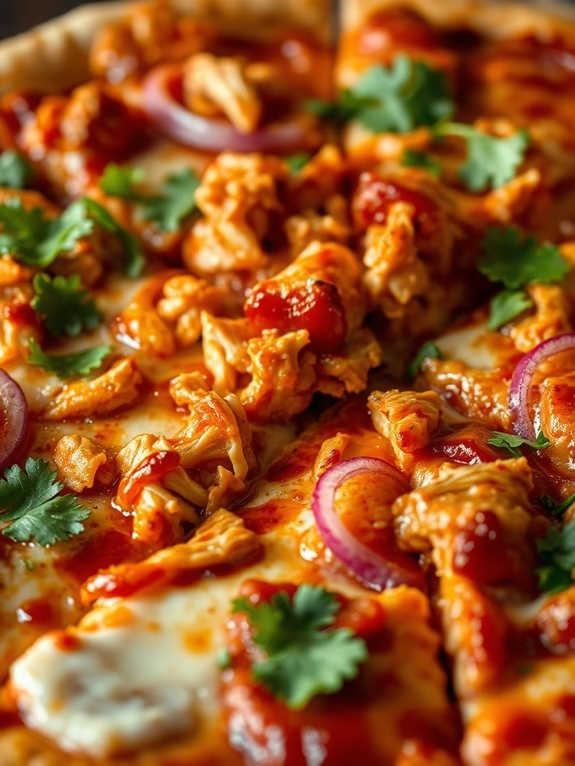
BBQ Chicken Pizza is a delicious and protein-packed dish that combines the smoky, tangy flavors of barbecue sauce with the savory taste of grilled chicken. It’s a perfect meal for family dinners or casual get-togethers, offering a unique twist on traditional pizza. By using a store-bought or homemade pizza crust, you can easily assemble this dish with minimal prep time, making it an ideal choice for those who want a quick yet satisfying meal. The recipe caters to a serving size of 4-6 people, guaranteeing there’s plenty to go around.
Creating BBQ Chicken Pizza isn’t only about the taste but also about the texture and presentation. The juicy grilled chicken, melted mozzarella, and crispy crust make each bite a delightful experience. Topped with red onions and fresh cilantro, this pizza offers a balance of flavors that will please even the pickiest eaters. The combination of ingredients guarantees you get a high-protein meal that’s both nutritious and delicious. This recipe is perfect for those looking to enjoy a healthy yet indulgent meal.
Ingredients (serves 4-6):
- 1 pre-made pizza crust (or homemade)
- 1 cup of barbecue sauce
- 2 cups cooked chicken breast, shredded (grilled or rotisserie)
- 2 cups mozzarella cheese, shredded
- 1 small red onion, thinly sliced
- 1/4 cup fresh cilantro leaves, chopped
- 1 tablespoon olive oil
- Salt and pepper to taste
Cooking Instructions:
- Preheat the Oven: Begin by preheating your oven to 450°F (232°C). If using a pizza stone, place it in the oven to heat as well.
- Prepare the Pizza Crust: If using a store-bought pizza crust, brush the edges with olive oil to guarantee a golden, crispy texture. For homemade crusts, roll it out to your desired thickness on a floured surface.
- Spread Barbecue Sauce: Evenly spread the barbecue sauce over the pizza crust, leaving a small border around the edges for the crust.
- Add Chicken: Distribute the shredded chicken evenly over the barbecue sauce. Make sure it’s spread out so every slice gets a good amount of chicken.
- Layer the Cheese: Sprinkle the mozzarella cheese over the chicken, guaranteeing it covers the entire surface evenly for a consistent melt.
- Top with Onions: Scatter the sliced red onions over the cheese. This will add a sweet and slightly tangy flavor to the pizza.
- Bake the Pizza: Place the prepared pizza in the preheated oven (or directly on the pizza stone if using) and bake for 12-15 minutes, or until the cheese is bubbly and the crust is golden brown.
- Garnish and Serve: Once baked, remove the pizza from the oven and allow it to cool for a few minutes. Garnish with the chopped cilantro before slicing and serving.
Extra Tips:
For an even richer flavor, consider marinating the chicken in barbecue sauce before cooking. If you prefer a spicier kick, add a sprinkle of crushed red pepper flakes to the barbecue sauce. To save time, you can use rotisserie chicken, which is already cooked and seasoned. When slicing the onions, aim for thin rings so they cook more evenly on the pizza. Finally, if you want a crispier crust, prebake the pizza crust for a few minutes before adding the toppings.
Chicken Fajita Wraps
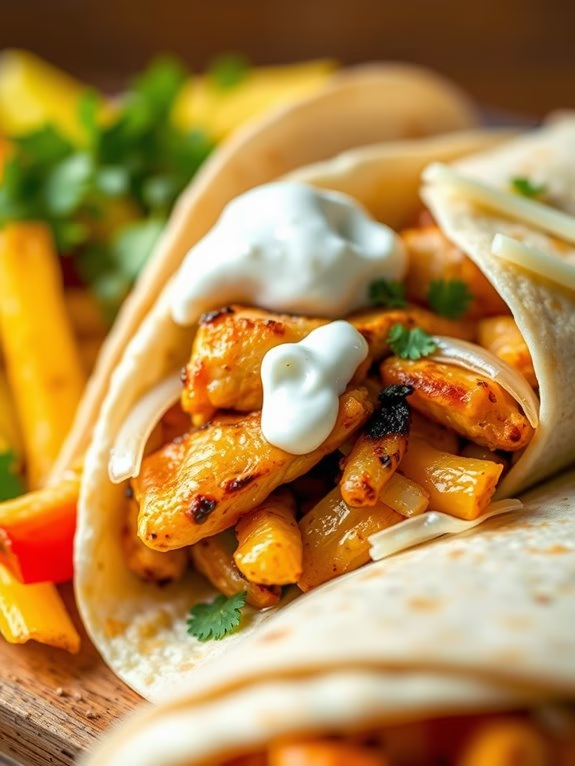
Chicken Fajita Wraps are a delightful high-protein meal that’s perfect for lunch or dinner. These wraps combine succulent strips of chicken with vibrant bell peppers and onions, all seasoned with a blend of classic fajita spices. Wrapped in a soft tortilla, this dish is both satisfying and nutritious, guaranteeing you get a good dose of protein while enjoying a burst of flavors with every bite.
Not only are these wraps delicious, but they’re also quick and easy to prepare, making them an ideal choice for busy weeknights or a casual weekend meal. To elevate the dish further, consider adding your favorite toppings such as sour cream, guacamole, or shredded cheese. These additional toppings can add a creamy texture and enhance the overall flavor profile of the wraps.
Whether you’re cooking for a family or hosting friends, Chicken Fajita Wraps are sure to impress with their simple yet irresistible taste.
Ingredients (Serves 4-6 people):
- 1 1/2 lbs boneless, skinless chicken breasts
- 2 tablespoons olive oil
- 1 red bell pepper
- 1 yellow bell pepper
- 1 green bell pepper
- 1 large onion
- 2 teaspoons chili powder
- 1 teaspoon cumin
- 1 teaspoon garlic powder
- 1/2 teaspoon paprika
- 1/2 teaspoon salt
- 1/4 teaspoon black pepper
- Juice of 1 lime
- 8-10 flour tortillas
- Optional toppings: sour cream, guacamole, shredded cheese, chopped cilantro
Instructions:
- Prepare the Ingredients: Start by slicing the chicken breasts into thin strips. Next, slice the bell peppers and onion into thin strips as well.
- Season the Chicken: In a large bowl, combine the sliced chicken with chili powder, cumin, garlic powder, paprika, salt, and black pepper. Add the juice of one lime and mix well to guarantee the chicken is evenly coated with the spices.
- Cook the Chicken: Heat 1 tablespoon of olive oil in a large skillet over medium-high heat. Add the chicken strips and cook for about 5-7 minutes, or until the chicken is fully cooked and slightly browned. Remove the chicken from the skillet and set it aside.
- Cook the Vegetables: In the same skillet, add another tablespoon of olive oil. Add the sliced bell peppers and onion to the skillet. Cook for about 5 minutes, stirring occasionally, until the vegetables are tender and slightly charred.
- Combine Chicken and Vegetables: Return the chicken to the skillet with the cooked vegetables. Stir well to combine and allow the flavors to meld together for 2-3 minutes.
- Assemble the Wraps: Warm the flour tortillas in a dry skillet or microwave. Place a generous amount of the chicken and vegetable mixture onto each tortilla. Add any optional toppings like sour cream, guacamole, shredded cheese, or chopped cilantro.
- Serve: Fold the tortillas around the filling to create wraps and serve immediately while warm.
Extra Tips:
When making Chicken Fajita Wraps, guarantee that the chicken and vegetables are cut into uniform strips for even cooking. If you prefer a spicier version, consider adding a pinch of cayenne pepper or a few jalapeño slices to the spice mix.
Additionally, to save time, you can prepare the chicken and vegetable mixture ahead of time and simply reheat it before serving. For an added nutritional boost, opt for whole wheat tortillas or serve the fajita mix over a bed of lettuce for a low-carb option.
Pesto Stuffed Chicken Breast
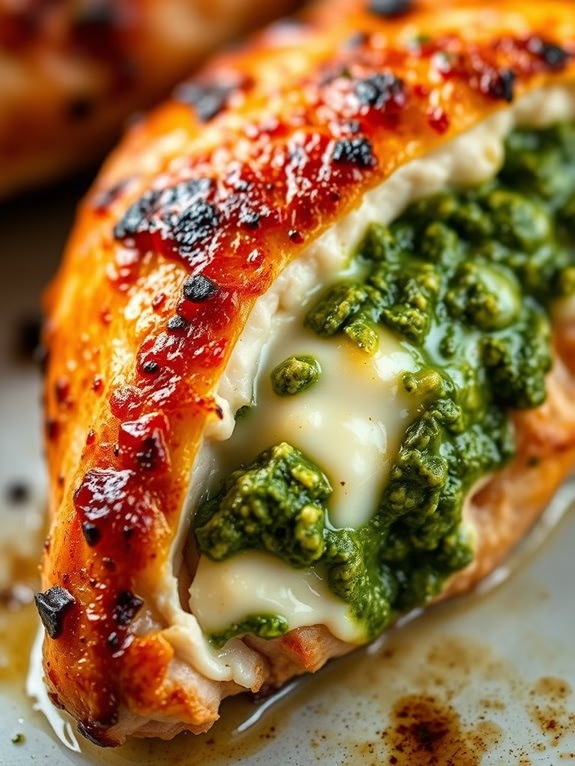
Pesto Stuffed Chicken Breast is a delightful high-protein dish that combines the rich flavors of pesto with the succulent texture of chicken breast. This recipe is perfect for a nutritious family dinner or an elegant meal for entertaining guests.
The aromatic pesto fills the chicken breast with a herby and nutty essence, making each bite a burst of flavor. The dish isn’t only delicious but also easy to prepare, guaranteeing that you can enjoy a gourmet-style meal at home without spending hours in the kitchen.
Ideal for a serving size of 4-6 people, this recipe involves stuffing chicken breasts with a homemade or store-bought pesto sauce, searing them to perfection, and then baking them for a juicy finish. The combination of crispy outer skin with the moist and flavorful filling is sure to impress.
Whether you serve it with a side of vegetables, a fresh salad, or a creamy risotto, Pesto Stuffed Chicken Breast will certainly become a favorite in your culinary repertoire.
Ingredients
- 4-6 boneless, skinless chicken breasts
- 1 cup of pesto sauce (homemade or store-bought)
- 1 cup of mozzarella cheese, shredded
- 2 tablespoons of olive oil
- 1 teaspoon of salt
- 1 teaspoon of black pepper
- 1 teaspoon of garlic powder
- 1 tablespoon of lemon juice
- Kitchen twine (optional)
Cooking Instructions
- Prepare the Chicken Breasts: Preheat your oven to 375°F (190°C). Using a sharp knife, carefully create a pocket in each chicken breast by slicing horizontally from the thicker side, making sure not to cut all the way through.
- Stuff the Chicken: In a small bowl, mix the pesto sauce with the shredded mozzarella cheese. Stuff each chicken breast pocket with the pesto and cheese mixture. If needed, secure the opening with kitchen twine to prevent the filling from spilling out.
- Season the Chicken: Rub each stuffed chicken breast with olive oil. Then, season the outside with salt, black pepper, and garlic powder, guaranteeing an even coating.
- Sear the Chicken: Heat a large oven-safe skillet over medium-high heat. Add a tablespoon of olive oil. Once the oil is hot, place the stuffed chicken breasts in the skillet and sear for about 3-4 minutes on each side, or until golden brown.
- Bake the Chicken: Transfer the skillet to the preheated oven. Bake the chicken for 20-25 minutes, or until the internal temperature reaches 165°F (74°C) and the cheese is melted and bubbly.
- Finish with Lemon Juice: Remove the chicken from the oven and let it rest for 5 minutes. Drizzle with fresh lemon juice before serving to enhance the flavors.
Extra Tips
When preparing the chicken breasts, make sure the pockets are deep enough to hold an adequate amount of filling but not too deep that they cut through the flesh entirely.
If you prefer an extra crispy texture, you can coat the chicken with breadcrumbs before searing. Additionally, allowing the chicken to rest after baking guarantees the juices redistribute throughout the meat, keeping it moist and tender.
If you opt for store-bought pesto, choose a high-quality brand for the best flavor.

