
The aroma of a perfectly roasted chicken fills the kitchen, making it feel like home.
There’s nothing quite like crispy, golden-brown skin to make your mouth water.
Have you ever tried honey garlic drumsticks?
They’re the perfect blend of sweet and savory, with a sticky glaze that’s irresistible.
Or how about lemon herb chicken thighs, where the zesty flavor dances on your palate?
Each recipe in our collection brings something special to the table, and I can’t wait for you to try them all!
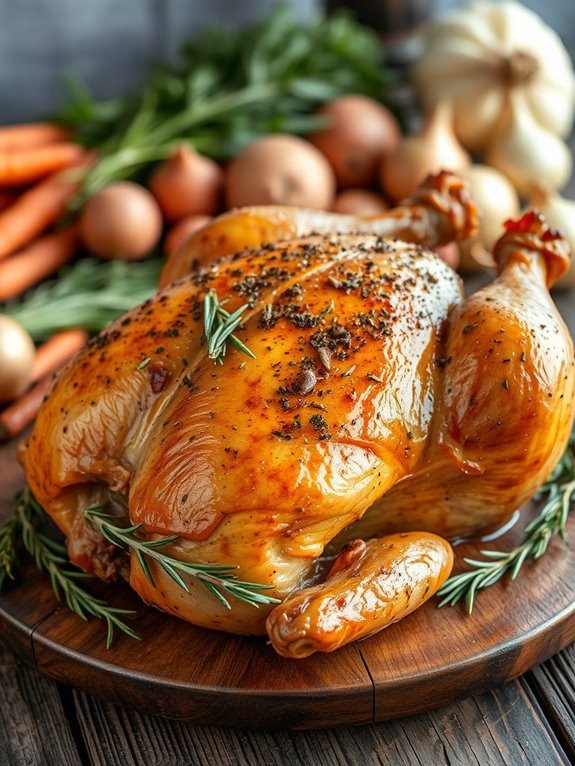
Classic Roast Chicken

Roasting a chicken is a timeless culinary tradition that brings warmth and comfort to any meal. A classic roast chicken is simple yet elegant, with a golden-brown, crispy skin encasing tender, juicy meat. The key to achieving a perfect roast chicken lies in the preparation and cooking technique, which enhances the natural flavors of the poultry while infusing it with aromatic herbs and spices.
Whether served as the centerpiece of a Sunday dinner or as a humble weeknight meal, a classic roast chicken is sure to satisfy.
Preparing a classic roast chicken involves a few straightforward steps that guarantee even cooking and a flavorful result. By first seasoning the chicken inside and out, and then roasting it at the right temperature, you can achieve a beautifully browned exterior and succulent interior.
Adding aromatics such as garlic, lemon, and fresh herbs will elevate the taste, while basting and resting the chicken guarantee it remains moist and tender. Here is a detailed recipe to guide you through the process of making a classic roast chicken that serves 4-6 people.
Ingredients:
- 1 whole chicken (4-5 pounds)
- 2 tablespoons olive oil
- 1 lemon, halved
- 4 garlic cloves, crushed
- 1 bunch fresh thyme
- 1 bunch fresh rosemary
- Salt and freshly ground black pepper
- 1 onion, quartered
- 2 carrots, chopped
- 2 celery stalks, chopped
Cooking Instructions:
- Preheat the Oven: Begin by preheating your oven to 425°F (220°C). A hot oven is essential for achieving a crispy skin.
- Prepare the Chicken: Remove any giblets from the chicken cavity and pat the chicken dry with paper towels. This helps the skin crisp up during roasting.
- Season the Chicken: Rub the entire chicken with olive oil, then season generously with salt and pepper both inside the cavity and on the skin.
- Add Aromatics: Stuff the cavity with lemon halves, crushed garlic cloves, and a sprig of both thyme and rosemary. These will infuse the chicken with flavor as it roasts.
- Prepare the Vegetables: In a roasting pan, scatter the onion, carrots, and celery to create a bed for the chicken. This will also add flavor to the drippings, which can be used to make gravy.
- Position the Chicken: Place the chicken breast-side up on top of the vegetables in the roasting pan.
- Roast the Chicken: Roast the chicken in the preheated oven for about 1 hour and 15 minutes, or until the juices run clear when the thigh is pierced and a meat thermometer reads 165°F (74°C).
- Baste Occasionally: Every 20 minutes, carefully remove the chicken from the oven and baste it with the pan juices. This helps keep the meat moist and adds flavor.
- Rest the Chicken: Once cooked, remove the chicken from the oven and let it rest for at least 10-15 minutes before carving. This allows the juices to redistribute throughout the meat, making it tender.
Extra Tips:
For an extra layer of flavor, consider adding a bit of butter under the skin before roasting. This can help to create an even more crispy and flavorful skin.
If you prefer a spicier roast, add a pinch of paprika or cayenne pepper to the seasoning mix. It’s also important to verify the chicken is at room temperature before cooking, as this promotes even cooking.
Finally, use the pan drippings to make a delicious gravy or sauce to accompany your roast chicken.
Honey Garlic Drumsticks
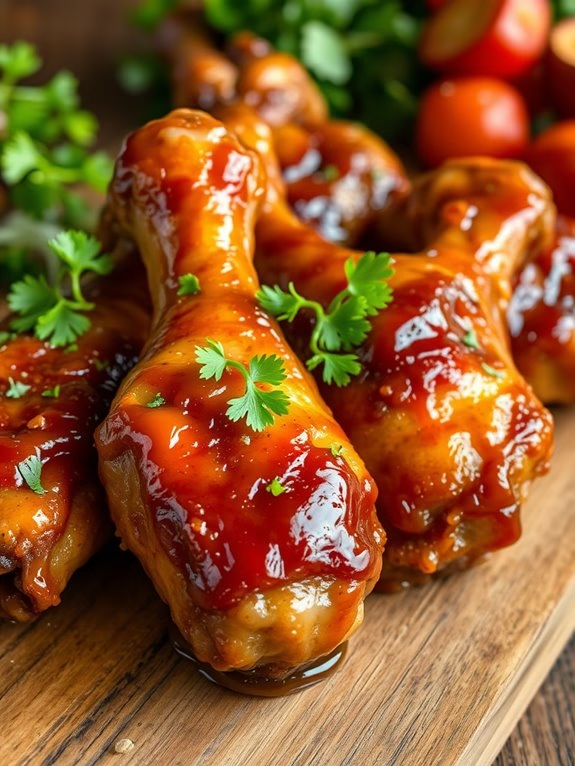
If you’re looking for a delicious and easy-to-make chicken dish that will please the whole family, these Honey Garlic Drumsticks are a fantastic choice. This recipe combines the sweetness of honey with the savory and aromatic flavors of garlic, creating a mouthwatering glaze that perfectly complements the tender chicken drumsticks.
The best part about this dish is that it requires minimal preparation and only a few ingredients, making it an ideal option for a quick weeknight dinner or a casual gathering with friends.
These drumsticks are oven-baked to perfection, resulting in juicy chicken with a slightly crispy skin. The glaze caramelizes beautifully in the oven, giving the drumsticks a lovely golden color and a flavor that will leave everyone asking for seconds. Pair these Honey Garlic Drumsticks with your favorite sides, such as roasted vegetables or a fresh salad, for a complete and satisfying meal for 4-6 people.
Ingredients:
- 12 chicken drumsticks
- 1/2 cup honey
- 1/4 cup soy sauce
- 1/4 cup ketchup
- 4 cloves garlic, minced
- 1 tablespoon vegetable oil
- 1 tablespoon apple cider vinegar
- 1 teaspoon ground black pepper
- 1/2 teaspoon salt
- 1/2 teaspoon paprika
- 1/4 teaspoon red pepper flakes (optional)
- Chopped fresh parsley for garnish (optional)
Instructions:
- Preheat the Oven: Preheat your oven to 400°F (200°C). Line a large baking sheet with aluminum foil or parchment paper for easy cleanup.
- Prepare the Drumsticks: Pat the chicken drumsticks dry with paper towels. This helps the skin to crisp up nicely in the oven. Place the drumsticks in a large bowl and season with salt, pepper, and paprika. Toss to coat evenly.
- Make the Honey Garlic Sauce: In a separate bowl, whisk together the honey, soy sauce, ketchup, minced garlic, vegetable oil, apple cider vinegar, and red pepper flakes if using. Mix until well combined.
- Marinate the Drumsticks: Pour the honey garlic sauce over the drumsticks and toss to guarantee each piece is well coated. Let the drumsticks marinate for at least 10-15 minutes to allow the flavors to penetrate the meat. If you have more time, marinating for 1-2 hours in the refrigerator is ideal.
- Arrange Drumsticks on the Baking Sheet: Place the marinated drumsticks in a single layer on the prepared baking sheet. Pour any remaining marinade over the top.
- Bake the Drumsticks: Bake in the preheated oven for 35-40 minutes or until the chicken is cooked through and reaches an internal temperature of 165°F (74°C). Halfway through the cooking time, turn the drumsticks over and baste with the sauce from the baking sheet to enhance the flavor and guarantee even glazing.
- Broil for Added Crispy Skin: If desired, switch the oven to broil for the last 2-3 minutes of cooking to achieve a crispy, caramelized skin. Keep a close eye on the drumsticks during this time to prevent burning.
- Serve and Garnish: Remove the drumsticks from the oven and let them rest for a few minutes. Garnish with chopped fresh parsley before serving for a pop of color and added freshness.
Extra Tips:
For the best results, try to use drumsticks that are similar in size to guarantee even cooking.
If you prefer a less sweet glaze, you can adjust the amount of honey to suit your taste. Additionally, if you like a bit of heat, feel free to increase the amount of red pepper flakes.
To make cleanup even easier, consider using a baking rack on top of the lined baking sheet, which allows excess fat to drip away, leaving the drumsticks deliciously glazed without sticking.
Lemon Herb Chicken Thighs
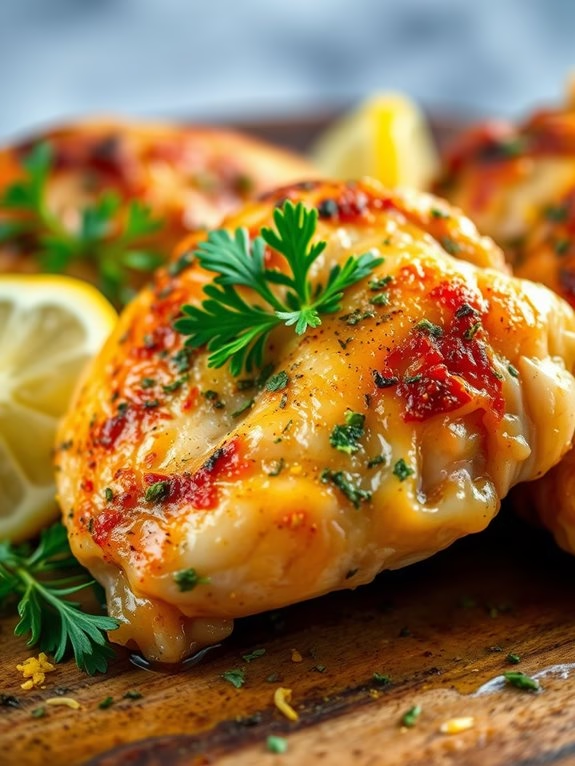
Lemon Herb Chicken Thighs are a delightful and savory dish that combines the juicy tenderness of chicken thighs with the fresh, zesty flavors of lemon and herbs. This recipe is perfect for a family dinner or a small gathering, offering a delicious main course that’s both easy to prepare and full of flavor.
Oven-baking the chicken guarantees that it remains moist while allowing the herbs and lemon to infuse deeply, creating a wonderful aroma and taste that’s sure to impress your guests.
This dish isn’t only packed with flavor but is also nutritious and suitable for various dietary preferences. The use of fresh herbs like rosemary, thyme, and parsley complements the citrusy notes of lemon, making each bite a burst of freshness.
The combination of garlic and olive oil adds a subtle richness, balancing the tanginess of the lemon. This recipe serves 4-6 people, making it ideal for a cozy meal with family or friends.
Ingredients (serves 4-6):
- 8 bone-in, skin-on chicken thighs
- 3 tablespoons olive oil
- 2 lemons (zested and juiced)
- 4 cloves garlic, minced
- 1 tablespoon fresh rosemary, chopped
- 1 tablespoon fresh thyme, chopped
- 1 tablespoon fresh parsley, chopped
- Salt and pepper to taste
- Lemon wedges and extra parsley for garnish (optional)
Cooking Instructions:
- Preheat the Oven: Begin by preheating your oven to 400°F (200°C). This guarantees that the oven reaches the right temperature for even cooking.
- Prepare the Marinade: In a large bowl, combine the olive oil, lemon zest, lemon juice, minced garlic, rosemary, thyme, parsley, salt, and pepper. Mix well to create a flavorful marinade.
- Marinate the Chicken: Add the chicken thighs to the bowl, guaranteeing each piece is fully coated with the marinade. Cover the bowl with plastic wrap and let the chicken marinate in the refrigerator for at least 30 minutes, or up to 2 hours for more intense flavor.
- Prepare the Baking Dish: Lightly grease a baking dish with olive oil. Arrange the marinated chicken thighs in the dish, skin side up, in a single layer.
- Bake the Chicken: Place the baking dish in the preheated oven. Bake for 35-40 minutes, or until the chicken is golden brown and the internal temperature reaches 165°F (74°C).
- Broil for Crispiness (Optional): For extra crispy skin, switch the oven to broil for the last 2-3 minutes of cooking. Keep a close eye to prevent burning.
- Serve: Remove the chicken from the oven and let it rest for a few minutes. Garnish with lemon wedges and extra parsley if desired before serving.
Extra Tips:
For the best results, try to use fresh herbs, as they deliver a more vibrant flavor than dried ones. If fresh herbs are unavailable, substitute with dried herbs but reduce the amount by half.
When marinating the chicken, guarantee that the skin is thoroughly covered with the marinade to enhance the flavor and crispness. Using a meat thermometer is recommended to guarantee the chicken is cooked through without drying it out.
Additionally, consider serving Lemon Herb Chicken Thighs with roasted vegetables or a fresh green salad to complement the dish.
Spicy Baked Wings

Spicy Baked Wings are a delicious and fiery twist on traditional chicken wings, perfect for those who love a bit of heat in their meals. These wings are marinated in a blend of spices and baked to perfection, creating a crispy, flavorful dish that’s sure to be a hit at any gathering.
Whether you’re hosting a game day party or simply craving something spicy, these wings are an easy and satisfying choice that can be prepared with minimal fuss.
The key to these Spicy Baked Wings is in the marinade, which includes a variety of spices that add layers of flavor and heat. Baking the wings instead of frying them results in less mess and a healthier option, without sacrificing the crunch and taste that make wings so irresistible.
With just the right balance of spice and crispiness, these wings are both mouthwatering and addictive.
Ingredients for 4-6 servings:
- 2 pounds chicken wings
- 2 tablespoons olive oil
- 1 tablespoon paprika
- 2 teaspoons garlic powder
- 2 teaspoons onion powder
- 1 teaspoon cayenne pepper
- 1 teaspoon black pepper
- 1 teaspoon salt
- 1 tablespoon hot sauce (optional)
- 1 tablespoon honey (optional)
- Fresh parsley, chopped (for garnish)
Cooking Instructions:
- Preheat the Oven: Begin by preheating your oven to 400°F (200°C). This will guarantee your wings cook evenly and become crispy.
- Prepare the Wings: Rinse the chicken wings under cold water and pat them dry with paper towels. This step is essential for achieving a crispy texture.
- Mix the Marinade: In a large bowl, combine the olive oil, paprika, garlic powder, onion powder, cayenne pepper, black pepper, and salt. If you desire extra heat, add the hot sauce. For a hint of sweetness, include the honey.
- Coat the Wings: Add the wings to the bowl with the marinade. Toss them until they’re well-coated with the spice mixture. Allow them to marinate for at least 30 minutes in the refrigerator for maximum flavor.
- Bake the Wings: Arrange the wings in a single layer on a baking sheet lined with foil or parchment paper. Bake in the preheated oven for 40-45 minutes, flipping them halfway through to guarantee even cooking.
- Check for Doneness: The wings are done when they’re golden brown and crispy, and the internal temperature reaches 165°F (74°C).
- Garnish and Serve: Remove the wings from the oven and transfer to a serving platter. Garnish with freshly chopped parsley for a pop of color and added flavor.
Extra Tips:
For the best results, make sure to pat the wings dry thoroughly before marinating. This helps the spices adhere better and results in a crispier finish.
Adjust the level of spice to suit your taste by varying the amount of cayenne and hot sauce. If you prefer a sweeter flavor, increase the honey in the marinade.
For an extra crispy texture, consider baking the wings on a wire rack placed over the baking sheet, which allows air to circulate around them as they cook.
Parmesan Crusted Breasts
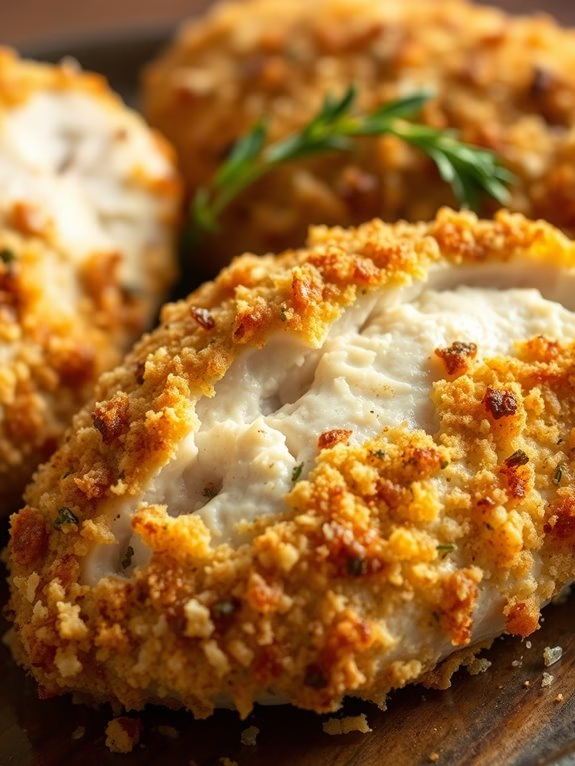
Parmesan Crusted Chicken Breasts are a delightful dish that combines the savory flavor of Parmesan cheese with the tender juiciness of chicken. This recipe is perfect for a family dinner or a small gathering, offering a satisfying crunch with every bite.
The key to this dish is creating a flavorful crust using a blend of Parmesan cheese, breadcrumbs, and herbs that adhere beautifully to the chicken, guaranteeing a crispy exterior while keeping the meat inside moist and tender. Baking the chicken in the oven allows for even cooking and adds a golden-brown color to the crust that’s as pleasing to the eye as it’s to the palate.
This recipe isn’t only delicious but also straightforward to prepare, making it an excellent choice for both novice and experienced cooks. By following a few simple steps, you can create a dish that’s both impressive and comforting.
With a preparation time of around 15 minutes and a cooking time of 25-30 minutes, Parmesan Crusted Chicken Breasts are perfect for a quick yet elegant meal. The following recipe is designed to serve 4-6 people.
Ingredients (Serves 4-6 people):
- 4-6 boneless, skinless chicken breasts
- 1 cup grated Parmesan cheese
- 1 cup breadcrumbs (preferably Panko for extra crunch)
- 2 teaspoons dried Italian herbs (such as oregano or basil)
- 1 teaspoon garlic powder
- 1/2 teaspoon salt
- 1/4 teaspoon black pepper
- 2 large eggs
- 1/4 cup all-purpose flour
- Olive oil spray or 2 tablespoons olive oil
Cooking Instructions:
- Preheat the Oven: Preheat your oven to 400°F (200°C). Line a baking sheet with parchment paper or lightly grease it with olive oil to prevent sticking.
- Prepare the Coating: In a shallow dish, combine the Parmesan cheese, breadcrumbs, dried Italian herbs, garlic powder, salt, and black pepper. Mix well to guarantee an even distribution of seasoning.
- Set Up Dipping Station: In another shallow dish, beat the eggs until smooth. Place the flour in a third shallow dish. This will create a three-step dipping station for coating the chicken.
- Coat the Chicken: Take each chicken breast and first dredge it lightly in flour, shaking off the excess. Dip it into the beaten eggs, guaranteeing it’s fully coated. Finally, press it into the Parmesan breadcrumb mixture, patting it down to guarantee an even crust.
- Arrange on Baking Sheet: Place the coated chicken breasts on the prepared baking sheet, ensuring they aren’t touching. If you prefer a crispier crust, lightly spray the tops of the chicken with olive oil or drizzle a small amount over each piece.
- Bake: Bake the chicken in the preheated oven for 25-30 minutes, or until the crust is golden brown and the chicken is cooked through. You can check doneness by ensuring the internal temperature reaches 165°F (74°C).
- Serve: Once cooked, remove the chicken from the oven and let it rest for a few minutes before serving. This allows the juices to redistribute within the meat, keeping it moist.
Extra Tips:
For an even crispier crust, consider using Panko breadcrumbs, as they provide a lighter and crunchier texture compared to regular breadcrumbs.
If you prefer a richer flavor, you can mix in some grated Romano cheese with the Parmesan. Make sure to season the chicken with a little salt and pepper before coating it for added flavor.
For a zesty twist, add a teaspoon of lemon zest to the breadcrumb mixture. Finally, if you want to prepare this dish in advance, the chicken can be coated and refrigerated for up to 4 hours before baking, making it a convenient option for busy schedules.
BBQ Glazed Chicken
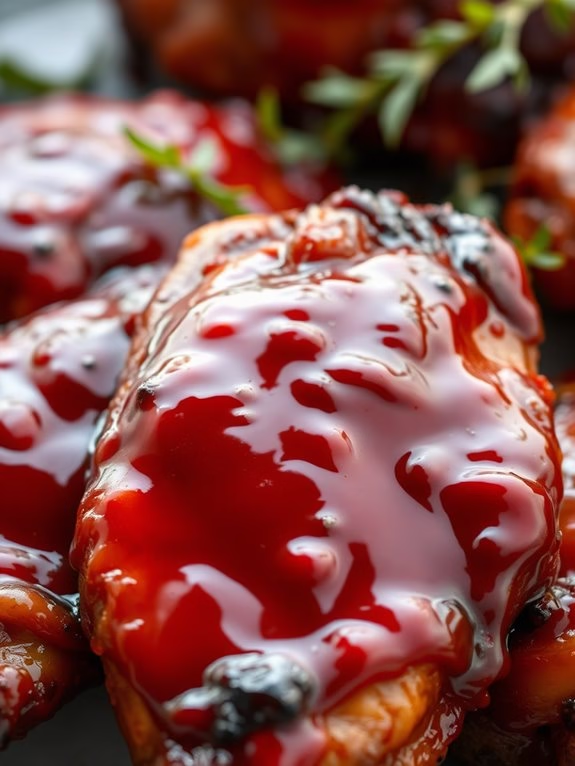
There’s nothing quite like the sweet, tangy, and smoky flavor of BBQ glazed chicken straight from the oven. This dish combines the rich flavors of a homemade BBQ sauce with perfectly baked, juicy chicken. Ideal for family dinners or small gatherings, the BBQ glazed chicken is a crowd-pleaser that’s easy to prepare and cook, making it a great choice for both novice and experienced chefs.
The key to achieving that irresistible flavor lies in the sauce: a well-balanced blend of sweetness, spice, and acidity that complements the natural flavors of the chicken. Cooking BBQ glazed chicken in the oven guarantees that the meat remains tender and juicy while the sauce caramelizes, creating a delicious sticky coating.
This recipe will guide you through creating a mouthwatering BBQ glaze and the perfect cooking method to achieve a succulent dish. Whether you’re a fan of traditional BBQ flavors or looking to try something new, this recipe won’t disappoint. Gather your ingredients, preheat your oven, and get ready to enjoy a delightful meal that will have everyone reaching for seconds.
Ingredients (Serves 4-6):
- 4-6 chicken thighs or drumsticks
- 1 cup ketchup
- 1/3 cup apple cider vinegar
- 1/4 cup brown sugar
- 2 tablespoons Worcestershire sauce
- 1 tablespoon Dijon mustard
- 1 tablespoon smoked paprika
- 1 teaspoon garlic powder
- 1/2 teaspoon onion powder
- 1/2 teaspoon salt
- 1/2 teaspoon ground black pepper
- 1 tablespoon olive oil
Cooking Instructions:
- Preheat the Oven: Preheat your oven to 375°F (190°C) to confirm it’s hot enough for even cooking.
- Prepare the BBQ Sauce: In a medium saucepan, combine the ketchup, apple cider vinegar, brown sugar, Worcestershire sauce, Dijon mustard, smoked paprika, garlic powder, onion powder, salt, and black pepper. Stir the mixture over medium heat until the sugar dissolves and the sauce thickens slightly, about 5-7 minutes. Remove from heat and let it cool slightly.
- Prep the Chicken: While the sauce is cooling, pat the chicken pieces dry with paper towels. This helps the sauce adhere better to the chicken.
- Coat the Chicken: Place the chicken in a large bowl or baking dish. Drizzle olive oil over the chicken, then pour about half of the BBQ sauce over the chicken. Toss to confirm each piece is fully coated with sauce.
- Arrange and Bake: Arrange the chicken pieces in a single layer on a baking sheet lined with parchment paper or in a baking dish. Bake in the preheated oven for 25 minutes.
- Add More Sauce: After 25 minutes, remove the chicken from the oven and brush with additional BBQ sauce. Return the chicken to the oven and bake for another 15-20 minutes, or until the chicken is fully cooked and the internal temperature reaches 165°F (74°C).
- Finish and Serve: Once cooked, remove the chicken from the oven and let it rest for a few minutes. Serve the chicken warm, garnished with any remaining sauce.
Extra Tips:
To enhance the flavors, consider marinating the chicken in half of the BBQ sauce for a few hours or overnight before cooking. This allows the flavors to penetrate the meat more deeply.
If you prefer a spicier kick, add a pinch of cayenne pepper or hot sauce to the BBQ sauce mixture. Additionally, keep an eye on the chicken during the last few minutes of baking to prevent the sugar in the BBQ sauce from burning.
Enjoy your BBQ glazed chicken with classic sides like coleslaw or cornbread for a complete meal.
Mediterranean Chicken Bake
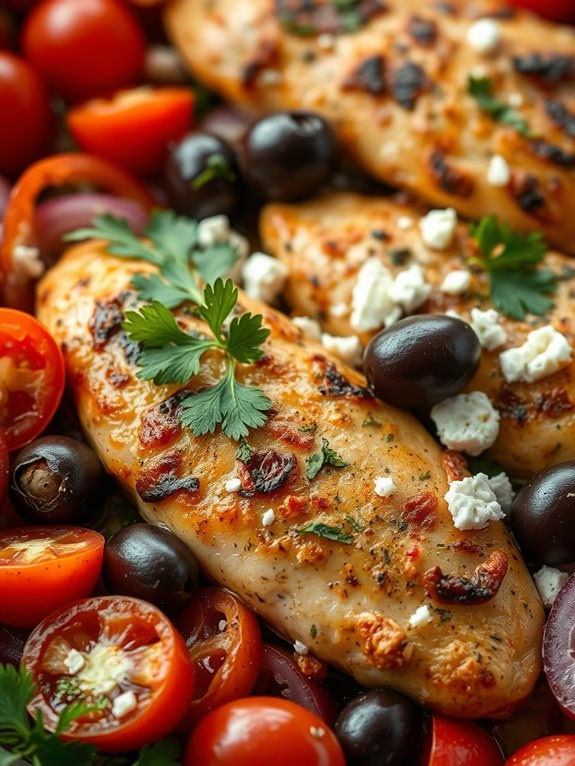
Mediterranean Chicken Bake is a delightful and flavorful dish that combines the rich and vibrant flavors of the Mediterranean region. This dish is perfect for a family dinner or a small gathering, offering a nutritious and delicious meal that’s sure to impress. With tender chicken, aromatic herbs, and a medley of vegetables, this bake isn’t only tasty but also a feast for the senses.
The beauty of the Mediterranean Chicken Bake lies in its simplicity. With minimal preparation and a short time in the oven, you can have a restaurant-quality dish ready in no time. The key to this recipe is using fresh ingredients and allowing the flavors to meld together in the oven, creating a mouthwatering aroma that will fill your kitchen.
Ingredients for 4-6 People:
- 4-6 boneless, skinless chicken breasts
- 2 tablespoons olive oil
- 1 lemon, sliced
- 1 cup cherry tomatoes, halved
- 1 red onion, sliced
- 1 bell pepper, sliced
- 1 cup Kalamata olives, pitted
- 4 cloves garlic, minced
- 1 teaspoon dried oregano
- 1 teaspoon dried thyme
- Salt and pepper to taste
- 1 cup feta cheese, crumbled
- Fresh parsley for garnish
Cooking Instructions:
- Preheat the Oven: Preheat your oven to 375°F (190°C) to guarantee it’s hot and ready for baking.
- Prepare the Chicken: Pat the chicken breasts dry with paper towels. Season both sides with salt, pepper, dried oregano, and dried thyme. This step guarantees that the chicken is flavorful throughout.
- Assemble the Bake: In a large baking dish, arrange the seasoned chicken breasts. Surround the chicken with lemon slices, cherry tomatoes, red onion, bell pepper, and Kalamata olives. Sprinkle the minced garlic evenly over the dish.
- Drizzle with Olive Oil: Drizzle olive oil evenly over the chicken and vegetables. This helps the chicken remain moist and encourages the vegetables to caramelize slightly, enhancing their natural flavors.
- Bake the Dish: Place the baking dish in the preheated oven and bake for 25-30 minutes, or until the chicken is cooked through and the vegetables are tender. The internal temperature of the chicken should reach 165°F (74°C).
- Add the Feta Cheese: Remove the dish from the oven and sprinkle the crumbled feta cheese over the top. Return to the oven for an additional 5 minutes, allowing the cheese to slightly melt and blend with the other ingredients.
- Garnish and Serve: Once done, remove the dish from the oven and let it cool slightly. Garnish with fresh parsley before serving for an added touch of freshness and color.
Extra Tips:
When making Mediterranean Chicken Bake, feel free to experiment with different vegetables like zucchini or eggplant for a more diverse flavor profile.
Always verify the chicken breasts are of similar size to cook evenly. If you prefer a spicier dish, consider adding a pinch of red pepper flakes.
Finally, serve this dish with a side of crusty bread or a light salad to complement the rich flavors of the bake.
Creamy Mushroom Chicken

Creamy Mushroom Chicken is an indulgent and flavorful dish perfect for a cozy dinner with family or friends. The combination of tender chicken, earthy mushrooms, and rich, creamy sauce makes this dish a comforting choice for any occasion.
It’s an oven-baked recipe that not only fills your kitchen with a tantalizing aroma but also requires minimal effort, making it an ideal option for both weeknight dinners and special gatherings.
This dish is designed to serve 4-6 people, guaranteeing everyone gets a generous portion of succulent chicken enveloped in a luscious sauce. The creamy mushroom sauce is made with a blend of fresh mushrooms, garlic, and herbs, all mixed into a velvety cream base that enhances the natural flavors of the chicken.
Whether you’re an experienced home cook or a beginner looking to impress, Creamy Mushroom Chicken is a recipe that promises satisfaction and praise from everyone at the table.
Ingredients:
- 4-6 boneless, skinless chicken breasts
- 2 tablespoons olive oil
- Salt and pepper, to taste
- 1 tablespoon unsalted butter
- 1 medium onion, diced
- 3 cloves garlic, minced
- 8 ounces cremini or button mushrooms, sliced
- 1 tablespoon all-purpose flour
- 1 cup chicken broth
- 1 cup heavy cream
- 1 teaspoon dried thyme
- 1 teaspoon dried parsley
- 1/2 cup grated Parmesan cheese
- Fresh parsley, chopped (optional, for garnish)
Instructions:
- Prepare the Chicken: Preheat your oven to 375°F (190°C). Season the chicken breasts with salt and pepper on both sides. Heat olive oil in a large oven-safe skillet over medium-high heat. Add the chicken breasts and sear for about 3-4 minutes on each side until golden brown. Remove the chicken from the skillet and set aside.
- Cook the Vegetables: In the same skillet, add the butter and let it melt. Add the diced onion and sauté for about 2-3 minutes until it becomes translucent. Stir in the minced garlic and sliced mushrooms, cooking for another 5-6 minutes until the mushrooms are browned and softened.
- Make the Sauce: Sprinkle the flour over the mushroom mixture and stir well to coat. Slowly pour in the chicken broth, stirring continuously to avoid lumps. Add the heavy cream, thyme, and parsley, and bring the mixture to a gentle simmer. Allow it to cook for about 5 minutes until it slightly thickens.
- Combine and Bake: Return the chicken breasts to the skillet, nestling them into the creamy mushroom sauce. Sprinkle the grated Parmesan cheese over the top. Transfer the skillet to the preheated oven and bake for 20-25 minutes, or until the chicken is cooked through and the sauce is bubbling.
- Garnish and Serve: Once cooked, remove the skillet from the oven and let it rest for a few minutes. Garnish with freshly chopped parsley if desired. Serve the Creamy Mushroom Chicken hot, spooning extra sauce over each piece.
Extra Tips:
For best results, ascertain the chicken breasts are of uniform thickness to promote even cooking. If necessary, use a meat mallet to pound them to about 1-inch thickness before seasoning.
You can also experiment with different types of mushrooms, such as shiitake or portobello, to add depth to the dish. If you prefer a thicker sauce, simmer it longer before adding the chicken back to the skillet.
Finally, serve with crusty bread or over a bed of mashed potatoes to soak up the delicious sauce.
Buffalo Chicken Casserole

Buffalo Chicken Casserole is a delightful and hearty dish that combines the spicy and tangy flavors of buffalo chicken with the comforting elements of a casserole. Perfect for a family dinner or a gathering with friends, this dish brings together juicy chicken, creamy cheese, and a hint of heat from hot sauce to create a balanced and satisfying meal.
Its ease of preparation makes it an excellent choice for both seasoned cooks and beginners looking to impress their guests with a flavorful oven-baked dish. This casserole isn’t only flavorful but also versatile, as it can be easily adjusted to suit individual spice preferences.
Whether you enjoy a mild kick or a fiery explosion of flavor, Buffalo Chicken Casserole can be adapted to your taste. Additionally, this dish is a great way to use leftover chicken, ensuring that nothing goes to waste while still delivering a delicious and satisfying meal.
Serve it with a side salad or some crusty bread to round out the meal, and you have a surefire crowd-pleaser.
Ingredients (for 4-6 servings):
- 2 pounds of boneless, skinless chicken breasts
- 2 cups of cooked penne pasta
- 1 cup of buffalo sauce
- 1 cup of ranch dressing
- 2 cups of shredded cheddar cheese
- 1 cup of mozzarella cheese
- 1/2 cup of blue cheese crumbles (optional)
- 1/2 cup of chopped green onions
- 2 tablespoons of olive oil
- Salt and pepper to taste
Cooking Instructions:
- Prepare the Chicken: Preheat your oven to 375°F (190°C). Cut the chicken breasts into bite-sized pieces and season them with salt and pepper. Heat olive oil in a large skillet over medium heat. Add the chicken and cook until golden brown and cooked through, about 7-10 minutes. Remove from heat and set aside.
- Cook the Pasta: While the chicken is cooking, bring a large pot of salted water to a boil. Add the penne pasta and cook according to the package instructions until al dente. Drain and set aside.
- Combine Ingredients: In a large mixing bowl, combine the cooked chicken, buffalo sauce, ranch dressing, cooked pasta, and half of the shredded cheddar cheese. Mix until all ingredients are evenly coated.
- Assemble the Casserole: Lightly grease a 9×13-inch baking dish. Pour the chicken and pasta mixture into the dish, spreading it out evenly. Top with the remaining cheddar cheese and the mozzarella cheese.
- Bake the Casserole: Place the baking dish in the preheated oven and bake for 20-25 minutes, or until the cheese is melted and bubbly.
- Add Finishing Touches: Remove the casserole from the oven. Sprinkle the blue cheese crumbles (if using) and chopped green onions on top for added flavor and garnish.
- Serve: Allow the casserole to cool for a few minutes before serving. Scoop generous portions onto plates and enjoy!
Extra Tips: For a milder version of Buffalo Chicken Casserole, you can reduce the amount of buffalo sauce or use a milder brand. If you prefer a spicier kick, feel free to add a few dashes of hot sauce to the mixture.
For added crunch, consider topping the casserole with crushed tortilla chips or panko breadcrumbs before baking. Additionally, if you have leftover vegetables such as broccoli or bell peppers, feel free to add them to the mixture for extra nutrition and texture.
Garlic Butter Chicken
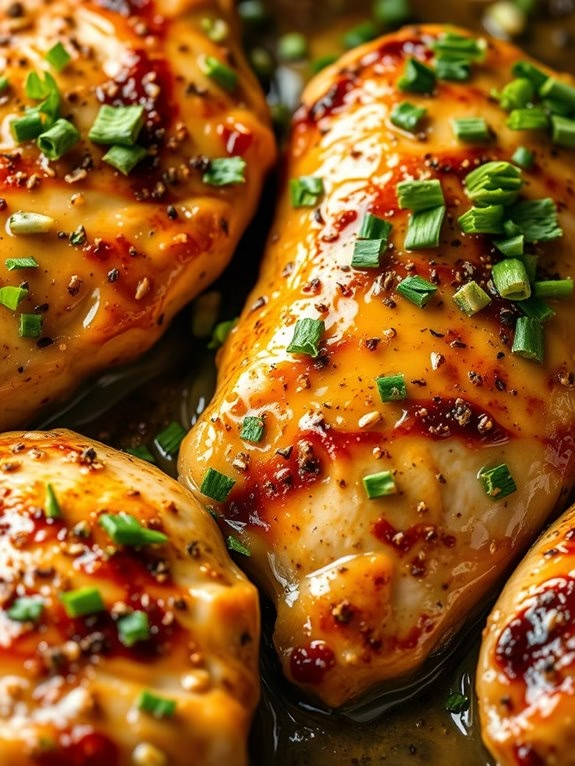
Garlic Butter Chicken is a flavorful and comforting dish that’s perfect for a family dinner. The combination of juicy chicken, aromatic garlic, and rich butter creates a savory experience that’s hard to resist. Baking the chicken in the oven enhances the flavors and guarantees that the chicken is cooked evenly and remains moist. This recipe is straightforward and requires minimal ingredients, making it an ideal choice for both novice cooks and busy individuals looking for a quick yet delicious meal.
The key to this dish is the aromatic garlic butter sauce, which is generously slathered over the chicken before baking. As it cooks, the butter melts and mingles with the juices from the chicken, creating a luscious sauce that can be drizzled over the finished dish. The garlic infuses the chicken with a robust flavor, making each bite a delight. This recipe serves 4-6 people, making it perfect for family gatherings or meal prepping for the week.
Ingredients:
- 4-6 boneless, skinless chicken breasts
- 1/2 cup unsalted butter, melted
- 5 cloves garlic, minced
- 1 tablespoon olive oil
- 1 tablespoon lemon juice
- 1 teaspoon Italian seasoning
- Salt and pepper to taste
- Fresh parsley, chopped (for garnish)
Cooking Instructions:
- Preheat the Oven: Begin by preheating your oven to 400°F (200°C). This temperature will allow the chicken to cook evenly and develop a nice, golden exterior.
- Prepare the Baking Dish: Lightly grease a 9×13 inch baking dish with olive oil. This will prevent the chicken from sticking to the bottom of the dish during cooking.
- Make the Garlic Butter Sauce: In a small bowl, combine the melted butter, minced garlic, lemon juice, Italian seasoning, salt, and pepper. Mix well until all the ingredients are fully incorporated.
- Season the Chicken: Place the chicken breasts in the prepared baking dish. Pour the garlic butter sauce over the chicken, making sure each piece is well coated. Use a spoon to spread the sauce evenly over the top.
- Bake the Chicken: Place the baking dish in the preheated oven and bake for 25-30 minutes, or until the chicken reaches an internal temperature of 165°F (75°C) and is no longer pink in the center.
- Garnish and Serve: Once cooked, remove the chicken from the oven and let it rest for a few minutes. Garnish with freshly chopped parsley before serving. Enjoy the chicken with your favorite sides, such as roasted vegetables or a fresh green salad.
Extra Tips:
For the best results, use chicken breasts of uniform thickness to guarantee even cooking. If your chicken breasts are particularly thick, consider pounding them to an even thickness before cooking.
Additionally, you can marinate the chicken in the garlic butter sauce for a few hours or overnight to intensify the flavors. If you prefer a bit of heat, add a pinch of red pepper flakes to the garlic butter sauce.
Finally, remember to spoon some of the delicious juices from the baking dish over the chicken when serving for an extra burst of flavor.
Teriyaki Chicken Thighs
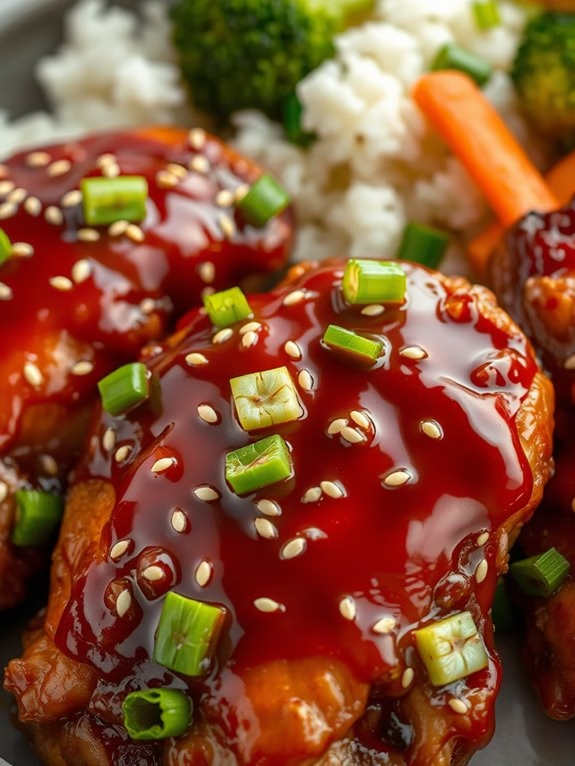
Teriyaki Chicken Thighs are a savory and satisfying dish that brings together the delightful flavors of sweet and tangy teriyaki sauce with tender, juicy chicken. This recipe is perfect for a family dinner or a small gathering, serving 4-6 people. The dish is cooked in the oven, making it a simple yet delicious meal that requires minimal hands-on time. The rich, glossy sauce not only adds depth of flavor but also keeps the chicken moist and succulent throughout the cooking process.
By preparing this dish, you’ll learn how to make a homemade teriyaki sauce that’s far superior to store-bought options. The chicken thighs are marinated in this sauce, allowing the flavors to penetrate deeply, resulting in a more flavorful bite. The oven-baking method guarantees even cooking and a perfect caramelization of the sauce, creating a beautiful, mouth-watering glaze over the chicken.
Ingredients (for 4-6 servings):
- 6-8 chicken thighs (bone-in, skin-on)
- 1/2 cup soy sauce
- 1/2 cup honey
- 1/4 cup rice vinegar
- 1 tablespoon sesame oil
- 3 cloves garlic, minced
- 1 tablespoon fresh ginger, grated
- 1 tablespoon cornstarch
- 1 tablespoon water
- 2 tablespoons sesame seeds
- 2 green onions, sliced
Cooking Instructions:
- Prepare the Marinade: In a medium-sized bowl, whisk together soy sauce, honey, rice vinegar, sesame oil, minced garlic, and grated ginger until well combined. This mixture will serve as both the marinade and the base for your teriyaki sauce.
- Marinate the Chicken: Place the chicken thighs in a large resealable plastic bag or a shallow dish. Pour the prepared marinade over the chicken, making sure each piece is well coated. Seal the bag or cover the dish and refrigerate for at least 1 hour, or overnight for more flavor.
- Preheat the Oven: Preheat your oven to 375°F (190°C). Line a baking dish with aluminum foil or parchment paper for easy cleanup.
- Bake the Chicken: Remove the chicken from the marinade and arrange it in the prepared baking dish, skin side up. Reserve the marinade for later use as a sauce. Bake the chicken in the preheated oven for 35-40 minutes, or until the chicken reaches an internal temperature of 165°F (74°C).
- Prepare the Teriyaki Sauce: While the chicken bakes, pour the reserved marinade into a small saucepan. Bring it to a boil over medium heat. In a small bowl, mix cornstarch with water until smooth. Add this slurry to the boiling marinade, stirring constantly until the sauce thickens.
- Glaze the Chicken: Once the chicken is fully cooked, remove it from the oven and brush it generously with the thickened teriyaki sauce. Sprinkle sesame seeds over the top for extra flavor and texture.
- Serve: Transfer the chicken to a serving platter and garnish with sliced green onions. Serve hot with rice and steamed vegetables for a complete meal.
Extra Tips:
For best results, allow the chicken to marinate overnight; this enhances the flavor and tenderness of the meat. If you prefer a thicker sauce, add a bit more cornstarch to the sauce mixture. Always taste the sauce before serving and adjust the sweetness or saltiness to your liking by adding more honey or soy sauce.
Finally, if you want a crispier skin, broil the chicken for the last 3-5 minutes of baking, keeping a close eye to avoid burning.
Pineapple Chicken Skewers

Pineapple Chicken Skewers are a delightful combination of sweet and savory flavors, perfect for a summer gathering or a delightful family dinner. This dish combines the tangy sweetness of pineapple with the savory goodness of marinated chicken, creating a mouthwatering experience. Cooking these skewers in the oven gives them a juicy tenderness and a slight caramelization that enhances their flavor.
Whether you’re planning a weekend BBQ or just craving something tropical, these skewers will surely transport you to a culinary paradise.
To make the Pineapple Chicken Skewers, you’ll need to marinate the chicken first to allow the flavors to infuse properly. Using fresh pineapple chunks adds an extra layer of freshness and sweetness to the skewers. This recipe is designed to serve 4-6 people, making it ideal for sharing with family and friends. With a balance of protein and fruit, it’s both nutritious and delicious, making it a hit for all ages.
Ingredients for Pineapple Chicken Skewers (serves 4-6):
- 1 1/2 pounds of boneless, skinless chicken breasts
- 2 cups fresh pineapple chunks
- 1 red bell pepper, cut into pieces
- 1 yellow bell pepper, cut into pieces
- 1 red onion, cut into wedges
- 1/4 cup soy sauce
- 1/4 cup pineapple juice
- 2 tablespoons honey
- 2 tablespoons olive oil
- 2 cloves garlic, minced
- 1 teaspoon ginger, grated
- Salt and pepper to taste
- Skewers (metal or wooden)
Cooking Instructions:
- Prepare the Marinade: In a mixing bowl, combine soy sauce, pineapple juice, honey, olive oil, minced garlic, and grated ginger. Mix well until all ingredients are fully incorporated, and season with salt and pepper to taste.
- Marinate the Chicken: Cut the chicken breasts into 1-inch cubes and place them in a sealable plastic bag or a shallow dish. Pour the marinade over the chicken, confirming all pieces are well-coated. Seal the bag or cover the dish, and refrigerate for at least 30 minutes to 2 hours for ideal flavor infusion.
- Preheat the Oven: While the chicken is marinating, preheat your oven to 400°F (200°C). If using wooden skewers, soak them in water for about 30 minutes to prevent burning.
- Assemble the Skewers: Thread the marinated chicken, pineapple chunks, red and yellow bell pepper pieces, and red onion wedges onto the skewers, alternating between ingredients to confirm even distribution of flavors.
- Bake the Skewers: Place the assembled skewers on a baking sheet lined with aluminum foil or parchment paper. Bake in the preheated oven for 20-25 minutes, turning the skewers halfway through to confirm even cooking. The chicken should be fully cooked with an internal temperature of 165°F (75°C), and the vegetables should be tender.
- Serve and Enjoy: Once cooked, remove the skewers from the oven and let them cool slightly before serving. Arrange them on a platter and garnish with fresh herbs if desired.
Extra Tips: For the best flavor, try to marinate the chicken overnight if possible. This will really allow the marinade to penetrate the meat, making it even more tender and flavorful.
If you want a bit more char and caramelization, you can finish the skewers under the broiler for an additional 2-3 minutes. Be sure to keep an eye on them to prevent burning. Additionally, feel free to experiment with other vegetables or fruits like zucchini or mango to add your own twist to this delightful dish.