
Are you looking for quick and scrumptious appetizers that will leave your guests raving?
Chicken breast is such a versatile ingredient, and it’s perfect for whipping up something special in no time!
From Baked Chicken Bruschetta Bites that burst with fresh flavors to Spicy Chicken Satay Skewers that bring the heat, there’s something for everyone.
And don’t forget the Mini Chicken Quesadilla Cups, a total crowd pleaser!
Get ready to impress with these 11 easy chicken breast appetizers that are sure to be a hit at your next gathering!
Baked Chicken Bruschetta Bites

Chicken Breast Appetizers are a crowd favorite at parties, dinners, or any gathering because of their savory taste and convenience. One such appetizer that’s a hit among all age groups is Baked Chicken Bruschetta Bites. This dish combines the succulent flavors of chicken with the freshness of tomatoes and basil, all packed into a bite-sized delight.
The bruschetta topping is a perfect complement to the chicken, adding a tangy and zesty flavor that will keep your guests coming back for more. Baked Chicken Bruschetta Bites aren’t only delicious but also easy to prepare. The recipe involves baking the chicken until it’s just right, topping it with a mixture of ripe tomatoes, basil, and a touch of garlic, and then baking it again until the flavors marry perfectly.
The result is an appetizer that’s as pleasing to the palate as it’s to the eye.
Ingredients:
- 2 large boneless, skinless chicken breasts
- Salt and pepper to taste
- 2 tablespoons olive oil
- 2 cups diced ripe tomatoes
- 1/2 cup finely chopped fresh basil
- 2 cloves garlic, minced
- 1/2 cup shredded mozzarella cheese
- 1/4 cup grated Parmesan cheese
- 1 baguette, sliced into 1/2 inch thick rounds
Cooking Instructions:
- Preheat your oven to 375 degrees Fahrenheit. Season the chicken breasts with salt and pepper on both sides.
- Heat the olive oil in a skillet over medium heat. Add the chicken breasts and cook until they’re golden brown on both sides and cooked through. This should take about 6-8 minutes per side.
- While the chicken is cooking, mix the diced tomatoes, chopped basil, and minced garlic in a bowl. Season with salt and pepper.
- Once the chicken is cooked, remove it from the skillet and let it cool. Once cooled, dice the chicken into bite-sized pieces.
- Arrange the baguette slices on a baking sheet and top each slice with the diced chicken. Spoon the tomato mixture over the chicken, making sure to evenly distribute it.
- Sprinkle the mozzarella and Parmesan cheese over the tomato mixture.
- Bake in the preheated oven for about 10-12 minutes, or until the cheese is melted and bubbly.
When preparing Baked Chicken Bruschetta Bites, make certain the chicken is cooked thoroughly but not overly dry. To achieve this, don’t overcook the chicken in the initial searing process.
Also, use ripe, juicy tomatoes for the bruschetta topping as they add a burst of freshness to the dish. Finally, serve these appetizers warm to guarantee the cheese is gooey and the flavors are at their peak. Enjoy the preparation process and your guests will surely love this delightful appetizer.
Spicy Chicken Satay Skewers
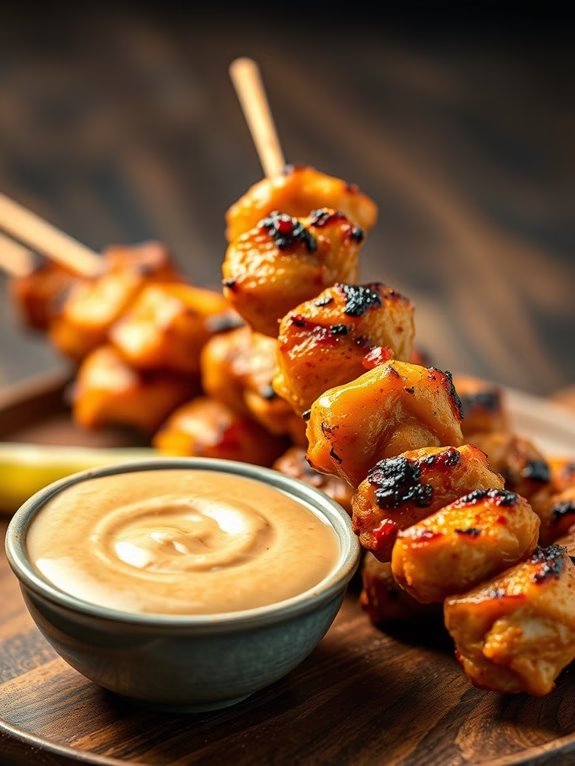
Spicy Chicken Satay Skewers are a popular appetizer that combines the tender texture of chicken with the flavorful punch of spices. This dish hails from Southeast Asia but has gained popularity worldwide due to its inviting aroma and vibrant taste. The skewers are threaded with pieces of chicken breast that have been marinated in a spicy mixture, then grilled to perfection. The result is a bite-sized treat that’s perfect for any gathering, small or large.
What sets the Spicy Chicken Satay Skewers apart is the unique combination of spices used in the marinade. The balance of sweet, spicy, and savory flavors is vital in this dish. The chicken is marinated for several hours, allowing the flavors to fully penetrate and enhance the meat. Once grilled, the skewers are typically served with a flavorful dipping sauce, adding another layer of complexity to this delightful appetizer.
Ingredients:
- 2 pounds of boneless, skinless chicken breasts
- 1/4 cup of soy sauce
- 2 tablespoons of honey
- 2 tablespoons of sesame oil
- 2 tablespoons of lime juice
- 2 cloves of garlic, minced
- 1 tablespoon of grated fresh ginger
- 1 teaspoon of crushed red pepper flakes
- 1/2 teaspoon of ground turmeric
- 1/2 teaspoon of ground coriander
- Salt to taste
- Wooden skewers, soaked in water for 30 minutes prior to grilling
For the Dipping Sauce:
- 1/2 cup of peanut butter
- 2 tablespoons of lime juice
- 2 tablespoons of soy sauce
- 2 tablespoons of honey
- 1/4 cup of warm water
- 1 clove of garlic, minced
- 1 teaspoon of grated fresh ginger
Cooking Instructions:
- Start by cutting the chicken breasts into 1-inch cubes and place them in a large mixing bowl.
- In a separate bowl, combine the soy sauce, honey, sesame oil, lime juice, garlic, ginger, crushed red pepper flakes, turmeric, coriander, and salt. Mix well until all the ingredients are blended.
- Pour the marinade over the chicken pieces and mix well to guarantee that each piece is well coated with the marinade. Cover the bowl and refrigerate for at least 2 hours or overnight for maximum flavor.
- While the chicken is marinating, prepare the dipping sauce by combining the peanut butter, lime juice, soy sauce, honey, warm water, garlic, and ginger in a small bowl. Stir until smooth and set aside.
- After marinating, thread the chicken pieces onto the soaked skewers.
- Preheat your grill to medium-high heat. Grill the skewers for 5-7 minutes on each side or until the chicken is fully cooked and has a nice char.
- Serve the skewers hot with the dipping sauce on the side.
Extra Tips:
When grilling the skewers, make sure to keep an eye on them as they can easily burn due to the honey in the marinade. Also, turning them frequently will help them cook evenly. If you don’t have a grill, you can also cook these skewers in the oven using the broil setting. Finally, if you prefer less heat, you can reduce the amount of crushed red pepper flakes in the marinade. Enjoy your Spicy Chicken Satay Skewers!
Mini Chicken Quesadilla Cups
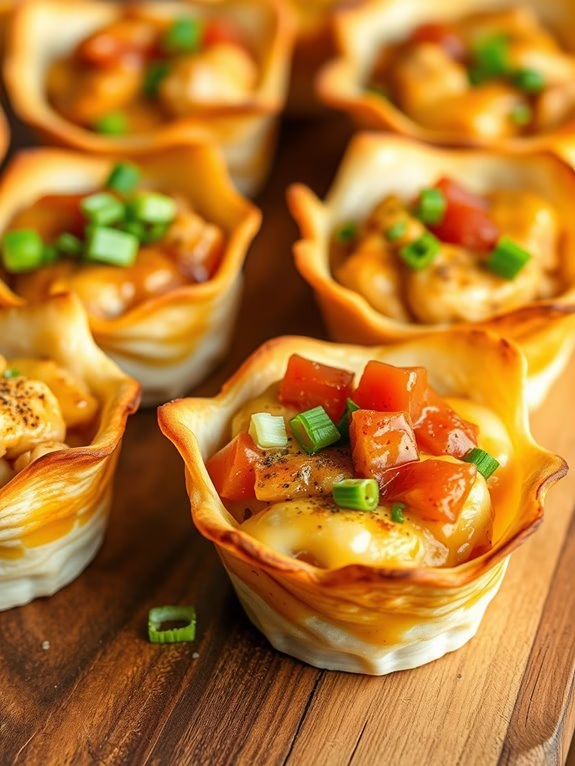
Mini Chicken Quesadilla Cups are a delightful and fun appetizer that will surely be a hit at your next gathering. These bite-sized treats are filled with tender chicken, gooey cheese, and bold Mexican flavors, all wrapped up in a crispy tortilla shell.
Whether you’re hosting a dinner party, a game day gathering, or just a casual get-together with friends, these mini quesadilla cups are sure to impress. Not only are they incredibly delicious, but they’re also easy to eat and serve, making them the perfect finger food.
Each cup is filled with seasoned chicken, melted cheese, and a touch of salsa for a burst of flavor in every bite. The mini tortilla shells are baked to a perfect crisp, adding a satisfying crunch to each mouthful. The best part? They’re incredibly easy to make! With a few simple ingredients and steps, you can whip up these mini chicken quesadilla cups in no time.
Ingredients:
- 2 chicken breasts, cooked and shredded
- 1 cup shredded Mexican cheese blend
- 1/2 cup salsa
- 12 mini flour tortillas
- 1/2 teaspoon salt
- 1/2 teaspoon black pepper
- 1/2 teaspoon chili powder
- 1/2 teaspoon cumin
- 1/4 cup chopped fresh cilantro
- 1/4 cup chopped green onions
Cooking Instructions:
- Preheat your oven to 375 degrees F and grease a mini muffin tin.
- In a bowl, mix together the shredded chicken, salsa, salt, black pepper, chili powder, and cumin until well combined.
- Warm the mini tortillas in the microwave for about 30 seconds. This makes them pliable and easy to fit into the muffin tin.
- Press each tortilla into the greased muffin tin, making sure to press them down to form a cup.
- Fill each tortilla cup with the chicken mixture, then top each with a sprinkle of the shredded cheese.
- Bake the quesadilla cups in the preheated oven for about 12-15 minutes, or until the tortillas are crispy and the cheese is bubbly and slightly golden.
- Remove from the oven and let them cool for a few minutes before garnishing with chopped cilantro and green onions.
When cooking Mini Chicken Quesadilla Cups, it’s important to remember a few tips. First, be sure to warm the tortillas before pressing them into the muffin tin. This will prevent them from cracking or breaking.
Second, don’t overfill the tortilla cups. Too much filling can cause the cups to overflow and make a mess in your oven. Finally, feel free to personalize your quesadilla cups. You can add in different types of cheese, use a different protein, or add in some more veggies for extra crunch and flavor.
These cups are versatile and can be adapted to suit any taste. Enjoy!
Tangy Buffalo Chicken Dip
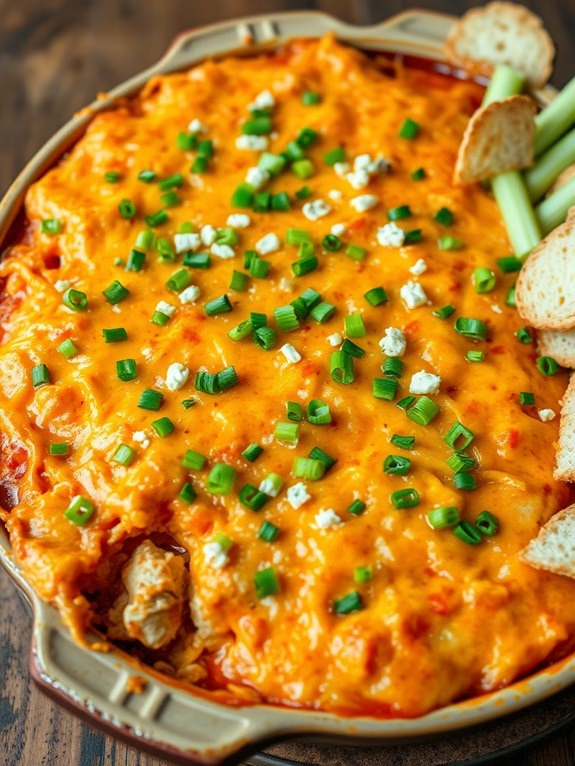
Buffalo chicken dip is a classic appetizer that’s perfect for any event, from game day to potlucks. This tangy and creamy dip is packed full of flavor and is assured to be a hit among your guests. Buffalo chicken dip is easy to make, and with a few simple ingredients, you can create a mouthwatering appetizer that will have your guests asking for the recipe.
This tangy buffalo chicken dip recipe is made with a few basic ingredients that you can easily find in your local grocery store. The beauty of this recipe is its simplicity – you don’t need to be a professional chef to make this delicious dip. The recipe serves 4-6 people, making it perfect for parties or family get-togethers.
Ingredients:
- 2 cups shredded cooked chicken
- 1 (8 oz) package cream cheese, softened
- 1/2 cup buffalo sauce
- 1/2 cup ranch dressing
- 1/2 cup crumbled blue cheese
- 1 cup shredded cheddar cheese
- 2 green onions, chopped
Instructions:
- Preheat your oven to 350 degrees Fahrenheit. This is an important step as it guarantees that the dip is cooked evenly throughout.
- In a large mixing bowl, combine the shredded chicken, softened cream cheese, buffalo sauce, and ranch dressing. Mix all these ingredients together until they’re well combined.
- Once these ingredients are mixed together, fold in the crumbled blue cheese and half of the shredded cheddar cheese. This gives the dip a cheesy and creamy texture.
- Transfer the mixture to a baking dish. Spread the remaining cheddar cheese on top of the mixture.
- Bake the dip in the preheated oven for about 20-25 minutes, or until the cheese is melted and bubbly.
- Once the dip is fully cooked, remove it from the oven and sprinkle the chopped green onions on top. This adds a bit of crunch and color to the dip.
When making this tangy buffalo chicken dip, it’s important to use high-quality ingredients. The flavor of the dip will greatly depend on the quality of the ingredients you use.
Additionally, make sure to adjust the amount of buffalo sauce according to your taste. If you like your dip extra spicy, feel free to add more sauce.
Finally, this dip pairs well with a variety of dippables. Serve it with tortilla chips, celery sticks, or sliced baguette for a satisfying appetizer.
Chicken and Cream Cheese Roll-ups
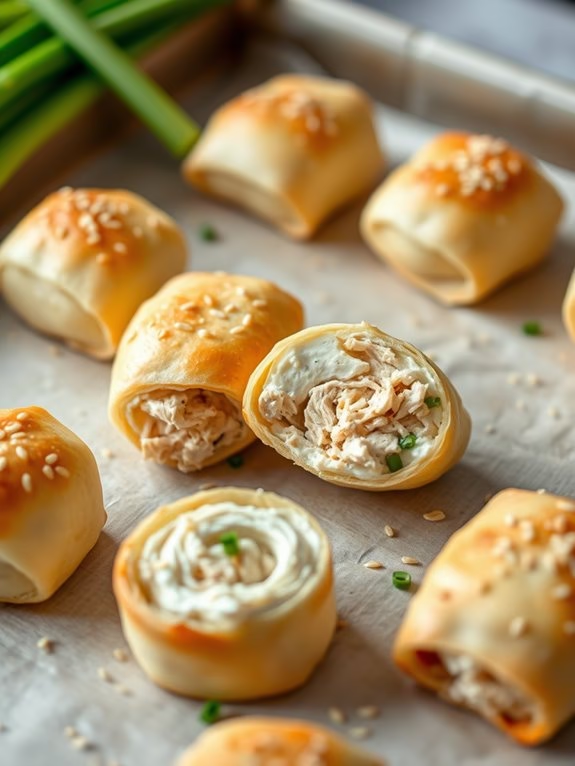
Whip up a batch of these Chicken and Cream Cheese Roll-ups for your next gathering, and watch them disappear in no time! These tasty appetizers combine the succulent flavors of chicken breast and the creamy richness of cream cheese, all wrapped up in a crispy, flaky pastry. The result is a bite-sized treat that’s packed with flavor and sure to impress your guests.
The best part about these appetizers is their simplicity. With just a handful of ingredients and a few easy-to-follow steps, you can have these delicious roll-ups ready in no time. Whether you’re hosting a party or just looking for a quick and delicious snack, these Chicken and Cream Cheese Roll-ups are the perfect solution.
Ingredients:
- 2 large chicken breasts, boneless and skinless
- 1 package of cream cheese (8 ounces)
- 1/4 cup of chopped fresh chives
- Salt and pepper to taste
- 2 sheets of puff pastry, thawed
- 1 egg, beaten
- 2 tablespoons of sesame seeds
Cooking Instructions:
- Preheat your oven to 375°F (190°C) and line a baking sheet with parchment paper.
- Cook the chicken breasts in a skillet over medium heat until they’re no longer pink in the middle. This should take about 15-20 minutes. Once cooked, let the chicken cool and then shred it into small pieces.
- In a bowl, combine the shredded chicken, cream cheese, chives, salt, and pepper. Mix until all the ingredients are well combined.
- Roll out the thawed puff pastry sheets and cut each sheet into 6 equal squares.
- Spoon the chicken and cream cheese mixture onto the center of each square. Fold the pastry over the filling and use a fork to seal the edges.
- Place the roll-ups on the prepared baking sheet. Brush each roll-up with the beaten egg and sprinkle with sesame seeds.
- Bake the roll-ups in the preheated oven for about 20 minutes, or until they’re golden brown and crispy.
- Allow the roll-ups to cool slightly before serving.
Extra Tips:
Remember to seal the edges of the roll-ups tightly to prevent the filling from spilling out during baking. If you want to prepare these appetizers in advance, you can freeze the unbaked roll-ups and then bake them right before serving. Just add a few extra minutes to the baking time.
For a little extra flavor, consider adding some finely chopped garlic or a sprinkle of your favorite herbs to the chicken and cream cheese mixture. Enjoy these delicious and satisfying appetizers!
Savory Chicken Lettuce Wraps
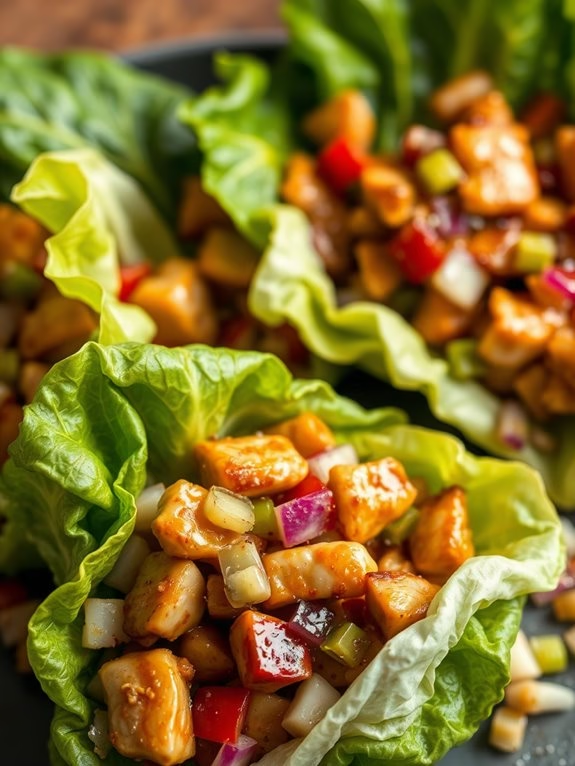
Chicken Breast Appetizers are the perfect solution for any gathering, be it a casual get-together or a formal dinner party. Not only are they easy to prepare, but they also offer a versatile canvas for a wide range of flavors. One such example is the Savory Chicken Lettuce Wraps. These delectable wraps combine the succulent taste of chicken with the invigorating crunch of lettuce, creating a balanced and delightful appetizer that will surely impress your guests.
The Savory Chicken Lettuce Wraps are simple to make and full of flavor. The savory chicken filling, paired with the crisp lettuce, creates a satisfying contrast of textures that’s sure to please any palate. This recipe is a healthy alternative to traditional appetizers and is perfect for serving 4-6 people.
Ingredients:
- 2 boneless, skinless chicken breasts
- 1 tablespoon olive oil
- 1/2 cup diced red onion
- 2 cloves garlic, minced
- 1/4 cup soy sauce
- 2 tablespoons rice vinegar
- 1 tablespoon hoisin sauce
- 1 teaspoon ground ginger
- 1/2 cup chopped water chestnuts
- 1/2 cup chopped green onions
- Salt and pepper to taste
- 1 head iceberg or romaine lettuce
Cooking Instructions:
- Start by chopping the chicken breasts into small pieces.
- Heat the olive oil in a large skillet over medium heat.
- Add the diced red onion and minced garlic to the pan and sauté until they become translucent.
- Add the chopped chicken to the skillet and cook until it’s no longer pink.
- Mix in the soy sauce, rice vinegar, hoisin sauce, and ground ginger, stirring well to combine.
- Stir in the chopped water chestnuts and green onions, and season with salt and pepper.
- Cook the mixture for a few more minutes until everything is well combined and heated through.
- Spoon the chicken mixture onto the lettuce leaves, folding them over to create a wrap.
When preparing the Savory Chicken Lettuce Wraps, it’s crucial to use fresh ingredients. Fresh lettuce and herbs can greatly enhance the flavor of the dish.
Also, remember to adjust the seasoning according to your preference. You may also add some chili flakes or hot sauce if you prefer a spicier variation.
Finally, the chicken mixture can be prepared ahead of time and reheated when needed, making it a convenient option for parties or gatherings.
Sweet BBQ Chicken Meatballs
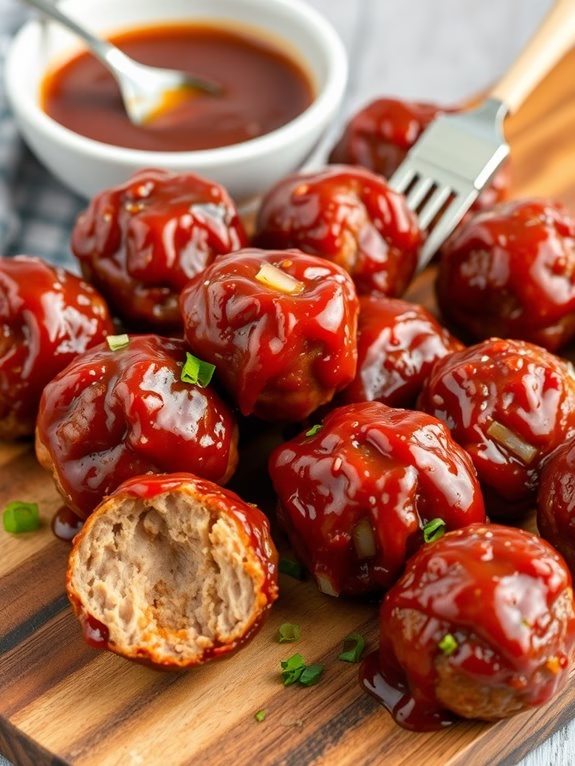
Sweet BBQ Chicken Meatballs are a delicious, bite-sized treat, perfect for any occasion. Whether it’s a family get-together, a game night with friends, or a simple evening snack, these meatballs are bound to be a hit. This dish takes the popular flavors of BBQ chicken and turns it into a succulent appetizer that everyone will love.
It’s a simple recipe with a delightful outcome that will leave your guests asking for more. The delightful combination of sweet and tangy BBQ sauce with tender chicken meatballs creates a symphony of flavors that’s both appetizing and satisfying.
The key to achieving the perfect texture for the chicken meatballs is to grind the chicken breast finely. This not only makes the meatballs tender but also allows them to absorb the BBQ sauce better. Now, let’s get started on making these irresistible Sweet BBQ Chicken Meatballs.
Ingredients:
- 1 lb chicken breast
- 1/2 cup breadcrumbs
- 1/2 cup BBQ sauce
- 1/4 cup finely chopped onions
- 1 large egg
- 1/4 cup milk
- 1/2 teaspoon salt
- 1/2 teaspoon black pepper
- 1 tablespoon olive oil
- 1/2 cup water
- Additional BBQ sauce for glazing
Cooking Instructions:
- Start by grinding the chicken breast in a food processor until it’s finely ground.
- In a large bowl, combine the ground chicken, breadcrumbs, chopped onions, egg, milk, salt, and pepper. Mix the ingredients well until they’re evenly distributed.
- Form the mixture into small, bite-sized meatballs. This recipe should yield about 20-24 meatballs.
- Heat the olive oil in a large pan over medium heat. Add the meatballs and brown them on all sides. This should take about 5-7 minutes.
- Once the meatballs are browned, add the BBQ sauce and water to the pan. Reduce the heat to low, cover the pan, and let it simmer for about 20 minutes. The sauce will thicken and the meatballs will become tender and flavorful.
- After 20 minutes, uncover the pan and increase the heat to medium. Cook for another 5-10 minutes until the sauce thickens into a glaze.
- Remove the meatballs from the pan and allow them to cool slightly. Before serving, brush them with additional BBQ sauce for an extra burst of flavor.
Extra tips: Using a small ice cream scoop can help you get uniform-sized meatballs. Also, remember to keep a close eye on the meatballs while they’re simmering in the sauce. It’s important to stir them occasionally to guarantee they cook evenly and don’t stick to the bottom of the pan.
Enjoy these Sweet BBQ Chicken Meatballs as an appetizer or a snack with your favorite dipping sauce.
Garlic Parmesan Chicken Wings
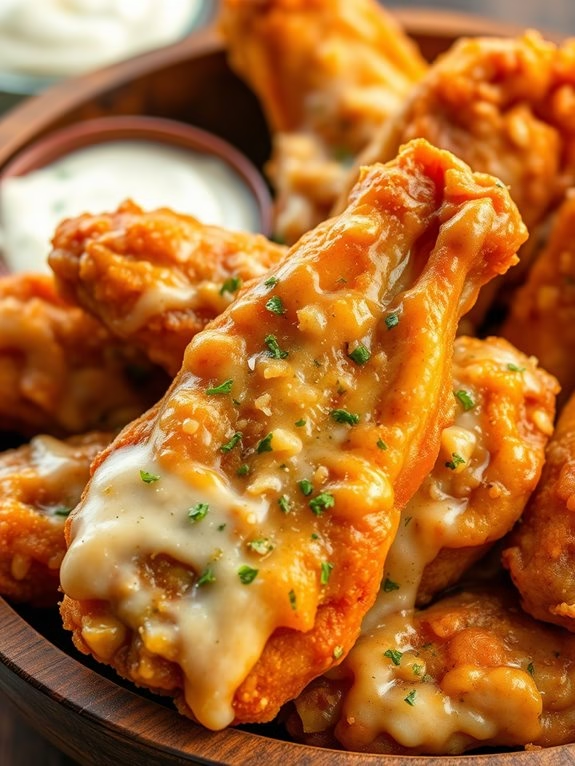
Garlic Parmesan Chicken Wings are a crowd-pleaser at any gathering. This savory appetizer is a delightful blend of crispy fried chicken wings tossed in a garlicky Parmesan cheese sauce. The distinct flavor of garlic paired with the creaminess of Parmesan cheese makes these chicken wings an irresistible snack for every occasion, be it game night, a family get-together, or a casual potluck.
This recipe is easy to make, requires simple ingredients, and is guaranteed to yield delicious results. The chicken wings are first marinated to infuse them with flavors, then fried to a golden brown, and finally tossed in a rich garlic Parmesan sauce. The result is a delightful appetizer that’s crunchy on the outside, juicy on the inside, and packed full of flavors.
Ingredients:
- 2 lbs chicken wings
- 1 cup all-purpose flour
- 1 teaspoon salt
- 1/2 teaspoon black pepper
- 1 cup grated Parmesan cheese
- 4 cloves garlic, minced
- 1/2 cup butter
- 2 tablespoons olive oil
- 1 teaspoon dried parsley
- Oil for frying
Instructions:
- Rinse the chicken wings under cold water and pat dry with a kitchen towel.
- Mix the flour, salt, and black pepper in a large bowl. Add the chicken wings and toss until they’re evenly coated.
- Heat oil in a deep frying pan over medium heat. Once the oil is hot, add the chicken wings and fry until they’re golden brown and crispy. This should take about 10 to 12 minutes.
- While the chicken is frying, prepare the garlic Parmesan sauce. Melt butter in a pan over medium heat. Add the minced garlic and sauté until it’s golden brown.
- After the garlic is cooked, add the grated Parmesan cheese, olive oil, and dried parsley. Stir until the cheese is melted and the sauce is smooth.
- Once the chicken wings are done, remove them from the oil and drain on a paper towel. Toss the fried chicken wings in the garlic Parmesan sauce until they’re well coated.
- Serve the Garlic Parmesan Chicken Wings hot with a side of ranch or blue cheese dressing for dipping.
Extra Tips:
Ensure that the oil is hot enough before frying the chicken wings. This helps achieve a crispy exterior while keeping the inside juicy.
Also, toss the wings in the sauce while they’re still hot, as this helps them absorb the flavors better. You can adjust the amount of garlic and Parmesan to suit your taste. If you like your wings extra cheesy, feel free to add more Parmesan. Enjoy your cooking experience!
Crunchy Chicken Tenders With Dip
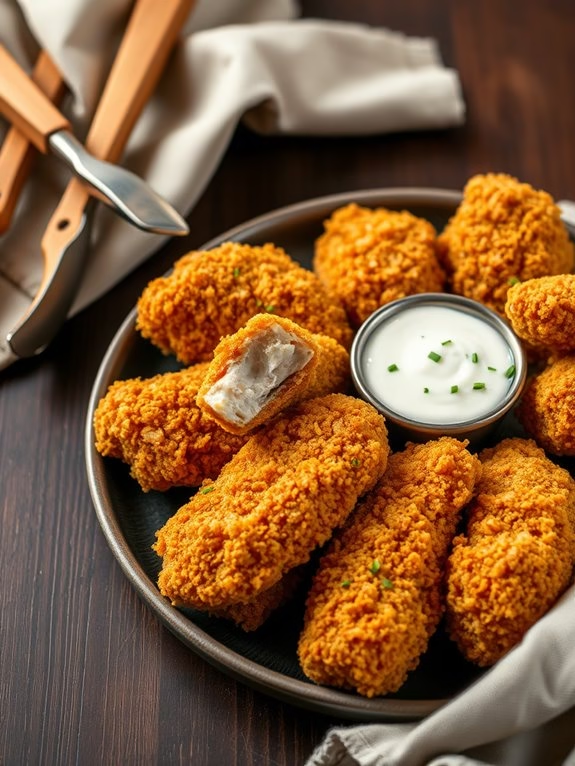
Crunchy chicken tenders with dip are a classic and crowd-pleasing appetizer. They’re perfect for parties, game day, or even a fun family dinner. This recipe delivers tender, juicy chicken encased in a crispy and flavorful coating, served with a simple, homemade dip that’s bound to satisfy. Not only are these chicken tenders delicious, but they’re also quick and easy to make, guaranteeing they’ll become a go-to appetizer in your home.
What sets these chicken tenders apart is the double-dredging technique, which yields an extra-crispy coating. The chicken is first dipped in a flavorful buttermilk mixture, then coated in a seasoned breadcrumb mixture, and fried until golden brown. The result is chicken tenders that are crunchy on the outside, while remaining moist and tender on the inside.
Ingredients:
- 1.5 lbs boneless chicken breasts
- 1 cup buttermilk
- 1 tsp salt
- 1/2 tsp black pepper
- 1 tsp garlic powder
- 2 cups breadcrumbs
- 1/2 cup all-purpose flour
- Oil for frying
- 1 cup sour cream
- 2 tbsp fresh chives, finely chopped
- Salt and pepper to taste
Cooking Instructions:
- Begin by cutting the chicken breasts into thin strips, about 1 inch wide.
- In a large bowl, combine the buttermilk, salt, pepper, and garlic powder. Add the chicken strips and let them marinate for at least 30 minutes.
- In another bowl, mix together the breadcrumbs and flour.
- Take a chicken strip from the buttermilk mixture, allowing excess to drip off, and then dredge it in the breadcrumb mixture, pressing lightly to verify it adheres. Repeat this process for a second coating.
- In a large skillet, heat the oil over medium-high heat. Once the oil is hot, add the chicken tenders in batches, making sure not to overcrowd the pan.
- Cook the chicken tenders for about 4-5 minutes on each side, until they’re golden brown and cooked through. Remove them from the skillet and place on a paper towel-lined plate to drain excess oil.
- While the chicken tenders are cooking, prepare the dip by mixing together the sour cream and chives in a small bowl. Season with salt and pepper to taste.
- Serve the chicken tenders warm with the dip on the side.
Extra Tips:
When frying the chicken tenders, it’s vital to maintain the right oil temperature. If the oil is too hot, the tenders can burn on the outside before they’re cooked on the inside. Conversely, if the oil isn’t hot enough, they can become greasy.
Use a thermometer to monitor the oil temperature, aiming for about 350 degrees Fahrenheit. If you don’t have a thermometer, test the oil with a small piece of bread – it should sizzle and brown in about 30 seconds.
Also, remember to let the chicken tenders rest for a few minutes after frying. This allows the juices to redistribute, guaranteeing a tender and juicy bite every time.
Bite-Sized Chicken Caesar Salad Cups
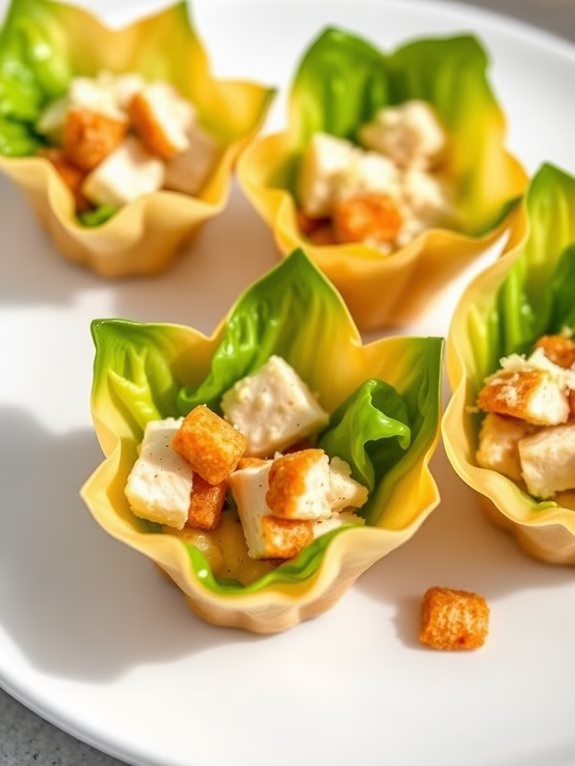
Bite-Sized Chicken Caesar Salad Cups are an impressive appetizer that’s perfect for any occasion. Whether you’re hosting a dinner party, a family gathering, or just a casual get-together, these delightful cups will surely impress your guests.
They’re a fun and creative way to enjoy a classic Caesar salad. The chicken is seasoned to perfection, and the crisp, fresh lettuce, combined with the creamy Caesar dressing, is simply irresistible.
Wrapped in a crunchy wonton cup, these bite-sized treats are easy to handle and even easier to enjoy. The wonton cups add an interesting texture to the usual Caesar salad. The beauty of this recipe lies in its simplicity and versatility. You can prepare the chicken and dressing ahead of time, and assemble the cups just before your guests arrive.
Ingredients:
- 2 boneless chicken breasts
- 1 tablespoon olive oil
- Salt and pepper to taste
- 1 head of romaine lettuce
- 12 wonton wrappers
- 1 cup Caesar dressing
- 1/2 cup Parmesan cheese
- 1 lemon
- 1 cup croutons
Cooking Instructions:
- Preheat your oven to 375 degrees Fahrenheit. Brush each wonton wrapper with olive oil and press into a muffin tin to create a cup shape.
- Bake the wonton wrappers for about 10-12 minutes, or until they’re golden and crispy. Allow them to cool completely.
- Season the chicken breasts with salt, pepper, and a squeeze of lemon juice. Cook the chicken in a pan with a tablespoon of olive oil over medium heat, until it’s fully cooked and no longer pink in the middle. This should take about 6-8 minutes on each side, depending on the thickness of the chicken breasts.
- Allow the chicken to cool, then chop it into bite-sized pieces.
- Chop the romaine lettuce into small, bite-sized pieces and toss it in a large bowl with the Caesar dressing.
- Once your wonton cups are cool, fill each one with a handful of dressed lettuce, a few pieces of chicken, a sprinkle of Parmesan cheese, and a few croutons.
- Serve immediately and enjoy!
Easy Chicken and Cheese Empanadas
Chicken and Cheese Empanadas are a delightful savory appetizer that’s sure to be a hit at your next gathering. Not only are they packed full of flavor, but they’re also easy to make and can be prepared in advance, making them perfect for parties, potlucks, or even as a light meal. The combination of tender chicken breast, aromatic spices, and melted cheese all wrapped up in a crispy golden pastry is irresistible.
The empanada, originally from Spain, has become a favorite snack worldwide, with each region adding its unique twist. This version features a simple yet delicious filling of chicken and cheese, which is both kid-friendly and appealing to adults. The preparation involves a bit of chopping and sautéing, and the assembling is a fun activity that even kids can help with.
Ingredients:
- 2 boneless, skinless chicken breasts
- 1 large onion, finely chopped
- 2 cloves garlic, minced
- 1 teaspoon cumin
- 1 teaspoon paprika
- Salt and pepper to taste
- 2 cups shredded cheddar cheese
- 1 package of ready-made empanada dough (about 12 discs)
- 1 egg, beaten
- Vegetable oil for frying
Cooking Instructions:
- Start by cooking the chicken breasts. Boil them in a pot of water until fully cooked, about 20 minutes. Once cooled, shred them into small pieces.
- While the chicken is cooking, heat a tablespoon of oil in a skillet over medium heat. Add the chopped onions and minced garlic, sauté until the onions become translucent.
- Add the shredded chicken to the skillet and season with cumin, paprika, salt, and pepper. Stir well to combine and cook for a few more minutes until all the flavors blend together.
- Remove the skillet from the heat and stir in the shredded cheddar cheese until it melts into the mixture.
- Preheat the oil for frying. While it’s heating, start assembling the empanadas. Place a spoonful of the chicken and cheese mixture in the center of each dough disc. Fold the dough over to form a half-moon shape, then seal the edges by crimping with a fork.
- Fry the empanadas in batches until they’re golden brown, about 3 minutes per side. Drain on paper towels to remove excess oil.
Extra Tips:
Working with empanada dough can be a bit tricky if it’s your first time. Make sure to keep the dough covered with a damp cloth as you assemble the empanadas to prevent it from drying out.
If you’re preparing these in advance, they can be frozen before frying and cooked straight from the freezer, adding a few extra minutes to the cooking time. Enjoy these tasty appetizers fresh from the fryer with your favorite dipping sauce.